Epson SC-p400 series User Manual
Hide thumbs
Also See for SC-p400 series:
- Quick start manual (2 pages) ,
- Service manual (230 pages) ,
- Start here (4 pages)
Table of Contents
Advertisement
Advertisement
Chapters
Table of Contents

Related Manuals for Epson SC-p400 series


Summary of Contents for Epson SC-p400 series
- Page 1 User's Guide CMP0038-01 EN...
-
Page 2: Copyrights And Trademarks
(excluding the U.S.) failure to strictly comply with Seiko Epson Corporation's operating and maintenance instructions. Seiko Epson Corporation shall not be liable for any damages or problems arising from the use of any options or any consumable products other than those designated as Original Epson Products or Epson Approved Products by Seiko Epson Corporation. -
Page 3: Table Of Contents
Displaying the Settings Screen....40 About Epson Print CD....18 Displaying Help. - Page 4 Printing from a Smart Device....69 Using Epson iPrint..... . 69 Appendix Supported Media.
-
Page 5: Introduction
SC-P400 Series User's Guide Introduction ❏ Avoid electrical outlets controlled by wall switches Introduction or automatic timers. ❏ Keep the entire computer system away from potential sources of electromagnetic interference, Important Safety such as loudspeakers or the base units of cordless telephones. -
Page 6: When Using This Product
SC-P400 Series User's Guide Introduction ❏ Use up the ink cartridge within six months of When using this product installation for best results. ❏ Do not put your hand inside this product or touch ❏ Do not dismantle the ink cartridges or try to refill the ink cartridges during printing. -
Page 7: The Symbols On The Product
The symbols on the product The symbols on this Epson product are used in order to ensure safety and proper use of the product and to prevent danger to customers and other persons, and property damage. -
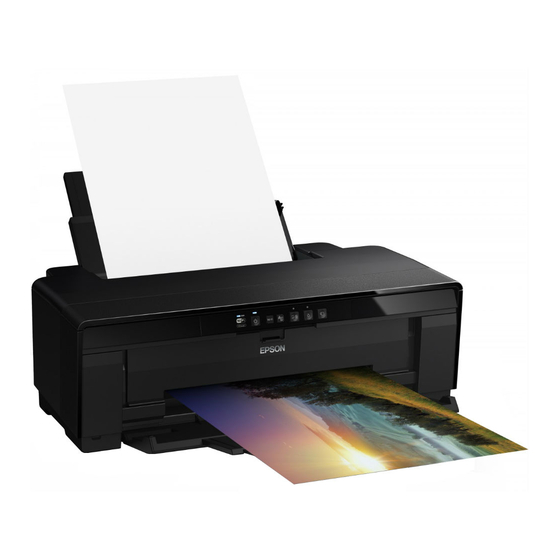
Page 8: Printer Parts
SC-P400 Series User's Guide Introduction Printer Parts Inside Front Ink absorber Absorbs ink that bleeds past the edge of the paper during borderless printing. Printer cover Ink check light Open in the event of a paper jam or when replacing The light for the affected ink cartridge lights or ink cartridges. -
Page 9: Back
SC-P400 Series User's Guide Introduction Back AC inlet Connects the power cable. Airflow vents Prevent the build-up of heat inside the printer. USB port Connects the USB cable. LAN port Connects the LAN cable. Roll paper edge guide Move left or right to match the width of the roll being loaded. -
Page 10: Control Panel
SC-P400 Series User's Guide Introduction ❏ Press after printing on roll paper to print a cut line and Control panel feed the paper to position where it can be easily cut. Press again after cutting the paper to return the end of the roll to the printing position. -
Page 11: Printer Features
Print beautiful photographs with little graininess. Support for a Wide Variety of Paper Types Long life prints EPSON offers a wide variety of special media for Pigment inks maintain more beautiful and more vibrant high-quality printing. The printer can also print on... - Page 12 SC-P400 Series User's Guide Introduction ❏ Cut sheet ❏ Roll paper Cut sheets are fed into the printer from the auto Fed from the supplied roll paper holder, which is sheet feeder. installed on the back of the printer. “Loading Paper into the Auto Sheet Feeder” on “Loading and Removing Roll Paper”...
-
Page 13: Notes On Usage And Storage
SC-P400 Series User's Guide Introduction requirements are met. For more details, see the Notes on Usage and manual supplied with the paper. Also, when operating in dry areas, air conditioned Storage environment, or under direct sunlight, maintain the appropriate humidity. -
Page 14: Notes On Handling Ink Cartridges
SC-P400 Series User's Guide Introduction ❏ Store the printer after confirming that the print ❏ Do not touch the IC chip in the ink cartridge. You head has been capped (the print head is positioned may not be able to print properly. -
Page 15: Notes On Handling Paper
This also applies to Epson special ❏ Paper may be wavy or curled if the temperature and media. However, with the correct storage method, the humidity change. -
Page 16: Introducing The Supplied Software
Use as input profiles when required for color management. Epson Easy Photo Print Print selected photos quickly and easily. “About Epson Easy Photo Print” on page 18 Epson Print CD With this software, you can design labels for music, photo, or movie CDs and DVDs and print them directly on the discs. -
Page 17: Summary Of The Printer Driver
SC-P400 Series User's Guide Introduction ❏ Allows the user to execute printer maintenance Summary of the Printer Driver functions to maintain print quality, and check the printer's status and so on. The main functions of the printer driver are described Windows below. -
Page 18: About Epson Easy Photo Print
❏ Except for Windows 8.1/Windows 8 Click the start button, and then select All Programs (or Programs) - Epson Software - Print CD. Starting in Mac OS X Select Go - Applications - Epson Software - Print CD - Print CD. -
Page 19: Basic Operations
SC-P400 Series User's Guide Basic Operations Open and fully extend the paper support. Basic Operations Loading Cut Sheets The method for loading cut sheets varies with the thickness of the paper. Three methods are available. ❏ Auto sheet feeder: 0.08 to 0.3 mm ❏... -
Page 20: Loading Fine Art Media
SC-P400 Series User's Guide Basic Operations Load the paper vertically with the printable side Open and fully extend the output tray. face up. Grasp and slide the edge guide to fit it to the width of the paper. Paper is fed when you send a print job. -
Page 21: Loading Thick Paper
SC-P400 Series User's Guide Basic Operations Attach the supplied rear manual feed guide to the Slide the paper in until it stops and keep it lightly back of the printer. held in this position for about three seconds. Align the triangles on the rear manual feed guide... - Page 22 SC-P400 Series User's Guide Basic Operations Open the output tray. Match the edge guide to the width of the paper and align the trailing edge with the triangles at Do not pull out the tray extension. the left and right sides of the tray.
-
Page 23: Loading And Removing Roll Paper
SC-P400 Series User's Guide Basic Operations Attach the roll paper holder to the rear of the Loading and Removing printer. Roll Paper Align the triangles on the roll paper holder with the triangles on the printer and insert the tabs into the matching slots. -
Page 24: Cutting Roll Paper
SC-P400 Series User's Guide Basic Operations “Removing Roll Paper” on page 24 Press the M button again to return the end of the roll to the printing position. To remove the roll paper: Press the M button for three seconds or more to eject the roll paper from the rear of the printer. -
Page 25: Loading And Removing Cds And Dvds
Loading and Removing CDs and DVDs A special application is required to print on CDs and DVDs. Use the supplied Epson Print CD application. Loading CDs and DVDs Use the supplied CD/DVD tray to load CDs and DVDs. Turn on the printer. -
Page 26: Removing Cds And Dvds
SC-P400 Series User's Guide Basic Operations Place a disc on the CD/DVD tray supplied with Slide the CD/DVD tray in straight and align the printable side up. triangles on the CD/DVD tray with those on the front manual feed tray. -
Page 27: Basic Printing Methods
SC-P400 Series User's Guide Basic Operations Set the Media Type, Color, Print Quality, Basic Printing Methods Source and other settings according to the paper loaded in the printer. This section explains how to print and how to cancel printing. Printing (Windows) You can make print settings such as paper size and paper feed from the connected computer and then print. -
Page 28: Printing (Mac Os X)
SC-P400 Series User's Guide Basic Operations The Progress Bar is displayed, and printing starts. When you have created the data, from the File menu of the application, click Print and so on. Screen while printing The following screen is displayed when you start printing, and the Progress Bar (the computer's processing status) is displayed. -
Page 29: Canceling Printing (Windows)
SC-P400 Series User's Guide Basic Operations You can also cancel a print job. Also, if an error occurs Check that this printer is selected, and then set while printing, a notification message is displayed. the paper size. Select the paper size, borderless printing options, and paper source in the Paper Size menu. -
Page 30: Canceling Printing (Mac Os X)
SC-P400 Series User's Guide Basic Operations If the job has been sent to the printer, print data is Select the job you want to cancel, and then click not displayed on the following screen. Delete. If the job has been sent to the printer, print data is not displayed on the following screen. -
Page 31: Printable Area
SC-P400 Series User's Guide Basic Operations When the I light flashes, remove the thick paper, CD Printable area or DVD, and then press the I button. When printing on roll paper The printable area is shown in gray in the illustration Press the I button. -
Page 32: Printed Area For Cds And Dvds
Please consider the environment before making any changes. Note: The supplied Epson Print CD application supports a minimum internal diameter of 18 mm and a maximum external diameter of 120 mm. When printing on CDs and DVDs, check the dimensions of the discs' printable... -
Page 33: Using The Printer Driver(Windows)
SC-P400 Series User's Guide Using the Printer Driver(Windows) The printer driver setting screen is displayed. Using the Printer Driver (Windows) Displaying the Settings Screen You can access the printer driver in the following ways: ❏ From Windows applications “Printing (Windows)” on page 27 Make the necessary settings. -
Page 34: Displaying Help
SC-P400 Series User's Guide Using the Printer Driver(Windows) Displaying Help Right-click on the item you want to check and display You can access the printer driver help in the following Right-click the item, and then click Help. ways: ❏ Click Help ❏... -
Page 35: Customizing The Printer Driver
SC-P400 Series User's Guide Using the Printer Driver(Windows) Customizing the Printer Note: You can save the settings as a file by clicking Export. You Driver can share the settings by clicking Import to import the saved file on another computer. -
Page 36: Rearranging Display Items
SC-P400 Series User's Guide Using the Printer Driver(Windows) Enter a name in the Name text box and click Go to the Utility tab and click Menu Save. Arrangement. You can save up to 100 settings. You can choose a setting you have registered from the Media Type list box. -
Page 37: Summary Of The Utility Tab
SC-P400 Series User's Guide Using the Printer Driver(Windows) ❏ Drag and drop unnecessary items to Not Summary of the Utility Display. You can perform the following maintenance functions from the printer driver's Utility tab. Note: When Delete Group is performed, the group (folder) is deleted, however the items in the deleted group (folder) remain. - Page 38 This function is useful when you want to make the same printer driver settings on multiple computers. Driver Update Visit the Epson website to check whether there is a driver newer than the currently installed version. If a new version is found, the printer driver will be updated automatically.
-
Page 39: Uninstalling The Printer Driver
SC-P400 Series User's Guide Using the Printer Driver(Windows) Uninstalling the printer Note: You can also remove the Epson Network Utility by driver clicking the Utility tab and selecting the Epson Network Utility. Note, however, that the drivers for any other Epson... -
Page 40: Using The Printer Driver(Mac Os X)
Using the Printer Driver (Mac OS X) You can perform maintenance tasks such as Nozzle Check or Head Cleaning by using Epson Printer Utility 4. This utility is installed automatically when you install the printer driver. Displaying the Settings Starting Epson Printer Utility 4... - Page 41 SC-P400 Series User's Guide Using the Printer Driver(Mac OS X) EPSON Status Monitor “Ink Density Optimization” on page 79 You can check the printer's status, such as the remaining ink level and error messages, from the computer's screen. Nozzle Check Print a nozzle check pattern to check if the print head nozzle is clogged.
-
Page 42: Uninstalling The Printer Driver
Uninstall the target printer driver before re-installing or updating the printer driver. Use the "Uninstaller" to uninstall the printer driver. Acquiring the "Uninstaller" Download the "Uninstaller" from the Epson website. http://www.epson.com/ Uninstalling When acquiring the "Uninstaller", check the procedure for uninstalling provided on the website. -
Page 43: Printing Varieties
Handling setting, and then click Print. Print Photos (PhotoEnhance) The printer driver for this printer comes with the Epson proprietary function PhotoEnhance that makes the most efficient use of the color reproduction area, corrects image data to improve colors before printing. - Page 44 Adobe Photoshop Photoshop Lightroom 1 or later, or Adobe Elements 6 or later Photoshop Elements 6 or later, make sure you perform step 1, otherwise you cannot select EPSON Other applications No Color Management Color Controls. Example of Adobe Photoshop CS5...
-
Page 45: Correct Color And Print
The printer driver automatically and internally corrects colors to match the color space. You can select from the following color correction modes. ❏ EPSON Standard (sRGB) Optimizes the sRGB space and corrects the color. ❏ Adobe RGB Optimizes the Adobe RGB space and corrects the color. - Page 46 You can adjust the correction value by checking the Display the printer driver Main tab and select sample image on the left side of the screen. You can EPSON Standard (sRGB), Adobe RGB, or also use the color circle to fine-tune the color EPSON Vivid for Mode.
- Page 47 Select Printer Manages Colors as the Color color correction. Handling setting, and then click Print. Select Print Settings from the list, and select EPSON Standard (sRGB), EPSON Vivid, or Adobe RGB for Color Controls under Color Settings. When adjusting the parameters manually, click Advanced Color Settings.
-
Page 48: Borderless Printing
SC-P400 Series User's Guide Printing Varieties ❏ Make the image data as large as the paper size. Borderless printing You can print your data without margins on the paper. The types of borderless printing you can choose vary as shown below depending on the media type. -
Page 49: Supported Media Sizes For Borderless Printing
SC-P400 Series User's Guide Printing Varieties Roll paper Setting Procedures for Printing Making Settings in Windows When the printer driver's Main screen is displayed, you can configure various settings required for printing such as Media Type, Source, Size, and Paper Size. - Page 50 SC-P400 Series User's Guide Printing Varieties XXXX (Sheet Feeder - Borderless (Auto Select Auto Expand or Retain Size as the Expand)) Method of Enlargement. If you select Auto Expand, set how much of the image goes beyond XXXX (Sheet Feeder - Borderless (Retain Size)) the edge of the paper as shown below.
-
Page 51: Enlarged/Reduced Printing
SC-P400 Series User's Guide Printing Varieties You cannot choose the expansion amount when Enlarged/Reduced Roll Paper is selected for Paper Size. Printing You can enlarge or reduce the size of your data. There are three setting methods. ❏ Fit to Page printing Automatically enlarges or reduces the image to fit the paper. -
Page 52: Fit To Page/Scale To Fit Paper Size
SC-P400 Series User's Guide Printing Varieties Making Settings for Mac OS X Fit to Page/Scale to fit paper size Open the Print screen, select Paper Handling from the list, and then check Scale to fit paper Making Settings in Windows size. -
Page 53: Fit To Roll Paper Width(Windows Only)
SC-P400 Series User's Guide Printing Varieties Select the width of the roll paper loaded in the Fit to Roll Paper Width printer from the Roll Width list. (Windows only) Display the printer driver Main tab and select Roll Paper for Source. - Page 54 SC-P400 Series User's Guide Printing Varieties Select the scale within a range of 10 to 650 %. Enter the scale. Check other settings and start printing. Check other settings and start printing. Making Settings for Mac OS X When the Print screen is displayed, select the size of the paper loaded in the printer from the Paper Size list.
-
Page 55: Multi-Page Printing
SC-P400 Series User's Guide Printing Varieties Making Settings in Windows Multi-Page Printing When the printer driver's Page Layout screen is displayed, select the Multi-Page check box, select N-up, and then click Settings. You can print multiple pages of your document on one sheet of paper. -
Page 56: Manual Double-Sided Printing(Windows Only)
SC-P400 Series User's Guide Printing Varieties Making Settings for Mac OS X Manual Double-Sided When the Print screen is displayed, select Layout from the list, and then specify the number of Printing pages per sheet and so on. (Windows only) “Printing (Mac OS X)”... -
Page 57: Poster Printing (Enlarge To Cover Several Sheets And Print - Windows Only)
SC-P400 Series User's Guide Printing Varieties “Printing (Windows)” on page 27 Poster Printing (Enlarge to cover several sheets and print - Windows only) The poster printing function automatically enlarges and divides the print data. You can join the printed sheets to create a large poster or calendar. -
Page 58: Setting Procedures For Printing
SC-P400 Series User's Guide Printing Varieties Select borderless poster printing or poster Setting Procedures for Printing printing with margins, and then select any pages that you do not want to print. Prepare the print data using applications. When borderless is selected: The printer driver automatically enlarges the Select Borderless Poster Print. -
Page 59: Joining The Output Paper Together
SC-P400 Series User's Guide Printing Varieties Joining the output paper Note: Regarding the size after joining together: together When Borderless Poster Print is cleared and printing with margins is selected, the Print Cutting The steps for joining the output paper together differ Guides items are displayed. - Page 60 SC-P400 Series User's Guide Printing Varieties Poster printing with margins Lay the upper left sheet on top of upper right When you select Overlapping Alignment Marks, the sheet. Lineup the X marks as shown in the following marks are printed on the paper. See the...
- Page 61 SC-P400 Series User's Guide Printing Varieties Lay the upper sheet on top of the lower sheet. After joining all of the sheets together, cut the Lineup the X marks as shown in the illustration margins along the outer guide lines.
-
Page 62: User-Defined Paper Sizes/Custom Paper Sizes
SC-P400 Series User's Guide Printing Varieties Front manual feed (poster board) User-defined Paper Sizes/ Width Windows: 203.2 to 329 mm Custom Paper Sizes Mac OS X: 89 to 329 mm Windows: 254 to 15,000 mm Length You can also print on paper sizes that are not already Mac OS X: 55 to 15,240 mm available in the printer driver. - Page 63 SC-P400 Series User's Guide Printing Varieties ❏ If the length and width ratio is the same as a Click +, and then enter the paper size name. defined paper size, select the defined paper size from Fix Aspect Ratio and select either Landscape or Portrait for the Base.
-
Page 64: Banner Printing (On Roll Paper)
SC-P400 Series User's Guide Printing Varieties Select Print Settings and choose a paper source Banner printing (on roll in the Page Setup menu. paper) The paper sources available depend on the custom page size. You can now print as normal. - Page 65 SC-P400 Series User's Guide Printing Varieties Making Settings in Windows Select an option for Size that corresponds to the In the printer driver's Main screen, select Media size of the document created in the application. Type. Select User Defined Paper Size to specify a “Printing (Windows)”...
-
Page 66: Layout Manager(Windows Only)
SC-P400 Series User's Guide Printing Varieties Layout Manager Making Settings for Mac OS X When the Print screen is displayed, select the size (Windows only) of the data created with the application in Paper Size. The Layout Manager function allows you to place... -
Page 67: Setting Procedures For Printing
SC-P400 Series User's Guide Printing Varieties Placing the same data Setting Procedures for Printing Check that the printer is connected and ready to print. Open the file you want to print in your application. Select Layout Manager in the Main tab of the... -
Page 68: Saving And Calling Layout Manager Settings
SC-P400 Series User's Guide Printing Varieties Arrange the objects on the Layout Manager Saving and Calling Layout screen. Manager Settings You can drag objects to move and resize them, use tool buttons and the Object menu to align You can save the Layout Manager screen arrangement and rotate objects on the Layout Manager and setting contents to a file. -
Page 69: Printing From A Smart Device
Epson iPrint is an application that allows you to print photos, websites, documents, and so on from smart devices such as smartphones and tablets. You can install Epson iPrint on a smart device from the following URL or QR code. http://ipr.to/d The home screen displayed when the app starts. - Page 70 Displays the selected photo or document. Starts printing. Note: ❏ From the Epson iPrint home screen, you can install a variety of apps such as Epson Creative Print. ❏ When printing from the Document menu in iOS on iPhones, iPads, and iPod touches, send the document using the iTunes file sharing function before you start Epson iPrint.
-
Page 71: Color Management Printing
SC-P400 Series User's Guide Color Management Printing Color Management Print Color Management Settings Printing You can perform color management printing using this printer's printer driver in the following two ways. About Color Management Choose the best method according to the application... -
Page 72: Setting Profiles
SC-P400 Series User's Guide Color Management Printing Setting color Setting profiles management with the Settings for the input profile, printer profile, and intent (matching method) vary between three types of color applications management printing since their color management engines are used differently. This is because color management usage differs between the engines. -
Page 73: Setting Color Management With The Printer Driver
SC-P400 Series User's Guide Color Management Printing Set color management to off. Setting color For Windows management with the Select Off (No Color Adjustment) for Mode on the Main screen. printer driver Color management printing by Host ICM (Windows) Use image data in which an input profile has been embedded. -
Page 74: Color Management Printing By Colorsync (Mac Os X)
Select Color Matching from the list, and then click ColorSync. Select Host ICM. When Epson special media is selected from Media Type in the Main screen, the printer profile corresponding to the media type is automatically selected and displayed in the... -
Page 75: Color Management Printing By Driver Icm(Windows Only)
SC-P400 Series User's Guide Color Management Printing Select Color Management and then Document. Select Check other settings and start printing. Printer Manages Colors as the Color Handling setting, and then click Print. Color management printing by Driver ICM (Windows only) The printer driver uses its own printer profiles to perform color management. -
Page 76: Printing (Mac Os X)
SC-P400 Series User's Guide Color Management Printing Intent Explanation Perceptual Converts the data so that a more visually natural image is produced. This feature is used when a wider gamut of color is used for image data. Relative Converts the data so that a set of... -
Page 77: Maintenance
Checking for clogged nozzles This function checks for clogged nozzles in the print Use Epson Printer Utility 4 for Mac OS X. head. If the print head nozzles are clogged, print results may include banding or unusual colors. Should you “Using Epson Printer Utility 4”... -
Page 78: Head Cleaning
Example of clogged nozzles Explanations in this section use the Windows printer driver as an example. Use Epson Printer Utility 4 for Mac OS X. “Using Epson Printer Utility 4” on page 40 Click Head Cleaning from the Utility tab in the printer driver's Properties (or Print Settings) screen. -
Page 79: Ink Density Optimization
Explanations in this section use the Windows printer perform Ink Density Optimization once a week. driver as an example. “Performing Ink Density Optimization” on Use EPSON Printer Utility 4 for Mac OS X. page 79 “Using Epson Printer Utility 4” on page 40 Adjusting Auto Ink Density... -
Page 80: Correcting Print Misalignment (Print Head Alignment)
As a result, print results may appear For the latest information, see the Epson Web site. grainy or out of focus. When this happens, perform Print Head Alignment to correct the print SC-P400 misalignment. -
Page 81: How To Replace
Ink color Product number Important: Magenta (M) T3273 Epson recommends the use of genuine Epson ink cartridges. Epson cannot guarantee the quality or Yellow (Y) T3274 reliability of nongenuine ink. The use of non-genuine ink may cause damage that is not... - Page 82 SC-P400 Series User's Guide Maintenance Press the H button. Important: The print head moves to the ink cartridge Do not touch the parts indicated in the replacement position. illustration. You may not be able to print properly. Open the cartridge cover.
- Page 83 SC-P400 Series User's Guide Maintenance Insert the new ink cartridge. Press the H button. Push the cartridge in until it clicks into place. Ink charging starts. Charging takes about three minutes. Charging is complete when the P light stops flashing and remains on.
-
Page 84: Cleaning The Printer
Cleaning sheet If a cleaning sheet is provided with the Epson special media, you can pass (feed and eject) it through the printer to clean the rollers when plain paper fails to produce the desired results. -
Page 85: Problem Solver
SC-P400 Series User's Guide Problem Solver Problem Solver Lights The lamps blink or light to show the status of the printer. Follow the instructions in the table below if an error occurs. Network light Paper light Power light Ink light... -
Page 86: Errors
SC-P400 Series User's Guide Problem Solver Network light Status Left side on Wireless LAN is operative. Right side on Ethernet LAN is operative. Flashing (both) One of the following: ❏ WPS (PIN code) entry is in progress. ❏ Preparing firmware update... -
Page 87: Other Errors
SC-P400 Series User's Guide Problem Solver Paper light Status What to do Flashing The printer cover is open. Close the printer cover. Paper or the CD/DVD tray is jammed. Remove jammed paper as described in the following sections. “Paper Jams when Printing from the Auto Sheet Feeder”... - Page 88 The printer's ink pads are not (alternately) end of their service life. user serviceable. Contact your dealer or Epson Support to request a replacement. The printer can not be used until the pads have been replaced; this prevents the ink from overflowing.
-
Page 89: Troubleshooting
If the nozzle check pattern is not printed correctly, the printer connection port? printer may require repair. Check the printer port. Contact your dealer or Epson Support. Click the Ports tab in the printer driver’s Properties screen, and check the Print to the following port(s). -
Page 90: The Printer Sounds Like It Is Printing, But Nothing Prints
Printer menu. The "Driver Version" shown on the test page is the version number of the Windows internal driver. This differs from the Epson printer driver version that you installed. Is printing paused? (Mac OS X) Display the screen to check the print status for the printer being used, and check that the job has not been paused. -
Page 91: Print Quality/Print Results
Since monitors and printers produce colors Are you using a genuine Epson ink cartridge? differently, printed colors will not always match This printer is developed for use with Epson ink on-screen colors perfectly. cartridges. If you use non-Epson ink cartridges, the... - Page 92 SC-P400 Series User's Guide Problem Solver Vertical ruled lines are misaligned. Are you printing with PhotoEnhance (auto print quality adjustment)? PhotoEnhance optimally enhances data that lacks Is the print head misaligned? (in bidirectional appropriate contrast or saturation for clear results printing) when printing.
-
Page 93: Unable To Feed Or Eject Paper
Is the paper damp? Have you changed the amount of Do not use paper that is damp. Also, Epson special enlargement? media should be left in the bag until you intend to use it. If it is left out for a long time, the paper curls up and Adjust the amount of enlargement for borderless printing. -
Page 94: Paper Jams When Printing From The Auto Sheet Feeder
RIP. Are you using the printer at normal room temperature? Epson special media should be used at normal room temperature (temperature: 15 to 25 C, humidity: 40 to 60 %). -
Page 95: Jammed Fine Art Media
After removing the paper, close the printer cover and press the I button to cancel the error. If you are unable to remove the paper, contact your dealer or Epson Support. Jammed Thick Paper, CD or DVD To resolve the jam, follow the steps below: A disc is shown in the illustration, but the same procedure applies to poster board. -
Page 96: Roll Paper Jam
I button to cancel the error. Color ink runs out quickly even when If you are unable to remove the item, contact your dealer or Epson Support. printing in the Black mode or when printing black data. Roll paper jam Color ink is consumed during the head cleaning process. -
Page 97: Appendix
Note: For information about the media types and appropriate settings for printing on paper other than Epson special media or when using raster image processing (RIP) software, see the manual supplied with the paper, or contact the dealer of the paper or the manufacturer of the RIP. - Page 98 Media Type (Printer Driver) Size Capacity Source Borderless ✓ Epson Premium Luster Sheet Photo Quality Inkjet Paper ICC Profile: SC-P400 Series Photo Quality IJP.icc Media Type (Printer Driver) Size Capacity Source Borderless Epson Photo Quality Ink Jet Sheet Matte Paper-Heavyweight ICC Profile: SC-P400 Series Epson Matte.icc...
- Page 99 Size Capacity Source Borderless ✓ Epson Archival Matte Sheet Watercolor Paper - Radiant White ICC Profile: SC-P400 Series Watercolor Paper - Radiant White.icc Media Type (Printer Driver) Size Capacity Source Borderless ✓ Watercolor Paper - Radiant White Rear - Fine Art Velvet Fine Art Paper Depending on the area of purchase, this may not be available.
-
Page 100: Commercially Usable Papers
Epson cannot guarantee the print quality. ❏ Although paper other than Epson media can be loaded and fed in the printer as long as it meets the following specifications, Epson cannot guarantee proper paper feeding and print quality. - Page 101 SC-P400 Series User's Guide Appendix Plain paper (cut sheets) (thickness 0.08 to 0.3 mm (64 to 90 g/m Media Type (Printer Driver) Size Capacity Source Borderless Plain Paper 12 mm total Sheet thickness Letter Legal 5 mm total thickness Non-standard sizes Width: 89 to 329 mm Length: 127 to 1,117.6 mm...
- Page 102 Length: 254 to 483 mm CD/DVD Name Media Type (Printer Driver) Size Capacity Source Borderless CD/DVD A special computer application is 12 cm CD/DVD required to print CDs and DVDs. CD/DVD Use the supplied Epson Print CD Premium Surface application.
-
Page 103: Transporting The Printer
SC-P400 Series User's Guide Appendix Fix the print head in place using ordinary tape. Transporting the Printer When applying the tape, be careful not to touch the internal parts of the printer. Some tape may Follow the steps below when moving or transporting the be difficult to remove if it is left in place for an printer. -
Page 104: Specifications Table
SC-P400 Series User's Guide Appendix Specifications Table Printer Specifications Weight Approx. 12.3 kg (without ink cartridges and Printer Specifications supplied accessories) Printing method On-demand ink jet Interface High-Speed USB1 (for connection to computer) Nozzle 108 nozzles x 8 (Yellow, Magenta,... -
Page 105: Standards And Approvals
This product conforms to Part 15 of the FCC Rules and Use by date See the date printed on the RSS-210 of the IC Rules. Epson cannot accept package (at normal temperature) responsibility for any failure to satisfy the protection... - Page 106 20dBm (eirp power) Australian model: AS/NZS CISPR32 Class B Epson hereby declares that this product, Model B472A, is in compliance with the essential requirements and other relevant provisions of AS/NZS 4268. Epson cannot accept responsibility for any failure to satisfy the protection requirements resulting from a non-recommended modification of the product.
-
Page 107: Where To Get Help
❏ Product name Before Contacting Epson ❏ Product serial number If your Epson product is not operating properly and you ❏ Proof of purchase (such as a store receipt) and date cannot solve the problem using the troubleshooting of purchase information in your product documentation, contact Epson support services for assistance. -
Page 108: Help For Users In Europe
Help for Users in Australia Sources of information, support, and services available from Epson Singapore are: Epson Australia wishes to provide you with a high level of customer service. In addition to your product World Wide Web documentation, we provide the following sources for (http://www.epson.com.sg) -
Page 109: Help For Users In Vietnam
SC-P400 Series User's Guide Where To Get Help Epson Hotline Epson Service Center (Phone: (66) 2685 -9899) Jakarta Mangga Dua Mall 3rd floor No 3A/B Our Hotline team can help you with the following over Jl. Arteri Mangga Dua, the phone: Jakarta ❏... -
Page 110: Help For Users In Hong Kong
❏ Sales enquiries and product information (Infoline) Internet Home Page Phone: 603-56288222 Epson Hong Kong has established a local home page in both Chinese and English on the Internet to provide users with the following information: ❏ Enquiries on repair services & warranty, product usage and technical support (Techline) ❏... -
Page 111: Help For Users In The Philippines
- 6PM) Prefix local STD code Help for Users in the Philippines To obtain technical support as well as other after sales services, users are welcome to contact the Epson Philippines Corporation at the telephone and fax numbers and e-mail address below:...