Sign In
Upload
Manuals
Brands
Sanyo Manuals
Projector
PLC-WXU700A
Sanyo PLC-WXU700A Manuals
Manuals and User Guides for Sanyo PLC-WXU700A. We have
7
Sanyo PLC-WXU700A manuals available for free PDF download: Owner's Manual, Service Manual, Quick Reference Manual
Sanyo PLC-WXU700A Owner's Manual (393 pages)
Multimedia Projector
Brand:
Sanyo
| Category:
Projector
| Size: 16.43 MB
Table of Contents
Table of Contents
3
Features and Design
2
Table of Contents
3
To the Owner
4
Safety Precaution
4
Safety Instructions
5
Installing the Projector in Proper Directions
7
Compliance
8
Part Names and Functions
9
Rear Terminal
10
Top Control
11
Remote Control
12
Remote Control Battery Installation
13
Remote Control Operating Range
13
Remote Control Code
13
Wireless Mouse Operation
15
Adjustable Feet
15
Installation
16
Positioning the Projector
16
Connecting the Ac Power Cord
20
Basic Operation
21
Turning on the Projector
21
How to Operate the On-Screen Menu
24
Menu Bar
25
Zoom and Focus Adjustment
26
Auto Setup Function
26
Keystone Correction
26
Sound Adjustment
27
Remote Control Operation
28
Computer Input
30
Computer System Selection
32
Auto Pc Adjustment
33
Manual Pc Adjustment
34
Image Mode Selection
36
Image Adjustment
37
Screen Size Adjustment
38
Video Input
40
Video System Selection
42
Setting
47
Information
63
Input Source Information Display
63
Maintenance and Cleaning
64
Cleaning the Filters
65
Resetting the Filter Counter
65
Lamp Handling Precautions
68
Appendix
69
Code
71
Compatible Computer Specifications
76
Technical Specifications
79
Optional Parts
80
Configurations of Terminals
82
For Windows
86
Network Viewer
86
Federal Communications Commission Notice
87
Fcc Warning
87
Table of Contents
90
Operating Environment and Configuration
93
Required Operating Environment for Computers
93
Network Specifications of the Projector
94
Useful Guide to the Network Function
95
About LAN Functions
96
LAN Functions and the Features
97
Image Projecting System Via LAN
97
An Example of the Connection
98
LAN Connection Modes
99
Setup Procedures
102
Installing the Software
104
Installed Software
106
File Converter 2 Installation
107
Installed Software and Places
107
Names and Functions of the Operation Screen
108
Network Connection Standby Display
109
Network Capture 5 Window
110
Wired LAN Configurations
112
Connecting to the LAN Line
113
Network Environment Settings
113
Setting Procedure
113
Confirming the Operation
115
Network PIN Code
117
Network Information
117
Wired Factory Default
118
Wired LAN Factory Default Settings
119
Wireless LAN Configurations
120
Setting the Network Environment
121
Setting Procedures
121
Configuring Security with the Projector
123
Easy Wireless Setting
126
Network PIN Code
127
Network Information
127
Wireless Factory Default
127
WIRELESS Indicator Display
128
Wireless LAN Factory Default Settings
129
Basic Setting and Operation
130
Starting up the Browser
131
Select a Display Mode and Login
131
Display of Main Setting Page
132
How to Use the Setting Page
133
Initial Setting
135
Network Pin Code Setting
136
Pjlink and Password Setting
136
Date and Time Setting
137
Network Configuration
138
Configuring Wireless LAN Setting and Security Setting
140
E-Mail Setting
142
SNMP Setting
146
Controlling the Projector
150
Power Control and Status Check
151
Controls
153
PC Adjustment
157
Setting up the Projector
158
How to Set the Timer
161
Timer Setting
161
Change the Event Mode
162
Check the Timer Events
162
Projector Information
164
Multi-Control
166
Confirmation of Registered Projector
168
Register the Projector
168
Change the Mode of the Registered Projector
169
Controlling All Together
170
Setting All Together
170
Viewer Auto Setting All Together
171
Network Capture Functions
172
About Network Capture Function
173
Commands on the Task Bar
174
Parameter Set up
175
Registering the Computers
176
Using the Real Time Capture
176
Using the Network Communication
181
Settings before Using the Network Communication
182
Description of Capture Editing Window
183
End the Communication
185
How to Use the Network Communication
185
Start the Communication
185
Edit Capture Image
186
Network Communication Operation and Change of State
188
Executing the Forcing Mode
189
Moderator Function
190
Preparation for Using the Moderator Function
191
Using the Moderator Function
192
Moderator's Password Setting up
193
Unregister Moderator Status
193
Error Information
194
Playing the Movie Files
195
Network Viewer Functions
198
Creating the Available Data [Network Viewer 5]
199
Procedure of Making Program
204
Creating a Program File [Program Editor]
204
Setting up the Display Order and Time of the Images
206
Using the Network Viewer Function
209
Use of the Projector as FTP Server
215
Network Projector [Windows Vista]
218
Use of "Connect to a Network Projector
219
11. Appendix
222
Use of Telnet
223
Web Browser Setting
225
Proxy Setting
225
Windows Xp Professional
226
Firewall Setting
230
Troubleshooting
231
Terminology
237
Table of Contents
244
Operating Environment and Configuration
246
Required Operating Environment for Computers
246
Network Specifications of the Projector
247
Useful Guide to the Network Function
248
How to Project the Computer Screen's Image Via the Network
248
How to Setup or Control the Projector by Using a PC Via the Network
248
How to Use All Functions Concerning the Network
248
About LAN Functions
250
LAN Functions and the Features
251
Image Projecting System Via LAN
251
An Example of the Connection
252
LAN Connection Modes
253
Setup Procedures
256
Installing the Software
258
Names and Functions of the Operation Screen
262
Network Connection Standby Display
263
Network Capture 5 Window
264
Wired LAN Configurations
266
Connecting to the LAN Line
267
Network Environment Settings
267
Confirming the Operation
269
Network PIN Code
271
Network Information
271
Wired Factory Default
272
Wired LAN Factory Default Settings
273
Wireless LAN Configurations
274
Setting the Network Environment
275
Setting Procedures
275
Configuring Security with the Projector
277
Easy Wireless Setting
280
Network PIN Code
281
Network Information
281
Wireless Factory Default
281
WIRELESS Indicator Display
282
Wireless LAN Factory Default Settings
283
Basic Setting and Operation
284
Starting up the Browser
285
How to Use the Setting Page
287
Initial Setting
289
Network Configuration
292
Configuring Wireless LAN Setting and Security Setting
294
E-Mail Setting
296
SNMP Setting
300
Controlling the Projector
304
Power Control and Status Check
305
Controls
307
PC Adjustment
311
Setting up the Projector
312
Timer Setting
315
Projector Information
318
Multi-Control
320
Network Capture Functions
326
About Network Capture Function
327
Using the Real Time Capture
330
Error Information
335
Appendix
336
Use of Telnet
337
Web Browser Setting
339
Firewall Setting for MAC os X V 10.4
342
Firewall Setting for MAC os X V 10.5
343
Troubleshooting
344
Terminology
347
Table of Contents
351
Chapter 1 Introducing
352
Introducing
352
Snmp
352
Trademarks
352
Operating Environment
353
Chapter 2 Set up
354
PJ Network Manager Installation
355
PJ Network Manager Un-Installation
355
Chapter 3 Basic Operation
356
Launching and Quitting PJ Network Manager
357
Name of Status Window
357
Quitting PJ Network Manager
358
Menu Tree
358
What's Target
358
Name of the Button on the Tool Bar
359
Icon Display for the Target
359
Addition of the Target
360
Editing the Target
360
Deletion of the Target
360
Setting up the Warning Value
361
Starting Target Monitoring
361
When Happens the Alert on the Target
362
When Happens the Trap Event on the Target
362
What's Trap
362
Stopping Monitoring the Target
363
Displaying All the Status Information of the Target
363
Setting the Target Group
363
Setting up the Password of Telnet
364
Setting Commands Batch Processing for Multiple Targets
364
Setting Timer for Targets
365
Setting up Default Setting
366
Customizing the Status List
368
Viewing the Alert Information
371
Viewing the Event Log
372
Description of Event, Type, Warning Column, Warning Value
373
About Event Treatment
375
Viewing the Command History
376
Storing the Management File
377
Information Saved to the Registry
377
Registering the Target Information from the Defined File at Once
378
Format of the Defined File
379
Example of the Defined File
379
Login to the Target Equipment
380
Owner's Manual Memory Viewer Function
382
Memory Viewer Function
383
Inserting the USB Thumb Drive
384
USB Thumb Drive for the Memory Viewer Function
384
Direct Start-Up into the Memory Viewer Mode
385
Entering the Memory Viewer Mode
386
Displaying the Memory Viewer Browser Window
387
Image Viewer in the Manual Mode
389
Image Viewer in the Program Mode for Windows
389
Selection of Menu
389
Operation During Image Viewer in the Manual/Program Mode
390
Operation During Playback Movie File
390
Termination of Memory Viewer
390
Duplicating the Data into the USB Thumb Drive for Windows
391
Formatting the USB Thumb Drive
392
Advertisement
Sanyo PLC-WXU700A Owner's Manual (154 pages)
Network Set-up and Operation For Windows
Brand:
Sanyo
| Category:
Projector
| Size: 14.12 MB
Table of Contents
For Windows
1
Compliance
2
Safety Instructions
4
Table of Contents
5
Operating Environment and Configuration
8
Required Operating Environment for Computers
8
Network Specifications of the Projector
9
Useful Guide to the Network Function
10
1 About LAN Functions
11
LAN Functions and the Features
12
Image Projecting System Via LAN
12
An Example of the Connection
13
LAN Connection Modes
14
2 Setup Procedures
17
Installing the Software
19
Installed Software
21
File Converter 2 Installation
22
Installed Software and Places
22
3 Names and Functions of the Operation Screen
23
Network Connection Standby Display
24
Network Capture 5 Window
25
4 Wired LAN Configurations
27
Connecting to the LAN Line
28
Network Environment Settings
28
Confirming the Operation
30
Network PIN Code
32
Network Information
32
Wired Factory Default
33
Wired LAN Factory Default Settings
34
5 Wireless LAN Configurations
35
Setting the Network Environment
36
Setting Procedures
36
Configuring Security with the Projector
38
Use of Security Type "Wep
39
Easy Wireless Setting
41
Network PIN Code
42
Network Information
42
Wireless Factory Default
42
WIRELESS Indicator Display
43
Wireless LAN Factory Default Settings
44
6 Basic Setting and Operation
45
Starting up the Browser
46
Display of Main Setting Page
47
How to Use the Setting Page
48
Initial Setting
50
Network Pin Code Setting
51
Pjlink and Password Setting
51
Date and Time Setting
52
Network Configuration
53
Configuring Wireless LAN Setting and Security Setting
55
E-Mail Setting
57
SNMP Setting
61
7 Controlling the Projector
65
Power Control and Status Check
66
Controls
68
Image Adjustment
70
PC Adjustment
72
Setting up the Projector
73
Timer Setting
76
Check the Timer Events
77
Change the Event Mode
77
Projector Information
79
Multi-Control
81
Start/Stop the Multi Control
82
Register the Projector
83
Confirmation of Registered Projector
83
Change the Mode of the Registered Projector
84
Controlling All Together
85
Setting All Together
85
Viewer Auto Setting All Together
86
8 Network Capture Functions
87
About Network Capture Function
88
Commands on the Task Bar
89
Parameter Set up
90
Using the Real Time Capture
91
Control by the Computer
92
Control by the Web Browser
93
Control by the Computer with Usb Memory
95
Using the Network Communication
96
Settings before Using the Network Communication
97
Description of Capture Editing Window
98
How to Use the Network Communication
100
Edit Capture Image
101
Network Communication Operation and Change of State
103
Executing the Forcing Mode
104
Moderator Function
105
Preparation for Using the Moderator Function
106
Using the Moderator Function
107
Moderator's Password Setting up
108
Unregister Moderator Status
108
Error Information
109
Playing the Movie Files
110
9 Network Viewer Functions
113
Creating the Available Data [Network Viewer 5]
114
Menu Tree
115
Creating a Program File [Program Editor]
119
Setting up the Display Order and Time of the Images
121
Using the Network Viewer Function
124
Use of the Projector as FTP Server
130
10 Network Projector [Windows Vista]
133
Use of "Connect to a Network Projector
134
11 Appendix
137
Use of Telnet
138
Web Browser Setting
140
Windows Xp Professional
141
Proxy Setting
142
Firewall Setting
145
Troubleshooting
146
Network Capture
148
Network Viewer
149
Terminology
152
Sanyo PLC-WXU700A Service Manual (130 pages)
Brand:
Sanyo
| Category:
Projector
| Size: 23.79 MB
Table of Contents
Service Manual
1
Table of Contents
2
Contents
2
Safety Instructions
3
Safety Precautions
3
Product Safety Notice
3
Service Personnel Warning
3
Specifications
4
Circuit Protections
5
Thermal Switch
5
Lamp Cover Switch
5
Fuse
5
Warning Temperature and Power Failure Protection
6
Maintenance
7
Cleaning the Filter
7
Resetting the Filter Counter
7
Lamp Replacement
8
Resetting the Lamp Counter
9
How to Check Lamp Used Time
9
Cleaning
10
Security Function Notice
11
Security Function Disable
11
Network Security Function Disable
11
Standby Mode Notice
12
Mechanical Disassembly
13
Optical Parts Disassembly
17
Panel Type Check
20
Optical Unit Top Removal
21
M Locations and Directions
22
Adjustments
23
Adjustments after Parts Replacement
23
Optical Adjustments
24
Contrast Adjustment
24
Integrator Lens Adjustment
25
Relay Lens-Out Adjustment
26
Electrical Adjustments
27
Service Adjustment Menu Operation
27
Memory IC (IC1391) Replacement
27
Circuit Adjustments
28
Output Voltage Adjustment
29
Common Center Adjustment
31
Note on White Uniformity Adjustment
32
Test Points and Locations
33
Service Adjustment Data Table
34
Chassis Block Diagrams
53
Chassis over View
53
System Control
54
Lamp Control
55
Audio Circuit
56
Power Supply & Protection Circuit
57
Fan Control Circuit
58
IIC Bus Control Circuit
59
Network (MCI) Circuit
60
Troubleshooting
61
Indicators and Projector Condition
61
No Power
62
No Picture
63
No Sound
64
Control Port Functions
65
Scaler I/O Port Functions (PW392)
65
I/O Expander Port Functions (TE7783)
66
IC Block Diagrams
67
Electrical Parts List
74
Electrical Parts Location
75
Electrical Parts List
76
Mechanical Parts List
108
Cabinet Parts Location
108
Optical Parts Location
109
Mechanical Parts List
113
Diagrams & Drawings
115
Parts Description and Reading in Schematic Diagram
116
Note on Soldering
118
Advertisement
Sanyo PLC-WXU700A Owner's Manual (85 pages)
Sanyo Projector User Manual
Brand:
Sanyo
| Category:
Projector
| Size: 13.06 MB
Table of Contents
Features and Design
2
Turning off the Projector
2
Auto Setup Function
2
Keystone Correction
2
Table of Contents
3
Turning on the Projector
3
Turning off the Projector
3
Zoom and Focus Adjustment
3
Auto Setup Function
3
Keystone Correction
3
To the Owner
4
Safety Instructions
5
Air Circulation
6
Moving the Projector
6
Installing the Projector in Proper Directions
7
Compliance
8
Part Names and Functions
9
Front
9
Back
9
Bottom
9
Rear Terminal
10
Remote Control
10
Top Control
11
Remote Control
12
Laser Pointer Function
12
Front
13
Remote Control Battery Installation
13
Remote Control Operating Range
13
Remote Control Code
13
Laser Pointer Function
14
Pointer Function
14
Front
15
Wireless Mouse Operation
15
Adjustable Feet
15
Installation
16
Positioning the Projector
16
Connecting to a Computer
17
Connecting to Video Equipment
18
Connecting to Component Video Equipment
19
Connecting the AC Power Cord
20
Basic Operation
21
Turning on the Projector
21
Turning off the Projector
23
How to Operate the On-Screen Menu
24
Menu Bar
25
Zoom and Focus Adjustment
26
Auto Setup Function
26
Keystone Correction
26
Sound Adjustment
27
Remote Control Operation
28
Computer Input
30
Input Source Selection (Computer 1: RGB / Component / RGB(Scart))
30
Input Source Selection (Computer 2: RGB)
31
Direct Operation
31
Menu Operation
31
Computer System Selection
32
Auto PC Adjustment
33
Manual PC Adjustment
34
Image Mode Selection
36
Image Adjustment
37
Screen Size Adjustment
38
Video Input
40
Input Source Selection (Video, S-Video)
40
Input Source Selection
40
Video System Selection
42
Image Mode Selection
43
Image Adjustment
44
Screen Size Adjustment
46
Setting
47
Auto Setup
48
Key Lock and PIN Code Lock
59
Information
63
Input Source Information Display
63
Maintenance and Cleaning
64
WARNING Indicator
64
Cleaning the Filters
65
Resetting the Filter Counter
65
Attaching the Lens Cap
66
Cleaning the Projection Lens
66
Cleaning the Projector Cabinet
66
Lamp Replacement
67
Resetting the Lamp Counter
68
Appendix
69
Troubleshooting
69
Menu Tree
73
Indicators and Projector Condition
75
Compatible Computer Specifications
76
List of Picture in Picture
78
Technical Specifications
79
Optional Parts
80
PJ Link Notice
81
Configurations of Terminals
82
PIN Code Number Memo
83
USB Thumb Drive Case
83
Dimensions
84
Sanyo PLC-WXU700A Owner's Manual (87 pages)
Brand:
Sanyo
| Category:
Projector
| Size: 9.67 MB
Table of Contents
Features and Design
3
Table of Contents
4
To the Owner
5
Safety Instructions
6
Installing the Projector in Proper Directions
8
Compliance
9
Part Names and Functions
10
Rear Terminal
11
Top Control
12
Remote Control
13
Remote Control Code
14
Remote Control Operating Range
14
Remote Control Battery Installation
14
Wireless Mouse Operation
16
Adjustable Feet
16
Installation
17
Connecting the Ac Power Cord
21
Basic Operation
22
How to Operate the On-Screen Menu
25
Menu Bar
26
Zoom and Focus Adjustment
27
Auto Setup Function
27
Keystone Correction
27
Sound Adjustment
28
Remote Control Operation
29
Computer Input
31
Computer System Selection
33
Auto Pc Adjustment
34
Manual Pc Adjustment
35
Image Mode Selection
37
Image Adjustment
38
Screen Size Adjustment
39
Video Input
41
Video System Selection
43
Setting
48
Information
64
Maintenance and Cleaning
65
Cleaning the Filters
66
Resetting the Filter Counter
66
Lamp Handling Precautions
69
Appendix
70
Code
72
Menu Tree
74
Compatible Computer Specifications
77
Technical Specifications
80
Optional Parts
81
Configurations of Terminals
83
Sanyo PLC-WXU700A Owner's Manual (12 pages)
Memory Viewer function
Brand:
Sanyo
| Category:
Projector
| Size: 1.08 MB
Table of Contents
Table of Contents
1
Memory Viewer Function
2
USB Thumb Drive for the Memory Viewer Function
3
Inserting the USB Thumb Drive
3
Direct Start-Up into the Memory Viewer Mode
4
Entering the Memory Viewer Mode
5
Displaying the Memory Viewer Browser Window
6
Menu Tree
7
Selection of Menu
8
Image Viewer in the Manual Mode
8
Image Viewer in the Program Mode for Windows
8
Operation During Image Viewer in the Manual/Program Mode
9
Operation During Playback Movie File
9
Termination of Memory Viewer
9
Duplicating the Data into the USB Thumb Drive for Windows
10
Formatting the USB Thumb Drive
11
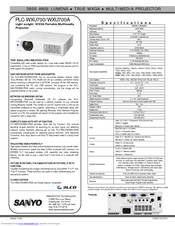
Sanyo PLC-WXU700A Quick Reference Manual (1 page)
WXGA Portable Multimedia Projector
Brand:
Sanyo
| Category:
Projector
| Size: 0.09 MB
Advertisement
Related Products
Sanyo PLC-WXU700A - 3800 Lumens
Sanyo PLC-WXU7000A
Sanyo Think GAIA PLC-WXU700
Sanyo PLC-WXU10N
Sanyo PLC-WXU300K
Sanyo PLC-WXU30
Sanyo PLC-WXU30A
Sanyo PLC-WXU30A - 3700 Lumens
Sanyo PLC-WXU300
Sanyo PLC-WXU3ST
Sanyo Categories
Projector
TV
Air Conditioner
Security Camera
LCD TV
More Sanyo Manuals
Login
Sign In
OR
Sign in with Facebook
Sign in with Google
Upload manual
Upload from disk
Upload from URL