Sign In
Upload
Manuals
Brands
Canon Manuals
Printer
MultiPASS MP390
Canon MultiPASS MP390 Manuals
Manuals and User Guides for Canon MultiPASS MP390. We have
6
Canon MultiPASS MP390 manuals available for free PDF download: User Manual, Service Manual, Software Manual, Setup Sheet, Brochure & Specs, Specifications
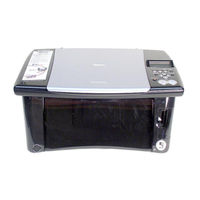
Canon MultiPASS MP390 User Manual (187 pages)
Canon MultiPASS MP390: Users Guide
Brand:
Canon
| Category:
All in One Printer
| Size: 5.14 MB
Table of Contents
How to Use the Documentation Provided
4
Table of Contents
5
Contents
5
Reading the Document
9
1 Introduction
11
Features of Your Machine
11
Main Components and Their Functions
12
Machine
12
Operation Panel
14
Menu Flow
16
2 Document and Paper Handling
20
Document Requirements
20
Loading Documents
21
General Paper Guidelines
22
Paper Types You Cannot Use
22
Handling Paper
22
Recommended Paper and Requirements
23
Canon Specialty Paper
23
Selecting the Correct Paper
24
Canon Specialty Paper
25
Setting the Paper Thickness Lever
28
Loading Paper
29
Loading Envelopes
30
3 Copying
32
Documents You Can Copy
32
Setting the Paper Size and Type
32
Making Copies
33
Adjusting Image Quality
34
Adjusting Exposure (Density)
35
Reducing or Enlarging a Copy
35
Using Preset Copy Ratios
35
Using Custom Copy Ratios
36
Copying an Image to Fit the Page
37
Advanced Copy Features
37
Copying Two Pages to Fit Onto a Single Page
38
Borderless Copying
39
Repeating an Image on a Page
41
Creating a Mirror Image
43
Shrinking an Image to Fit the Page
44
4 Photo Printing from a Memory Card
45
Compatible Memory Cards
46
Inserting/Removing a Memory Card
47
Inserting a Memory Card
47
Removing a Memory Card
48
Convenient Printing Functions
49
Setting Borderless Printing
49
Setting VIVID Photo Printing
50
Setting Date Printing
51
Printing by Using the Photo Index Sheet
52
Printing All Images
56
Index Printing
58
Printing an Index
59
Printing a Single Image
61
Printing a Range of Images
63
DPOF (Digital Print Order Format) Printing
66
From a Digital Camera
67
5 Photo Printing Directly from a Digital Camera
68
Paper Types for a Digital Camera
68
Printing Directly from a Digital Camera
69
6 Becoming Familiar with the Software
71
Installing the Software
71
System Requirements
71
Software Components
73
MP Drivers
73
MP Toolbox
73
Utility Software
73
Using the MP Toolbox to Scan Images
73
Uninstalling, Reinstalling the Software
74
Uninstalling the MP Toolbox
74
Uninstalling the MP Drivers
75
Reinstalling
75
7 Printing from Your Computer
76
Before Printing
76
Is the Software (MP Drivers) Installed
76
Is the Machine Specified as [Set as Default Printer]
76
Is the Correct Paper Set in the Multi-Purpose Tray
76
Printing Documents
77
Canceling Printing
78
Changing Print Settings
78
Changing Print Settings with the Print Advisor
79
Changing Print Settings Manually
79
8 Scanning
80
About Scanning Images
80
Before Scanning
80
Scanning Methods
80
Scanning Using the MP Toolbox
81
Scanning from an Application Software
82
Scanning with the Operation Panel of the Machine
83
9 Preparing Your Machine for Fax
84
Examples of Connecting the Telephone
84
Line to the Machine
84
Using as a Fax Only
84
Connecting a Telephone or Answering Machine
84
Setting the Telephone Line Type
85
Registering Sender Information
86
Guidelines for Entering Numbers, Letters, and Symbols
87
Entering the Date and Time
88
Registering Your Fax/Telephone Number and Name (Sender Information)
88
Directory Dialing
89
Registering Directory Dialing
89
Changing or Deleting an Entry
91
Printing the DIRECTORY DIAL List
92
Setting Daylight Saving Time
93
Summary of Reports and Lists
95
Activity Report
96
Printing the ACTIVITY REPORT
96
User's Data List
96
Printing the USER'S DATA LIST
96
Tx Report
97
Rx Report
97
10 Sending Faxes
98
Documents You Can Fax
98
Flow of Sending Faxes
98
Before Sending Faxes
99
Adjusting the Image Quality (Fax Resolution)
99
Adjusting the Scan Contrast
99
Sending Methods
100
Sending from Your Machine (Memory Sending)
100
Sending Faxes from Your Computer
100
How to Use Directory Dialing
101
Dialing the Number Using Directory Dialing
101
Redialing a Busy Number
101
Manual Redialing
101
Automatic Redialing
101
Documents Stored in Memory
102
Printing a List of Documents in Memory
102
Printing or Deleting a Document in Memory
102
Checking a Document's Details in Memory
104
Special Dialing
104
Dialing through a Switchboard
104
Switching Temporarily to Tone Dialing
104
Sending/Receiving Using ECM
105
11 Receiving Faxes
106
Flow of Receiving Faxes
106
Receive Modes
107
If You Want to Receive Faxes Automatically as Well as Voice Calls
107
If You Want to Receive Only Faxes Automatically with Your Machine, or You Have a Dedicated Telephone Line for Fax Use Only
107
If You Have Subscribed to a Distinctive Ring Pattern Detection (DRPD) Service with Your Telephone Company
108
If You Receive Mainly Voice Calls and Sometimes Faxes, or You Want to Receive Faxes Manually
108
If You Want to Receive Voice Messages on Your Answering Machine and Receive Faxes Automatically
108
Setting the Receive Mode
109
Canceling Receiving
109
Memory Receiving
110
Paper Size and Type
110
12 Maintenance
111
Replacing Ink Tanks
111
Low Ink Warning
111
When to Replace an Ink Tank
111
Compatible Ink Tanks
111
Replacing an Ink Tank
112
Resetting the Ink Counter
114
Checking the Ink Level
115
Maintaining the Print Head
116
Flowchart of Print Head Maintenance
116
Printing the Nozzle Check Pattern
117
Confirming the Nozzle Check Pattern
118
Cleaning the Print Head
119
Aligning the Print Head
120
Using the Calibration Function
121
Setting the Power Save Timer
122
Cleaning Your Machine
123
Cleaning the Platen Glass and Document Cover
123
Cleaning the Exterior
123
Cleaning the Roller
123
13 Troubleshooting
125
Software
125
Problems Installing and Uninstalling Software
125
MP Drivers/Mp Toolbox
125
MP Toolbox Only
125
MP Drivers Only
125
General
127
Paper Is Jammed
127
Removing Jammed Paper
127
The Cover Cannot be Closed
128
The Inner Cover Cannot be Closed
128
The Paper Output Tray Cannot be Closed
128
The Paper Output Tray Cannot be Opened
128
When the Alarm Lamp Flashes
129
Nothing Displays on the LCD (There Is no Power)
129
Problems Outputting
130
Cannot Print at All, Cannot Print Correctly
130
Paper Curls
131
Outputting Stops While In-Progress
131
Copying
131
Problems Copying
131
Memory Card
132
Memory Card Problems
132
Memory Card Is Not Recognized
132
Images on the Memory Card Are Not Recognized
132
Cannot Print Correctly from the Memory Card
133
Cannot Write to a Memory Card from PC
133
Removable Disk Does Not Appear in Windows Explorer
133
The [Unplug/Eject] Icon Does Not Appear (Windows 2000)
133
The Machine Does Not Appear in [Hardware Devices] in the [Add/Remove Hardware] Dialog Box (Windows 2000)
134
In Windows Explorer, You Cannot Display [Thumbnails] (Windows 2000)
134
The Memory Card Is Recognized as a Drive Other than [Removable Disk]
134
Computer Cannot be Started
134
Printing (from Computer)
135
Problems Printing from Your Computer
135
Cannot Print to a Shared Printer
136
Faxing
136
Problems Receiving Faxes
136
Cannot Receive a Fax, Cannot Print a Fax
136
Cannot Receive Faxes Automatically
137
Machine Does Not Switch Automatically between Voice and Fax Calls
137
Quality of Received Fax Is Poor
137
Cannot Receive a Fax Using Error Correction Mode (ECM) Method
137
Repeated Errors Occur When You Receive a Fax
138
Problems Sending Faxes
138
Cannot Send a Fax
138
Cannot Send a Fax Clearly
138
Cannot Send a Fax Using Error Correction Mode (ECM) Method
139
Repeated Errors Occur When You Send a Fax
139
Telephone Problems
139
Cannot Dial
139
Telephone Disconnects During a Call
139
If the Power Disconnects Unexpectedly
140
Scanning
141
Problems Scanning
141
You Tried to Create a Multi-Page PDF, but Were Not Able to Scan Multiple Documents
143
When You Click a Button on the MP Toolbox, an Unwanted Application Opens
143
You Opened the Properties Dialog Box
143
(Windows 2000)
143
Cannot Scan Correctly with Multi-Scan
144
Scanned Image Is Displayed Large (Small) on the Computer Screen
144
LCD Messages
145
Cannot Print Properly from a Digital Camera
149
14 Appendix
151
How to Change Settings and Explanation of Their Content
151
Accessing the Machine Settings
151
Settings
152
Function Key: [COPY]
152
Function Key: [FAX]
153
Function Key: [PHOTO PRINT]
153
Function Key: [Additional Functions]
154
Settings for Paper Types
160
For Copying
160
For Photo Printing
160
For Photo Index Sheet Printing
161
Displaying Electronic Manuals Stored on
162
The Setup CD-ROM
162
About the Software Guide
164
About the Photo Application Guide
165
Using the Online Help
165
Using the Utility Software
165
Safety Information
166
Legal Limitations on Use of Your Product
171
And Use of Images
171
Users in the U.S.A
171
Pre-Installation Requirements for Canon Facsimile Equipment
171
Connection of the Equipment
172
In Case of Equipment Malfunction
172
Rights of the Telephone Company
172
FCC Notice
173
Users in Canada
174
Pre-Installation Requirements for Canon Facsimile Equipment
174
Specifications
176
General Specifications
176
System Requirements
178
Ink Specifications
178
Copy Specifications
178
Photo Print Specifications
178
Fax Specifications
179
Telephone Specifications
179
Print Specifications
180
Scan Specifications
180
Canon Limited Warranty
181
Index
183
Advertisement
Canon MultiPASS MP390 Service Manual (149 pages)
Brand:
Canon
| Category:
Printer
| Size: 3.37 MB
Table of Contents
Table of Contents
8
Service Manual
2
Symbols Used
5
Chapter 1 General Description
12
Table of Contents
14
Features
16
1Overview
16
Overview
16
Specifications
17
1General Specifications
17
General Specifications
17
2Scanner Specifications
19
Scanner Specifications
19
3Printer Specifications
20
Printer Specifications
20
4Copy Specifications
21
Copy Specifications
21
5Communication Specifications
22
Communication Specifications
22
6Color Communication Specification
24
Color Communication Specification
24
7Function
24
Function
24
Overview
27
1External View
27
External View
27
2Operation Panel
29
Operation Panel
29
Consumables
32
1Ink Tanks
32
Ink Tanks
32
Chapter 2 Technical Reference
34
Table of Contents
36
Component Layout
38
1Printer Mechanical Section
38
Printer Mechanical Section
38
2Electrical Layout
38
Electrical Layout
38
3Sensor Layout
39
Sensor Layout
39
Scanner Mechanism
41
1Scanning Section Layout
41
Scanning Section Layout
41
Printer Section
43
1Printer Mechanical Section
43
Printer Mechanical Section
43
2Carriage Section
43
Carriage Section
43
3Purge Section
43
Purge Section
43
4Paper Feed Section
44
Paper Feed Section
44
5Ink Sensor
44
Ink Sensor
44
6Cleaning Mode and Suction Amount
44
Cleaning Mode and Suction Amount
44
Chapter 3 Disassembly And Assembly
48
Attention to be Paid During Assembly/Disassembly/Assembly and Disassembly
50
Attention to be Paid During Assembly/Disassembly
52
1Safety Cautions
52
Safety Cautions
52
2General Cautions
53
General Cautions
53
3Product-Inherent Cautions
54
Product-Inherent Cautions
54
4Caution When Replacing the SPCNT Board
55
Caution When Replacing the SPCNT Board
55
5Shipping the Main Unit
55
Shipping the Main Unit
55
Assembly and Disassembly
57
1Disassembly/Assembly
57
Disassembly/Assembly
57
2Basic Disassembly
57
Basic Disassembly
57
3Operation Panel Unit
63
Operation Panel Unit
63
4Scanner Unit
64
Scanner Unit
64
5NCU Board, Modular Board
65
NCU Board, Modular Board
65
6SPCNT Board
67
SPCNT Board
67
7Modem Board
68
Modem Board
68
Print & ASF Unit
69
9Power Supply Unit
71
Power Supply Unit
71
Chapter 4 Maintenance
74
Maintenance
74
Table of Contents
76
3Periodic Inspection
78
Periodic Inspection
78
Maintenance
78
Consumables
78
Cleaning
78
4Periodic Replacement Parts
79
Periodic Replacement Parts
79
5Adjustment Items
79
Adjustment Items
79
6General Tools
79
General Tools
79
7Special Tools
79
Special Tools
79
How to Clean Parts
81
3Scanning Unit
81
Scanning Unit
81
Exterior
81
Printer
82
Service Switches
83
1Hardware Switches
83
Hardware Switches
83
2Service Data Setting
83
Service Data Setting
83
3Service Data Flowchart
85
Service Data Flowchart
85
New Sssws/Parameters Added to this Model
93
1Service Data
93
Service Data
93
User Report Output Functions
94
Wiring Diagram
96
Chapter 5 Troubleshooting
98
Table of Contents
100
Troubleshooting Index
102
Errors Shown on the Display
104
1User Error Message
104
User Error Message
104
Error Code
109
1Error Code List
109
Error Code List
109
2New Error Codes and Recovery Methods
114
New Error Codes and Recovery Methods
114
Errors Not Shown on the Display
116
1General Errors
116
General Errors
116
2Printing Problem
116
Printing Problem
116
3Scanning Problems
118
Scanning Problems
118
4Memory Card Problem
119
Memory Card Problem
119
Test Mode Function Problems
120
1Faulty Operation Panel Test
120
Faulty Operation Panel Test
120
2Faulty DRAM Test
120
3Faulty Sensor Test
120
Faulty Sensor Test
120
Processing Communication Problems
121
1Initial Identification of Problems
121
Initial Identification of Problems
121
2Procedures for Processing Communication Problems
122
Procedures for Processing Communication Problems
122
Test Functions
126
1Test Mode Overviw
126
Test Mode Overviw
126
2Test Mode Flowchart
126
3DRAM Tests
128
DRAM Tests
128
4PRINT Tests
128
PRINT Tests
128
5FACULTY Tests
129
FACULTY Tests
129
6PRINTER Tests
133
PRINTER Tests
133
7MODEM, NCU Tests
134
MODEM, NCU Tests
134
Chapter 6 Appendix
138
Main Body
142
2Checking Operation
142
Checking Operation
142
Installation
142
User Data Flow
144
1User Mode Settings
144
User Mode Settings
144
2Fax Mode Settings
147
Fax Mode Settings
147
Canon MultiPASS MP390 Software Manual (138 pages)
Canon MultiPASS MP360: Software Guide
Brand:
Canon
| Category:
All in One Printer
| Size: 6.21 MB
Table of Contents
Table of Contents
2
Troubleshooting
1
About this Guide
3
1 : Installing
6
System Requirements and Software
6
Installing the Software
8
Run the Setup Screen
8
Step 1 Install MP Drivers
9
Step 2 Install MP Toolbox
10
Step 3 Connect the USB Cable
13
Install Utility Software
13
View User's Manual
13
If Installation Fails before Completion
13
Checking Installation
14
Printer Driver and Fax Driver (Fax Model Only)
14
Scanner Driver
15
Memory Card (Storage Device) Driver
16
MP Toolbox
16
Reading from or Writing to a Memory Card
17
Enabling/Disabling Overwriting Memory Card Data
17
Setting the Default Printer
18
Removing and Reinstalling the Software
19
To Remove the MP Toolbox
19
To Remove the MP Drivers
19
To Reinstall the Software
19
2 Printing
20
2 : Printing
22
Printing Documents
22
Previewing Your Document before Printing
22
Changing Print Settings (Opening the Settings Dialog Box)
24
To Change Settings for the Current Print Job
24
To Change Settings for All Future Print Jobs
24
Setting the Paper Type and Print Quality/[Main] Tab
26
Setting a Custom Print Quality
27
Setting a Custom Color Adjustment
28
Setting Page Size and Number of Copies/ [Page Setup] Tab
29
Setting Page Size and Number of Copies/[Page Setup] Tab
29
Printing on a Custom Paper Size
31
Enlarging/Reducing to Fit the Paper Size (Fit-To
31
Scaled Printing
31
Printing Multiple Pages on One Sheet (Page Layout Printing)
32
Poster Printing
33
Duplex Printing and Binding a Document into a Booklet (Booklet Printing)
34
Borderless Printing
35
Duplex Printing
36
Setting Background Printing (Windows 98/Me Only)
37
Selecting a Stamp/[Stamp/Background] Tab
38
[Stamp/Background] Tab
38
Creating or Changing a Stamp
39
Specifying the Text and Color of a Text Stamp (Windows 2000/XP)
40
Specifying an Image for a Graphic Stamp (Windows 2000/XP)
41
Specifying the Text and Color of a Stamp (Windows 98/Me)
42
Changing the Placement and Rotation of a Stamp
44
To Change the Position of a Stamp
44
Saving or Deleting a Stamp
45
To Save a Stamp
45
To Delete a Stamp
45
Selecting a Background/[Stamp/Background] Tab
46
Saving a New Image as a Background/Deleting a Background
47
To Save a New Image as a Background
47
To Delete a Background
48
Setting Special Effects/[Effects] Tab
49
Saving Settings as a Print Profile/[Profiles] Tab
51
[Profiles] Tab
51
To Save a Print Profile
51
To Retrieve and Use a Print Profile
52
To Delete a Print Profile
52
To Restore the Factory Pre-Defined Settings
52
Cleaning and Machine Settings/[Maintenance] Tab
53
[Maintenance] Tab
53
Cleaning the Print Head
54
Deep Cleaning
54
Aligning the Print Head
56
Printing the Nozzle Check Pattern
58
Resetting the Ink Counter
59
Setting for Slow-Drying Paper (Custom Settings)
60
Controlling Operating Noise (Quiet Mode)
61
Checking the Status of the Machine with the BJ Status Monitor
62
To Start the BJ Status Monitor
62
To Cancel Printing
63
To Display a List of Printing Jobs
64
Sharing the Printer and Using It on a Network
65
Setting up the Printer for Sharing
65
Installing the Printer Driver on a Client System
65
Sharing the Printer in Windows 2000/XP
66
3 Scanning
67
3 : Scanning
69
Scanning with the Operation Panel
69
Setting the Scanning Method for the [Black Start] or [Color Start] Key
70
To Set up in the [MP Toolbox] Main Screen
70
To Set up in the [Settings] Dialog Box
71
To Set up in the [Scanners and Cameras] Dialog Box
72
Scanning with the MP Toolbox
73
MP Toolbox Settings
76
Scanner Settings
76
Save Scanned Image to
78
Scanning an Image from an Application
80
Creating One PDF File from Two or more
81
Scanning Two or more Small Documents at One Time
84
Placing the Document
84
[Color (Multi-Scan)] in the MP Toolbox
85
[Multi-Scan] in Scangear MP (Simple Mode)
86
[Multi-Crop] in Scangear MP (Advanced Mode)
87
Setting Preferences and Scanning with Scangear MP
89
Switching between Simple Mode and Advanced Mode
89
Using Simple Mode
90
Using Advanced Mode
91
Advanced Mode Toolbar
92
To Enlarge or Reduce the Preview Image
92
To Move the Image
92
To Invert the Color in the Image
92
To Flip the Image
92
To Rotate the Image
92
To Show the Ruler in the Preview Area
92
To Delete the Preview Displayed
92
To Detach and Move the Toolbar
93
Advanced Mode - Specifying the Parameters of a Scan
93
To Select the Parameters of a Scan Automatically
93
To Specify the Parameters of a Scan
93
Advanced Mode - [Main] Tab Settings
94
Advanced Mode - [Settings] Tab Settings
96
Advanced Mode - [Settings 1] Tab Settings in the [Preferences] Dialog Box
98
Advanced Mode - [Settings 2] Tab Settings in the [Preferences] Dialog Box
100
Advanced Mode - [Color] Tab Settings
101
To Correct Tone Automatically
101
To Save Settings to a Color Adjustment File
101
To Scan with the Settings in the Saved Color Adjustment File
102
To Revise the Color Adjustment Settings Currently on Display or to Return to Default Settings
102
To Revise All Color Adjustment Settings or to Return to Default Settings
102
Advanced Mode - [Color] Tab - Brightness and Contrast
102
Advanced Mode - [Color] Tab - Gamma
103
Advanced Mode - [Color] Tab - Histogram
104
Advanced Mode - [Color] Tab - Tone Curve
105
Advanced Mode - [Halftone] Tab
106
Determining Resolution
107
Scanning with the WIA Driver
108
(Windows XP Only)
108
Scanning with the WIA Driver (Windows XP Only)
108
Scanning from the [Scanners and Cameras] Dialog Box
108
Setting Preferences in the WIA Driver
109
4 Faxing
110
4 : Faxing (Fax Model Only)
111
Sending a Fax
111
Characters and Symbols for Fax Numbers
112
Selecting a Recipient from the Address Book
113
Adding a Recipient to the Address Book
114
Changing Your Fax Settings
115
Registering or Editing a Recipient in the Address Book
116
Opening the Address Book for the First Time
117
Registering a Recipient (WAB Contact) in the Address Book
119
Searching and Removing a Recipient
120
Designating a Different Windows Address Book
121
Importing an Address Book
122
5 Troubleshooting
123
5 : Troubleshooting
124
Problems Outputting
124
Paper Curls
125
Memory Card Problems
125
(Mp390/Mp370)
125
Memory Card Problems (MP390/MP370)
125
Problems Installing and Uninstalling Software
126
Problems Printing from Your Computer
127
Problems Scanning
128
Glossary
131
Index
135
Advertisement
Canon MultiPASS MP390 Setup Sheet (8 pages)
Canon MultiPASS MP390: Install Guide
Brand:
Canon
| Category:
All in One Printer
| Size: 1.89 MB
Table of Contents
Check the Contents
2
Connect the Power Cord
3
Install the Print Head
3
Install the Ink Tanks
4
Load the Paper
4
Paper Output Tray
4
Connect the Usb Cable
8
Install the Utility Software
8
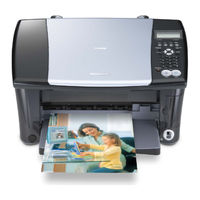
Canon MultiPASS MP390 Brochure & Specs (6 pages)
Canon MP390 Printer
Brand:
Canon
| Category:
All in One Printer
| Size: 0.54 MB
Canon MultiPASS MP390 Specifications (2 pages)
Canon Desktop Photo Printer/Copier/Fax/Scanner
Brand:
Canon
| Category:
All in One Printer
| Size: 0.2 MB
Advertisement
Related Products
Canon PIXMA MP530
Canon Pixma MP800R
Canon PIXMA MP160
Canon PIXMA MP180
Canon PIXMA MP760
Canon PIXMA MP800
Canon MP250 series
Canon PIXMA MP600R
Canon MP980 series
Canon PIXMA MP150
Canon Categories
Printer
Digital Camera
All in One Printer
Camcorder
Scanner
More Canon Manuals
Login
Sign In
OR
Sign in with Facebook
Sign in with Google
Upload manual
Upload from disk
Upload from URL