Miele KM 6310 Operating And Installation Instructions
Ceramic cooktop with induction
Hide thumbs
Also See for KM 6310:
- Operating and installation instructions (14 pages) ,
- Operating and installation instructions (68 pages) ,
- Operating and installation instructions (68 pages)

Related Manuals for Miele KM 6310


Summary of Contents for Miele KM 6310
- Page 1 Operating and Installation instructions Ceramic Cooktop with induction KM 6310 KM 6344 en - CA To prevent accidents and appliance damage, read these instructions before installation or use. M.-Nr. 09 166 590...
-
Page 2: Table Of Contents
KM 6310 ........ - Page 3 Con|ctivity and Miele|home ........
-
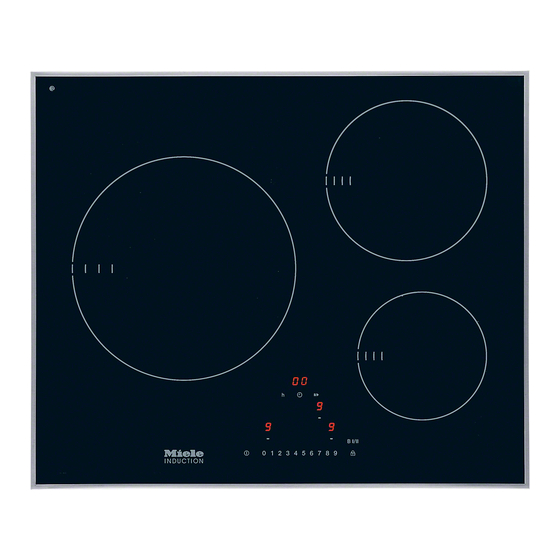
Page 4: Guide To The Cooktop
Guide to the cooktop Cooktop models KM 6310 Cooking zone with twin booster bc Cooking zone with booster Control panel... - Page 5 Guide to the cooktop KM 6344 Cooking zone with twin booster bcd Cooking zones with boosters Control panel...
-
Page 6: Control Panel
Guide to the cooktop Control panel 0 1 2 3 5 6 7 8 9 Sensors a Cooktop ON/OFF b Settings bar - For setting the power level - For setting the time c Lock indicator d Single booster / twin booster e For selecting the cooking zone f Stop and Go g - Timer selection... - Page 7 Guide to the cooktop Indicator lights i Lock indicator j Booster Cooking zone display = Cooking zone ready for use = Keeping warm function 1 to 9 = Power levels = Level 1 twin booster = Booster / level 2 twin booster ß...
-
Page 8: Cooking Zone Data
* Cookware of any diameter may be used within the specified range. ** The wattage quoted may vary depending on the size and material of the cookware used. Special accessories Cooktops with the < symbol in the top left-hand corner are pre-equipped for the Miele|home system (see Optional accessories). -
Page 9: Safety Instructions And Warnings
This will protect you from injury and prevent damage to the cooktop. Miele will not be held liable for damage caused by failure to comply with the safety instructions and warnings. Keep the instructions in a safe place and pass them along to any... - Page 10 Safety instructions and warnings Intended use This cooktop is intended for use in households and similar environments. This cooktop is not intended for outdoor use. Use the cooktop only in household-type situations for the preparation and warming of food. All other types of use are not permitted. Individuals who are incapable of using the appliance safely because of their physical, sensory or mental capabilities or their lack of experience or knowledge must not use this appliance without...
- Page 11 Safety instructions and warnings Children at the cooktop Children under 8 years of age must be kept away from the cooktop unless they are under constant supervision. Children 8 years and older must only be allowed to use the cooktop without supervision if the operation of the dishwasher has been explained to them in such a way that they can safely use it.
- Page 12 (selected) settings. Technical safety Installation, repair and maintenance work should only be performed by a Miele authorized service technician. Work by unqualified persons could be dangerous for the user. A damaged cooktop can be dangerous. Before installing the cooktop, check for visible damage.
- Page 13 Any contact with connections carrying voltage or changes to the electrical or mechanical set-up will endanger you and may impair the functioning of the cooktop. Repairs not performed by a Miele authorized service technician will void the warranty. Only with original Miele spare parts can the manufacturer guarantee the safety of the appliance.
- Page 14 Safety instructions and warnings Proper use Oil and fat may ignite if overheated. Do not leave the appliance unattended when cooking with oil or fat.? Do not use water to extinguish oil or fat fires. Switch the cooktop off and use a lid or a wet dishtowel to put out the fire. After use, switch off the element by its control and do not rely on the pan detector.
- Page 15 Safety instructions and warnings If the cooktop is built in behind a cabinet door, it should only be operated with the door open. Close the door only when the residual heat indicators have gone out. The cooktop is hot during use and remains so for some time after being switched off.
- Page 16 Safety instructions and warnings Rough cookware can scratch the glass ceramic surface. Use only pots and pans with a smooth bottom. Salt, sugar, and grains of sand or dirt (e.g. from fresh vegetables) between the cookware and the cooktop can cause scratches. Keep cooktop and cookware clean.
- Page 17 Safety instructions and warnings Metal objects stored in a drawer under the cooktop can become hot when the cooktop is in heavy use over a longer period of time. Do not store metal objects in a drawer under the cooktop! The cooktop is equipped with a cooling fan.
-
Page 18: Help Protect Our Environment
Help protect our environment Disposal of packing materials Disposal of an old appliance The cardboard box and packing Old appliances contain materials that materials are biodegradable and can be recycled. Please contact your recyclable. Please recycle. local recycling authority about the possibility of recycling these materials. -
Page 19: Before The First Use
Before the first use Stick the data plate, which is included with the appliance documents, on the appropriate place on the cooktop (see Technical Service). First cleaning ^ Remove any protective foil and stickers. ^ Before first use, wipe down the appliance with a damp cloth and dry it. -
Page 20: Induction
Induction How induction works Under each induction cooking zone there is an induction coil. When the cooking zone is switched on, the coil generates a magnetic field that acts directly on the bottom of the cookware to heat it up. The cooking zone heats up indirectly from the heat given off by the cookware. -
Page 21: Noises
Induction Noises When you use an induction cooking zone, the following noises may occur, depending on the the type and shape of the cookware bottom: – The zone may hum at higher power settings. The humming will become quieter or disappear if you lower the power setting. -
Page 22: Cookware
Induction Cookware Suitable cookware is made of: – stainless steel with a magnetizable bottom – enamel-coated steel – cast iron. Unsuitable cookware is made of: – stainless steel with a non-magnetizable bottom – aluminium, copper – glass, ceramics, earthenware, stoneware. If you are not sure whether a pot or pan is suitable for induction, you can test it using a magnet against the bottom. -
Page 23: Use
The basics of use Your glass ceramic cooktop is equipped with sensors which respond to touch. To operate the cooktop, simply touch the relevant sensor. An audio signal confirms each touch of the sensor. The cooking zones and the timer must be active if you want to set or change a power level or time. -
Page 24: Switching On
Switching on Begin by switching on the cooktop, then the desired cooking zone. Do not leave the cooktop unattended when in use! Switching the cooktop on ^ Touch the s sensor. 0 appears in each of the cooking zone displays. If you don't touch another sensor within the next few seconds, the cooktop will shut off for safety. -
Page 25: Power Settings
Power settings The cooktop is factory-programmed with 9 power levels. You can increase the number of power levels (see Programming). The additional levels are indicated by a dot next to the number. Power settings Default settings Extended settings (9 power levels) (17 power levels) Keeping warm Melting butter... -
Page 26: Auto Heat-Up
Auto heat-up When Auto heat-up is activated, the cooking zone starts heating at the highest power setting and then switches to the power level selected (continued-cooking level). The heat-up time depends on the continued-cooking level you selected (see chart). Activating ^ Briefly touch the sensor for the desired cooking zone. - Page 27 Continued-cooking Heat-up time level* in minutes and seconds (approx.) 0 : 15 0 : 15 0 : 15 0 : 15 0 : 25 0 : 25 0 : 50 0 : 50 2 : 00 5 : 50 5 : 50 2 : 50 2 : 50 2 : 50...
-
Page 28: Booster Function
Booster Function The cooking zones are equipped with a booster or a twin booster (see Guide to the cooktop). The booster function increases the power so that large quantities can be quickly heated, e.g. water for cooking pasta. When activated, the cooking zones will heat with more power for 15 minutes. - Page 29 Activating the booster ^ Touch the sensor for the desired cooking zone. ^ Select a power level, if necessary. ^ Touch the B I/II sensor. The Booster indicator light will come on, and hflashes in the cooking zone display. After a few seconds h becomes steady and the indicator light goes out.
-
Page 30: Keeping Warm
Keeping warm Every cooking zone has a keeping-warm setting. Keeping warm (h) is between power levels 0 and 1. If it is activated, the cooking zone switches off after a maximum of two hours. Keeping warm is for keeping food warm that has just been cooked warm, i.e. -
Page 31: Switching Off And Residual Heat Display
Switching off and residual heat display Switching a cooking zone off ^ Touch the sensor for the desired cooking zone twice. A 0 flashes for a few seconds in the cooking zone display. If the cooking zone is still hot, the residual heat display appears. -
Page 32: Tips For Saving Energy
Tips for saving energy – Whenever possible, keep pots and pans covered while cooking. This helps to limit the loss of heat. open closed – For small quantities, choose small cookware. A small pot requires less energy than a larger, only partially filled pot. –... -
Page 33: Timer
Timer The cooktop must be switched on to use the timer. The timer can be used for two different functions: – To set the minute minder – To set a cooking zone to switch off automatically. You can select a time from 1 minute (01) to 9 hours (9^). A time up to 99 minutes is set and displayed in minutes. -
Page 34: Minute Minder
Timer Minute minder Setting the minute minder Minutes Example: You want to set a time of 15 minutes. ^ Switch the cooktop on. ^ Touch the m sensor. 00 appears in the timer display, and the right 0 flashes. First you set the tens, then the ones. ^ Touch the number corresponding to the tens (in this case 1) on the settings bar. - Page 35 Timer Hours To set full hours, touch the respective number on the settings bar. To set the half hours, touch the space between 2 numbers on the settings bar. Example: You want to set a time of 2 hours and 30 minutes ^ Switch the cooktop on.
- Page 36 Timer Changing ^ Touch the m sensor. ^ Set the desired time as described above. Clearing ^ Touch the m sensor until 00 appears in the timer display.
-
Page 37: Switching A Cooking Zone Off Automatically
Timer Switching a cooking zone off automatically You can set a time after which a cooking zone switches off automatically. All of the cooking zones can be programmed at the same time. If the programmed time is longer than the maximum time allowed, the safety switch-off function will switch off the cooking zone automatically when the maximum time has elapsed (see Safety switch-off). -
Page 38: Using Both Timer Functions At The Same Time
Timer Using both timer functions at the same time The minute minder and automatic switch-off functions can be used at the same time. If you have programmed one or more switch-off times and would also like to set the minute minder: Keep touching the m sensor until the indicator lights for the programmed cooking zones light up steady and 00 appears in the timer display. -
Page 39: Safety Features
Safety features Safety lock / System lock Your cooktop is equipped with a safety lock to prevent the cooktop and the cooking zones from accidentally being switched on or their settings changed. The safety lock can be activated when the cooktop is switched on. - Page 40 Safety features Activating Three-finger control (factory default) ^ Touch the $ sensor and the selection switches of both right-hand cooking zones at the same time until the lock indicator comes on and LC appears in the timer display. The indicator light and LC will go out after a short while. One-finger control ^ Touch the $ sensor until the lock indicator lights up and LC appears in the timer display.
-
Page 41: Stop And Go
Safety features Stop and Go Your cooktop has a Stop and Go feature which, when activated, reduces the power of all switched-on cooking zones to level 1. The power levels of the cooking zones and the timer settings cannot be changed, the cooktop can only be switched off. -
Page 42: Safety Switch-Off
Safety features Safety switch-off If the the cooking time is too long If a cooking zone is heated for an unusually long period of time (see chart) at the same power level, it will switch itself off and the residual heat will be displayed. To use the cooking zone again, switch it back on in the usual way. -
Page 43: Overheat Protection
– fats or oils being heated at high power settings. – insufficient ventilation of the underside of the cooktop. – a hot cooking zone being switched on after a power outage. If, despite elimination of the cause, the overheat protection is triggered again, contact Miele Customer Service. -
Page 44: Cleaning And Care
Cleaning and care NEVER use a steam cleaner to clean this appliance. The steam can reach the electrical components and cause a short circuit. Clean the appliance on a regular basis, preferably after each use. Let the appliance cool down before cleaning. Dry the appliance any time water is used to clean it. - Page 45 First wipe down the surface with a damp cloth to loosen soiling, then remove stubborn crusting with a glass scraper. Next, clean the cooktop with the Miele ceramic and stainless steel cleaner (see "Optional accessories"), or a commercial ceramic cleaner and paper towel or a clean cloth. Do not apply cleaner to a hot cooking zone as this can leave spots.
-
Page 46: Programming
Programming You can change the programming of your cooktop (see chart). You can change several settings one after the other. After starting the programming function P (Program), an S (Status) will appear in the timer display. With cooktops that have 3 cooking zones, an additional display appears at the back left. - Page 47 Programming Saving the settings ^ Touch the s sensor until the displays go out. If you do not want to save the settings ^ Touch the $ sensor until the displays go out.
- Page 48 Programming Program* Status** Setting 00 Demo mode and factory Demo mode ON default settings (after switching the cooking zone on dE appears in the timer display for several seconds) Demo mode Off Factory default settings restored 02 Number of power levels 9 power levels (1, 2, 3 ...
- Page 49 System lock Only manual activation of the system lock Manual and automatic activation of the system lock Auto heat-up Miele|home Feature not available - only on deregistered communication-enabled registered appliances retrofitted with a communication...
-
Page 50: Troubleshooting
If necessary, contact Miele Customer Service for assistance. Risk of injury! Miele assumes no liability for any hazards arising from improper installation, maintenance or repairs performed by unauthorized persons! NEVER open the appliance housing. Only Miele authorized professionals may install or perform maintenance and repair work on this appliance. - Page 51 Troubleshooting Problem Possible fault Solution There is a strange Each subsequent use smell or vapours reduces the odour and it when the appliance is will ultimately dissipate being used for the entirely. first time. In the cooking zone There is no or unsuitable Use suitable cookware display the ß...
- Page 52 Troubleshooting Problem Possible fault Solution Power level 9 is Operating both zones automatically reduced at power level 9 would if you select power exceed the permitted level 9 on the maximum power for the connected cooking cooktop. zone. The cooktop switches One or several of the Clean the control panel or off while in use, and a...
- Page 53 FE 48 fork. Remove the cause of the blockage. If the fault message appears again, call Miele Customer Ser- vice. Other fault messages There is a fault in the Interrupt the power supply to the FE..
-
Page 54: Optional Accessories
Miele dealer. Cookware Miele offers a wide range of cookware especially designed for Miele appliances. Please refer to the Miele website for more details on individual products. Pots in various sizes Frying pans with lids... - Page 55 To enjoy the benefits of this feature, your appliance must be fitted with a communications module. You can find detailed information on the Miele|home system on the Internet at miele-at-home.de. XKM 2100 KM Communication module including installation accessories...
- Page 56 Miele|home a Communication-enabled appliances (examples) b Communication module c SuperVision appliance d Electrical power supply (powerline) e Miele|home gateway f (WLAN) router Possible connections (optional) g PC, notebook h iPod* or iPhone* i Connection to a domestic bus system display...
- Page 57 Optional accessories Con|ctivity a Communication module XKM 2000 DA b Communication module XKM 2100 KM c Electrical power supply (powerline)
-
Page 58: Con|Ctivity And Miele|Home
Con|ctivity and Miele|home Registering the cooktop If you want to register your cooktop – for Miele{home, first prepare the registration procedure on the display device (see Miele|home installation instructions) – for Con|ctivity, you must first register the hood (see Con|ctivity installation instructions). -
Page 59: To Deregister The Cooktop
Deregistration will take a few minutes. 1 will become steady when the process has been completed successfully. ^ To save the setting, touch the s sensor until the displays go out. ^ Follow the installation instructions of Miele|home or Con|ctivity. -
Page 60: Safety Instructions For Installation
Safety instructions for installation Ensure that the electrical supply The appliance must be installed by cable for the cooktop cannot touch the a qualified professional and floor panel after installation nor be connected to the electric power subject to any mechanical strain. supply by a qualified electrician. - Page 61 Safety instructions for installation Clearance above the cooktop If there is more than one appliance installed below the exhaust hood, each with a different safety clearance, the largest clearance must be used. For an exhaust hood above the cooktop, always use the clearance specified by the hood manufacturer.
- Page 63 Safety instructions for installation Minimum clearance underneath the Protective base cooktop Installation of a protective base under the cooktop is allowed but not required. To ensure proper ventilation of the cooktop, a minimum clearance is A gap of 10 mm at the back is required required between the appliance and an for the power supply cable.
- Page 64 Safety instructions for installation Safety clearance to a wall covering A safety clearance must be maintained between the countertop cut-out and any wall covering to protect it from heat damage. If the covering is made of a combustible material (e.g. wood), a safety clearance e of 50 mm must be maintained between the cut-out and the covering.
- Page 65 Safety instructions for installation Cooktops with frame or Tiled countertop bevelled edges Seal between cooktop and countertop The grouting a and the hatched area below the cooktop frame must be smooth and flat, so that the frame will be level and the sealing strip under the edge of the upper part of the cooktop can provide an adequate seal against the countertop.
-
Page 66: Installation Dimensions
Installation dimensions KM 6310 a Front b Cooktop height c Connection for Miele|home d Electrical box The connection cable (1440 mm long) comes with the cooktop. - Page 67 Installation dimensions KM 6344 a Front b Cooktop height c Connection for Miele|home d Electrical box The connection cable (1440 mm long) comes with the cooktop.
-
Page 68: Installation
Installation Preparing the countertop Inserting the cooktop ^ For the countertop cut-out use the ^ Feed the power supply cable down dimensions given in the illustration. through the countertop cut-out. Observe the safety clearances (see ^ Center the cooktop in the cut-out. Safety instructions for installation). -
Page 69: Electrical Connection
Electrical connection Connection CAUTION: Before installation or The cooktop is ready for connection to servicing, disconnect the power a grounded power supply. supply by either removing the fuses, shutting off the power main or 208/240 V, 60 Hz, 40 A fuse rating. manually "tripping"... -
Page 70: Technical Service, Data Plate
In the event of a fault which you cannot easily fix yourself, please contact the Miele Technical Service Department at the address on the back of this booklet. When contacting Technical Service please quote the serial number and model of the appliance. - Page 72 Alteration rights reserved / 3313 M.-Nr. 09 166 590 / 03 For the most updated manual, visit the Miele web site.