
Related Manuals for Electrolux FHWC3060LSA +


Summary of Contents for Electrolux FHWC3060LSA +
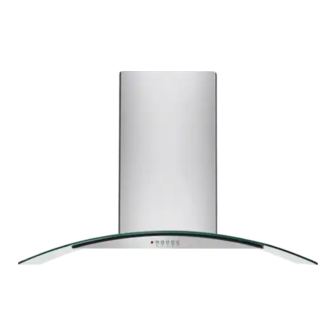
- Page 1 Use & care guide Guia de uso y cuidado Guide d’utilisation et d’entretien 30” and 36” Range Hood FHWC3060LSA + FHWC3660LSA 316902443 June 2011...
-
Page 2: Table Of Contents
Finding information Table of contents NOTE Please read and save this guide ........02 Registering your product with Frigidaire enhances our ability to serve you. You can register online at Keep a record for quick reference ........02 www.frigidaire.com or by dropping your Product Registration Card in the mail. -
Page 3: Important Safety Instructions
Important safety instructions Important safety instructions WARNING IMPORTANT To reduce the risk of fire, electric shock, or injury to persons, observe the following: • FOR RESIDENTIAL USE ONLY. Indicates installation, operation, or • Use this appliance only in the manner maintenance information which is important intended by the manufacturer. -
Page 4: Electrical Requirements
Important safety instructions Important safety instructions WARNING WARNING To reduce the risk of injury to persons, in the event of a cooker top grease fire, observe the following: To reduce the risk of fire, use only metal duct • Smother flames with a close-fitting lid, work. -
Page 5: Intended Use
Installing the hood • Do not have a fuse in the neutral or ground circuit. Upper and lower chimney IMPORTANT Upper bracket Save installation instructions electrical inspector’s use. The range hood must be connected with copper Lower bracket wire only. The range hood should be connected directly to the fused disconnect (or circuit breaker) box Collar through metal electrical conduit. - Page 6 Installing the hood Installing the hood • If open fireplaces are operated in the same room, ask your local chimney sweeper about the local regulations prior to installation. • If you are renting, then approval must be obtained from the owner of the property. IMPORTANT • Attention! In order for the range hood to reach optimal performance, install it over the middle of We recommend that two people carry the cooking area.
-
Page 7: Install Framing For Hood Support
Installing the hood • Flexible metal round ducts should only be used fig. when no other duct fitting exists. Limit use to short lengths and do not crush when making corners. Examples of possible ducting or air recirculation fig. Roof pitch with Sidewall cap Recirculator flashing and cap Pipe Pipe Pipe Collar... - Page 8 Installing the hood • Insert 2 screws (10 or 14) in the top location, but fig. Ceiling do not fully insert the screws (fig. ). Mount the range hood (1) to the wall and tighten the screws. 0.9” Insert and tighten the 2 remaining screws on the Long 9.8” bottom location of the range hood (fig. screws 9.3” • Attach the collar (6) to the range hood (1). Secure with 2 short screws (12) (fig. 9.13” fig.
-
Page 9: Electrical Connections
Installing the hood fig. fig. fig. fig. L (live) = Black N (neutral) = White (ground) = Green • Mount the junction box onto the range hood using 2 short screws (15) (fig. Electrical connections fig. DANGER Danger of electric shock! All fittings must be installed by a competent person in accordance with current wiring regulations and local building regulations. -
Page 10: Recirculation Mode
Installing the hood Installing range hood to the wall in CAUTION recirculation mode • For the operation of the range hood with Danger of injury. The chimney skirts may have recirculation mode a recirculator, model no. some sharp edges. FHWRKT60LS, needs to be obtained. Please call Frigidaire at 1.800.944.9044 to order this kit. -
Page 11: Operation
Operation / Cleaning and maintenance Operation Use a soft cloth moistened with hand-warm mildly soapy water or household cleaning • Press one of the speed ( • / • • / • • • ) buttons detergent. Never use metal pads, chemical, to turn the appliance on. abrasive material or stiff brush to clean the Button Function appliance. -
Page 12: Technical Data
Troubleshooting fig. fig. Distance Readjust the between the distance (page appliance and the cooking 7, fig. Suction place too table below) performance large. is not good. Clean Metallic anti- filters (see grease filter is Cleaning and dirty. maintenance). Environmental protection fig. fig. Waste electrical products should not be disposed of with household waste. -
Page 13: Warranty Information
Home Products, Inc. In Canada, your appliance is of Alaska. warranted by Electrolux Canada Corp. 12. Damages to the finish of appliance or home Electrolux authorizes no person to change or add to any incurred during installation, including but not obligations under this warranty. Obligations for service limited to floors, cabinets, walls, etc.