Miele G 8066 Operating Instructions Manual
Commercial dishwasher
Hide thumbs
Also See for G 8066:
- Installations plan (31 pages) ,
- Operating instructions manual (64 pages)
Table of Contents

Related Manuals for Miele G 8066


Summary of Contents for Miele G 8066
-
Page 1: Operating Instructions
Operating instructions Commercial dishwasher G 8066 To avoid the risk of accidents or damage to the machine it is essential to read these instructions before it is installed, commissioned and used for the first time. M.-Nr. 06 743 480... -
Page 2: Table Of Contents
G 8066 WES DOS and G 8066 DOS: ....... . . - Page 3 Contents Programming special functions ........32 1.
- Page 4 Contents Problem solving ..........51 Cleaning the drain pump and non-return valve .
-
Page 5: Description Of The Machine
– G 8066 WES has the same features as the G 8066 and also a built-in wa- ter softener. G 8066 DOS and G 8066 WES DOS: – G 8066 DOS with two built-in... -
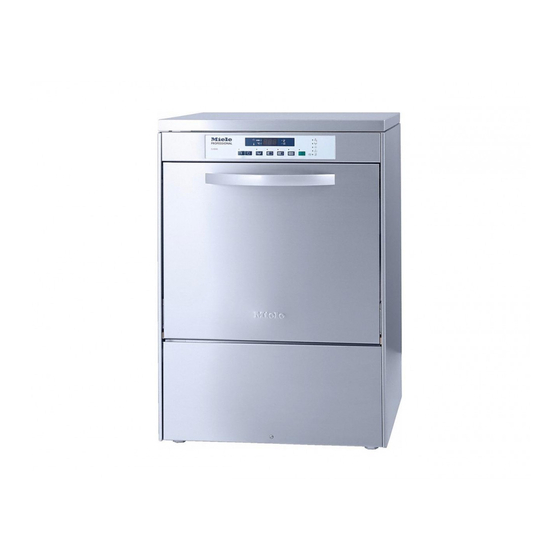
Page 6: Guide To The Machine
Guide to the machine Control panel a On button j "Add rinsing agent" indicator light, only applies to G 8066 and G 8066 b Off button WES DOS machines c DRAIN programme button k "Drain fault" indicator light d SHORT programme button l "Inlet fault"... -
Page 7: Overview
Guide to the machine Overview a Connection for DOS Module e Spray arms (Dispensing system for liquid f Salt reservoir, only applies to WES cleaning agent) on the rear right machines with a built-in water hand side, only applies to machines softener without a built-in dispensing system g Control panel... - Page 8 Guide to the machine G 8066 DOS and G 8066 WES DOS: a Service panel b Cleaning agent level indicator c Handle for opening the service panel d Rinsing agent level indicator...
-
Page 9: Warning And Safety Instructions
This machine should be requirements. Incorrect use can lead commissioned and then maintained to personal injury and damage to by a Miele authorised and trained ser- property. vice technician or other suitably qualified To avoid the risk of accidents and and competent approved person. - Page 10 Warning and Safety instructions Personnel operating the machine Be careful when sorting items with should be trained regularly. sharp pointed ends and Untrained personnel should not be positioning them in the machine that allowed access to the machine or its you do not hurt yourself or create a controls.
- Page 11 Warning and Safety instructions The following points should be The machine is designed for observed to assist in maintaining operation with water and additive cleaning agents only. Organic solvents quality standards, to protect users, and to avoid damage to the machine must not be used in this machine, as there is the danger under certain and items being cleaned.
- Page 12 Only use genuine Miele regulations and wear safety goggles accessories with this machine. and gloves). Consult Miele on the type and Make the door lock inoperative, so that children cannot accidentally shut application of such equipment. themselves in. Then make appropriate arrangements for the safe disposal of the machine.
-
Page 13: Caring For The Environment
Caring for the environment Disposal of the packing Disposal of your old machine material Electrical and electronic machines often contain materials which, if The transport and protective packing handled or disposed of incorrectly, has been selected from materials which could be potentially hazardous to are environmentally friendly for human health and to the environment. -
Page 14: Before Using For The First Time
If you are not satisfied with leads to serious damage to the wa- the results from one brand, try another ter softener. Make sure you have quality brand before contacting Miele picked up the correct packet of for advice. reactivation salt before filling the salt... -
Page 15: Opening And Closing The Door
Opening and closing the door To open the door To close the door ^ Grasp the handle and open the door. ^ Lift the door upwards and push until it clicks shut. The door should only be opened during operation for emergencies, e.g. if articles are knocking together or if a programme fault is indicated in the display (see "Cancelling a... -
Page 16: Water Softener Unit (Optional)
Water softener unit (optional) Important Only applies to machines with a The built-in water softener has settings built-in water softener. from 0.2 - 6.5 mmol/l (1 °d - 35 °d ). Where the water hardness level is To achieve good cleaning results, the above 5.4 mmol/l (30 °d) an external dishwasher needs to operate with soft water softener unit, e.g. -
Page 17: Setting The Water Softener
Water softener unit (optional) Setting the water softener Table of settings ^ Switch off the machine with the Z mmol/l or mmol/l °f Value °d displayed button. 0 *) ^ Press and hold A and 6 at the same time and, whilst doing so, switch the machine on with the On button Y. -
Page 18: Filling The Salt Reservoir
These may contain insoluble additives which can impair the functioning of the water softener. If in doubt consult the Miele Professional Department. The salt reservoir holds approx. 2 kg of salt. -
Page 19: Salt Indicator K
Water softener unit (optional) Salt indicator k Rinsing out salt residues at the end of operation ^ Press the Z button. ^ Press and hold the 6 button and press Y at the same time. The rinsing process will begin which will dilute and rinse out any residual salt. -
Page 20: Adding Rinsing Agent
Rinsing agent is poured into the storage reservoir and the amount set is dispensed automatically in the final rinse. G 8066 and G 8066 WES: These versions of the dishwasher are fitted as standard with a built-in rinsing agent dispensing pump. -
Page 21: Adding Rinsing Agent And Venting The Dispensing System
You should not start a programme until after the dispensing system has been vented. Fill the rinsing agent reservoir when the G 8066 WES DOS and indicator on the right hand side of the G 8066 DOS: service panel shows there is insufficient These versions of the dishwasher are rinsing agent. - Page 22 Adding rinsing agent ^ Grasp the service panel handle and open the panel. ^ Take the red cap off the filler spout. ^ Using the funnel supplied fill the container with rinsing agent. ^ Replace the red cap and close the service panel.
-
Page 23: Loading The Machine
Loading the machine Preparing the load – Tall, narrow, hollow items should be placed in the centre of the baskets to Remove coarse residues and empty all ensure better water coverage. containers before loading into the machine. – The spray arms must not be blocked by items which are too tall or which Do not use metal scourers or hang down in their path. -
Page 24: Items Not Suitable For Dishwashers
Loading the machine Items not suitable for dishwashers: – Cutlery with wooden or horn handles. – Wooden or plastic cutting boards. – Heat sensitive plastic items (see "Programmes with reduced final rinse temperature"). – Items, e.g. old knives with handles which have been glued on. -
Page 25: Loading Examples
Loading the machine Loading examples The dishwasher can be supplied with a standard range of baskets, or with baskets to suit your individual requirements. The diversity of inserts and baskets is so great that it is not possible to illustrate them all or give detailed instructions on their use here. -
Page 26: Add Cleaning Agent
Add cleaning agent G 8066 and G 8066 WES: Only use cleaning agents Cleaning agent can be dispensed in formulated for use in this type of powder form by placing it on the inside machine. Do not use cleaning of the door or in liquid form using an... -
Page 27: Adding Liquid Cleaning Agent
Add cleaning agent Adding liquid cleaning agent: The dishwasher can also be connected to an optional DOS Module G 60 for dispensing liquid cleaning agent. See "Programming special functions" for instructions on how to set the concentration level and vent the dispensing system. -
Page 28: G 8066 Wes Dos And G 8066 Dos
Maintenance of the dispensing system To ensure trouble-free operation, regular maintenance should be carried out at specified intervals by a Miele approved service technician. Every 1 to 1 ½ years Replace the DOS Module siphon tubes or for machines with integrated... -
Page 29: Operation
Operation When the boiler and tank are filled and Preparing the machine the operating temperature has been ^ Close the door. reached, the indicator light for the Start button 6 will flash and the duration for ^ Open the stopcock. the programme selected will appear in ^ Press the Y button to switch the the display in minutes. -
Page 30: Selecting A Programme
The programme selected will remain in machine. memory for the duration of the operating session, e.g. during a G 8066 WES and G 8066 WES DOS: working day, until the machine is switched off. The k indicator light will come on in... -
Page 31: Changing A Programme
Operation Changing a programme Switching off ^ Select the DRAIN 6 programme. Provided the Start button has not yet been pressed, a wrongly selected The water will drain away. When the programme may be changed as DRAIN programme has finished: described below (if it has been ^ Press the Z button. -
Page 32: Programming Special Functions
Altering the special function settings or G 8066 and G 8066 WES: venting the dispensing system causes Models G 8066 and G 8066 WES are the machine to drain automatically. It designed for use with powder cleaning will save both time and energy if you agents. -
Page 33: Setting The Cleaning Agent Dispensing Method
^ Press the A button once. 0, 1, 2, or 3 will appear in the display. 0 = powder cleaning agent, placed on the inside of the door (G 8066 and G 8066 WES) 1 = liquid cleaning agent dispensed... -
Page 34: Setting The Cleaning Agent Dosage Concentration Level
Programming special functions 1.2 Setting the cleaning agent Only for DOS Module C 60: dosage concentration level Also set the dosage selector on the If the dispensing method has been DOS Module to position "10". programmed for liquid cleaning agent, you can alter the dispensing Proceed to step 1.4 if you do not want concentration as follows. -
Page 35: Setting The Dos 2 Rinsing Agent Dosage Concentration Level And Venting The Dispensing System (Programming Level 3)
Proceed to step 2.4 if you do not want 1 = Built-in pump and built-in container to make any other changes to settings (G 8066 DOS and G 8066 WES DOS) in this programming level. ^ Press the A button repeatedly until the option you want appears. -
Page 36: 2.3 Venting The Dispensing System
Programming special functions 2.3 Venting the dispensing system 2.4 To save your changes ^ Call up Programming level 3 ^ Press 6. SP will appear in the (see 2.1). display. ^ Press 6 again. The alteration is now Then, or if you were already in Programming level 3, vent the saved. -
Page 37: Setting The Main Wash Or Final Rinse Temperature And / Or Final Rinse Duration (Programming Level 4)
Programming special functions 3. Setting the main wash or 3.1 Setting the main wash temperature final rinse temperature and / or final rinse duration You must first call up Programming (Programming level 4) level 4 as follows: ^ Switch off the machine with the Z Please make a note of any changes button. -
Page 38: Setting The Offset Range For The Final Rinse Temperature
Programming special functions 3.2 Setting the offset range for the 3.3 Selecting the final rinse duration final rinse temperature ^ Call up Programming level 4 ^ Call up Programming level 4 (see 3.1). (see 3.1). Then, or if you were already in Then, or if you were already in Programming level 4, set the duration for the final rinse as follows:... -
Page 39: Buzzer (Programming Level 5)
Programming special functions 4. Buzzer (Programming You can then set the buzzer as follows: level 5) ^ Press the z button repeatedly until 5.01 appears in the display. Programming level 5 allows you to activate a buzzer to sound when ^ Press A once. -
Page 40: Altering The Programme Duration (Programming Level 6)
Programming special functions 5. Altering the programme 5.1 Altering the programme duration for the SHORT programme duration (Programming level 6) You must first call up Programming You can set the programme duration in level 6 as follows: a range from 75 seconds to 480 seconds. -
Page 41: Altering The Programme Duration For The Standard Programme
Programming special functions 5.2 Altering the programme duration 5.3 Altering the programme duration for the STANDARD programme for the INTENSIVE programme ^ Call up Programming level 6 ^ Call up Programming level 6 (see 5.1). (see 5.1). Then, or if you were already in Then, or if you were already in Programming level 6, set the Programming level 6, set the... -
Page 42: Resetting The Factory Default Settings
Programming special functions 6. Resetting the factory default ^ Press A repeatedly until 00 (factory default setting) appears in the settings display. You can reset all parameters back to The factory default settings have now the factory default settings in been called up. -
Page 43: Cleaning And Care
Cleaning and care Cleaning the wash cabinet, Cleaning the tank and wash cabinet / Draining tank and filters ^ Press 6 to begin the DRAIN The dishwasher must not be programme (see the programme used without all the filters in place. chart). -
Page 44: Cleaning The Flat Filters
Cleaning and care Cleaning the flat filters Cleaning the fine filter The water in the tank can be hot. The water in the tank can be hot. The tank must be drained before The tank must be drained before removing the filters. removing the filters. -
Page 45: Cleaning The Control Panel
Cleaning the spray arms E-Cloth ^ A microfibre "E-Cloth" is available Waste particles can lodge in the spray from the Miele UK Spare Parts arm jets. Department, which is suitable for It is therefore important to inspect the cleaning surfaces such as stainless... -
Page 46: Problem Solving Guide
With the aid of the following guide, minor problems can be easily corrected without calling in a Miele service technician, saving you both time and money. The following guide may help you to find the reason for a fault, and to correct it. - Page 47 Problem solving guide Problem Possible cause Remedy The wash cycle finishes Before rectifying the problem you must: early and the 6 indicator light flashes – Switch off the machine (fault code F..A appears with the Z button. in the display). The filters in the wash Clean the filters, see cabinet are clogged.
- Page 48 Problem solving guide Problem Possible cause Remedy The dishes are not The dishes were not See "Loading the clean. loaded correctly. Dishes machine". were placed inside other pieces, water could not access all surfaces. The programme was not Select a more powerful powerful enough.
- Page 49 Problem solving guide Problem Possible cause Remedy White residue is visible Not enough rinsing agent Increase the rinsing agent on cutlery and crockery, was used. dosage, see clouding occurs on "Programming special glassware; film can be functions". wiped off. There is no salt in the salt Add reactivation salt, see reservoir.
- Page 50 ^ Start the DRAIN 6 programme. ^ Select a wash programme so that the boiler and tank will fill with water. If the DRAIN 6 programme will not start or the fault code appears again, call the Miele Service Department.
-
Page 51: Problem Solving
Problem solving Cleaning the drain pump and The drain pump is situated under the non-return valve a. non-return valve If water has not been pumped away at the end of a programme the drain pump or the non-return valve might be blocked. -
Page 52: Cleaning The Filters In The Water Inlet
Problem solving Cleaning the filters in the water inlet Filters are incorporated in the screw connection of the water inlet hose to protect the water inlet valve. If these filters get dirty they need to be cleaned, otherwise insufficient water flows into the wash cabinet. -
Page 53: After Sales Service
Should you still have any difficulties or if a fault code "F..." appears in the display again, please contact: – your authorised Miele Service Dealer, – the Miele Service Department (see back cover for contact details). ^ When contacting the your Dealer or... -
Page 54: Installation
Installation Please refer to the installation Cover plate (protects the worktop) diagram supplied with the machine. The underside of the worktop must be protected against water damage by a Furniture and fittings installed stainless steel plate. near the machine must be of a commercial standard able to withstand the effects of steam and condensation. -
Page 55: Electrical Connection Uk
– The mains connection cable may only be replaced by an original Miele spare part or an appropriate cable with wire end ferrule. – For technical data see data plate... -
Page 56: Plumbing
1 to 10 bar (100-1000 kPa) the p / 6 indicator light may come on and the fault code "F2E" show in the display. Please contact the Miele Service Department. The inlet hose must not be shortened or damaged in any way –... - Page 57 Hose clips are supplied for securing it in position. – A longer drain hose (up to 4 m long) is available to order from the Miele Spare Parts Dept. – The drainage system must not exceed 4 metres. See also the installation diagram...
-
Page 58: Programme Chart
Programme chart Programme When to use Powder cleaning agent Follow manufacturer's instructions For heavily soiled crockery with dried 40 grammes (2 g/l) on the INTENSIVE on soiling. inside of the door. 3 min Add 20 g after every five programme cycles. For normally soiled loads. - Page 59 Programme chart Programme sequence Main wash Run-off Final rinse 3) 4) 3) 5) 65°C/160 sec 5 sec 85°C/15 sec 65°C/100 sec 5 sec 85°C/15 sec 65°C/70 sec 5 sec 85°C/15 sec 2 min 45 sec 3) To alter the wash and rinsing temperature and the rinsing time, see "Programming special functions".
-
Page 60: Technical Data
Technical data Height: 82 (85) cm Width: 60 cm Depth: 60 cm Voltage: see data plate Connected load: see data plate Fuse rating: see data plate Mains connection cable: approx. 1.8 m Water pressure (flow rate): 0.5 - 10 bar (100 - 1000 kPa) Cold or hot water connection: up to max. - Page 64 Alteration rights reserved/4205 M.-Nr. 06 743 480 / 00 en - GB...