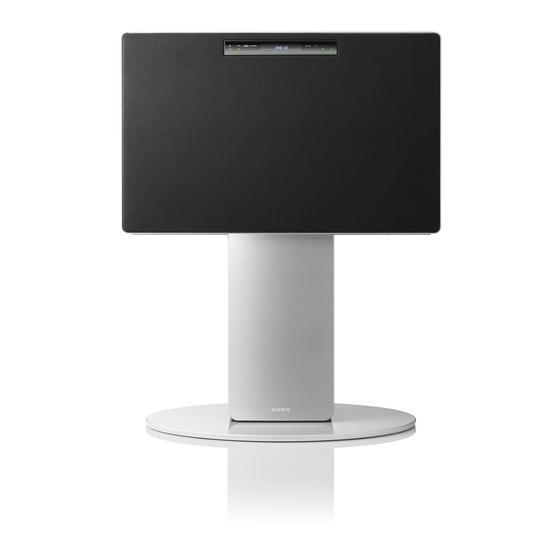
Sony Esprit TAV-L1 Operating Instructions Manual
Tv integrated av system
Hide thumbs
Also See for Esprit TAV-L1:
- Operating instructions manual (383 pages) ,
- Service manual (210 pages) ,
- Quick setup manual (2 pages)

Related Manuals for Sony Esprit TAV-L1


Summary of Contents for Sony Esprit TAV-L1
- Page 1 2-670-721-11(4) TV Integrated AV System Operating Instructions TAV-L1 © 2006 Sony Corporation...
-
Page 2: Notice For Customers
This plug cannot be used and should be • is a registered trademark of the DVB project. destroyed. • “PlayStation” is a trademark of Sony Computer • Dangerously high voltages are present inside the system. Entertainment, Inc. Do not open the cabinet. Refer servicing to qualified •... -
Page 3: Table Of Contents
Table of Contents NOTICE FOR CUSTOMERS ...... 2 Basic Operations How to replace the fuse ........2 Getting Started About this manual ........5 Safety information ........5 1: Checking the accessories......14 Precautions ..........8 2: Inserting batteries into the remote ..14 Notes about the discs ........ - Page 4 Advanced Operations Using the Lift Unit/Front Panel Using the TV Menu Display Navigating through menus ......37 Overview of the items........69 Enjoying the sound at low volume....70 Picture Adjustment menu ......38 (AUDIO DRC) Sound Adjustment menu......39 Enjoying a bilingual DVD disc......70 Screen menu..........
-
Page 5: About This Manual
CD format power cord (mains lead). • If the AC power cord (mains lead) is damaged, stop using DATA CDs (CD-ROMs/CD-Rs/ it and ask your dealer or Sony service centre to exchange CD-RWs containing MP3* audio tracks, JPEG image files, and •... - Page 6 Notes about moving the lift unit up/down Air circulation is Air circulation is • The lift unit moves up and down blocked. blocked. automatically when the system is turned on/off, and when the input is switched with “AUTO” selected in “Lift Mode”...
- Page 7 Water and moisture Cleaning • Do not use this system near • Unplug the AC power cord (mains lead) water – for example, near a when cleaning the plug and this system. If bathtub or shower room. Also do you do not, it may result in electric shock. not expose to rain, moisture or •...
-
Page 8: Precautions
Volume adjustment Precautions • Adjust the volume so as not to trouble your neighbours. Sound carries very easily at night time. Therefore, closing the windows or using headphones is suggested. Safety • When using headphones, adjust the volume so as to avoid excessive levels, as hearing damage may result. -
Page 9: Notes About The Discs
If you have any questions or problems concerning your star shape) may cause a malfunction. system, please consult your nearest Sony dealer. • The ventilation holes can accumulate dust over time. To Do not use a disc that has a commercially available accessory ensure proper ventilation, we recommend removing the attached, such as a label or ring. -
Page 10: Guide To Basic Operations Of This System
Using the remote Guide to basic operations of this system This system is a TV with DVD player. The lift unit of this system has built-in 2.1 channel speakers. You can enjoy high quality and exciting sound from TV, DVD, FM and other connected components. -
Page 11: Overview Of The Remote
x Auto input select button F While the input is except DVD, if you press Z on the Overview of the remote system or H, the input will be changed to DVD automatically. Using the menu This system has various types of menus: •... -
Page 12: Common Operations
– Picture Freeze (page 21) Common operations Freezes the TV picture. – Input select/Text hold – Info/Text reveal • In TV mode (page 25): Selects the input source • In digital mode: Displays brief details of the from equipment connected to the system. programme currently being watched. -
Page 13: Overview Of The System/Lift Unit Buttons And Indicators
5 2 +/– – Volume Overview of the system/ Increases (+)/decreases (–) volume. 6 PROG +/– lift unit buttons and • In TV mode: Select next (+)/previous (–) channel. indicators • In FM mode: Select next (+)/previous (–) preset station. 7 FM Touch panel buttons (2 –... -
Page 14: Getting Started
Getting Started 2: Inserting batteries into the remote 1: Checking the accessories Remote RM-ANU005 (1) Size AA batteries (R6 type) (2) AC power cord (mains lead) (1) Screws (2) FM wire antenna (aerial) (1) Frame grille (1) Quick Start Guide (1) Notes •... -
Page 15: 3: Connecting A Tv Aerial/Vcr/Dvd Player
3: Connecting a TV aerial/VCR/DVD player Rear of the system AC power cord (mains lead) (supplied) DVD player (SmartLink) Scart lead (not supplied) Scart lead (not supplied) RF lead (not supplied) Coaxial cable (not supplied) To prevent the system from toppling over Remove the covers. -
Page 16: 4: Connecting The Fm Wire Antenna (Aerial)
Secure the wall anchor bracket to a wall 4: Connecting the FM or pillar. Thread the rope or chain through both wire antenna (aerial) holes of the screws, and then tighten the other end of the rope or chain to the wall Connect the supplied FM wire antenna (aerial) for anchor bracket. -
Page 17: 5: Switching On The System
5: Switching on the If you have poor FM reception, use an “L” type 75-ohms coaxial cable (not supplied) to connect the system to an outdoor FM antenna (aerial) as shown below. If you use a 75- system ohms coaxial cable other than “L” type, you may not be able to replace the covers properly. -
Page 18: 6: Auto-Tuning The Tv
The system starts searching for all available 6: Auto-tuning the TV digital channels, followed by all available analogue channels. This may take some time, please be patient and do not press any buttons on After switching on the system, a message confirming the system or remote. -
Page 19: 7: Selecting The Dvd Language (Quick Setup)
To quit the Quick Setup 7: Selecting the DVD Press DVD DISPLAY in any step. language (Quick Setup) To recall the Quick Setup display Press DVD DISPLAY. (If a disc is playing, press stop playback, then press DVD DISPLAY.) You can set the display language. The Control Menu appears. -
Page 20: Watching Tv
Press 1 on the system to switch on the Watching TV system. When the system is in standby mode (the 1 Watching TV (standby) indicator on the system is red), press "/1 on the remote to switch on the system. Press DIGITAL to switch to digital mode or ANALOG to switch to analogue mode. - Page 21 • While you are viewing Teletext, press repeatedly to Do this choose between four different options of brightness. Mute the sound Press %. Press again to restore. • When four coloured items appear at the bottom of the Text page, Fastext is available. Fastext allows you to access Switch to digital Press DIGITAL.
-
Page 22: Checking The Digital Electronic Programme Guide (Epg)
Displays 14:9 broadcasts in the correct proportions. Checking the Digital As a result, black border areas are visible on the screen. Electronic Programme Zoom* Guide (EPG) All Categories Thu 27 May 10:31 Displays cinemascopic (letter box format) broadcasts 10:30 11:00 11:30 12:00 Thu 27 May... - Page 23 Do this Do this Press </M/m/, to Sort the programme Press the blue button. Set a programme to information by be displayed select the future Press </M/m/, to category – Category automatically on the programme you want to select a category. The list screen when it starts display.
-
Page 24: Using The Favourite List
Do this Using the Favourite list Set the time and date Press (OK). of a programme you Press M/m to select want to record – [Manual timer REC]. Manual timer REC Press M/m to select the date, then press ,. In digital mode, press to display the Set the start and stop... -
Page 25: Viewing Pictures From Connected Equipment
Do this Viewing pictures from Add or remove Press the blue button. channels in the Channels that are stored in connected equipment Favourite list the Favourite list are indicated by a symbol. Press M/m to select the Switch on the connected equipment, then channel you want to add perform one of the following operation. -
Page 26: Enjoying Discs
Note about CDs/DVDs Enjoying Discs The system can play CD-ROMs/CD-Rs/CD-RWs recorded in the following formats: Available discs – audio CD format. – video CD format. – MP3 audio tracks, JPEG image files, and DivX video files of format conforming to ISO 9660 Level Format of discs Disc logo 1/Level 2, or its extended format, Joliet. - Page 27 Notes about CD-R/CD-RW/DVD-R/DVD-RW/DVD+R/ Types of Super Audio CDs DVD+RW There are two types of discs, depending on the Super Audio CD layer and CD layer combination. In some cases, CD-R/CD-RW/DVD-R/DVD-RW/DVD+R/ DVD+RW cannot be played on this system due to the •...
-
Page 28: System Sound Feature
Copyrights System sound feature This product incorporates copyright protection technology that is protected by U.S. patents and other intellectual property rights. Use of this copyright protection technology must be authorized by Macrovision, and is intended for home and other You can take advantage of this front surround sound limited viewing uses only unless otherwise authorized simply by selecting one of system's preprogrammed by Macrovision. - Page 29 HP 2CH only. * About S-Force PRO Front Surround With cover opened. Sony’s long-term involvement in surround technology (and the vast amounts of acoustic data accumulated as a result) has led to the development of all-new processing method and Press SOUND FIELD.
-
Page 30: Playing Discs
Depending on the DVD VIDEO or VIDEO CD, some Playing discs operations may be different or restricted. Refer to the operation details supplied with your disc. Press "/1. The system turns on. Unless the system input is already set to “DVD,” press DVD. -
Page 31: Various Play Modes
x When playing a DATA CD/DATA DVD (DivX Various play modes video) • The choice of DATA CD or DATA DVD audio Changing the sound signal formats differ, depending on the DivX (DVD VIDEO, DVD-VR, VIDEO CD, CD, DATA video file contained on the disc. The format is shown in the display. -
Page 32: (Pbc Playback)
x When playing a DATA CD/DATA DVD (DivX Notes video) • You cannot use Programme Play, Shuffle Play, or Repeat Play with Video CDs with PBC playback. • Depending on the VIDEO CD, [Press ENTER] in step 3 Example: MP3 audio may appear as [Press SELECT] in the instructions supplied with the disc. -
Page 33: Searching For A Particular Point Or A Scene On A Disc
Watching frame by frame (Slow-motion Play) • For DVD-Rs/DVD-RWs in VR mode, CDs, Super Audio CDs, DATA CDs, and DATA DVDs the system (DVD VIDEO, DVD-R, DVD-RW, DivX video, VIDEO CD remembers the resume playback point for the current disc. only) The resume point is cleared when: Press... -
Page 34: Displaying Various Angles And Subtitles
Notes Press (ENTER). • Depending on the DVD VIDEO, you may not be able to The first scene of each title, chapter, or track change the subtitles even if multilingual subtitles are appears as follows. recorded on it. You also may not be able to turn them off. •... -
Page 35: Enjoying The Fm Radio
You can also select a preset station by entering its Enjoying the FM Radio number with number buttons, then press (ENTER). Listening to the FM Adjust the volume by pressing 2 +/–. radio To turn off the FM radio Press "/1. Preset FM radio stations in the system’s memory first To listen to non-preset FM radio stations (see “Presetting FM radio stations”... -
Page 36: Presetting Fm Radio Stations
Press M/m to select the preset number Presetting FM radio you want. stations TUNED ST You can preset 20 FM stations. Before tuning, make Press (ENTER). sure to turn down the volume to minimum. The station is stored. TUNED ST Repeat 1 to 7 to store other stations. -
Page 37: Navigating Through Menus
Overview of the TV menus Using the TV Menu The following options are available in each menu. For Navigating through details on navigating through menus, see page 37. Also, see page in parentheses for details of each menu. menus Picture Adjustment Picture Mode Custom Contrast... -
Page 38: Picture Adjustment Menu
Set Up Picture Adjustment Auto Startup (43) Auto Tuning (43) menu Programme Sorting (43) Programme Labels (43) AV Preset (44) Picture Adjustment – Label/Skip/Sound Offset Picture Mode Custom Manual Programme Preset (44) Contrast Brightness – Programme/Channel/Label/AFT/Audio Filter/ Colour Skip/ATT/Confirm Sharpness Digital Set Up (46) Backlight Colour Tone... -
Page 39: Sound Adjustment Menu
Colour Tone Sound Adjustment Press (OK) to select [Colour Tone]. menu Press M/m to select one of the following, then press (OK). • [Cool]: Gives the white colours a blue tint. Sound Adjustment • [Neutral]: Gives the white colours a neutral tint. Sound Effect Treble •... -
Page 40: Screen Menu
Treble/Bass/Balance Screen menu Adjusts higher-pitched sounds (Treble), adjusts lower-pitched sounds (Bass), and emphasizes left or right speaker balance (Balance). Screen Auto Format Press (OK) to select the option. Screen Format Smart RGB Center Press </, to set the level, then press (OK). -
Page 41: Features Menu
• [AV1]: Outputs signals from equipment Features menu connected to the 1 socket. • [AV4]: Outputs signals from equipment connected to the 4 socket. • [Auto]: Outputs one of the signals above. Features Power Saving Standard Light Sensor PC Adjustment AV2 Output D-TV PC Adjustment... -
Page 42: Timer Menu
Press m/M to select the minute, then Timer menu press (OK). The clock starts. Timer Timer Sleep Timer Clock Set Fri 20. 8 21:30 Sets a predefined period of time after which the Timer system automatically switches on/off. Press (OK) to select [Timer]. Press m/M to select [Set], then press (OK). -
Page 43: Set Up Menu
Programme Sorting Set Up menu (Analogue mode only) Changes the order in which the analogue channels are stored on the system. Set Up Auto Startup Press (OK) to select [Programme Auto Tuning Programme Sorting Sorting]. Programme Labels AV Preset Manual Programme Preset Press M/m to select the channel you Digital Set Up want to move to a new position, then... -
Page 44: Av Preset
AV Preset Manual Programme Preset (Analogue mode only) Do the following options. Before selecting [Label]/[AFT]/[Audio Filter]/[Skip]/ Press (OK) to select [AV Preset]. [ATT], press PROG +/– to select the programme Press M/m to select the desired input number with the channel. You cannot select a programme number that is set to skip (page 46). - Page 45 Option Description Option Description Press M/m to select Channel Fine-tunes the selected [Channel], then press programme number manually if you feel that a slight tuning (OK). adjustment will improve the Tune the channels as picture quality. (Normally, fine follows: tuning is performed If you do not know the automatically.) channel number...
-
Page 46: Digital Set Up
Option Description Press M/m to select one of the following options, then press (OK). Skip Skips unused analogue channels when you press Option Description PROG +/– to select channels. (You can still select a skipped Digital Tuning Tunes in all the available channel using the number digital channels. - Page 47 Option Description Option Description Programme Removes any unwanted digital Digital Manual Tunes the digital channels List Edit channels stored on the system, Tuning manually. and changes the order of the Press the number digital channels stored on the button to select the system.
- Page 48 Code] below. automatically receive software updates, free Press M/m to select the through your existing aerial age restriction or (when issued). Sony [None] (for unrestricted recommends that this watching), then press option is set to [On] at all (OK). times. If you do not want Press <.
-
Page 49: Using The Dvd's Menu
® Using the DVD’s Menu Enjoying DivX videos Navigating through DVD’s menu About DivX video files ® DivX is a video file compression technology, developed by DivX, Inc. This product is an official ® DivX Certified product. A DVD is divided into a lot of sections, which make You can play DATA CDs and DATA DVDs that up a picture or music feature. - Page 50 DivX video files that the system can play To go to the next or previous page Press </,. The system can play data that is recorded in DivX format, and which has the extension “.AVI,” or To return to the previous display “.DIVX.”...
-
Page 51: Using The Player Control Menu
Using the Player Control Menu Control Menu items 12 3 Navigating through 1 2 ( 2 7 ) 1 8 ( 3 4 ) DVD VIDEO 1 : 3 2 : 5 5 menus DISC TITLE CHAPTER REPEAT Quit: ENTER DISPLAY 1 Currently playing title number* 2 Currently playing chapter number*... - Page 52 List of Control Menu items Item Item Name, Function, Relevant Disc Type [TITLE] (page 53)/[SCENE] (page 53)/[TRACK] (page 53) Selects the title, scene, or track to be played. [CHAPTER] (page 53)/[INDEX] (page 53) Selects the chapter or index to be played. [INDEX] (page 53) Displays the index and selects the index to be played.
-
Page 53: Searching/Selecting The Disc
x When playing a Super Audio CD Searching/selecting the [TRACK] [INDEX] disc x When playing a CD [TRACK] x When playing a DATA CD/DATA DVD (MP3 Searching for a title/chapter/track/ audio) [ALBUM] scene, etc. [TRACK] x When playing a DATA CD/DATA DVD (JPEG file/DivX video) [ALBUM] You can search a DVD by title or chapter, and you can... -
Page 54: Selecting [Original] Or [Play List] On A Dvd-R/Dvd-Rw
The options for [ORIGINAL/PLAY LIST] Press (ENTER). appear. [T **:**:**] changes to [T --:--:--]. 1 ( 4 4 ) Input the time code using the number 3 ( 2 8 ) DVD-VR 1 : 3 0 : 5 0 buttons, then press (ENTER). - Page 55 Press TIME/TEXT. Press TIME/TEXT repeatedly to change the time information. Each time you press TIME/TEXT while playing the disc, the display changes 1 t 2 t ... t 1 The display and the kinds of time that you can t ... check depend on the disc you are playing.
-
Page 56: Using The Play Mode
Using the play mode BRAHMS SYMPHONY Creating your own programme To check DATA CD/DATA DVD (MP3 audio/DivX (Programme Play) video) text By pressing TIME/TEXT while playing MP3 audio tracks on a DATA CD/DATA DVD or DivX video You can play the contents of a disc in the order you files on a DATA CD/DATA DVD, you can display want by arranging the order of the tracks on the disc to the name of the album/track/file, and the audio bit rate... -
Page 57: Playing In Random Order
Follow step 5 for new programming. To PROGRAM 0:00:00 cancel a programme, select [--] under ALL CLEAR 1. TRACK – – – – [T], then press (ENTER). 2. TRACK – – 3. TRACK – – 4. TRACK – – To cancel all of the tracks in the 5. -
Page 58: (Shuffle Play) Playing Repeatedly
x When playing a DVD VIDEO or DVD-R/DVD- Press (ENTER). Shuffle Play starts. • [OFF]: Does not play repeatedly. “SHUF” appears in the front panel display. • [DISC]: Repeats all of the titles on the disc. • [TITLE]: Repeats the current title on a disc. To return to normal play •... -
Page 59: Enjoying The Slide Show
Playback order of MP3 audio tracks or JPEG Enjoying the slide show image files The playback order of MP3 audio tracks or JPEG image files recorded on a DATA CD/DATA DVD is About MP3 audio tracks and JPEG as follows: image files Structure of disc contents What is MP3/JPEG? -
Page 60: Playing Data Cds Or Data Dvds With Mp3 Audio Track And Jpeg Image Files
• The system may take longer time to playback, when Press M/m to select an album. progressing to the following album or jump to other album. x When selecting an album • Some type of JPEG files cannot be played. Press H to start playing the selected album. -
Page 61: Playing Audio Tracks And Images As A Slide Show With Sound
Rotating direction 3 ( 3 0 ) R O C K B E S T H I T K A R A O K E M Y F A V O U R I T E S O N G R &... - Page 62 • [FAST]: Sets the duration shorter than Press M/m to select [MODE [NORMAL]. (MP3, JPEG)], then press (ENTER). • [SLOW1]: Sets the duration longer than The options for [MODE (MP3, JPEG)] appear. [NORMAL]. • [SLOW2]: Sets the duration longer than Press M/m to select the setting you want [SLOW1].
-
Page 63: Locking Discs
Press M/m to select [ON t], then press Locking discs (ENTER). x If you have not entered a password (CUSTOM PARENTAL CONTROL, PARENTAL The display for registering a new password CONTROL) appears. You can set 2 kinds of playback restrictions for the PARENTAL CONTROL desired disc. - Page 64 x When you have already registered a password The display for entering the password appears. CUSTOM PARENTAL CONTROL Custom parental control is already set. To play, enter your password and press ENTER PARENTAL CONTROL Enter password, then press ENTER Enter your 4-digit password using the number buttons, then press (ENTER).
-
Page 65: Using The Setup Display
To play a disc for which Parental Control is set Using the Setup Display Insert the disc and press H. The display for entering your password appears. Enter your 4-digit password using the number By using the Setup Display, you can make various buttons, then press (ENTER). - Page 66 SCREEN SETUP SCREEN SAVER: BACKGROUND: Options Select a setting using M/m, then press M/m/ (ENTER) (ENTER). The setting is selected and setup is complete. DVD DISPLAY SCREEN SETUP SCREEN SAVER: BACKGROUND: JACKET PICTURE Selected setting Press DVD DISPLAY. (If a disc is playing, press x to stop playback, then To reset all of the [SETUP] settings press DVD DISPLAY.)
- Page 67 Select [LANGUAGE SETUP] in the Setup Display. x [SCREEN SAVER] The screen saver image appears when you leave the To use the display, see “Using the Setup Display” (page 65). system in pause or stop mode for 15 minutes, or when you play back a Super Audio CD, CD, or DATA CD/ DATA DVD (MP3 audio) for more than 15 minutes.
- Page 68 x [PAUSE MODE] (DVD VIDEO/DVD-R/DVD-RW only) Selects the picture in pause mode. [AUTO] The picture, including subjects that move dynamically, is output with no jitter. Normally select this position. [FRAME] The picture, including subjects that do not move dynamically, is output in high resolution.
-
Page 69: Using The Lift Unit/Front Panel Display
Using the Lift Unit/Front Panel Display Overview of the items About the indications in the lift unit/front panel display TITLE CHAP REP REP1 SHUF PGM TUNED ST MONO SA-CD NTSC 1 Current surround format (Except for JPEG and 5 Lights up when an FM radio station is tuned. (36) Super Audio CD) 6 Lights up when an FM stereo broadcast is tuned. -
Page 70: Enjoying The Sound At Low Volume
Enjoying the sound at low volume Enjoying a bilingual DVD disc (AUDIO DRC) (DUAL MONO) Narrows the dynamic range of a Dolby Digital sound You can play bilingual broadcasts recorded on track. Useful for watching movies at low volume late DVD-R/DVD-RWs in VR mode. -
Page 71: Reinforcing Bass Frequencies
Reinforcing bass frequencies Using the lift function (SW LEVEL) (Lift Mode) You can reinforce bass frequencies on any source. The lift unit moves up and down by pressing the system or remote. The lift unit can also be moved automatically, according to the selected input or system power on/off when you select “AUTO”... - Page 72 Notes Note • If you change the lift mode setting, change it while the lift When the lift unit is completely up, you cannot use OSD- unit is not moving. related functions, and “NOT IN USE” appears in the front •...
-
Page 73: Using Optional Equipment
Using Optional Equipment Connecting optional equipment You can connect a wide range of optional equipment to the system. Connecting cables are not supplied. Notes • When connecting optional equipments, make sure not to trap any cords in the lift unit, or area where the unit moves. •... - Page 74 To connect Do this To connect Do this “PlayStation 2”, Connect to the scart socket Digital satellite Connect only to the HDMI IN 6 DVD player or 1. When you connect the socket. The digital video and audio receiver decoder A decoder, the scrambled signal from signals are input from the digital the TV tuner is output to the decoder,...
- Page 75 Personal Computer To connect Do this Personal Computer Connect to the PC Input socket 5 and the audio socket C on the rear of the system (page 73). CAM (Conditional Remove the dummy card from the Access Module) I CAM slot and insert the CAM. For encripted PPV Insert the viewing card into the (Pay per View)
-
Page 76: Additional Information
Additional Information Specifications AUDIO: 500 mVrms (100% modulation) Impedance: 47 kilo ohms • i Headphones jack Display unit • CAM (Conditional Access Module) slot • MODEM Power Requirements: Modem jack (Not supported on this system) 220–240 V AC, 50/60 Hz Screen Size: Amplifier section 32 inches... -
Page 77: Pc Specifications
PC specifications Horizontal Vertical Horizontal Vertical Signals frequency frequency Standard (Pixel) (Line) (kHz) (Hz) 31.5KHz 60Hz 37.9KHz 72Hz VESA 37.5KHz 75Hz VESA 31.47KHz 70Hz VGA-T SVGA 35.1KHz 56Hz VESA Guidelines 37.9KHz 60Hz VESA Guidelines 48.1KHz 72Hz VESA 46.9KHz 75Hz VESA 1024 48.4KHz 60Hz... -
Page 78: Language Code List (Dvd Function Only)
Language code list (DVD function only) The language spellings conform to the ISO 639: 1988 (E/F) standard. Code Language Code Language Code Language Code Language 1027 Afar 1183 Irish 1347 Maori 1507 Samoan 1028 Abkhazian 1186 Scots Gaelic 1349 Macedonian 1508 Shona 1032 Afrikaans 1194 Galician... -
Page 79: Troubleshooting
Press 1 on the system to switch it off, disconnect the AC power cord (mains lead), and inform your dealer or Sony service centre of how the indicator flashes (number of flashes), or any messages or letters/numbers that appear in the front panel display. - Page 80 Problem Cause/Remedy Picture (dotted lines or stripes) • Keep the system away from electrical noise sources such as cars, noise motorcycles, or hair-dryers. • Make sure that the aerial is connected using the supplied coaxial cable. • Keep the aerial cable away from other connecting cables. •...
- Page 81 Problem Cause/Remedy Severe hum or noise is heard • Check that the components are connected securely. • Check that the connecting cords are away from a transformer or motor, and at least 3 meters away from the system or a fluorescent light. •...
- Page 82 Problem Cause/Remedy The remote does not function • Check that the remote is set correctly for the equipment you are using. • Replace the batteries. FM stations cannot be tuned in • Check that the aerial is connected securely. Adjust the aerial or connect an external aerial if necessary (page 16).
- Page 83 • Multi-angles are not recorded on the DVD being played (page 34). • The DVD prohibits changing the angles. A disc cannot be ejected and • Contact your Sony dealer or local authorized Sony service facility. “LOCKED” appears in the front panel display [Data error] appears on the TV •...
-
Page 84: Self-Diagnosis Function (Dvd Function Only)
When you turn on the system, the version number [VER.X.XX] (X is a number) may appear on the screen. Although this is not a malfunction and for Sony service use only, normal system operation will not be possible. Turn off the system, and then turn on the system again to operate. -
Page 85: Index
Index Numerics 14:9 21 CA Module Set-up 48 EFFECT 62 4:3 21 Category list 23 Eject (Z) 13 5.1 Channel Surround 31 Channels ENTER ( ) 19 Channel 45 EPG (Digital Electronic Programme selecting 20 Guide) ( ) 22 Accessories supplied 14 CHAPTER 53 Aerial, connecting 15 CLEAR 12... - Page 86 Manual Programme Preset 44 Region code 27 Technical Set-up 48 Manual timer REC 24 Reminder 23 Text MODE (MP3, JPEG) 62 Remote Text (/) 12 MP3 59 control sensor 13 Text hold ( ) 12 Multi Session CD 27 inserting batteries 14 Text reveal ( ) 12 Multi-angle 34...
- Page 88 When transporting the system, follow the protection procedure (page 9). Do not hold For useful information about Sony products 2-670-721-11(4) TAV-L1 Printed in Spain...