Table of Contents
Advertisement
Quick Links
Advertisement
Table of Contents

Related Manuals for Pioneer AVIC-F50BT


Summary of Contents for Pioneer AVIC-F50BT
- Page 1 Operation Manual NAVIGATION AV SYSTEM AVIC-F50BT AVIC-F950DAB AVIC-F950BT AVIC-F850BT Be sure to read Important Information for the User first! Important Information for the User includes the important information that you must understand before using this navigation system. English...
-
Page 2: Table Of Contents
Adjusting the LCD panel angle 17 Using the touch panel 26 Inserting and ejecting a disc 17 – Using the common touch panel – Inserting a disc (for AVIC-F50BT) 17 keys 26 – Ejecting a disc (for AVIC-F50BT) 17 – Operating list screens (e.g. POI –... - Page 3 Contents – The display while driving on the After the location is decided motorway 32 Setting a route to your destination 46 – Displaying multiple routes 46 Types of the road stored in the map database 32 Checking and modifying the current Operating the map screen 32 route –...
- Page 4 Contents – Checking for traffic jams Basic operations of the AV source automatically 57 Displaying the AV operation screen 76 – Selecting a source 76 Selecting the preferred RDS-TMC service provider manually 57 Turning off the AV source 76 AV source plate display 76 Registering and connecting a Bluetooth Using the radio device...
- Page 5 Contents Playing audio CDs Setting the top-priority languages 100 Starting procedure 87 Setting the angle icon display 100 Reading the screen 87 Setting the aspect ratio 101 Using the touch panel keys 87 Setting the parental lock 101 – Setting the code number and Operating by hardware buttons 88 level 101 Playing music files on ROM...
- Page 6 Contents Functions coupled with Aha Radio and the Checking sensor learning status and driving navigation system 118 status 132 – Viewing POI information with Aha – Clearing status 133 Radio 118 Checking the device number 133 Checking the version information 133 Using the Bluetooth audio player Registering your home 133 Starting procedure 119...
- Page 7 Contents – Setting the use of motorways 140 – Changing the screen size of SD/USB – Setting to select your route video 148 – Displaying your DivX VOD registration automatically using the route alternatives function 141 code 149 – Displaying the distance and estimated –...
- Page 8 Contents – DVD-Video and CD 184 Displaying the operation status of – AVCHD recorded discs 185 vehicle equipment – Playing DualDisc 185 Displaying obstacle detection – Dolby Digital 185 information 164 Detailed information for playable media 185 Displaying the operating status of the climate –...
- Page 9 Contents – App settings menu 199 – System Settings menu 199 – Bluetooth Settings menu 200 Glossary 201 Specifications 204 Engb...
-
Page 10: Introduction
The screen examples shown in this manual e.g.) are those for AVIC-F50BT. The screens may p If the home location has not been stored vary according to the models. yet, set the location first. -
Page 11: Notice Regarding Video Viewing
Chapter Introduction “External storage device (USB, SD)” satellite, cable and/or any other media), broad- casting/streaming via internet, intranets and/ The SD memory card, SDHC memory card, or other networks or in other electronic con- microSD card, microSDHC card and USB tent distribution systems, such as pay-audio or memory device are collectively referred to as audio-on-demand applications. -
Page 12: Map Coverage
Chapter Introduction Notes on internal memory This manual applies to the following iPod models. Before removing the vehicle iPod with 30-pin connector battery ! iPod touch 4th generation ! iPod touch 3rd generation If the battery is disconnected or discharged, ! iPod touch 2nd generation the memory will be erased and must be repro- ! iPod touch 1st generation... - Page 13 Chapter Introduction Engb...
-
Page 14: Basic Operation
Chapter Basic operation Checking part names and functions This chapter gives information about the names of the parts and the main features using the buttons. AVIC-F50BT (with the LCD panel closed) AVIC-F50BT (with the LCD panel open) Engb... - Page 15 Chapter Basic operation AVIC-F950DAB, AVIC-F950BT, and AVIC-F850BT 1 LCD screen 4 HOME button ! Press the HOME button to display the 2 VOL (+/–) button “Top Menu” screen while the map Press to adjust the AV (Audio and Video) screen, the AV operation screen, or the source volume.
-
Page 16: Protecting Your Product Against Theft
Chapter Basic operation = For details, refer to Temporarily clear- ! After removing the detachable faceplate, keep ing the screen (navigation system in it in a safe place so it is not scratched or da- standby mode) on page 23. maged. -
Page 17: Attaching The Detachable Faceplate
Basic operation Attaching the detachable faceplate Inserting and ejecting a disc Slide the detachable faceplate all the Inserting a disc (for AVIC-F50BT) way into the navigation system. WARNING Make sure the detachable faceplate is se- ! Keep hands and fingers clear of the unit when curely connected to the mounting hooks of opening, closing, or adjusting the LCD panel. -
Page 18: Inserting A Disc (For Avic-F950Dab, Avic-F950Bt And Avic-F850Bt)
! If data loss or corruption occurs on the sto- (for AVIC-F50BT) rage device for any reason, it is usually not possible to recover the data. Pioneer accepts Press and hold the h button. no liability for damages, costs or expenses The LCD panel opens fully. -
Page 19: Inserting An Sd Memory Card (For Avic-F950Dab, Avic- F950Bt And Avic-F850Bt)
Chapter Basic operation Press the middle of the SD memory Ejecting an SD memory card card gently until it clicks. (for AVIC-F950DAB, AVIC- F950BT and AVIC-F850BT) Press the middle of the SD memory card gently until it clicks. Pull the SD memory card out straight. Pull the SD memory card out straight. -
Page 20: Connecting And Disconnecting An Ipod
Check that no USB storage device is ! Pioneer cannot guarantee compatibility with connected. all USB mass storage devices and assumes no responsibility for any loss of data on media Connect your iPod. -
Page 21: Disconnecting Your Ipod
! To prevent data loss and damage to the sto- rage device, never remove it from this naviga- tion system while data is being transferred. ! Pioneer cannot guarantee compatibility with all USB mass storage devices and assumes no responsibility for any loss of data on media players, iPhone, smartphone, or other devices while using this product. -
Page 22: Unplugging A Usb Storage Device
Chapter Basic operation Plug a USB storage device into the USB Startup and termination interface cable for iPod / iPhone. Start the engine to boot up the system. USB interface cable for iPod / iPhone After a short pause, the splash screen comes on for a few seconds. -
Page 23: Regular Startup
Chapter Basic operation Read the terms carefully, checking the A message about the map details, and then touch [OK] if you agree to database the conditions. After you start using this navigation system, a message related to map data may be dis- played. -
Page 24: How To Use The Navigation Menu Screens
Chapter Basic operation How to use the navigation menu screens 1 Top Menu Menu which was being displayed last time is displayed. This is the starting menu to access the desired 3 AV operation screen screens and operate various functions. You can also check or cancel your set route from This is the screen that normally appears when this menu. -
Page 25: Shortcut Menu
Chapter Basic operation Touch In this manual, the application menu screen and the application operation screen are col- lectively referred to as the “AppRadio Mode screen”. 7 Application menu screen This navigation system can switch to the ap- plication menu, which you can display and op- erate the application for the iPhone or smartphone on the screen. -
Page 26: Using The Touch Panel
Chapter Basic operation Using the touch panel right of the item allows you to see the remain- ing characters. You can operate the product by touching the marks and items (touch panel keys) displayed Operating the on-screen keyboard on the screen directly with your fingers. Using the common touch panel keys 1 Keyboard... -
Page 27: Swipe Action
Chapter Basic operation While touching the screen, slide your Allows you to move the cursor to the right or finger toward the function you want to left for a number of characters equivalent to execute and release. the number of touches. b Text box Displays the characters that are entered. -
Page 28: Swipe Action List
Chapter Basic operation Swipe action list The other guidance displays Navigation Operation Action screen Displays the turning direction at the next guide point and the distance, and gives a voice announcement. Guidance dis- Cancels the display of the in- play tersection guide map. - Page 29 Chapter Basic operation Audio Operation Action screen Operation Action screen Skips to the previous content. Skips to the previous preset Skips to the next content. channel. Aha Radio Unmutes the sound. Skips to the next preset chan- Radio (FM, nel. Mutes the sound.
-
Page 30: How To Use The Map
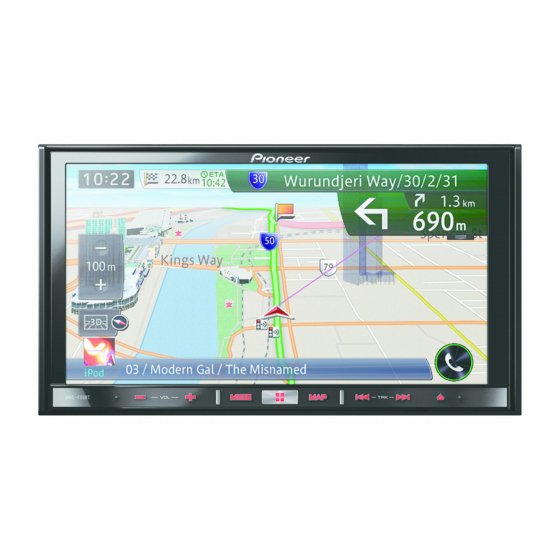
Chapter How to use the map Most of the information provided by your navigation system can be seen on the map. You need to be- come familiar with how information appears on the map. How to read the map screen This example shows an example of a 2D map screen. -
Page 31: Enlarged Map Of The Intersection
Chapter How to use the map p When there is no data of current po- Meaning of guidance flags sition, no information is displayed. Icon Meaning ! The AV source currently selected p Depending on the source currently Destination The chequered flag indicates your desti- chosen, an image is displayed. -
Page 32: The Display While Driving On The Motorway
While driving on the motorway, motorway exit lighted in pink) have only basic data and can numbers and motorway signs may be dis- only be used to plot a navigable route. Pioneer played in the vicinity of interchanges and navigation will display full route guidance, in- exits. -
Page 33: Viewing Information About A Specified Location
Chapter How to use the map Viewing information about a specified location For the locations you have searched using the destination menu, you can display the detailed information as long as the information related to the location is stored in the system. Search for a location using the “Desti- nation”... -
Page 34: Switching The View Mode
Chapter How to use the map of the screen and the map on the left side Enables you to call the position if a tele- of the screen. phone number is available. (Pairing with If you touch the map, the map is scrolled mobile phone featuring Bluetooth wireless on the whole screen. -
Page 35: Displaying One-Way Street Marks
Chapter How to use the map When “Heading up” is selected, p Up to 200 items or 100 preinstalled POIs is dis- played. are displayed on the map. ! North up: The map display always has north at the Displaying preinstalled POIs on top of the screen. -
Page 36: Registering A Scale
Chapter How to use the map Touch the subcategory to display. The indicator of the selected POI lights up and you can continue to select the POI. p The indicator also lights up when several POI are selected. Touching the facility again turns off the indicator and deselects the POI. -
Page 37: Searching For And Selecting A Location
Chapter Searching for and selecting a location The basic flow of creating CAUTION your route For safety reasons, these route-setting functions are not available while your vehicle is in motion. 1 Park your vehicle in a safe place and apply To enable these functions, you must stop in a the handbrake. -
Page 38: Searching For A Location By Address
Chapter Searching for and selecting a location Searching for a location by Touch [Country]. address The most frequently used function is “Ad- dress”, in which the address is specified and the destination is searched. You can select the method of searching for a location by address. -
Page 39: Searching For A City Name First
Chapter Searching for and selecting a location p If the search candidates number reaches Enter the city name and then touch [OK]. 20 or less, the screen automatically changes to the search result screen. Display the “Destination” screen. = For details of the operations, refer to How to use the navigation menu screens on page Touch [Address]. -
Page 40: Finding Your Destination By Specifying The Postcode
Chapter Searching for and selecting a location Touch the street you want. Touch [Postcode]. The “Enter Postcode” screen appears. Enter the house number and then touch [OK]. Input the postcode. The “House number selection” screen ap- A list of cities with the specified postcode is pears. -
Page 41: Searching By Selected City History
Chapter Searching for and selecting a location 11 Touch the desired house number range. Touch the desired house number range. The searched location appears on the map The searched location appears on the map screen. screen. = For subsequent operations, refer to Setting = For subsequent operations, refer to Setting a route to your destination on page 46. -
Page 42: Searching For A Nearby Poi
Chapter Searching for and selecting a location Touch [POI Name]. Touch [Near Me]. The “Spell name” screen appears. POIs are divided into several categories. p The “Category history” screen appears if Touch [Name]. you have searched for POIs before. # If you change the country to search, touch p The history can be stored up to 10 genres. -
Page 43: Searching For Pois Around The City
Chapter Searching for and selecting a location p The “Category history” screen appears if Touch the category you want. The “POI List” screen appears. you have searched for POIs before. p The history can be stored up to 10 genres. p If there are more detailed categories within You can delete the stored histories collec- the selected category, repeat this step as... -
Page 44: Deleting The Icons Displayed After Searching For A Nearby Poi
Chapter Searching for and selecting a location Deleting the icons displayed after searching for a nearby POI After searching for a nearby POI, the icons of nearby facilities appear on the map. The fol- lowing operation shows how to delete the icons. -
Page 45: Searching For A Location By Coordinates
Chapter Searching for and selecting a location Touch the entry you want. Touch [OK]. The searched location appears on the map screen. = For subsequent operations, refer to Setting a route to your destination on page 46. The searched location appears on the map screen. -
Page 46: After The Location Is Decided
Chapter After the location is decided # If you touch [Profile], the “Route Profile” Setting a route to your screen appears. destination = For details, refer to Checking the current itin- erary on page 47. Search for a location. # If you touch [Waypoints], the “Waypoints = For details, refer to Chapter 4. -
Page 47: Checking And Modifying The Current
Chapter Checking and modifying the current route Displaying the route overview Demo OFF While the demonstration guidance is run- p The route overview is only active when the ning, [Demo OFF] appears. Touching the route is set. key finishes the demonstration guidance. 5 Cancel Route Display the editing route screen. -
Page 48: Modifying The Route Calculation Conditions
Chapter Checking and modifying the current route Modifying the route Route Condition This setting controls how the route should be calculation conditions calculated by taking into account the time, dis- You can modify the conditions for route calcu- tance or main road. lation and recalculate the current route. -
Page 49: Editing Waypoints
Chapter Checking and modifying the current route Search for a location. Calculates a route that avoids motorways. p The system may calculate a route that in- cludes motorways even if “Avoid” is selected. Editing waypoints You can edit waypoints (locations you want to visit on the way to your destination) and recal- = For details, refer to Chapter 4. -
Page 50: Sorting Waypoints
Chapter Checking and modifying the current route Display the editing route screen. Touch [Sort], and then touch [Manual]. You can specify the order of waypoints to sort. = For details of the operations, refer to How to use the navigation menu screens on page # If you touch [Automatic], the waypoints are sorted in the order of the nearest one from the current location. -
Page 51: Finishing The Demonstration Guidance
Chapter Checking and modifying the current route p The demonstration is repeated, but finishes Touch [Cancel Route]. in the following cases: A message confirming the cancellation of the ! When starting actual driving current route appears. ! When searching a route Touch [Yes]. -
Page 52: Editing The Data On The Use Of Navigation
Chapter Editing the data on the use of navigation function Registering and editing Touch the item you want to configure. locations Storing favourite locations Storing your favourite locations as “Favour- ites” lets you save the time and effort of re-en- tering this information. -
Page 53: Deleting The Destination History From The List
Chapter Editing the data on the use of navigation function Display the “Edit/Settings” screen. Touch [Delete]. = For details of the operations, refer to How to Select the location you want to delete. use the navigation menu screens on page Touch [Edit Data]. -
Page 54: Deleting Learned Routes
Chapter Editing the data on the use of navigation function Deleting learned routes The device learns the streets you often use, and the learned streets are preferentially used during a route search. To change a frequently used street, delete the learned route and let the device learn it again. -
Page 55: Using Traffic Information
Chapter Using traffic information Touch [Traffic Information]. You can check real-time traffic information The “Traffic information menu” screen ap- transmitted by the Traffic Message Channel (TMC) of the FM Radio Data System (RDS) on pears. screen. The traffic information is updated peri- Touch [Nearby incidents]. -
Page 56: Checking Traffic Information On The Route
Chapter Using traffic information ! By event: scale is changed, the icons are resized ac- You can sort the traffic information ac- cording to the selected scale. cording to the incident. Traffic event icon The list will be sorted in the order of closed/blocked roads, traffic jams, acci- dents, road works and others. -
Page 57: Checking For Traffic Jams Automatically
Chapter Using traffic information Checking for traffic jams Selecting the preferred RDS- automatically TMC service provider manually If there is information about traffic jams on A default preferred TMC service provider for your current route and if an alternative route each country has been set. -
Page 58: Registering And Connecting A Bluetooth
Chapter Registering and connecting a Bluetooth device ® If your devices feature Bluetooth technology, ! Pairing from your Bluetooth devices p If you try to register more than 5 devices, this navigation system can be connected to your devices wirelessly. This section describes the system will ask you to select one of the how to set up a Bluetooth connection. - Page 59 Chapter Registering and connecting a Bluetooth device Wait until your Bluetooth device ap- ing on the Bluetooth device. Perform pairing pears in the list. according to the screen instructions for this product or Bluetooth device. Refer to the in- struction manual of your devices to register (registration and authentication of device).
- Page 60 Chapter Registering and connecting a Bluetooth device For iPod with Lightning connector users p Only the iPod with Lightning connector can perform the iPhone cooperation function (AppRadio Mode and aha) via Bluetooth wireless technology. Activate the Bluetooth wireless tech- nology on your devices. For some Bluetooth devices, no specific-action p If you cannot find the Bluetooth device that is necessary to activate Bluetooth wireless...
- Page 61 Chapter Registering and connecting a Bluetooth device ! Transferring the phone book technology. For details, refer to the instruction You can transfer the phone book to the navi- manual of your devices. gation system if the registered Bluetooth Display the “Phone” screen. device features PBAP (Phone Book Access = For details of the operations, refer to How to Profile).
-
Page 62: Pairing From Your Bluetooth Devices
Chapter Registering and connecting a Bluetooth device Touch the Bluetooth device name you You can select whether to use the want to register. Bluetooth audio function if the registered Bluetooth device features Bluetooth audio. The message “Is this Android?” appears. Touch [Yes] if the Bluetooth device you connected is an Android device. - Page 63 Chapter Registering and connecting a Bluetooth device The message “Is this Android?” appears. For iPod with 30-pin connector users Activate the Bluetooth wireless tech- Touch [No]. The message “Is this device equipped with a nology on your devices. For some Bluetooth devices, no specific-action Digital AV Connector?”...
- Page 64 Chapter Registering and connecting a Bluetooth device Display the “Phone” screen. You can perform the following setting depend- ing on the Bluetooth device registered. = For details of the operations, refer to How to ! Transferring the phone book use the navigation menu screens on page You can transfer the phone book to the navi- gation system if the registered Bluetooth Touch [Bluetooth Settings].
-
Page 65: Deleting A Registered Device
Chapter Registering and connecting a Bluetooth device The device is registered in the navigation A message prompting you to delete a regis- system. After the device is successfully re- tered device appears. gistered, the Bluetooth connection is estab- Touch [Yes]. lished from the navigation system. -
Page 66: Setting For Priority Connecting
Chapter Registering and connecting a Bluetooth device Touch the name of the device that you pears and the map screen returns by touching want to connect. [OK]. p To cancel the connection to your device, touch [Cancel]. p If connection fails, check whether your de- vice is waiting for a connection and then retry. -
Page 67: Using Hands-Free Phoning
Chapter Using hands-free phoning Making a phone call CAUTION You can make a phone call in many different For your safety, avoid talking on the phone as ways. much as possible while driving. If your mobile phone features Bluetooth tech- nology, this navigation system can be con- nected to your mobile phone wirelessly. -
Page 68: Calling A Number In The Phone Book
Chapter Using hands-free phoning Searching for a contact to call on the # If you touch , the entered number is de- leted one digit at a time from the end of the num- alphabet tabs ber. Press and hold to delete all digits. Display the “Phone”... -
Page 69: Dialling From The History
Chapter Using hands-free phoning p Each call history saves 30 calls per regis- p To cancel the call after the system starts dialling, touch [Cancel] or tered mobile phone. If the number of calls exceeds 30, the oldest entry will be deleted. Touch to end the call. -
Page 70: Dialling A Facility's Phone Number
Chapter Using hands-free phoning Display the “Destination” screen. Receiving a phone call = For details of the operations, refer to How to You can perform hands-free answering by use the navigation menu screens on page using the navigation system. Touch [Stored]. Answering an incoming call Touch next to the location that you... -
Page 71: Transferring The Phone Book
Chapter Using hands-free phoning p If you connect a mobile phone featuring an Touch to end the call. auto-synchronisation function, the phone book transfer or synchronisation will be automatically performed. p A maximum of 1 000 entries can be trans- ferred per mobile phone. -
Page 72: Deleting Registered Contacts
Chapter Using hands-free phoning Touch [Delete]. Depending on the mobile phone, the phone The “Delete” screen appears. book registered in the navigation system may be automatically overwritten and this Touch the entry you want to delete. step may be skipped. ! Overwrite: The existing data is overwritten, and if the telephone number is added to the... -
Page 73: Changing The Phone Settings
The “Bluetooth Settings” screen appears. You can change the device name to be dis- played on your mobile phone. (Default is Touch [Password]. “PIONEER NAVI”.) The password setting screen appears. Display the “Phone” screen. Touch to delete the current pass-... -
Page 74: Stopping Bluetooth Wave Transmission
Chapter Using hands-free phoning Stopping Bluetooth wave Touch the desired option. transmission You can stop transmission of electric waves by turning off the Bluetooth function. If you do not use the Bluetooth wireless technology, we recommend selecting “Off”. Display the “Phone” screen. = For details, refer to Displaying the phone menu on page 67. -
Page 75: Notes For Hands-Free Phoning
Chapter Using hands-free phoning p If “Refuse All Calls” is set to “On”, rejected echo, decrease the volume level for hands- incoming calls will not be stored in the free phoning. This may reduce the echo. missed call list. ! With some mobile phones, even if you press the accept button on the mobile phone when a call comes in, hands-free Notes for hands-free phoning... -
Page 76: Basic Operations Of The Av Source
The operation screen of the selected source You can play or use the following sources with appears. your Pioneer navigation system. p If seven or more sources can be selected, ! Radio (FM, MW/LW) appears. -
Page 77: Using The Radio
Chapter Using the radio 2 Programme service name indicator You can listen to the radio using the naviga- tion system. This section describes operations Shows the programme service name (station for radio. name) of the current station. p When “AM” is selected, this indicator is not shown. -
Page 78: Using The Touch Panel Keys
Chapter Using the radio Using the touch panel keys tuner will scan frequencies until it finds a broadcast strong enough for good reception. p You can cancel seek tuning by touching either briefly. p If you keep holding , you can skip broadcasting frequencies. -
Page 79: Storing The Strongest Broadcast Frequencies
Chapter Using the radio Keep touching a preset tuning key [1] Viewing the three latest radio text to [6]. You can display the currently received radio The selected radio station has been stored in text and the three most recent radio text trans- memory. -
Page 80: Using Advanced Functions
Chapter Using the radio p The preset number may disappear on the Using advanced functions display if the tuner tunes into a regional sta- Tuning in strong frequencies tion that differs from the originally set sta- tion. Local seek tuning allows you to only tune into p The regional function can be turned on or those radio stations with sufficiently strong off independently for each FM band. -
Page 81: Using News Programme Interruption
Chapter Using the radio Tune into a TP station or another en- Turns the News function on. p A news programme can be cancelled by hanced network’s TP station. touching [Cancel]. Touch [TA]. p You can also cancel the news programme by changing the source or band. -
Page 82: Interruption Icon Status
Chapter Using the radio PI Seek operation NEWS indicator If the unit fails to find a suitable alternative fre- Indicator Meaning quency, or if you are listening to a broadcast Information interruption is activated, and the reception becomes weak, the naviga- but you will not receive data since there tion system will automatically search for a dif- is none. -
Page 83: Using The Digital Radio (Dab)
Chapter Using the Digital Radio (DAB) p This function is only available on AVIC- Touch [Digital Radio] on the left edge of the screen to display the “Digital Radio” F950DAB. screen. You can listen to the Digital Audio Broadcast- ing using the navigation system. This section Use the touch panel keys on the screen describes operations for Digital Audio Broad- to control the radio. -
Page 84: Using The Touch Panel Keys
Chapter Using the Digital Radio (DAB) Appears when the navigation system switches To tune manually, touch briefly. The to a channel received in good condition auto- frequencies move up or down one step at a matically from a channel received in bad con- time. -
Page 85: Selecting A Channel From The List
Chapter Using the Digital Radio (DAB) p If you touch [Update], you can update the Display the preset channel list. channel list. = For details, refer to Using the touch panel p [ABC] may appear depending on the list. If keys on page 84. -
Page 86: Using Advanced Functions
Chapter Using the Digital Radio (DAB) Using advanced functions Switching to a channel with good receiving sensitivity automatically If the tuner cannot get good reception, the unit will automatically search for another en- semble that supports the same service com- ponent. -
Page 87: Playing Audio Cds
Chapter Playing audio CDs You can play a normal music CD using the Shows the title of the track currently built-in drive of the navigation system. This playing (when available). section describes how. : Artist name Shows the artist name of the track cur- rently playing (when available). -
Page 88: Operating By Hardware Buttons
Chapter Playing audio CDs 1 Selects a track from the list Operating by hardware Touching the key displays a list which lets you buttons see the track titles on a disc. You can play a track on the list by touching it. Pressing the TRK button You can skip tracks forward or backward. -
Page 89: Playing Music Files On Rom
Chapter Playing music files on ROM 3 Current time You can play a disc that contains compressed 4 File type indicator audio files using the built-in drive of the navi- gation system. This section describes these Shows the type of audio files. 5 Current file information operations. -
Page 90: Using The Touch Panel Keys
Chapter Playing music files on ROM Using the touch panel keys = For details, refer to Displaying the phone menu on page 67. 6 Plays files in random order The files in the current repeat play range can be played at random by only touching a single key. -
Page 91: Playing A Dvd-Video
Chapter Playing a DVD-Video You can play a DVD-Video using the built-in Shows which digital sound format (surround drive of the navigation system. This section de- sound format) has been selected. 7 Audio channel indicator scribes operations for playing a DVD-Video. Shows the current audio channel type, such as “Mch”... -
Page 92: Starting Playback From A Specified Time
Chapter Playing a DVD-Video 1 Searches for a desired scene and starts menu. For details, refer to the instructions pro- playback from a specified time vided with the disc. a Frame-by-frame playback (or slow-motion = For details, refer to Searching for a speci- fic scene and starting playback from a playback) specified time on page 93. -
Page 93: Resuming Playback (Bookmark)
Chapter Playing a DVD-Video p The appearance of this key changes ac- Touch the keys to input the target num- cording to the current setting. ber or time and then touch [Enter]. j Changes the viewing angle (Multi-angle) Each touch of switches between viewing angles. -
Page 94: Using The Dvd Menu By Touch Panel Keys
Chapter Playing a DVD-Video p This function may not work properly with Frame-by-frame playback some DVD disc content. In that case, use This lets you move ahead one frame at a time touch panel keys to operate the DVD menu. during pause. -
Page 95: Operating By Hardware Buttons
Chapter Playing a DVD-Video Touch the desired mode. Operating by hardware buttons Pressing the TRK button You can skip chapters forward or backward. Pressing and holding the TRK button You can perform fast reverse or fast for- ward. ! Full A 4:3 picture is enlarged in the horizontal direction only, enabling you to enjoy a 4:3 TV picture (normal picture) without any... -
Page 96: Reading The Screen
Chapter Playing a DivX video 6 Current folder name indicator You can play a DivX disc using the built-in drive of the navigation system. This section de- Shows the folder name currently playing. 7 Digital sound format indicator scribes those operations. Shows the digital sound format (surround sound format) currently selected. -
Page 97: Playing A Divx Video
Chapter Playing a DivX video 8 Switches the subtitle language Touching a folder on the list shows its content. You can play a file on the list by touching it. You can switch the subtitle language while the disc is playing when a disc has multilingual data (multi-subtitle). -
Page 98: Starting Playback From A Specified
Chapter Playing a DivX video on the “DivX” screen. % Touch and hold [r] until is dis- Touch p The appearance of this key changes accord- played during playback. The icon is displayed, and forward slow ing to the current setting. motion playback begins. -
Page 99: Playing Divx ® Vod Content
Chapter Playing a DivX video p Remember that use of this system for com- Pressing and holding the TRK button mercial or public viewing purposes may You can perform fast reverse or fast for- constitute an infringement on the author’s ward. -
Page 100: Dvd-Video Or Divx Setup
Chapter DVD-Video or DivX setup Display the “DVD/DivX® Setup” screen. This chapter describes how to configure the DVD-Video/DivX playback. = For details, refer to Displaying DVD/DivX® Setup menu on page 100. Touch [Subtitle Language], [Audio Lan- Displaying DVD/DivX® guage] or [Menu Language]. Setup menu Each language menu is displayed and the cur- rently set language is selected. -
Page 101: Setting The Aspect Ratio
Chapter DVD-Video or DivX setup Setting the aspect ratio Setting the code number and level When you first use this function, register your There are two kinds of displays. A wide screen code number. If you do not register a code display has a width-to-height ratio (TV aspect) number, the parental lock will not operate. -
Page 102: Setting The Auto Play
Chapter DVD-Video or DivX setup p The DivX subtitles will be displayed even Setting the auto play when the subtitle file setting is on if no cor- When a DVD disc with a DVD menu is in- responding subtitle files exist. serted, this unit will cancel the DVD menu p Up to three subtitle lines can be displayed automatically and start playback from the first... -
Page 103: Language Code Chart For Dvds
Chapter DVD-Video or DivX setup Language code chart for DVDs Two-letter Two-letter Two-letter code, input Language code, input Language code, input Language code code code aa, 0101 Afar ie, 0905 Interlingue rn, 1814 Rundi ab, 0102 Abkhazian ik, 0911 Inupiaq ro, 1815 Romanian af, 0106... -
Page 104: Playing Music Files (From Usb Or Sd)
Chapter Playing music files (from USB or SD) Reading the screen You can play compressed audio files stored in the external storage device (USB, SD). p When you play audio files stored on a USB storage device, a USB interface cable for iPod / iPhone (sold separately) is required for connection. -
Page 105: Using The Touch Panel Keys (Music)
Chapter Playing music files (from USB or SD) 7 Playback condition indicator Touching the key displays the list which lets Indicates the current playback condition. you find track titles or folder names on an ex- ternal storage device (USB, SD). Playing files in random order Touching a folder on the list shows its content. -
Page 106: Operating By Hardware Buttons
Chapter Playing music files (from USB or SD) Operating by hardware buttons Pressing the TRK button You can skip files forward or backward. Pressing and holding the TRK button You can perform fast reverse or fast for- ward. Engb... -
Page 107: Playing Video Files (From Usb Or Sd)
Chapter Playing video files (from USB or SD) Reading the screen You can play video files stored in the external storage device (USB, SD). p When you play video files stored on a USB storage device, a USB interface cable for iPod / iPhone (sold separately) is required for connection. -
Page 108: Using The Touch Panel Keys (Video)
Chapter Playing video files (from USB or SD) Setting a repeat play range The contents of the folder in which the cur- rently playing file is located are displayed. Indicator Meaning 3 Recalls equaliser curves Repeats all video files in the selected = For details, refer to Using the equaliser external storage device (USB, SD). -
Page 109: Operating By Hardware Buttons
Chapter Playing video files (from USB or SD) Touch the keys to input the target num- ber or time and then touch [Enter]. ! To select 5 minutes 3 seconds, touch [5], [min], [3], [sec] and [Enter] in order. ! To select 71 minutes 00 seconds, touch [7], [1], [min] and [Enter] in order. -
Page 110: Reading The Screen
Chapter Using an iPod (iPod) Display the AV operation screen. CAUTION = For details of the operations, refer to Dis- For iPod with Lightning connector users playing the AV operation screen on page 76. iPod source is not available when an iPod with Connect your iPod. -
Page 111: Using An Ipod (Ipod)
Chapter Using an iPod (iPod) Setting a repeat play range Video Indicator Meaning Repeats all songs or videos in the se- lected list. Repeats just the current song or video. 8 Current song (episode) information : Song title (episode) Shows the title of the current song. When a podcast is played, the episode 1 Source icon is displayed (when available). -
Page 112: Using The Touch Panel Keys
Chapter Using an iPod (iPod) Using the touch panel keys Video Music p If you touch , alphabet characters are displayed. Touch the first letter of the title of the video/song you are looking for. 3 Recalls equaliser curves Video = For details, refer to Using the equaliser 2 3 9 on page 151. -
Page 113: Changing The Wide Screen Mode
Chapter Using an iPod (iPod) p Images may be unclear when “Cinema” or Changing the wide screen “Zoom” is selected. mode p Remember that use of this system for com- mercial or public viewing purposes may You can set the screen size of video. p The default setting is “Full”. -
Page 114: Using Aha Radio
! An App Connectivity Kit (CD-AH200) (sold smartphone to enjoy Aha Radio content on separately) is required for connection to this navigation system. this navigation system. Because the application for the iPhone or smartphone is not provided by Pioneer, the re- Engb... -
Page 115: Starting Procedure
Chapter Using Aha Radio Register your iPhone and connect it to ! The device is connected to this navigation system via Bluetooth. this product via the Bluetooth wireless technology. p The registered device must be selected as Starting procedure the priority device. = For details, refer to Registering your The procedure varies depending on your type Bluetooth devices on page 58. -
Page 116: Reading The Screen
Chapter Using Aha Radio = For details of the operations, refer to the In- Shows the rated value of the current stallation Manual. content displayed (only when and where applicable). Display the AV operation screen. = For details of the operations, refer to Dis- playing the AV operation screen on page 76. - Page 117 Chapter Using Aha Radio Pop-up screen Indicator Meaning Touching the key performs fast re- verse of the current content for 30 seconds. Touching the key sends you to the Location confirmation screen of the selected POI to search for the de- sired route.
-
Page 118: Functions Coupled With Aha Radio And The Navigation System
Chapter Using Aha Radio Functions coupled with Aha Radio and the navigation system Depending on the stations, functions coupled with the navigation system may also be. Viewing POI information with Aha Radio You can check the information of POI location when setting to the destination the POI loca- tion obtained with Aha Radio. -
Page 119: Using The Bluetooth Audio Player
Chapter Using the Bluetooth audio player Starting procedure You can control the Bluetooth audio player. p Before using the Bluetooth audio player, Pull out the connecting cable for using you must register and connect the device the AppRadio Mode. to this navigation system. p You cannot use Bluetooth audio player = For details, refer to Registering your when the connecting cable for using the... -
Page 120: Using The Touch Panel Keys
Chapter Using the Bluetooth audio player 4 Battery status of the Bluetooth device Shows the elapsed playing time within p Depending on the Bluetooth device, this the current file. p In the following cases, file information icon may not appear. 5 Connection status indicator will only be displayed after a file starts Shows whether the device featuring Bluetooth... -
Page 121: Operating By Hardware Buttons
Chapter Using the Bluetooth audio player Each touch of this key, switches between the file information screen and the list selection screen. 4 Operates some functions by swipe action = For details, refer to Swipe action on page 5 Sets a repeat play range The repeat play range can be changed by only touching a single key. -
Page 122: Using Av Input
Chapter Using AV input Turn on the setting of video input 2 You can display the video image output by the device connected to the navigation system. (AV2). For details of the connection method, refer to = For details, refer to Setting video input 2 the Installation Manual. -
Page 123: Changing The Wide Screen Mode
Chapter Using AV input Changing the wide screen tions are the same as those of the normal picture. mode p Images may be unclear when “Cinema” or “Zoom” is selected. You can set the screen size of video. p Remember that use of this system for com- p The default setting is “Full”. - Page 124 Chapter Using AppRadio Mode ! Pioneer is not liable for any issues that may WARNING arise from incorrect or flawed app-based Certain uses of a smartphone may not be content. legal while driving in your jurisdiction, so ! The content and functionality of the sup-...
-
Page 125: Using Appradio Mode
Chapter Using AppRadio Mode — Lightning Digital AV Adapter (Apple Inc. Connect your iPhone. products) (sold separately) = For details, refer to Connecting your iPod on — Lightning to USB cable (supplied with page 20. iPhone with Lightning connector) Press the HOME button to display the ! The device is connected to this navigation “Top Menu”... -
Page 126: For Iphone With Lightning Connector Users
Chapter Using AppRadio Mode For iPhone with Lightning Touch the desired application icon. The desired application is launched, and the connector users application operation screen appears. Set “App connection settings” to Operate the application. “iPhone”, and “iPod Connection Settings” to “Digital AV Connector”. Press the HOME button to go back to = For details, refer to Selecting the device con- the application menu screen. - Page 127 Chapter Using AppRadio Mode p To use AppRadio Mode with an Android Application menu screen device connected to this product, you should adjust the size of the Android win- dow on the screen of this product. Setting the display size for the Android video playback p This function is only available in AppRadio Mode (HDMI connection) on the Android.
-
Page 128: Using The Keyboard
Chapter Using AppRadio Mode 4 Hides the keyboard and text can now Using the keyboard be entered using the keyboard of iPhone CAUTION 5 Changes the iPhone keyboard layout For your safety, the keyboard functionality is only p The iPhone keyboard layouts that can be available when the vehicle is stopped and the selected by tapping depends on the... -
Page 129: Other Functions
Chapter Using AppRadio Mode Displaying the image of your The sound mix function is enabled. 2 Adjusts the AppRadio Mode volume application (iPhone with Each touch of [+] or [–] increases or de- Lightning connector) creases the volume level. You can set an image of the application for smartphone, which is not compatible with AppRadio Mode, to be shown on the screen. - Page 130 Chapter Using AppRadio Mode p You can only control the application on the connected device. Connect your smartphone to this pro- duct via the separately sold App Connectiv- ity Kit (CD-AH200). p The cable connection method varies de- pending on your device. = For details of the operations, refer to the In- stallation Manual.
-
Page 131: Customising Preferences
Chapter Customising preferences Displaying the information screen Press the HOME button to display the “Top Menu” screen. Touch The “Information” screen appears. Touch the item you want to configure. 1 Speed Pulse The Speed Pulse value detected by the navi- gation system is shown. -
Page 132: Checking Sensor Learning Status And Driving Status
Chapter Customising preferences Checking sensor learning Signal com- Used in posi- Colour munication tioning status and driving status Orange p The navigation system can automatically Yellow use its sensor memory based on the outer dimensions of the tyres. p When the GPS aerial is connected to Display the “Information”... -
Page 133: Clearing Status
Chapter Customising preferences p When tyres have been changed or Checking the device number chains fitted, turning on the Speed Display the “Information” screen. Pulse allows the system to detect the = For details, refer to Displaying the informa- fact that the tyre diameter has changed, tion screen on page 131. -
Page 134: Displaying The Adjustment And Correction Screen
Chapter Customising preferences Display the “Volume/Position adjust- Touch [Home]. If the home location has not been stored yet, a ment” screen. confirmation message appears. = For details, refer to Displaying the adjust- ment and correction screen on page 134. Touch [Yes]. The registration is complete. -
Page 135: Switching The Muting/Attenuation Level
Chapter Customising preferences Switching the muting/ Touch [+] or [–] to set their volume. attenuation level You can select the muting/attenuation level of “Mute Timing”. This setting is also effective for a mute signal that has been received from the MUTE lead connected to the navigation unit. -
Page 136: Switching The Road On Which You Are Driving
Chapter Customising preferences Switching the road on Touch the item you want to configure. which you are driving When you are driving in the area where an or- dinary road and toll road run parallel, and if the system calculates your vehicle position to be on a road opposite from the one on which you are actually driving, you can switch your vehicle position to the right road, i.e. -
Page 137: Setting The Scroll-Locked 2D (Normal) View
Displaying the 3D landmarks p The 3D landmarks and this setting are only available on AVIC-F50BT. You can select whether to display the 3D land- marks on the map. p 3D landmarks only appear when the view mode is “3D View”... -
Page 138: Setting The Barrier Graphic For The City Map
Chapter Customising preferences Setting the barrier graphic for Setting the map colour change the city map between day and night p This function is only available on AVIC- To improve the visibility of the map during the F50BT. evening, you can set the timing for changing On the city map screen, you can display a the combination of the map colour. -
Page 139: Deleting The Track Log Automatically
Chapter Customising preferences Deleting the track log Setting the criteria of route automatically calculation You can delete the track log automatically. You can predefine the route calculation criter- ia. This setting controls how the route should Display the “Navi Settings” screen. be calculated by taking into account the time, = For details, refer to Displaying the screen for distance or main road. -
Page 140: Setting The Use Of Ferries
Chapter Customising preferences Setting the use of ferries Setting the route calculation allowing for time restrictions You can predefine the use of ferries when cal- culating a route. This setting controls whether This setting controls whether streets or ferry crossings should be taken into account. bridges that have traffic restrictions during a certain time should be taken into account. -
Page 141: Setting To Select Your Route Automatically Using The Route Alternatives Function
Chapter Customising preferences Touch [Motorway]. Displaying the distance and The setting screen appears. estimated time Touch the item you want to set. You can set the display information of the esti- mated time of arrival in the route guidance. ! Use (default): Calculates a route that may include motor- Display the “Navi Settings”... -
Page 142: Setting The Auto-Zoom Display
Chapter Customising preferences Setting the auto-zoom display Setting the App operation screen interruption This setting enables switching to an enlarged map around the point where your vehicle is You can set whether to automatically switch to approaching an intersection, entrance/exit of the navigation screen from the AppRadio motorway or a junction. -
Page 143: Changing The Unit Between Km And Miles
Chapter Customising preferences 20km/h, 30km/h, 40km/h (default), Displaying the traffic 50km/h, 60km/h notification icon ! mile or Mile&Yard: Selects whether to display or hide the traffic 10mph, 20mph, 25mph (default), 30mph, notification icons on the map when incidents 40mph occur on your route. Major Ordinary Road ! km: Display the “Navi Settings”... -
Page 144: Selecting The Language
Chapter Customising preferences Touch the item you want to configure. Setting the time difference Adjusts the system’s clock. Set the time differ- ence (+, –) from the time originally set in your navigation system. Display the “System Settings” screen. = For details, refer to Displaying the screen for system settings on page 143. -
Page 145: Changing To The Splash Screen Stored On The Sd Memory Card
Chapter Customising preferences Display the “System Settings” screen. Touch [Splash Screen Setting]. The “Select Splash Screen” screen appears. = For details, refer to Displaying the screen for system settings on page 143. Touch the image to use as the splash screen from the list. -
Page 146: Setting The Illumination Colour
Chapter Customising preferences Press the MODE button. Selecting the colour from the preset The adjustment results are saved. colours Display the “System Settings” screen. Press the MODE button once again. Proceed to the 16-point adjustment. = For details, refer to Displaying the screen for system settings on page 143. -
Page 147: Reversing The Climate Control Status Display
Chapter Customising preferences Touch to adjust the values for Displaying the icon for setting Red, Green and Blue to create a favourite the rear display output colour. You can display the icon to select which source will be displayed on the rear display. Colour bar # You can adjust the colour tone by dragging Icon of output to select which setting of the... -
Page 148: Setting Video Input 1 (Av1)
Chapter Customising preferences Touch Setting video input 2 (AV2) You can use outside video equipment such as portable players connected to this product with this setting. p This setting applies to RCA inputs (AUDIO INPUT and VIDEO INPUT) on the back of the system. -
Page 149: Displaying Your Divx Vod Registration Code
Chapter Customising preferences p If a registration code has not been acti- Displaying your DivX VOD vated, the deregistration code is not dis- registration code played. If you want to play DivX VOD (video on de- mand) content on this navigation system, you Touch [Deregistration Code]. -
Page 150: Setting The Fm Tuning Step
Chapter Customising preferences p “Auto PI” can be set only when the source Displaying the screen for is selected to “Source Off”. AV sound settings Display the “Setting according to Press the HOME button to display the source” screen. “Top Menu” screen. = For details, refer to Displaying the screen for AV system settings on page 147. -
Page 151: Adjusting Loudness
Chapter Customising preferences Touch [FAD/BAL]. Touch [On]. When “Sub. W” is selected in “Rear SP”, # If you touch [Off], the setting is turned off. [Balance] will be displayed instead of Touch , and select the level [FAD/BAL] and the front/rear speaker balance you want to set. - Page 152 Chapter Customising preferences Display the “AV Sound Settings” = For details, refer to Using the auto-ad- screen. justed equaliser on page 153. = For details, refer to Displaying the screen for The difference between “Custom1” and AV sound settings on page 150. “Custom2”...
-
Page 153: Adjusting Source Levels
Chapter Customising preferences p You cannot select [SLA] when the FM tuner Touch the frequency for which you want to adjust the level. is selected as the AV source. Compare the FM tuner volume level with the level of the source you wish to ad- just. -
Page 154: Using The Subwoofer Output
Chapter Customising preferences Each touch of changes the Enhancing bass (Bass Booster) cut-off frequencies as follows: You can enhance bass sounds that are often 50Hz — 63Hz — 80Hz — 100Hz — 125Hz muted by driving noise. Display the “AV Sound Settings” Using the subwoofer output screen. -
Page 155: Before Operating The Auto Eq Function
Previous settings for Auto EQ will be over- ! When this navigation system is connected to a power amp with input level control, written. p For AVIC-F50BT users Auto EQ may be impossible if the power amp’s input level is set below the standard level. - Page 156 Chapter Customising preferences Press the HOME button to display the Do not press the h button to open or close “Top Menu” screen. the panel when you are using the micro- phone. Touch The “Edit/Settings” screen appears. Stop the vehicle in a quiet place, close all the doors, windows and sun roof, and Touch [AV Settings].
-
Page 157: Displaying The Screen For App Settings
Chapter Customising preferences “App connection settings” can be set when 15 Store the microphone carefully in the glove compartment or another safe place. all of the following conditions are met. If the microphone is subjected to direct sun- ! The AV source is turned off. light for an extended period, high tempera- ! All iPod, smartphone and external storage tures may cause distortion, colour change or... -
Page 158: Setting The Keyboard Language With Application For Iphone
Chapter Customising preferences For smartphone users Setting the rear output Display the “App settings” screen. The navigation system’s rear output can be = For details of the operations, refer to Dis- used for a full-range speaker or subwoofer connection. If you switch “Rear SP” to playing the screen for app settings on page “Sub. -
Page 159: Adjusting The Picture
Chapter Customising preferences p The adjustments of “Brightness” and Adjusting the picture “Contrast” are stored separately when your vehicle’s headlights are off (daytime) and CAUTION when your vehicle’s headlights are on For safety reasons, you cannot use some of these (nighttime). -
Page 160: Selecting The Video For Rear Display
Chapter Customising preferences p Touching Selecting the video for rear closes the pop-up screen. p When “Mirror AV” is selected, the following display restrictions are applied to rear display. — When selecting “Rear View” in the map You can choose either to show the same image as the front screen or to show the se- display, nothing is displayed. -
Page 161: Using The Rear View Camera Functions
Setting for rear view camera card slot. CAUTION = For details of the operation, refer to Insert- Pioneer recommends the use of a camera which ing and ejecting an SD memory card on outputs mirror reversed images, otherwise the page 18. -
Page 162: Setting Guidelines On The Rear View Image
Chapter Customising preferences Setting guidelines on the rear When the polarity of the connected lead is positive while the gearstick is in the RE- view image VERSE (R) position. ! GND: CAUTION When the polarity of the connected lead is ! When adjusting the guidelines, be sure to negative while the gearstick is in the RE- park the vehicle in a safe place and apply the... -
Page 163: Setting The Safe Mode
Chapter Customising preferences Touch [OK]. The screen for setting the guidelines appears. Touch to select a point. Touch to adjust the po- sition of the point. p When a point is moved, the distance from the initial value is displayed at the top right of the screen. -
Page 164: Displaying Obstacle Detection
Chapter Displaying the operation status of vehicle equipment By connecting the optional Vehicle Bus adap- ter, you can display the operation status of the vehicle’s parking sensor function and climate control panel on the navigation screen. CAUTION ! For information on installing the Vehicle Bus adapter, see the operating manual of the Vehi- cle Bus adapter. - Page 165 Chapter Displaying the operation status of vehicle equipment 3 4 5 1 Displays that the rear window heating setting is on. 2 Displays that the front window heating setting is on. 3 Displays that the internal circulation mode setting is on. 4 Displays that the A/C setting is on.
-
Page 166: Other Functions
Touch [OK]. Enter a password hint. p Up to 40 characters can be entered for a Forgotten password hint. Contact the nearest authorised Pioneer Ser- Touch [OK]. vice Station. The “Password confirmation” screen ap- pears. p If you want to change the password cur- rently set, enter the current password and then enter the new one. -
Page 167: Restoring The Navigation System To The Default Or Factory Settings
Chapter Other functions Restoring the navigation Touch the item you want to initialise. system to the default or factory settings You can restore settings or recorded content to the default or factory settings. Various methods are used to clear user data, and the situations and the cleared content differ in each case. -
Page 168: Setting Items To Be Deleted
Chapter Other functions Setting items to be deleted The items to be deleted vary depending on the reset method. The items listed in the following table will be restored to the default or factory settings. Any items not listed below will be retained. —... - Page 169 Chapter Other functions Setting items to be deleted Method 1 Method 2 Method 3 — Volume setting for AV sources, TA volume All settings and stored data in the “Phone” — screen Overlay POI in the “View” screen — — —...
-
Page 170: Troubleshooting
If you have problems operating your navigation system, refer to this section. The most common problems are listed below, along with likely causes and solutions. If a solution to your problem cannot be found here, contact your dealer or the nearest authorised Pioneer service facility. Problems with the navigation screen... - Page 171 Appendix Appendix Symptom Cause Action (Reference) You cannot position your vehicle Something is covering the GPS aer- Do not cover the GPS aerial with spray paint on the map without a significant ial. or vehicle wax, because this may block the re- positioning error.
- Page 172 Appendix Appendix Symptom Cause Action (Reference) Rear display picture disappears. The source disc being listened to in Before ejecting the disc, switch the source. the navigation system has been This problem may occur when certain con- ejected. nection methods are used. There is a problem with the rear dis- Check the rear display and its connection.
- Page 173 Appendix Appendix Symptom Cause Action (Reference) The “AV1 Input” or “AV2 Input” set- No video output from the con- Correct the settings. (Page 122) nected equipment. ting is incorrect. The audio or video skips. The navigation system is not firmly Secure the navigation system firmly.
- Page 174 Appendix Appendix Symptom Cause Action (Reference) Sound from the iPod cannot be The audio output direction may Use the iPod to change the audio output di- heard. switch automatically when the rection. Bluetooth and USB connections are used at the same time. Problems with the phone screen Symptom Cause...
-
Page 175: Messages For Navigation Functions
Route calculation has failed be- ! Change the destination. possible. cause of a malfunction in the map ! Consult the Pioneer Local dealer if this mes- data, software, or hardware. sage persists. Route calculation not possi- The destination is too far. -
Page 176: Messages For Av Functions
If the error persists, record the error message and contact your dealer or your nearest Pioneer service centre. The messages in “( )” will appear on the rear display. - Page 177 Appendix Appendix Message Cause Action (Reference) Cannot play back all tracks All the files on the inserted external Store playable files. storage device are secured by DRM. None of the files can be played by Replace it with a playable file. (Page 188, this unit.
-
Page 178: Messages For Bluetooth Functions
When problems occur with Bluetooth functions, an error message appears on the display. Refer to the table below to identify the problem, then take the suggested corrective action. If the error persists, record the error message and contact your dealer or your nearest Pioneer service centre. Message... -
Page 179: Positioning Technology
The position of the speed detection circuit vary depending on the vehicle model. For The Global Positioning System (GPS) uses a details, consult your authorised Pioneer network of satellites orbiting the Earth. Each dealer or an installation professional. of the satellites, which orbit at a height of... -
Page 180: Handling Large Errors
Appendix Appendix Map matching When positioning by GPS is As mentioned, the positioning systems used impossible by this navigation system are susceptible to ! GPS positioning is disabled if signals can- certain errors. Their calculations may, on occa- not be received from more than two GPS sion, place you in a location on the map where satellites. -
Page 181: Conditions Likely To Cause Noticeable Positioning Errors
Appendix Appendix Conditions likely to cause ! If you drive in zigzags. noticeable positioning errors For various reasons, such as the state of the road you are travelling on and the reception status of the GPS signal, the actual position of your vehicle may differ from the position dis- played on the map screen. - Page 182 Appendix Appendix ! If you are on a steep mountain road with ! If trees or other obstacles block the GPS many height changes. signals for a considerable period. ! If you drive very slowly, or in a start-and- ! If you enter or exit a multi-storey car park or stop manner, as in a traffic jam.
-
Page 183: Route Setting Information
Appendix Appendix Route setting information current heading. In such cases, you are in- structed to turn around, so please turn Route search specifications around safely by following the actual traffic rules. Your navigation system sets a route to your ! In some cases, a route may begin on the destination by applying certain built-in rules to opposite side of a railway or river from your the map data. -
Page 184: Built-In Drive And Care
Appendix Appendix Built-in drive and care one hour. Also, wipe any damp discs with a soft cloth. ! Use only conventional, fully circular discs. ! Playback of discs may not be possible be- Do not use shaped discs. cause of disc characteristics, disc format, recorded application, playback environ- ment, storage conditions and so on. -
Page 185: Avchd Recorded Discs
Appendix Appendix is a trademark of DVD Format/Logo Licensing Corporation. p It is not possible to play DVD-Audio discs. This DVD drive may not be able to play all discs bearing the marks shown above. AVCHD recorded discs This unit is not compatible with discs recorded Detailed information for in AVCHD (Advanced Video Codec High Defi- playable media... - Page 186 Appendix Appendix CD-R/CD-RW discs tion, playback environment, storage conditions, and so on. ! Unfinalised discs cannot be played back. ! It may not be possible to playback CD-R/ CD-RW discs recorded on a music CD re- USB storage device compatibility corder or a personal computer because of = For details about USB storage device com- disc characteristics, scratches or dirt on...
- Page 187 Appendix Appendix Notes specific to DivX files ! The character code for the subtitle file should comply with ISO-8859-1. Using char- ! Only DivX files downloaded from DivX part- acters other than ISO-8859-1 may cause the ner sites are guaranteed for proper opera- characters to be displayed incorrectly.
-
Page 188: Media Compatibility Chart
Appendix Appendix Media compatibility chart General DVD-R/-R SL/-R USB storage de- Media CD-R/-RW SD memory card DL/DVD-RW vice ! ISO9660 level 1 ! ISO9660 level 1 ! ISO9660 level 2 ! ISO9660 level 2 File system FAT16/FAT32 ! Romeo, Joliet ! Romeo, Joliet ! UDF 1.02/1.50/ ! UDF 1.02/1.50/... - Page 189 Appendix Appendix WMA compatibility DVD-R/-R SL/-R USB storage de- Media CD-R/-RW SD memory card DL/DVD-RW vice File extension .wma Bit rate 5 kbps to 320 kbps (CBR), VBR Sampling frequency 8 kHz to 48 kHz Note: The navigation system is not compatible with the following: ™...
- Page 190 Appendix Appendix DivX compatibility DVD-R/-R SL/-R USB storage de- Media CD-R/-RW SD memory card DL/DVD-RW vice File extension .avi/.divx Home Theater Ver. 3.11/Ver. 4.x/Ver. 5.x/ Profile (DivX version) Ver. 6.x Compatible audio codec MP3, Dolby Digital DivX files on the external storage device Bit rate (MP3) 8 kbps to 320 kbps (CBR), VBR (USB, SD) cannot be played.
- Page 191 Appendix Appendix Video files compatibility (USB, SD) File extension .avi .mp4 .m4v .wmv Format MPEG-4 MPEG-4 H.264 MPEG-4 Compatible video MPEG-4 MPEG-4 H.264 MPEG-4 codec Linear PCM Compatible audio (LPCM) codec Maximum resolu- 400 pixels x 240 pixels tion Bit rate: Bit rate: Bit rate: Bit rate:...
-
Page 192: Bluetooth
! The Bluetooth word mark and logos are re- DivX gistered trademarks owned by Bluetooth SIG, Inc. and any use of such marks by PIONEER CORPORATION is under licence. Other trademarks and trade names are those of their respective owners. Engb... -
Page 193: Aac
ROM and DVD-R/RW/ROM discs. Keeping the CAUTION same terminology as DVD video, individual ! Pioneer accepts no responsibility for data lost DivX video files are called “Titles”. Keep in from an iPod, even if that data is lost while mind that when naming flies/titles on a CD-R/ using the navigation system. -
Page 194: Lightning
IMPORTANT Requirements to access app-based connected HDMI content services using this product: ! Latest version of the Pioneer compatible con- nected content application(s) for the smart- phone, available from the service provider, downloaded to your iPhone device. ! A current account with the content service provider. -
Page 195: Mhl
In that case, please consult your dealer or the nearest authorised Pioneer Liquid crystal display (LCD) screen Service Station. ! If the LCD screen is near the vent of an air conditioner, make sure that air from the air conditioner is not blowing on it. -
Page 196: Display Information
Appendix Appendix Display information Destination menu Phone menu Page Page Address Dial Pad POI Name Contacts List Stored 44, 52 Call history Favourites Redial History 44, 53 Bluetooth Settings Home Incoming call settings Near Me Edit/Delete Near dest. Around City Information menu Coordinates Page... -
Page 197: Edit/Settings Menu
Appendix Appendix Edit/Settings menu Navi settings menu Map Display Page Page Edit Data Show Speed Limit Navi settings Road Colour AV Settings 150, 154, 158 2D locked scroll Source Settings 3D Land Mark App settings City Map Vol./Pos. Adj. City Map Barrier System Settings Day/Night Display Safe Mode... -
Page 198: Av Settings Menu
Appendix Appendix AV Settings menu Page Auto reroute choice Distance/ETA Auto reroute Close Up View AV Guide Mode App Guide Mode Minor Ordinary Road Page Major Ordinary Road AV Sound Settings Motorway FAD/BAL (Balance) km / mile Loudness EQ Menu Sub Woofer Bass Booster Sonic Center Control... -
Page 199: Setting According To Source Menu
Appendix Appendix Setting according to source menu App settings menu Page Page AV Input App connection settings AV1 Input App keyboard settings AV2 Input Android Video Adj. SD/USB settings SD video output settings System Settings menu Set USB video output DVD/DivX®... -
Page 200: Bluetooth Settings Menu
Appendix Appendix Bluetooth Settings menu Page Registration Change device Delete device Device Name Password Bluetooth On/Off Engb... -
Page 201: Glossary
Appendix Appendix Glossary DivX DivX is a popular media technology created by DivX, LLC, a subsidiary of Rovi Corporation. AAC is short for Advanced Audio Coding and DivX media files contain highly compressed refers to an audio compression technology video with high visual quality that maintains a standard used with MPEG-2 and MPEG-4. - Page 202 Appendix Appendix ISO 9660 format Multi-audio (Multilingual dialogue) This is the international standard for the for- Some videos feature dialogue recorded in mul- mat logic of DVD/CD-ROM folders and files. tiple languages or audio recorded in multiple For the ISO9660 format, there are regulations tracks.
- Page 203 Appendix Appendix Region number Waypoint DVD players and DVD discs feature region A location that you choose to visit before your numbers indicating the area in which they destination; a journey can be built up from were purchased. Playback of a DVD is not pos- multiple waypoints and the destination.
-
Page 204: Specifications
AVIC-F850BT ....6.1 inch wide/16:9 Chassis ..... 178 mm × 100 mm × Effective display area: 167 mm AVIC-F50BT ....... 155.2 mm × 81.3 mm Nose ......170 mm × 97 mm × 11 mm AVIC-F950DAB ....135 mm × 70.8 mm AVIC-F950BT AVIC-F950BT .... - Page 205 Audio ........1.0 V (1 kHz, 0 dB) Preout impedance: Number of channels ....2 (stereo) AVIC-F50BT ....... 100 W MP3 decoding format ... MPEG-1, 2 & 2.5 Audio Layer AVIC-F950DAB ....1 kW WMA decoding format ..Ver. 7, 8 & 9 AVIC-F950BT ....
- Page 206 Appendix Appendix LW tuner Frequency range ...... 153 kHz to 281 kHz Usable sensitivity ..... 28 µV (S/N: 20 dB) Signal-to-noise ratio ....62 dB (IEC-A network) DAB tuner (AVIC-F950DAB) Frequency range Band C ....... 174.928 MHz to 239.200 MHz (5A-13F) L Band ........
- Page 207 Engb...
- Page 208 For further details, please visit our website. PIONEER CORPORATION 1-1, Shin-ogura, Saiwai-ku, Kawasaki-shi, Kanagawa 212-0031, JAPAN PIONEER ELECTRONICS (USA) INC. P.O. Box 1540, Long Beach, California 90801-1540, U.S.A. TEL: (800) 421-1404 PIONEER EUROPE NV Haven 1087, Keetberglaan 1, B-9120 Melsele, Belgium/Belgique ©...