Table of Contents
Advertisement
Dear Customer
Thank you for purchasing this product.
For optimum performance and safety, please read these
instructions thoroughly before connecting, operating or adjusting
this product.
Please keep this manual for future reference.
Supplied
Accessories
Please check and identify the supplied accessories.
1 x AC power supply cord
For Argentina
(K2CJ2DA00006)
For other Latin American
countries
(K2CQ2CA00007)
2 x Remote control
batteries
1 x Power plug adaptor
(except for Argentina)
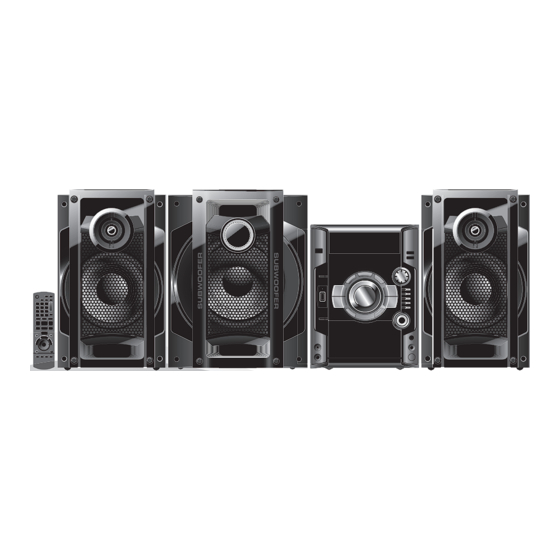
Unless otherwise indicated, illustrations in these operating instructions are of SC-AK780 for other Latin American countries.
Operations in these instructions are described mainly using the remote control, but you can perform the operations on the main unit if the
controls are the same.
Your unit may not look exactly the same as illustrated.
PH PR
RQTX0266-M_en.indd 1
RQTX0266-M_en.indd 1
20 Apr 08
1 x FM indoor antenna
1 x AM loop antenna
1 x Remote Control
AK780
(N2QAYB000425)
AK580
(N2QAYB000424)
The illustration shows
SC-AK780.
Operating Instructions
CD Stereo System
SC-AK780
Model No.
SC-AK580
RQTX0266-M
4/20/09 10:01:41 AM
4/20/09 10:01:41 AM
Advertisement
Table of Contents

Related Manuals for Panasonic SC-AK780


Summary of Contents for Panasonic SC-AK780
-
Page 1: Operating Instructions
(except for Argentina) Unless otherwise indicated, illustrations in these operating instructions are of SC-AK780 for other Latin American countries. Operations in these instructions are described mainly using the remote control, but you can perform the operations on the main unit if the controls are the same. - Page 2 These operating instructions are applicable to the following systems. CAUTION! Change the voltage setting to suit the AC voltage in your area. System SC-AK780 SC-AK580 See page 5. Note that the unit will be seriously damaged or fail to operate...
-
Page 3: Table Of Contents
Safety precautions Table of contents Safety precautions .......... 3 Placement Placement Placement of speakers ........4 Set the unit up on an even surface away from direct sunlight, high temperatures, high humidity, and excessive vibration. These Preparing the remote control ......4 conditions can damage the cabinet and other components, thereby Making the connections ........ -
Page 4: Placement Of Speakers
Placement of speakers Preparing the remote control Front speakers are designed identically so that no left or right channel orientation is necessary. AK780 Use alkaline or manganese batteries. Insert so the poles (+ and –) match those in the remote control. Place the subwoofer on the fl... -
Page 5: Making The Connections
Making the connections Connect the AC power supply cord only after all the other connections have been made. Power supply connection Power supply connection Antenna connections Antenna connections Place the antenna where reception is best. Insertion of connector Even when the connector is perfectly inserted, depending on the ■... -
Page 6: Demo Function
Making the connections (continued) Optional antenna connections Optional antenna connections Use an outdoor antenna if radio reception is poor. Note: Disconnect the outdoor antenna when the unit is not in use. Do not use the outdoor antenna during a lightning storm. FM outdoor antenna AM outdoor antenna AM outdoor antenna (not included) -
Page 7: Overview Of Controls
Overview of controls Main unit Main unit Refer to the numbers in parentheses for page reference. Buttons labeled such as 1 function in exactly the same way as the controls on the remote control (\ page 8). Display panel (10) Disc trays 1 Standby/on switch [y/l, POWER] (6, 19) - Page 8 Overview of controls (continued) Remote control Remote control Buttons labeled such as 1 function in exactly the same way as the controls on the main unit (\ page 7). Clock or timer setting (15) Play timer or record timer setting (15) Disc selection (9) Sleep timer setting (15) Auto off function...
-
Page 9: Discs
Discs Play Mode function Basic play Basic play You can listen to specifi c discs and tracks. Press [0, OPEN/CLOSE] on the main unit to open the tray. The unit turns on, load a disc in the current tray with the label Preparation facing up. - Page 10 Discs (continued) Press [4 / 1] or [¡ / ¢] to select the track. To select a track directly, press the numeric buttons after Checking the track information pressing [4 / 1] or [¡ / ¢]. You can view the information of the current track from the display Press [OK].
-
Page 11: Using The Fm/Am Radio
Using the FM/AM radio NOTE about using a DualDisc Manual tuning Manual tuning The digital audio content side of a DualDisc does not meet the technical specifi cations of the Compact Disc Digital Audio (CD-DA) format so playback may not be possible. Press [FM/AM] to select “FM”... -
Page 12: Usb
Using the FM/AM radio (continued) The USB connectivity enables you to record sound or music tracks from various sources to MP3 format and store into the USB mass Memory preset Memory preset storage device which can be played back. Typically, USB memory devices (bulk only transfer). - Page 13 Panasonic will not be held responsible on the consumer’s action to record copyrighted music in the form of various audio fi les Press [DISPLAY] repeatedly during recording.
- Page 14 USB (continued) Erasing the recorded tracks Recording from CD using analog format This function allows you to erase unwanted tracks quickly and easily. You can change your recording mode from the default digital recording to analog recording. Press [6, USB] and then [7] (stop). Press [6, CD] and then [7] (stop).
-
Page 15: Using The Timers
Using the timers To activate the timer Setting the clock Setting the clock Press [ ˚PLAY/REC] repeatedly to turn on your desired timer. ˚ PLAY ˚ REC No display (off) This is a 24-hour clock. Press [CLOCK / TIMER] to select “CLOCK”. Press [y] to turn off the unit. -
Page 16: Using Sound Effects
Using sound effects Changing the sound quality: Preset EQ Changing the sound quality: Preset EQ Enjoying the bass: D.BASS Enjoying the bass: D.BASS Press [PRESET EQ] repeatedly to select your desired setting. Press [D.BASS] repeatedly to select either “ON D.BASS” or “OFF D.BASS”. -
Page 17: Using Other Equipments
Rear panel of “LINE OUT” Other Panasonic audio or video equipment may start functioning this main unit position when you operate the unit using the supplied remote control. You can operate this unit in another mode by setting the remote control operating mode to “REMOTE 2”. -
Page 18: Troubleshooting Guide
Troubleshooting guide Before requesting service, make the following checks. If you are in doubt about some of the check points, or if the solutions indicated in the chart do not solve the problem, consult your dealer for instructions. ■ Common problems Page When the unit is in standby •... -
Page 19: Maintenance
Also you may contact us directly by our Contact Center: Panama 800-PANA (800-7262) Colombia 1-8000-94PANA (1-8000-947262) - National Line 635-PANA (635-7262) - Bogota Line Ecuador 1800-PANASONIC (1800-726276) Costa Rica 800-PANA737 (800-7262737) El Salvador 800-PANA (800-7262) Guatemala 1-801-811-PANA (1-801-811-7262) Chile 800-260602 From a cell phone: 245-2520... -
Page 20: Specifi Cations
2) Total harmonic distortion is measured by the digital spectrum FL = Front left channel analyzer. FR = Front right channel SW = Subwoofer channel Panasonic Corporation Web Site: http://panasonic.net RQTX0266-M L0409CH0 RQTX0266-M_en.indd 20 RQTX0266-M_en.indd 20 4/20/09 10:02:54 AM 4/20/09 10:02:54 AM...