Table of Contents
Advertisement
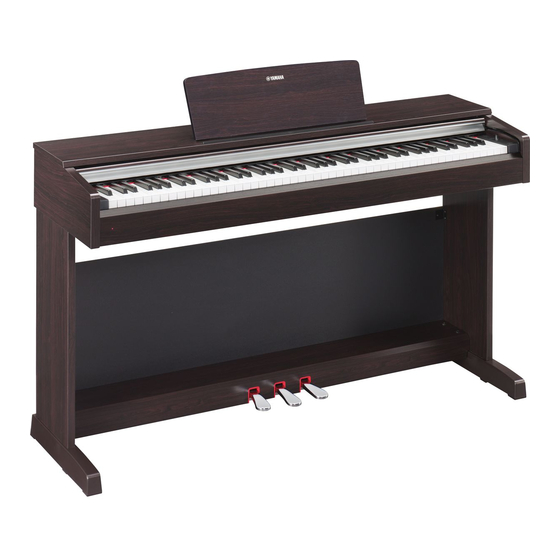
For information on assembling the keyboard stand, refer to the instructions at the end of this manual.
Pour obtenir des informations sur l'assemblage du support du clavier, reportez-vous aux instructions à la fin de ce manuel.
Para información sobre el montaje del soporte del teclado, consulte las instrucciones al final de este manual.
YDP-162
YDP-142
Owner's Manual
Mode d'emploi
Manual de instrucciones
EN
FR
ES
Advertisement
Table of Contents

Related Manuals for Yamaha 142


Summary of Contents for Yamaha 142
- Page 1 YDP-162 YDP-142 Owner’s Manual Mode d’emploi Manual de instrucciones For information on assembling the keyboard stand, refer to the instructions at the end of this manual. Pour obtenir des informations sur l'assemblage du support du clavier, reportez-vous aux instructions à la fin de ce manuel.
-
Page 2: Table Of Contents
Sounds (Voices) ........16 Selecting a Voice ............16 Listening to the Demo Songs ........17 Adding Variations to the Sound (Reverb)......18 Transposing the Pitch in Semitones ......19 Fine-tuning the Pitch ...........19 Layering Two Voices (Dual mode) ........20 Playing Duo ..............21 YDP-162/142 Owner’s Manual... -
Page 3: Special Message Section
This product should be used only with the components supplied installed correctly. Mismatches or incorrect installation may result or; a cart, rack, or stand that is recommended by Yamaha. If a in overheating and battery case rupture. cart, etc., is used, please observe all safety markings and instructions that accompany the accessory product. - Page 4 Yamaha Corporation of America or its subsid- to the operation of other electronic devices. iaries. * This applies only to products distributed by YAMAHA CORPORATION OF AMERICA. (class B) COMPLIANCE INFORMATION STATEMENT OBSERVERA! (DECLARATION OF CONFORMITY PROCEDURE) Apparaten kopplas inte ur växelströmskällan (nätet) så...
-
Page 5: Precautions
AC printed on the name plate of the instrument. outlet. Then have the instrument inspected by qualified Yamaha service personnel. • Use the specified adaptor (page 32) only. Using the wrong adaptor can result in •... - Page 6 Yamaha cannot be held responsible for damage caused by improper use or modifications to the instrument, or data that is lost or destroyed. Always turn the power off when the instrument is not in use.
-
Page 7: About The Manuals
Contains the MIDI Data Format and MIDI Implementation chart. MIDI Basics (only in English, French and German) Contains basic explanations about MIDI. To obtain these manuals, access the Yamaha Downloads website, select your country, enter “YDP-142” or “YDP-162” in the Model Name box, then click [SEARCH]. Yamaha Downloads http://download.yamaha.com/... -
Page 8: Panel Controls And Terminals
Panel Controls and Terminals The illustrations are taken from the YDP-142. Rear YDP-142 TO PEDAL Rear Rear YDP-162 (Keyboard side) TO PEDAL (Keyboard side) (Keyboard side) ] (Standby/On) switch..... page 10 [PLAY] button ........page 25 For turning the power on or setting to standby. -
Page 9: Basic Operations
CAUTION • Do not try to use the music rest in a half-raised position. When lowering the music rest, do not release your hands from the music rest until it is all the way down. YDP-162/142 Owner’s Manual... -
Page 10: Turning The Power On
] (Standby/On) switch is in the standby status, electricity is still flowing to the instrument at a minimum level. When not using the instrument for an extended period of time, be sure to unplug the power cord from the wall AC outlet. YDP-162/142 Owner’s Manual... -
Page 11: Auto Power Off
Stand Assembly” on page 28 for instructions on installing the headphone hanger. NOTICE Standard stereo phone plug Do not hang anything other than the headphones on the hanger. Doing so may damage this instrument or the hanger. YDP-162/142 Owner’s Manual... -
Page 12: Playing The Piano
Lowest key C0: depth 0 (Standard setting) Setting range: A-1 (–3) ~ D 0 (+3) The higher the value, the more clearly that low and high sounds are heard at lower volume levels. Default Setting : C0 (0) YDP-162/142 Owner’s Manual... -
Page 13: Using The Pedals
This effect is applied to the entire sound of the instrument. To turn on the Damper Resonance: Default setting: While holding [PIANO/VOICE], press the G 2 key. To turn off the Damper Resonance: While holding [PIANO/VOICE], press the G2 key. Lowest key (Off) (On) YDP-162/142 Owner’s Manual... -
Page 14: Using The Metronome
While holding down [METRONOME], press one of the keys between C1 and G2 to set the volume of the metronome. Pressing a higher key results in higher volume, while pressing a Default setting: lower key results in lower volume. D2 (15) YDP-162/142 Owner’s Manual... -
Page 15: Changing The Touch Sensitivity
When transporting by truck, do not subject the instrument to excessive vibration or shock. If you transport the instrument fully assembled, make sure to check all the screws then tighten them as necessary. YDP-162/142 Owner’s Manual... -
Page 16: Advanced Operations
The sound of a “tonewheel” type electric organ. Often heard in jazz and rock music. Jazz Organ The rotary speed of the rotary speaker effect can be switched by using the left pedal. Stereo-sampled, large-scale strings ensemble with realistic reverb. Try combining this Strings Voice with piano in the Dual mode. YDP-162/142 Owner’s Manual... -
Page 17: Listening To The Demo Songs
Herr Christ, der ein'ge Gottes-Sohn, BWV.601 J.S.Bach Jazz Organ Original Original Strings Original Original The Demo Songs excluding original Songs are short rearranged excerpts from the original compositions. The original Demo Songs are Yamaha originals (©2012 Yamaha Corporation). YDP-162/142 Owner’s Manual... -
Page 18: Adding Variations To The Sound (Reverb)
Reverb Depth range: increases as you press higher keys. 0 (no effect) - 20 (maximum depth) While holding down [PIANO/VOICE], press the A4 key to set the Reverb Depth to the most suitable value for the current Voice. YDP-162/142 Owner’s Manual... -
Page 19: Transposing The Pitch In Semitones
To set the pitch to 442.0 Hz: Press and hold down the [DEMO/SONG] and [PIANO/VOICE] simultaneously, and press the A0 key. Lowest key To restore default pitch: Press and hold down the [DEMO/SONG] and [PIANO/VOICE] simultaneously, and press [+R] and [–L] simultaneously. YDP-162/142 Owner’s Manual... -
Page 20: Layering Two Voices (Dual Mode)
A setting of “0” produces an equal balance between two Voices. Settings below “0” increase the volume of Voice 2 while settings above “0” increase the volume of Voice1, in relation to the other. To exit from Dual mode, press [PIANO/VOICE]. YDP-162/142 Owner’s Manual... -
Page 21: Playing Duo
• Damper Pedal: Applies Sustain to the right section. • Sostenuto Pedal: Applies Sustain to both sections. • Soft Pedal: Applies Sustain to the left section. To exit from Duo, simultaneously hold down [PIANO/VOICE] and press [+R] and [–L]. YDP-162/142 Owner’s Manual... -
Page 22: Song Playback And Practice
During playback, press [+R] and [–L] simultaneously to jump to the playback position at the beginning of the Song then continue playback at the last specified tempo. Press [DEMO/SONG] or [PLAY] to stop playback. The [PLAY], [+R] and [–L] lamps turn off. YDP-162/142 Owner’s Manual... -
Page 23: Practicing A One-Hand Part
A -1 Lowest key To turn off Quick Play: Hold down [DEMO/SONG] and press the lowest key (A-1) to play from the top of the first measure (including a rest or blank). Lowest key YDP-162/142 Owner’s Manual... -
Page 24: Recording Your Performance
After the Save operation is completed, the lamps will turn off, stored (while the lamps are indicating that the Record operation has been completed. flashing). Otherwise, all recorded data will be lost. YDP-162/142 Owner’s Manual... -
Page 25: Changing The Initial Settings Of The Recorded Song
Press [PLAY] to start recording without playing the keyboard. The selected Part ([+R] or [–L]) lamp flashes. Press [REC] or [PLAY] to stop recording. All data recorded for the selected Part will be deleted, and the lamp turns off. YDP-162/142 Owner’s Manual... -
Page 26: Backing Up Data And Initializing The Settings
With Musicsoft Downloader (available for free downloading), up to 10 SMF files can be transferred from the computer to the internal memory of this instrument, and vice versa. For details, refer to the “Computer-related Operations” downloadable from Yamaha Manual Library (page 7). -
Page 27: Appendix
(page 30). The damper pedal was pressed when the power was turned on. This is not a The damper pedal does not function as expected. malfunction; release the pedal and press it again to reset the function. YDP-162/142 Owner’s Manual... -
Page 28: Keyboard Stand Assembly
Appendix Keyboard Stand Assembly The illustrations here are taken from the YDP-142. CAUTION • Be careful not to confuse parts, and be sure to install all parts in the correct direction. Please assemble in accordance with the sequence given below. - Page 29 A will project beyond D and E equally when seen from the front. 5-2 Secure A by tightening the short screws (6 × 16mm) from the front. Secure C. Securely tighten the screws on C that were attached in Step Projection of A YDP-162/142 Owner’s Manual...
-
Page 30: Connecting The Pedal Cord
• Are the pedal and power cords inserted securely into the sockets? Check the connection. • If the main unit creaks or is otherwise unsteady when you play on the keyboard, refer to the assembly diagrams and retighten all screws. YDP-162/142 Owner’s Manual... - Page 31 Key cover Top portion Do not hold here Do not hold Hold here here CAUTION Do not hold the key cover or top portion. Improper handling can result in damage to the instrument or personal injury. YDP-162/142 Owner’s Manual...
-
Page 32: Specifications
Others: PA-5D, PA-150 or an equivalent * Specifications and descriptions in this owner’s manual are for information purposes only. Yamaha Corp. reserves the right to change or modify products or specifications at any time without prior notice. Since specifications, equipment or options may not be the same in every locale, please check with your Yamaha dealer. -
Page 33: Index
............8 USB TO HOST ............15 Maintenance ............... 24 User Song ..............7 Manuals .............. 14 Metronome ..............16 Voice ............... 7 MIDI Basics ..............16 Voice List ............7 MIDI Reference .............. 12, 14 Volume YDP-162/142 Owner’s Manual... - Page 34 The model number, serial number, power requirements, etc., El número de modelo, el número de serie, los requisitos de aliment- may be found on or near the name plate, which is at the bottom ación, etc. pueden encontrarse en la placa de identificación o cerca of the unit.
- Page 36 Yamaha Global Site U.R.G., Digital Musical Instruments Division http://www.yamaha.com/ © 2012 Yamaha Corporation Yamaha Downloads 207APGR*.*-01A0 http://download.yamaha.com/ Printed in Indonesia Yamaha Manual Library ZE28920 http://www.yamaha.co.jp/manual/...