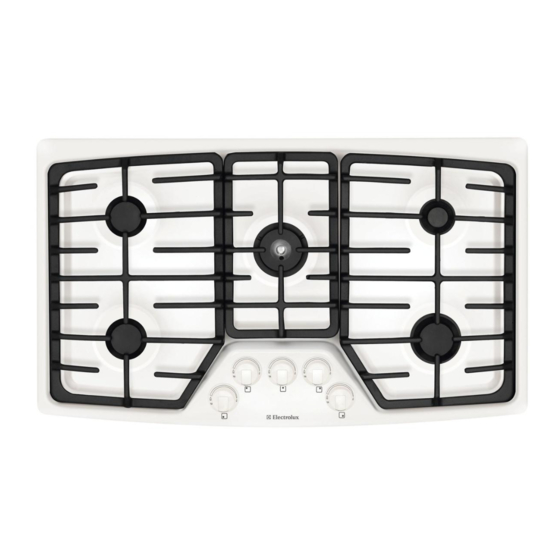
Electrolux EW36GC55G - 36" Gas Cooktop Installation Instructions Manual
30" & 36" models
Hide thumbs
Also See for EW36GC55G - 36" Gas Cooktop:
- Use and care manual (20 pages) ,
- Specifications (2 pages) ,
- Installation instructions manual (29 pages)
Advertisement
Available languages
Available languages
Quick Links
Download this manual
See also:
Use and Care Manual
INSTALLATION
AND SERVICE MUST BE PERFORMED BY A QUALIFIED
INSTALLER.
IMPORTANT:
SAVE FOR LOCAL ELECTRICAL INSPECTOR'S USE.
READ AND SAVE THESE INSTRUCTIONS
FOR FUTURE REFERENCE.
If the information
in this manual
is not followed
exactly,
a fire or explosion
may result
causing property
damage,
personal
injury or death.
FOR YOUR SAFETY:
--
Do not store or use gasoline
or other flammable
vapors
and liquids in
the vicinity
of this or any other appliance.
--
WHAT
TO DO IF YOU SMELL GAS:
•
Do not try to light any appliance.
•
Do not touch
any electrical
switch; do not use any phone
in your
building.
•
Immediately
call your
gas supplier from a neighbor's
phone.
Follow
the
gas supplier's
instructions.
•
If you cannot
reach your
gas supplier,
call the fire department.
--
Installation
and service must be performed
by a qualified
installer,
service agency
or the gas supplier.
30" Min.
(76.2 cm)
C
Gas Cooktop
Dimensions
21/2"Min.
(6.4 cm Min.)
Gas Cooktop
Cutout
Dimensions
Figure 1
MODEL
A. WIDTH
B. DEPTH
C HEIGHT
D. BOX WIDTH
E.BOX DEPTH
30" GasCooktop
30 (76.2)
213A (55.2)
4_A(10.8)
27 (68.6)
19 (48.3)
36" GasCooktop
36 (91.4)
213A (55.2)
4_A(10.8)
331/4 ( 84.5)
19 (48.3)
MODEL
MINIMUM
MAXIMUM
MINIMUM
MAXIMUM
COOKTOP
30" GasCooktop
271/4 ( 69.2)
281/2 ( 72.4)
191/8 ( 48.6)
1934 (50.2)
8 (20.3)
36" GasCooktop
337/8 (86.1)
34_A (87)
191/8 ( 48.6)
1934 (50.2)
8 (20.3)
All dimensions
are stated in inches and (cm).
Dimension H includes a 5" (12.7 cm) space underneath the cooktop for connection to gas supply line.
NOTE: Wiring
diagrams
for this cooktop
are enclosed
in this booklet
Printed in United States
318201472
(O701) Rev. A
English - pages 1-9
Espahol- paginas 10-17
Fran_ais - pages 18-26
Wiring Diagram 27-28
Advertisement

Related Manuals for Electrolux EW36GC55G - 36" Gas Cooktop


Summary of Contents for Electrolux EW36GC55G - 36" Gas Cooktop
- Page 1 INSTALLATION AND SERVICE MUST BE PERFORMED BY A QUALIFIED INSTALLER. IMPORTANT: SAVE FOR LOCAL ELECTRICAL INSPECTOR'S USE. READ AND SAVE THESE INSTRUCTIONS FOR FUTURE REFERENCE. If the information in this manual is not followed exactly, a fire or explosion may result causing property damage, personal...
- Page 2 Important Notes to the Installer • Be sure your cooktop is installed and grounded Readall instructions contained in these installation properly by a qualified installer or service technician. instructions before installing the cooktop. Remove all packing material before connecting the •...
- Page 3 13"(33cm) Max.Depth ForCabinet 30" (76.2 cm) Installed A bove Min. Clearance Cooktop. Between the Top of the Cooking Platform and Unprotected Wood or Metal 1V2" (3.8 cm) Minimum Distance Clearance Cabinet Between Rear Edge of Cutout and Nearest Combustible Surface Above Countertop.
- Page 4 Typical Under Counter Installation of an Electric Built-in Oven with a Cooktop Mounted Above Side filler panels are necessary to iso- All mounting hardware must be late the unit from adjoining cabinets. used to secure the built-in oven to This cooktop may Panel height should allow for installa- the cabinets.
- Page 5 Typical Gas Cooktop Installation Over Electric Built-in Oven Installed Under the Counter 18" (45.7 cm) Max.----_ 4" (10.2 cm) 61/2" Manifold Pi 5" ,(16.5 cm) Flare (12.7cm) Min. Union 120V/6OHz Flexible Connector Grounded Right Side of Outlet Cabinet Union Flare Wall Oven Cabinet Pressure...
- Page 6 Service Center or by phone at 1-877- local codes and requirements. Failure to follow ELECTROLUX (1-877-435-3287). instructions could result in serious injury or property damage. The qualified agency performing this work Clamp Down Information assumes responsibility for the conversion.
- Page 7 Install Pressure Regulator Once regulator is in place, open the shutoff valve in the Install thepressure r egulator withthearrowonthe gas supply line. Wait a few minutes for gas to move regulator pointing uptowardtheunitina position where through the gas line. youcanreach the access c ap. Check for leaks.
- Page 8 Do not, under any circumstances, cut or remove the Check Operation third (ground) prong from the power cord. Refer to the Use and Care Guide packaged with the cooktop for operating instructions and for care and Disconnect electrical supply cord from cleaning of your cooktop.
- Page 9 Turn on Electrical Power and Open Main Shutoff Clockwise Gas Valve Check the Igniters Operation of electric igniters should be checked after cooktop and supply line connectors have been Counterclo_ carefully checked for leaks and the cooktop has been connected to electric power. To operate the surface burner: Push in and turn a surface burner knob to the LITE position.
- Page 10 LA INSTALACION Y EL SERVICIO DEBEN SER REALIZADOS POR UN INSTALADOR CALIFICADO. IMPORTANTE: GUARDE ESTAS INSTRUCCIONES PARA USO DEL INSPECTOR ELI_CTRICO LOCAL. LEA Y GUARDE ESTAS INSTRUCCIONES PARA FUTURAS REFERENCIAS Si todas las instrucciones de este manual no son observadas a la letra, se puede ocurrir incendios...
-
Page 11: Instrucciones De Seguridad Importantes
Notas importantes para el instalador: • No deje articulos que interesan los niEos en los 1. Lea todas las instrucciones de instalaci6n antes de armarios que est_n sobre la la plancha de cocinar. realizar la instalaci6n de la plancha de cocinar. Les podria causar quernaduras graves si intentan... - Page 12 Max,profundidad degabinetes instalados por encima d ela plancha d e 30" (76.2 cm) Minimo de empotar e s13" (33cm). espacio entre la parte 11/2" (3.8 cm) Minimo Distancia superio de la entre el borde posterior del Espacio plataforma de hueco y la mas cerca superficie la plancha de combustible por encima del 18"...
- Page 13 Tipica instalacion de un horno electrico empotrado con una plancha de cocinar por encima Entrepaflos Ilenador de lados son necesarios para aislar el aparato de los armarios adyacentes. La altura de panel debe de permitir la instalaci6n Todas las fijaciones modelos de planchas de cocinar...
-
Page 14: Estufa De Gas
Instalacion tipica de la plancha de cocinar a gas por encima de un horno electrico empotrado instalado debajo del mostrador 18" (45.7 cm) Max._ 4" (10.2cm) 61/2" Tubo mOIti 5" (13.5 cm) (12.7cm) Min. UniOn Lado derecho Uni6n del armario 120V/60Hz Toma de Uni6n... - Page 15 Para hacer la conversion del gas natural al gas propano, es Instalacion de la plancha de coccinar necesario utilizar el servicio de un t_cnico calificado, in 1. Examine visualmente la plancha de cocinar para saber acuerdo con las instrucciones del fabricante y todos los si hay daho.
- Page 16 de tres patas (a tierra) que calza con un enchufe de pared de tres patas de conexi6n a tierra (vet Figura 9) para disminuir la posibilidad de peligro de choques electricos desde el artefacto. Un electricista calificado debe verificar el enchufe de pared y el circuito para asegurar que el enchufe esta conectado a tierra correctamente.
- Page 17 todaslascintas delasbases d e los 5. Ajuste bajo "LOW" para la v_lvula de quemador quemadores yverifique queestos de superficie puente o triple (Figura 12) (algunos seencuentren acomodados Tapa del rnodelos) Nota: En la valvula de quernador triple el correctamente sobre labase del quemadore ajuste <<LOW>>...
- Page 18 UN INSTALLATEUR QUALIFIE DOlT EFFECTUER L'INSTALLATION ET LE SERVICE IMPORTANT: CONSERVEZ CES INSTRUCTIONS POUR LES INSPECTEURS LOCAUX. LISEZ CES INSTRUCTIONS ET CONSERVEZ-LES POUR RI_FERENCES ULTERIEURES. Si les instructions de ce manuel ne sont pas suivies a la lettre, il pourrait en resulter un incendie ou une explosion susceptible de causer des dommages...
- Page 19 Notes importantes & I'lnstallateur • Assurez-vous que votre appareil est correcternent 1. Lisez toutes les instructions contenues dans ce feuillet install_ et rnis & la terre par un installateur ou un avant d'installer I'appareil. technicien d'entretien qualifi_. 2. Enlevez tout le materiel d'emballage avant de connec- •...
- Page 20 D6gagement minimum de 30" (76,2 cm) entre le haut de la surface de cuisson et la L'armoire sup6rieure ne bois ou en m_tal doitpasexc6der non, uneprofondeur de13"(33cm) €base de I'armoire 11/2"(3.8 cm) minimum protegee. ecommande entre le rebord arriere de decoupage et le D_gagement tour en mat6riel combustible le plus proche du dessus du...
- Page 21 Des panneaux lat@raux des@paration doivent 6treinstalles pourisoler I 'appareil desarmoires accol@es. Lahauteur despanneaux doitpermet- Les attaches a nti- treI'installation desmodeles detables decuis- Cette table decuisson p eut- versements doivent 6 tre sonapprouvees. Reportez-vous aux informa- 6treinstall@e audessus decer- utilis@es pourretenirle tionstypiques d 'unetabledecuisson _ gazins- tainsmodeles defoursencas- fourencastr@ a ux...
- Page 22 18"'Max, I*-- (45.7 cm) 4" _0.2 cm) 5" Max. 6 Y2" Min. i.5 cm) _vas_ Mur de droite de Prise de I'armoire Tube en m_tal flexible F 120V/60Hz Manchon conduit d'alimentation en gaz mise a la terre evas_ R_gulateur de pression Mur de I'armoire gauche""_"...
- Page 23 Si vous desirez convertir votre plaque de cuisson au gaz 9010 peut _tre commande en passant par votre centre de propane, servez-vous des orifices a debit fixe qui sont service ou en t_l_phonant au 1-877-ELECTROLUX (1-B77- fournis et emballes dans un sac marqu_ "POUR 435-3287).
- Page 24 Important: Enlevez tout I'emballage et la Le tuyau d'alimentation dolt _tre equipe d'un robinet documentation de la plaque de cuisson avant de d'arr_t approuve. Ce robinet devrait _tre situs dans la brancher le gaz et le courant electrique sur celle-ci. m_me piece que la plaque de cuisson eta un endroit permettant de I'ouvrir et de le fermer sans difficultY.
- Page 25 Branchez le courant electrique a la plaque de cuisson au gaz Alimentation en electricite Circuit de derivation de 120 volt, 60 Hertz, avec raise la terre appropri_e, prot6ge par un disjoncteur de 15 Emplacement de la amperes ou un fusible temporise. N'utilisez pas de plaque signal&tique rallonge...
- Page 26 2. Branchez I'alimentation en &lectricit& et ouvrez le d. Enlevez le bouton de commande et reglez le robinet robinet principal d'alimentation en gaz. comme indiqu_ a I'etape e. e. La dimension de la flamme de la portion arriere 3. V&rifiez les allurneurs externe du br01eur peut _tre augment_e ou diminu_e...
- Page 27 S_ ..ff_W SB£e_ • mOWL_ _ ..mz_oo L_ZO _ U 0 • E_Ww_0_ woz_z _ozwz • uozNz • ..E3£ m© _or0 _mOOO i.l z _ _I_...
- Page 28 c3 w > • o ul _D r {S LJ ..mm27 • <_. _wZ> • • , {xt:s • .{j_ _ZLU • , ,wwrr , ,zw_. Zzkmkc -ozwz --c0zr_z c_--_-( • • "m , z ;_ LJLJ c c_ *1' 5_w88 LJZLJ _Lm<_...