Table of Contents
Advertisement
Quick Links
Advertisement
Table of Contents

Related Manuals for Haier HLT23E1


Summary of Contents for Haier HLT23E1
- Page 1 Top Load Clothes Washer Lave-Linge Automatique á Dessus Frontal Pour des Vêtements Lavadora Automática Para las Ropas de Cargado Tapa User Manual Model # HLT23E Guide de l’Utilisateur Modéle # HLT23E Manual del Usuario Para Modelo de # HLT23E Quality Innovation Style ■...
-
Page 2: Safety Instructions
English IMPORTANT SAFETY INSTRUCTIONS Warning – To reduce the risk of fire, electric shock, or injury to persons when using your appliance, follow basic precautions, including the following: 1. Read all instructions before using the appliance. 2. Use this appliance only for its intended purpose as described in this use and care guide. - Page 3 Risk of child entrapment. Before you throw away your old washer, take off the door so that children may not easily get trapped inside. Thank you for using our Haier product. This easy-to-use manual will Model number guide you in getting the best use of your washer.
-
Page 4: Table Of Contents
English Table Of Contents PAGE SAFETY INSTRUCTIONS..............1 OPERATING INSTRUCTIONS ..............4 Parts and Features ..................4 Operations ....................5 Normal Operating Sounds ..............9 Lint Filter ....................9 Safety Lid Switch ..................9 Care and Cleaning Guide ..............10 Cleaning and Maintenance..............10 Moving and Vacationing ..............11 Storage of Your Washer ................11 Troubleshooting..................12 INSTALLATION INSTRUCTIONS ............14 Tools and Materials Required ..............14... -
Page 5: Operating Instructions
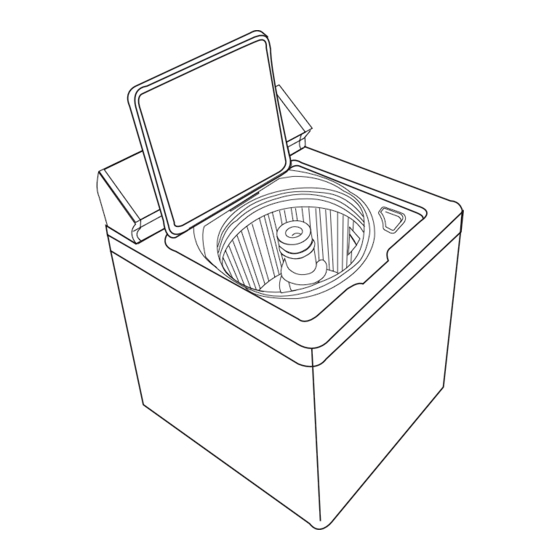
English OPERATING INSTRUCTIONS Parts and Features Control Panel Temperature Load Size 1. Temperature Control Knob 6. Inner Wash Tub 2. Load Size Knob 7. Liquid Bleach Dispenser 3. Start/Stop Knob 8. Agitator 4. Wash Cycle/Wash Time Knob 9. Net Bag (For Gentle Laundry) 5. -
Page 6: Operations
English Operations Wash Cycle/Wash Time: • Select the appropriate cycle based on the fabric type and select the appropriate wash time based on the soil level. For your convenience, the washer has REGULAR, DELICATE, HAND-WASHABLE, and PERMANENT PRESS cycles. Note: Turn the knob CLOCK WISE to your desired setting. Once the cycle is selected, then PULL OUT the knob to START. - Page 7 English Load Size/Water Level: • Depending on the size of your load that you want to wash, you can select the appropriate water level settings: Small, Medium or Large. Load Size Reset Mode: • If you need additional water, turn the knob to the RESET position. Hold it until you have the amount of water you need.
- Page 8 English Fabric Softener Dispenser: • The fabric softener dispenser is located on the top of the agitator. Dispenser will automatically release liquid fabric softener at proper time during rinse cycle. Steps to use the dispenser: 1. Pour in liquid fabric softener into dispenser as recommended by the manufacturer.
- Page 9 English Temperature Control: WASH/RINSE Temperature Temperature • Depending on what types of clothes you are washing, select the desired tempera- ture setting. See the garment for proper temperature that is recommended by gar- ment manufacturers. You can wash and rinse from five temperature combinations: WASH/RINSE TYPES OF FABRICS Hot/Cold...
-
Page 10: Normal Operating Sounds
English Normal Operating Sounds The following sounds are normally heard during the operation of the washer: • Clanging: This is normal as the heavy wet clothes in the Washer are continuously being tossed around. • Air rushing noise: This happens when the Washer tub spins at very high RPM. -
Page 11: Care And Cleaning Guide
English Care and Cleaning Guide Warning: Always unplug your washer to avoid electric shock before cleaning. Ignoring this warning may result in death or injury. Before using cleaning products, always read and follow manufacturer’s instructions and warnings to avoid personal injury or product damage. Cleaning and Maintenance •... -
Page 12: Moving And Vacationing
English Moving & Vacationing •Turn off water supply faucets and disconnect hoses. Drain water from all hoses. This will prevent from damaging due to water leakage if the hoses accidentally get ruptured or they become loose. • Disconnect electrical plug. •... -
Page 13: Troubleshooting
English Troubleshooting Washer does not operate: • Check if unit is plugged in. The plug may have come loose. • Check if the electrical wall receptacle is of proper voltage. • Check if the circuit breaker needs to be reset or if the fuse needs to be replaced. - Page 14 English Washer is making noise: • Washer may need to be reinstalled. (Check washer installation section) • Washer load may need to be re-balanced, as the load may be uneven. • Coins, loose change, buttons or other heavy objects could make noise (read Operating Guide –...
-
Page 15: Installation Instructions
English INSTALLATION INSTRUCTIONS Tools and Materials Required You will need to have following tools to help you in the installation of your Washer: • Scissors • Phillips Screwdriver • Standard Screwdriver • Pliers • Wrench • Tape Measure • Gloves •... -
Page 16: Unpacking Your Washer
English Unpacking Your Washer • Remove all packing materials. This includes the foam base and all adhesive tape holding the washer accessories inside and outside. • To remove the cardboard shipping brace from the washer, step on the cardboard base and tilt the washer back, until the security shipping screw is free from the base. -
Page 17: Steps For Installation
English Steps for Installation • Select a suitable location for the washer on a hard even surface away from direct sunlight or heat source e.g. radiators, baseboard heaters, cooking appliances etc. Any floor unevenness should be corrected with the leveling legs located on the bottom corners of the washer. - Page 18 English 3. Connect the other end to their respective washer inlet located at the rear of the washer. Note: Hot water needs to be at a temperature of at least 120˚F – 140˚F. (49˚C- 60˚C) for the soap to dissolve and to avoid soap residue remaining on clothes.
-
Page 19: Electrical Connections
English Electrical Connections Grounding Instructions This appliance must be grounded. In the event of an electrical short circuit, grounding reduces the risk of electric shock by providing an escape wire for the electric current. This appliance is equipped with a cord having a grounding wire with a grounded plug. -
Page 20: Warranty
This warranty does not cover incidental or Contact your nearest authorized service cen- consequential damages, so the above ter. All service must be performed by a Haier limitations may not apply to you. Some states authorized service center. For the name and... - Page 21 No regrese este producto a la tienda Si tiene algún problema con este producto, por favor contacte el "Centro de Servicio al Consumidor de Haier" al 1-877-337-3639 (Válido solo en E.U.A). NECESITA UNA PRUEBA DE COMPRA FECHADA PARA EL SERVICIO DE LA GARANTIA...