Table of Contents
Advertisement
Quick Links
Advertisement
Table of Contents

Related Manuals for Bosch HBF010BA1T


Summary of Contents for Bosch HBF010BA1T
- Page 1 Oven HBF010BA1T User manual and installation instructions [en]...
-
Page 2: Table Of Contents
en Safety ¡ Up to an altitude of max. 4000 m above Table of contents sea level. 1.3 Restriction on user group USER MANUAL This appliance may be used by children aged 8 or over and by people who have reduced Safety .............. 2 physical, sensory or mental abilities or inad- Preventing material damage ....... -
Page 3: Safety
Safety en WARNING ‒ Risk of burns! WARNING ‒ Risk of electric shock! The appliance and its parts that can be If the insulation of the power cord is dam- touched become hot during use. aged, this is dangerous. ▶ Caution should be exercised here in order ▶... -
Page 4: Preventing Material Damage
en Preventing material damage 2 Preventing material damage Leaving the appliance to cool down with the door open 2.1 General will damage the front of neighbouring kitchen units over ATTENTION! time. Objects on the cooking compartment floor at over Always allow the cooking compartment to cool ▶... -
Page 5: Familiarising Yourself With Your Appliance
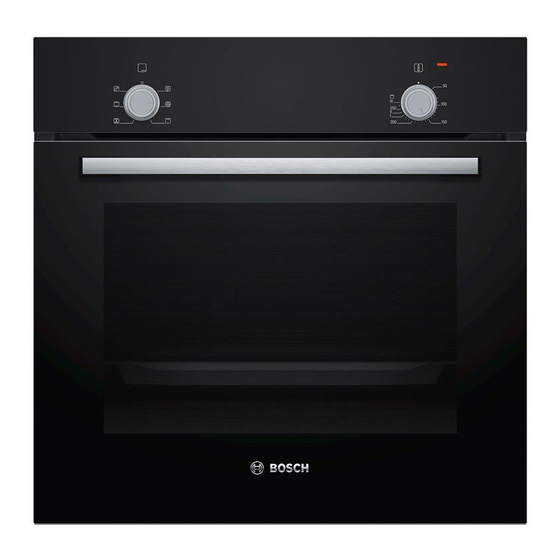
Familiarising yourself with your appliance en 4 Familiarising yourself with your appliance 4.1 Control panels Function selector Use the function selector to set the types of You can use the control panel to configure all functions heating and other functions. of your appliance and to obtain information about the You can turn the function selector clockwise or operating status. -
Page 6: Rails
en Familiarising yourself with your appliance Temperature and setting levels There are different settings for the types of heating and functions. Symbol Function Zero setting The appliance does not heat up. 50–275 Temperature range Set the temperature in the cooking compartment in °C. 1, 2, 3 Grill settings Depending on the appliance type, set the grill settings for the grill, for the large... - Page 7 You will find a comprehensive range of products for Wire rack Insert the wire rack with the open your appliance in our brochures and online: side facing the appliance door and www.bosch-home.com the curved lip facing downwards. Accessories vary from one appliance to another. When Baking tray...
- Page 8 en Basic operation 6 Basic operation Use the temperature selector to set the temperature 6.1 Switching on the appliance or grill setting. Turn the function selector to any position other than ▶ a The appliance starts heating after a few seconds. the "Off" position . When the dish is ready, switch off the appliance.
- Page 9 Rails en 9 Rails To clean the rails and cooking compartment thor- ATTENTION! oughly, you can remove the shelf supports. Incorrect assembly Never move the rail before the two hooks are se- ▶ cured fully in the upper holes. Otherwise the 9.1 Unhooking the rails enamelled coating may be damaged and break.
- Page 10 en Appliance door 10 Appliance door It is normally sufficient if you clean the outside of the Open the locking levers on the left- and right-hand appliance door. If the appliance door is very dirty on hinges. the inside and outside, you can remove the appliance door and clean it.
- Page 11 Appliance door en To remove the upper cover of the oven door, press 10.5 Attaching the appliance door in the tabs on the left and right using your fingers. Reattach the oven door in the reverse sequence to re- Pull out and remove the cover. moval.
-
Page 12: Troubleshooting
en Troubleshooting 10.6 Additional door safety WARNING ‒ Risk of burns! During long cooking times, the oven door may become Additional safety devices have been fitted to prevent very hot. contact with the oven doors. Always attach these safety Supervise small children when the oven is in opera- devices when children could come near the oven. -
Page 13: Transportation And Disposal
Transportation and disposal en 12 Transportation and disposal You can find out here how to prepare your appliance 12.2 Transporting the appliance for transportation. You will also find out how to dispose Keep the original appliance packaging. Only transport of old appliances. the appliance in the original packaging. - Page 14 en How it works Use the recommended settings when configuring WARNING ‒ Risk of fire! the appliance settings. Opening the appliance door creates a draught. WARNING ‒ Risk of scalding! Greaseproof paper may come into contact with the Hot steam may escape when you open the appli- heating element and catch fire.
- Page 15 How it works en Baking tips Topic We have compiled a few tips to help you achieve a Determine whether the Push a cocktail stick into good baking result. cake is ready. the highest point on the cake. If the cocktail stick Topic comes out clean, the You want your cake to...
- Page 16 en How it works Meal Accessory/cookware Shelf posi- Type of Temperature Cooking tion heating in °C time, minutes Yeast cake with dry topping, 2 levels Universal pan 150–170 20–30 Baking tray Yeast cake with moist topping Universal pan 160–180 30–50 Yeast cake with moist topping, 2 levels Universal pan 150–170 40–65 Baking tray...
- Page 17 How it works en Meal Accessory/cookware Shelf posi- Type of Temperature Cooking tion heating in °C time, minutes Biscuits, 2 levels Universal pan 130–150 25–35 Baking tray Biscuits, 3 levels 5+3+1 130–150 30–40 Baking tray Universal pan Meringues Universal pan 80-100 100-150 Meringues, 2 levels Universal pan 90-100 100-150...
- Page 18 en How it works 14.6 Bread and bread rolls Topic Your cake is cooked on ¡ Reduce the baking The values for bread dough apply to both dough the outside but is not fully temperature and in- placed on a tray and dough placed in a loaf tin. baked through on the in- crease the baking ATTENTION!
- Page 19 How it works en 14.7 Pizza, quiche and savoury cakes Here, you can find information about pizza, quiche and savoury cakes. Recommended settings Pizza, quiche and savoury cakes Meal Accessory/cookware Shelf posi- Type of Temperature Cooking tion heating in °C time, minutes Pizza, fresh Universal pan 190–210 20–30...
- Page 20 en How it works Meal Accessory/cookware Shelf posi- Type of Temperature Cooking tion heating in °C time, minutes Potato gratin, raw ingredients, 4 cm Ovenproof dish 150–170 60–80 deep Potato gratin, raw ingredients, 4 cm Ovenproof dish 150–160 70–80 deep, on 2 levels 14.9 Poultry, meat and fish Cookware with lid ¡...
- Page 21 How it works en ¡ When roasting, add a little liquid if the meat is lean. Tips for roasting and braising Cover the base of the glass cookware with ap- Use these tips for good results when roasting and prox. 1/2 cm of liquid. braising.
- Page 22 en How it works Meat Food Accessories/cook- Shelf posi- Type of Temperature Cooking ware tion heating in °C/grill time in mins setting Joint of pork without rind, e.g. neck, Cookware without lid 180–200 140–160 1.5 kg Joint of pork with rind, e.g. shoulder, Cookware without lid 170–190 190–200...
- Page 23 How it works en 14.10 Vegetables and side dishes This is where you can find information about preparing vegetable products that you can use as a side dish for your meals. Recommended settings Vegetables and side dishes Use the settings listed in the table. Food Accessories/cook- Shelf posi-...
- Page 24 en How it works be preserved. The thinner you cut the slices, the Ensure that neither fruit nor mushrooms overlap on quicker the drying process will be and the more flavour the wire rack. the dried food will retain. Settings ranges are specified Grate vegetables and then blanch them.
- Page 25 How it works en Recommended settings Proving dough The temperature and time are dependent on the type and quantity of the ingredients. The values in the table are therefore guide values only. Meal Accessory/cookware Shelf posi- Type of Temperature Cooking time, tion heating in °C...
- Page 26 en Installation instructions If you can use your appliance to cook on multiple levels, position baking tins either next to one another or offset on different shelves so that they are not directly one above the other in the cooking compartment. Recommended settings Baking Meal...
- Page 27 Installation instructions en 15.1 Important information This appliance is designed for use up to a maximum height of 4000 metres above sea level. Do not use the door handle to transport or install the appliance. The appliance must be disconnected from the power sup- ply whenever installation work is being carried out.
- Page 28 en Installation instructions ¡ All work on the appliance, including replacing the 15.5 Corner installation cabling, must only be carried out by the after-sales service. 15.7 Important information about the electrical connection Note the following information and ensure that: WARNING ‒ Risk of electric shock! There is a risk of electric shock if you touch live com- ponents.
- Page 29 Installation instructions en Cable colour Cable type Blue Neutral conductor (zero) Brown Phase conductor (external conductor) 15.10 Only Sweden, Finland and Norway You can also connect the appliance to the protective contact system with the enclosed plug. The plug must be accessible following the installation. If the plug can no longer be accessed following installation, provide a separator in the phases in the fixed electrical installa- tion in accordance with the set-up instructions.
- Page 32 Expert advice for your Bosch home appliances, help with problems or a repair from Bosch experts. Find out everything about the many ways Bosch can support you: www.bosch-home.com/service Contact data of all countries are listed in the attached service directory.