
Related Manuals for Siemens HB113FBS1


Summary of Contents for Siemens HB113FBS1
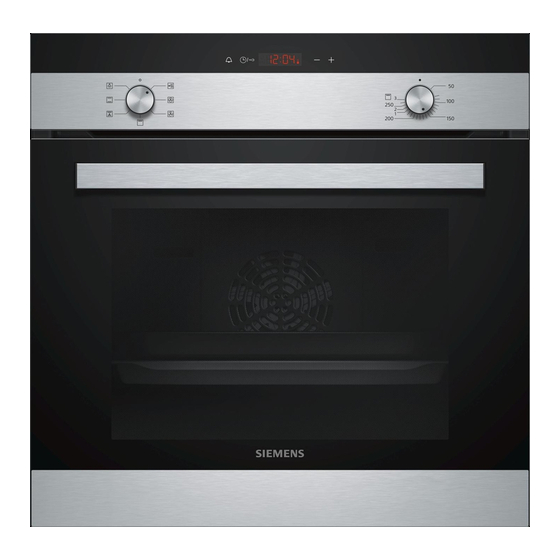
- Page 1 Oven HB113FBS1 User manual and installation instructions Register your product on My Siemens and discover exclusive ser- vices and offers. siemens-home.bsh-group.com/welcome The future moving in. Siemens Home Appliances...
-
Page 2: Table Of Contents
en Safety ¡ In private households and in enclosed Table of contents spaces in a domestic environment. ¡ Up to an altitude of max. 4000 m above sea level. USER MANUAL Do not use the appliance: Safety .............. 2 ¡ with an external timer or a remote control. Preventing material damage ....... -
Page 3: Safety
Safety en WARNING ‒ Risk of burns! WARNING ‒ Risk of electric shock! The appliance and its parts that can be Incorrect repairs are dangerous. touched become hot during use. ▶ Repairs to the appliance should only be ▶ Caution should be exercised here in order carried out by trained specialist staff. -
Page 4: Preventing Material Damage
en Preventing material damage 1.5 Halogen bulb WARNING ‒ Risk of electric shock! When changing the bulb, the bulb socket con- WARNING ‒ Risk of burns! tacts are live. The bulbs in the cooking compartment get ▶ Before replacing the bulb, ensure that the very hot. There is still a risk of burning for appliance is switched off in order to pre- some time after they have been switched off. - Page 5 Environmental protection and saving energy en Use dark-coloured, black-coated or enamelled baking tins. ¡ These types of baking tin absorb the heat particu- larly well. Open the appliance door as little as possible during operation. ¡ This maintains the temperature in the cooking com- partment and eliminates the need for the appliance to reheat.
- Page 6 en Familiarising yourself with your appliance 4 Familiarising yourself with your appliance 4.1 Control panels Buttons and display The buttons are touch-sensitive surfaces. To se- You can use the control panel to configure all functions lect a function, simply press lightly on the relev- of your appliance and to obtain information about the ant field.
-
Page 7: Familiarising Yourself With Your Appliance
Familiarising yourself with your appliance en Symbol Type of heating What it's used for and how it works Hot air gentle Cook selected dishes gently on one level without preheating. The fan distributes the heat from the ring-shaped heating element in the back wall evenly around the cooking compartment. - Page 8 facing downwards. your appliance in our brochures and online: Baking tray Slide the tray in with the sloping www.siemens-home.bsh-group.com E.g. univer- edge facing the appliance door. Accessories vary from one appliance to another. When sal pan or...
- Page 9 Before using for the first time en You can find out which accessories are available for your appliance in our online shop or from our after- sales service. 5 Before using for the first time Configure the settings for initial start-up. Clean the ap- Before heating, wipe the smooth surfaces in the pliance and accessories.
- Page 10 en Time-setting options Place the food in the cooking compartment. 8 Time-setting options Your appliance has different time-setting options which Use the or button to change the timer duration. ▶ ensure that operation can be controlled. a The appliance applies the change after a few seconds.
-
Page 11: Childproof Lock
Childproof lock en When the dish is ready, switch off the appliance. 8.4 Setting the end time ‒ You can delay the time at which the cooking time is Changing the end time due to end by up to 23 hours and 59 minutes. In order to achieve a good cooking result, you can only Notes change the set end time before operation starts and... - Page 12 en Rails Using oven cleaner in a hot cooking compartment WARNING ‒ Risk of fire! damages the enamel. Loose food remnants, fat and meat juices may catch Do not use oven cleaner in the cooking compart- ▶ fire. ment when it is still warm. Before using the appliance, remove the worst of the ▶...
-
Page 13: Appliance Door
Appliance door en 12 Appliance door It is normally sufficient if you clean the outside of the Open the locking levers on the left- and right-hand appliance door. If the appliance door is very dirty on hinges. the inside and outside, you can remove the appliance door and clean it. - Page 14 en Appliance door To remove the upper cover of the oven door, press Hold the top pane in both brackets and insert it at in the tabs on the left and right using your fingers. an angle towards the back. Pull out and remove the cover. Push the pane into both openings on the underside.
-
Page 15: Troubleshooting
Troubleshooting en The notch on the hinge must engage on both sides. Close the appliance door. 12.6 Additional door safety Additional safety devices have been fitted to prevent contact with the oven doors. Always attach these safety devices when children could come near the oven. You can purchase this special accessory from after-sales service. -
Page 16: Transportation And Disposal
en Transportation and disposal Fault Cause and troubleshooting The time flashes in There has been a power cut. the display. Reset the time. ▶ → "Setting the time", Page 11 Childproof lock is activated. lights up in the display and no ... -
Page 17: Customer Service
Customer Service en Slide all accessories, such as baking trays, into the This appliance is labelled in accord- corresponding slots with thin cardboard at the ance with European Directive edges, in order to avoid damaging the appliance. 2012/19/EU concerning used elec- Place cardboard or similar between the front and trical and electronic appliances rear side to prevent knocks against the inside of the... - Page 18 en How it works open the appliance door before the food has fin- WARNING ‒ Risk of scalding! ished cooking, you may not be able to achieve this Hot steam may escape when you open the appli- result. ance door. Steam may not be visible, depending on The hot air gentle type of heating is used to meas- the temperature.
- Page 19 How it works en ¡ Position baking tins/dishes either next to one an- Topic other or offset on different shelves so that they are You want your cake to ¡ Only grease the base not directly one above the other in the cooking com- rise evenly.
- Page 20 en How it works Meal Accessory/cookware Shelf posi- Type of Temperature Cooking tion heating in °C time, minutes Sponge cake, 2 levels Universal pan 140–160 30–55 Baking tray Shortcrust tart with dry topping Universal pan 170–190 25–35 Shortcrust tart with dry topping, Universal pan ...
- Page 21 How it works en Biscuits Meal Accessory/cookware Shelf posi- Type of Temperature Cooking tion heating in °C time, minutes Viennese whirls Universal pan 140-150 30-40 Viennese whirls, 2 levels Universal pan 140–150 30–45 Baking tray Viennese whirls, 3 levels 5+3+1 ...
- Page 22 en How it works 16.6 Bread and bread rolls Topic Your cake is unevenly ¡ Reduce the baking The values for bread dough apply to both dough browned. temperature. placed on a tray and dough placed in a loaf tin. ¡ Cut the greaseproof ATTENTION! paper to a suitable When the cooking compartment is hot, any water in-...
- Page 23 How it works en Meal Accessory/cookware Shelf posi- Type of Temperature Cooking tion heating in °C time, minutes Bread rolls, sweet, fresh, 2 levels Universal pan 160–180 15–25 Baking tray Bread rolls, fresh Universal pan 200–220 20–30 Toast with topping, x 4 Wire rack ...
- Page 24 en How it works Recommended settings Bakes and gratins Meal Accessory/cookware Shelf posi- Type of Temperature Cooking tion heating in °C time, minutes Bake, savoury, fresh, cooked ingredi- Ovenproof dish 200–220 30–60 ents Bake, sweet Ovenproof dish 180–200 50–60 Potato gratin, raw ingredients, 4 cm Ovenproof dish...
- Page 25 How it works en ¡ Placing half a potato or a small ovenproof container Poultry ¡ For duck or goose, pierce the skin on the underside in the stomach cavity of the fish provides stability. of the wings. This allows the fat to drain out. ¡...
- Page 26 en How it works Food Accessories/cook- Shelf posi- Type of Temperature Cooking ware tion heating in °C/grill time in mins setting Small turkey, 2.5 kg Cookware without lid 180–200 80–100 Turkey breast, boned, 1 kg Cookware with lid 240–260 80–100 Turkey thigh, on the bone, 1 kg Cookware without lid...
- Page 27 How it works en Topic Topic Your roasting juices are ¡ Select a smaller item Your roasting juices are ¡ Use a larger item of burnt. of cookware. too clear and watery. cookware so that more ¡ When roasting, add liquid evaporates. more liquid.
- Page 28 en How it works 16.12 Tips for keeping acrylamide levels to 16.13 Drying a minimum when cooking You can achieve outstanding drying results for the food using hot air. With this type of preserving, flavours are Acrylamide is harmful to your health and is produced concentrated as a result of the dehydration.
- Page 29 How it works en Place the dough into the cooking compartment at Tip: If you want to preheat the oven, do not carry out the specified shelf position. the final proving stage in the appliance. Recommended settings Proving dough The temperature and time are dependent on the type and quantity of the ingredients. The values in the table are therefore guide values only.
- Page 30 en Installation instructions If you can use your appliance to cook on multiple levels, position baking tins either next to one another or offset on different shelves so that they are not directly one above the other in the cooking compartment. Recommended settings Baking Meal...
- Page 31 Installation instructions en 17.1 Important information This appliance is designed for use up to a maximum height of 4000 metres above sea level. Do not use the door handle to transport or install the appliance. The appliance must be disconnected from the power sup- ply whenever installation work is being carried out.
- Page 32 en Installation instructions ¡ All work on the appliance, including replacing the 17.5 Corner installation cabling, must only be carried out by the after-sales service. 17.7 Important information about the electrical connection Note the following information and ensure that: WARNING ‒ Risk of electric shock! There is a risk of electric shock if you touch live com- ponents.
- Page 33 Installation instructions en Cable colour Cable type Blue Neutral conductor (zero) Brown Phase conductor (external conductor) 17.10 Only Sweden, Finland and Norway You can also connect the appliance to the protective contact system with the enclosed plug. The plug must be accessible following the installation. If the plug can no longer be accessed following installation, provide a separator in the phases in the fixed electrical installa- tion in accordance with the set-up instructions.
- Page 36 Valid within Great Britain: Imported to Great Britain by BSH Home Appliances Ltd. Grand Union House Old Wolverton Road Wolverton, Milton Keynes MK12 5PT United Kingdom Manufactured by BSH Hausgeräte GmbH under the trademark licence of Siemens AG *9001676944* 9001676944 (020223)