Table of Contents
Advertisement
Quick Links
Advertisement
Table of Contents

Related Manuals for Acer CG48


Summary of Contents for Acer CG48
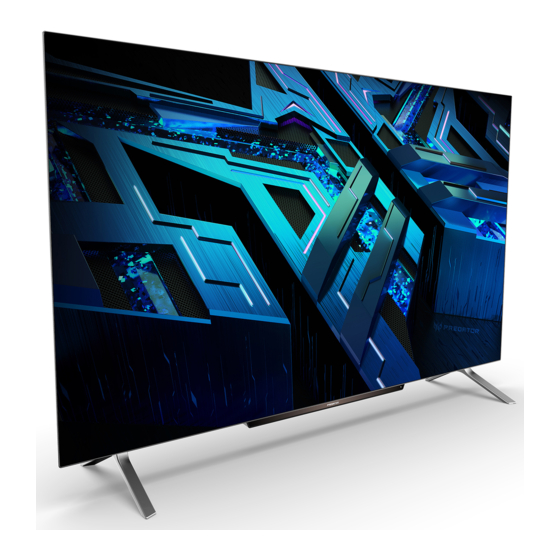
- Page 1 Acer OLED Monitor User Guide...
- Page 2 Serial number: __________________________________ Date of purchase: ________________________________ Place of purchase: _______________________________ Acer and the Acer logo are registered trademarks of Acer Incorporated. Other companies’ product names or trademarks are used herein for identification purposes only and belong to their respective companies.
-
Page 3: Information For Your Safety And Comfort
Information for your safety and comfort Safety instructions Read these instructions carefully. Keep this document for future reference. Follow all warnings and instructions marked on the product. Special notes on OLED monitors The following are normal with the OLED monitor and do not indicate a problem. •... - Page 4 of the product and to protect it from overheating. These openings must not be blocked or covered. The openings should never be blocked by placing the product on a bed, sofa, rug or other similar surface. This product should never be placed near or over a radiator or heat register, or in a built-in installation unless proper ventilation is provided.
-
Page 5: Product Servicing
We at Acer are very conscious of the environmental effects of our business and strive to identify and provide the best working procedures to reduce the environmental impact of our products. -
Page 6: Disposal Instructions
Do not throw this electronic device into the trash when discarding. To minimize pollution and ensure utmost protection of the global environment, please recycle. For more information on the Waste from Electrical and Electronics Equipment (WEEE) regulations, visit https://www.acer-group. com/sustainability/en/our-products-environment.html. OLED pixel statement The OLED unit is produced with high-precision manufacturing techniques. -
Page 7: Tpc (Temporal Peak Control)
TPC (Temporal Peak Control) If the monitor has not been in use for a periold of time , the TPC starts to reduce the brightness of the screen gradually. After 1 minutes of inactivity, the screen brightness will be gradually reduced to 60% approxiamate within 4.5mins. - Page 8 • Give your eyes regular breaks by looking away from the monitor and focusing on a distant point. • Blink frequently to keep your eyes from drying out. Display • Keep your display clean. • Keep your head at a higher level than the top edge of the display so your eyes point downward when looking at the middle of the display.
- Page 9 (“x” = 0~9, a ~ z, A ~ Z, or blank) We, Acer Incorporated, hereby declare under our sole responsibility that the product described above is in conformity with the relevant Union harmonization legislations as below Directive and following harmonized...
- Page 10 Acer America Corporation 333 West San Carlos St., San Jose Suite 1500 CA 95110, U. S. A. Tel : 254-298-4000 Fax : 254-298-4147 www.acer.com Federal Communications Commission Supplier’s Declaration of Conformity This device complies with Part 15 of the FCC Rules. Operation is subject to the following...
-
Page 11: Table Of Contents
Table of Contents Information for your safety and comfort ............ii Safety instructions .....................ii Special notes on OLED monitors ................ii Cleaning your monitor ..................ii Accessibility ..................... ii Safe listening ....................ii Warnings ......................ii Using electrical power ..................iii Product servicing .................... iv Potentially explosive environments .............. -
Page 12: Package Contents
OLED monitor Quick start guide Warranty card Warranty card Predator CG48 Quick Guide USB cable USB Type-C cable HDMI 2.1 cable (Optional) (Optional) (Optional) AC Power cord DP Cable (Optional) Remote Controller Monitor Base (x2) CG48 User Guide English... -
Page 13: Power Key And Navi Key
Input Source Input Source Navi Bu on Navi Key DC Power Power Key (Up/Down/Le /Right) (Up/Down/Left/Right) OK Bu on OK Button Main Menu Main Menu Exit Exit Modes Modes Volume Down Volume Down Volume Up Volume Up CG48 User Guide English... -
Page 14: Installing The Monitor Base
2. Align and install the monitor bases into the mounting slots on the bottom of the monitor. 3. Secure the monitor bases with the four screws. CG48 User Guide English... - Page 15 4. Lift the monitor to an upright position and place it on a table. Note: We highly recommended to use at least two people to lift the monitor. 5. Remove the plastic bag around the monitor. Removing the plastic bag CG48 User Guide English...
-
Page 16: Installing A Wall-Mount Bracket (Optional)
1. Place the monitor on a table, with the screen facing down. Note: We recommend that you cover the table surface with soft cloth to prevent damage to the monitor. 2. Remove the four screws securing the monitor bases. 3. Remove the monitor bases. CG48 User Guide English... - Page 17 If installing with a wall mounting kit, it is recommended to use VESA mounting kit (200mm x 200mm) with M 6 x 10 (L) mm screws to fix your monitor on the wall. • Please check monitor weight in advance to choose suitable load capacity of VESA arm stand. CG48 User Guide English...
-
Page 18: Monitor Introduction
• Type-C: 3840x2160 supports up to 138Hz in overclocking mode, FreeSync Premium and HDR10 function. • HDMI(2.0): 3840x2160 supports to 60Hz. • HDMI(2.1): 3840x2160 supports up to 138Hz in overclocking mode, FreeSync Premium and HDR10 function. CG48 User Guide English... -
Page 19: Connecting The Cables
Audio output is only for audio output model. Please check user manual for more instruction. • Charging USB devices just in DC on mode. • Type-C Port can support power delivery charging up to 20V/3.25A. • All of standard downstream port USB-A support 5V / 0.9A. CG48 User Guide English... -
Page 20: Connecting Ac Power Cord
The power saving states will be kept until a control signal has been detected or the keyboard or mouse is activated. The recovery time from Active OFF state back to ON state is around 3 seconds. CG48 User Guide English... -
Page 21: Display Data Channel (Ddc)
Return DP_PWR 19-pin color display signal cable PIN No. Description PIN No. Description TMDS Data2+ TMDS Data2 Shield TMDS Data2- TMDS Data1+ TMDS Data1 Shield TMDS Data1- TMDS Data0+ TMDS Data0 Shield TMDS Data0- TMDS Clock+ CG48 User Guide English... - Page 22 Reserved (N.C. on device) DDC/CEC Ground +5V Power Hot Plug Detect 24-pin USB Type C cable PIN No. Description PIN No. Description SSTXp1 SSTXp1 SSTXn1 SSTXn1 VBUS VBUS SBU1 SBU1 VBUS VBUS SSTXn2 SSTXn2 SSTXp2 SSTXp2 CG48 User Guide English...
-
Page 23: Standard Timing Table
1680x1050 60Hz 1920x1080 60Hz 1920x1080 120Hz 1920x1080 144Hz 2560x1440 60Hz 2560x1440 75Hz 2560x1440 100Hz 2560x1440 120Hz 2560x1440 144Hz 3840x2160 60Hz 3840x2160 120Hz 3840x2160 138Hz Note: HDMI-1, HDMI-2 and HDMI-3 don’t support UHD 120Hz and UHD 138Hz. CG48 User Guide English... -
Page 24: Using The Shortcut Menu
Input Switch Hot Key Main Menu Hot key1 (default: Modes) To choose scenario mode (Action, Racing, Sports) which user-defined profile to use or scenario mode (User, Standard, ECO, Graphics, HDR). Modes Ac on Racing Sports User Standard Graphics Move CG48 User Guide English... -
Page 25: Hot Key2 (Default: Brightness)
Information Hot Key : Show Monitor Information and Reset control function. Modes Hot Key : To change Modes Hot Key menu. Exit Hot Key to exit current page and store. CG48 User Guide English... - Page 26 PIP/PBP functions will be grayed out. • Super Sharpness: Super Sharpness technology can simulate high-resolution images by boosting the pixel density of the original source to make images sharper and clearer. Turn this function On or Off. CG48 User Guide English...
- Page 27 Color CG48 User Guide English...
- Page 28 - Cool: Decreases the color temperature and makes the screen image to appear cooler with a blue tint. - User: Enables you to adjust the hue and saturation of each color (red (R), green (G) and blue (B)) manually. CG48 User Guide English...
- Page 29 Reset to reset all 6-axis hue values to their factory defaults. • 6-axis Saturate: Adjust the red, green, blue, yellow, magenta and cyan saturation. Select Reset to reset all 6-axis saturation values to their factory defaults. CG48 User Guide English...
- Page 30 Audio • Volume: Adjust the volume level from 0 (audio muted) to 100. • Mute: Select On to mute audio or Off to unmute. Gaming CG48 User Guide English...
- Page 31 Screen Position = -1, Between Center and Bottom Note: • This function is only enabled if Ultra-Wide Mode is set to “21:9” or “32:9”. • This function is grayed out when Ultra-Wide Mode is set to “Off”. CG48 User Guide English...
- Page 32 OSD is locked (“OSD Locked”). During lock-state, you cannot use any User Control keys. To unlock the OSD, press and hold the joystick for about 5 seconds until the “OSD Unlock” message is displayed on the screen. CG48 User Guide English...
- Page 33 System CG48 User Guide English...
- Page 34 • USB 3.2: Select On to enable USB 3.2 or Off to disable the function. Note: If your phone supports USB Type-C connection but cannot display on the screen, please turn on USB3.2 at OSD menu. CG48 User Guide English...
- Page 35 During Image Retention Refresh process do not turn off monitor and do not unplug the power. • Image Retention Refresh can be pressed only when the screen has been used for than 4 hours, before the time is exceeded it will be grayed out. CG48 User Guide English...
- Page 36 (Game Mode: Action, Game Mode: Racing or Game Mode: Sports) where you want to save settings to. Press the joystick on your preferred game mode to save the settings. CG48 User Guide English...
-
Page 37: Troubleshooting
- Check if the computer system is switched on and in power saving/standby mode. Note: Acer monitor is purposed for video and visual display of information obtained from electronic devices. Regulatory Compliance Regulatory Compliance...