Siemens RDS110 User Manual
Smart thermostat
Hide thumbs
Also See for RDS110:
- Quick manual (68 pages) ,
- User manual (59 pages) ,
- Mounting instructions (4 pages)
Table of Contents
Advertisement
Quick Links
Advertisement
Table of Contents

Related Manuals for Siemens RDS110


Summary of Contents for Siemens RDS110
- Page 1 RDS110 Smart Thermostat User Guide A6V10877569_en--_f 2021-12-15...
- Page 2 Table of Contents About this user guide ................... 5 Revision history ....................5 Reference documents ..................6 Before you start ....................6 Summary ......................8 Brief description ....................8 Inbox items ...................... 8 Equipment combinations ................. 8 Mounting and installation ................11 Getting started with your thermostat ............
- Page 3 Exploring the app using demo mode............. 44 Viewing and controlling devices in different locations ........44 9.4.1 Viewing and filtering devices ............44 9.4.2 Widgets ..................45 9.4.3 Switching between "Away" and "At home" ........46 9.4.4 Setting schedules ................46 9.4.5 Switching between heating and OFF modes .........
- Page 4 11.1.24 How does the thermostat adapt start optimization of outside temperature? .................. 56 11.1.25 How does the temperature switching differential work? ....57 11.2 Technical specifications ................57 11.3 Cyber security disclaimer ................57 11.4 Limited warranty .................... 57 Index ........................58 4 | 59 A6V10877569_en--_f...
-
Page 5: Revision History
About this user guide Revision history 1 About this user guide 1.1 Revision history Edition Date Changes December 2021 Updated operation information about the mobile application. July 2021 Added information about universal contact. Updated device association information. Added section 9.7. Added description of optimum start control. -
Page 6: Reference Documents
If you find any lack of clarity while using this document, or if you have any criticisms or suggestions, please contact your local point of contact (POC) at the nearest branch office. Addresses for Siemens RCs are available at www.siemens.com/sbt. Conventions for text... - Page 7 The 'i' symbol identifies supplementary information and tips for an easier way of working. Document use/ request Before using products from Siemens Industry, Inc., it is important that you read the to the reader documents supplied with or ordered at the same time as the products (equipment, applications, tools, and so on) carefully and in full.
-
Page 8: Brief Description
Brief description 2 Summary 2.1 Brief description Smart Thermostat RDS110 is designed to control your heating system in apartments, single family homes, dormitories and other residential-type as well as light commercial spaces. Apart from traditional operations performed directly on the hardware unit, remote operations that use a mobile app are also allowed for your convenience. - Page 9 AQR2540Nx AQR2535N x (T+r.h.) 1410 AQR2540Nx * The documents can be downloaded from http://siemens.com/bt/download specifying the product number as shown in the above table. 1) Requires a mounting plate and/or design frames. 2) With digital display. Actuators Type of unit Product no.
- Page 10 White decoration frame and ARG100.01 A6V1119064 metallic mounting plate for S55772-T102 installation on rectangular conduit box (1 set) * The documents can be downloaded from http://siemens.com/bt/download specifying the product number as shown in the above table. 10 | 59 A6V10877569_en--_f...
-
Page 11: Mounting And Installation
Mounting and installation 3 Mounting and installation Mounting NOTICE We recommend hiring licensed installers to mount and install the thermostat. ● The thermostat is suitable for wall mounting. ● The recommended height is 1.50 m above the floor. ● Do not mount the thermostat in recesses, shelves, behind curtains or doors, or above or near heat sources. - Page 12 Mounting and installation 4. Disconnect all the labeled wires and then remove your old thermostat. NOTICE! Do not dispose of your old thermostat as part of household if it contains mercury in a sealed tube. Contact a thermostat recycling organization, for example, www.thermostat-recycle.org, for safe disposal of your old thermostat.
- Page 13 Mounting and installation 9. Screw the power unit on the mounting plate tightly. 10. Attach the front module horizontally. Ensure that each side of the front module aligns with the power unit and press the corners in the order illustrated below: Top (1);...
-
Page 14: Getting Started With Your Thermostat
Getting started with your thermostat Setup wizard 4 Getting started with your thermostat 4.1 Setup wizard When your thermostat is powered up for the first time, a setup wizard displays to guide you through the following procedures: ● Setting a display language ●... -
Page 15: Thermostat Display Overview
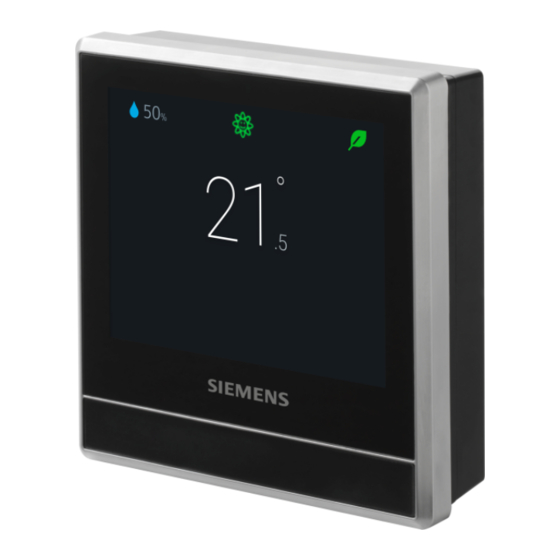
Getting started with your thermostat Thermostat display overview 4.2 Thermostat display overview Normal display Tap to display detailed information and additional settings. Displays whether the system is in an energy-optimized mode. If the leaf is red, predefined settings were changed. Tap the red leaf to restore the energy-saving mode. - Page 16 Getting started with your thermostat Thermostat display overview Idle display Relative room humidity Shows room air quality: ● If the icon is green, the air quality is good. ● If the icon is orange, the air quality is moderate. ● If the icon is red, the air quality is poor.
-
Page 17: Home Screen Icon Overview
Getting started with your thermostat Home screen icon overview 4.3 Home screen icon overview Icon Description The device is connected to the cloud but not associated with an account. “At home” mode is on. “AWAY“ mode is on. You must manually tap to activate this mode. -
Page 18: Presence Detection Using The Built-In Pir Sensor
Presence detection Presence detection using the built-in PIR sensor 5 Presence detection 5.1 Presence detection using the built-in PIR sensor By using a built-in presence detection sensor (also called PIR (Passive infrared detector) sensor), the thermostat detects occupancy and then does the following: ●... - Page 19 Presence detection Presence detection using the built-in PIR sensor The width of each cell. It is 80 cm (31 in). The thermostat. The height of each cell. It is 80 cm (31 in). The area that the PIR sensor can detect. Change from “Unoccupied”...
-
Page 20: Approach Detection
Presence detection Approach detection 5.2 Approach detection The thermostat has a built-in approach sensor. It can detect someone approaching the thermostat. If activity is sensed within 10 cm, it will switch from its idle screen to the main home screen with full temperature and setpoint display. Sensor position The location of the approach sensor. -
Page 21: Temperature Control
Operating the thermostat on the device Temperature control 6 Operating the thermostat on the device 6.1 Temperature control Your thermostat acquires the room temperature using the built-in sensor and/or the external room temperature sensor, and maintains the setpoint by delivering control commands to heating equipment. -
Page 22: Operating Modes
Operating the thermostat on the device Operating modes 6.2 Operating modes 6.2.1 Operating modes with manual switchover Operating mode overview Operating Description mode At home You can use this mode when you stay at home or inside the room where the thermostat is located. When the thermostat operates under this mode, you can toggle to let the thermostat run automatically following a scheduler, or toggle to... -
Page 23: Wlan Connection
Operating the thermostat on the device WLAN connection 6.2.2 Operating modes in a scheduler Operating mode overview Operating mode Description Comfort Makes you feel comfortable when you are at home or inside the room where the thermostat is located. Makes you feel comfortable when you are asleep. It also Economy helps save energy. - Page 24 Operating the thermostat on the device WLAN connection – > , and then wait for the thermostat to discover the networks nearby. 3. Tap your desired network. If necessary, tap to scroll through the networks to select one. 4. For secured networks, enter the relevant password, and then tap “Connect”. Note: For more information about the administrator password, see Creating an administrator password [➙...
-
Page 25: Screen Lock Protection
Operating the thermostat on the device Screen lock protection 3. Tap “Push Button Setup”, and then press the WPS button on your WPS- supported router to start the discovery of your thermostat. > “Connect”. 4. On the thermostat, tap 5. Tap “OK” once the thermostat is connected to the network successfully. 6.4 Screen lock protection 6.4.1 Locking the home screen Whether the thermostat is selected for commercial or home use, you can set a... -
Page 26: Turning On/Off The Supply Of Domestic Hot Water
Operating the thermostat on the device Turning on/off the supply of domestic hot water you use your thermostat for the first time. You can also create, modify or deactivate it later under “Advanced Settings”. Actions protected by the administrator password are listed as below. You can find them under “Advanced Settings”... -
Page 27: Basic Settings
Operating the thermostat on the device Basic settings 6.7 Basic settings Under basic settings, you can: ● Lock/Unlock the home screen [➙ 25] ● Change the temperature unit [➙ 21] ● Connect to a WLAN network [➙ 23] if the thermostat is selected for home use ●... -
Page 28: Changing A Time Zone
Operating the thermostat on the device Advanced settings The first three options are described in separate sections. This section describes the remaining options. 6.8.1 Changing a time zone When there is internet connection, the thermostat automatically detects the time zone for you. However, you can also change it manually. Change the time zone 1. - Page 29 Operating the thermostat on the device Advanced settings No. Application Descriptions Factory Range Dependencies settings settings A DC 0…10 V X1 floor Floor temperature at -50 ° C -50…80 ° C temp. ref. at 0 V of the 0-10 V external floor input in terminal X1 temperature...
- Page 30 Operating the thermostat on the device Advanced settings Heating setpoints No. Application Descriptions Factory Range Dependencies settings settings 0…50 ° C 11. Comfort The default heating 21 ° C setpoint for “Comfort” heating setpoint defined in a scheduler. This setpoint must be higher than that for protection.
- Page 31 Operating the thermostat on the device Advanced settings Humidification setpoints No. Application Descriptions Factory Range Dependencies settings settings 0…100%RH Displays only if 16. Comfort The humidification 40%RH you’ve humidity setpoint for “Comfort”. This setpoint configured the setpoint must be output as “Humidifier (no higher than the humidification...
- Page 32 Operating the thermostat on the device Advanced settings Dehumidification No. Application Descriptions Factory Range Dependencies setpoints settings settings 0…100%RH Displays only if 20. Comfort The dehumidification 60%RH you’ve dehum. setpoint for “Comfort”. This setpoint configured the setpoint must be output as “Dehumidifier lower than the dehumidification...
- Page 33 Operating the thermostat on the device Advanced settings Functions No. Application Descriptions Factory Range Dependencies settings settings 1…8760 h 24. Pump/valve A circle kicked in to 500 h Application kick cycle turn on a constantly setting No. 38; idle pump or valve This function for a minimum period displays only if...
- Page 34 Operating the thermostat on the device Advanced settings Minimum switchover No. Application Descriptions Factory Range Dependencies time adjustment settings settings 0…60 min You’ve 29. Humidify (no The minimum 3 min fan) min. ON working time of a configured the time standalone thermostat humidifier.
- Page 35 Operating the thermostat on the device Advanced settings Other settings No. Application Descriptions Factory Range Dependencies settings settings 0…5 A 35. Heating The electrical load of 0 A (2 A if you’ve device your connected electrical heating device. It is selected load recommended to...
- Page 36 Operating the thermostat on the device Advanced settings No. Application Descriptions Factory Range Dependencies settings settings 38. Heating Indicates a different Default Slow control loop time for PWM (Pulse Medium Width Modulation) Default pulse periods. You Fast can select the default setting to let 2-position the system configure...
-
Page 37: Changing System Setup
NOTICE When selecting the gas boiler application, make sure hydronic heating is used. The RDS110.R is not calibrated for use with a gas-fired duct heating system. Change basic settings 1. On the Home screen, tap , then tap and . - Page 38 Operating the thermostat on the device Advanced settings The thermostat switches to “OFF” mode, if the input is configured as “Normally open”. Thus, if a thermostat in a hotel is configured to “Normally open” for this input, “Normally open” is activated when a hotel guest pulls out the room card.
-
Page 39: Change Advanced Settings
Operating the thermostat on the device Advanced settings ● Configure the output as a free-standing humidifier, a free-standing dehumidifier or a domestic hot water boiler. ● Activate or deactivate the optimum start settings for heating. Activating optimum start settings allows for pre-heating unoccupied spaces (a scheduled “Unoccupied”... -
Page 40: Factory Reset
Operating the thermostat on the device Software updates Resetting the thermostat You can reset the thermostat to factory settings. A factory reset clears all local settings but keeps the link between the thermostat and user account. Note that after a factory reset, the connection state in the mobile application is indicated as “offline”... -
Page 41: Green Leaf Indication
Green leaf indication 7 Green leaf indication The Green leaf indication informs the user that the system offers an energy- optimized mode. When the heating output is energized and if the thermostat detects that the room air temperature is 2 K higher than the default heating setpoint for “Comfort”... -
Page 42: Air Quality Display
Air quality display 8 Air quality display By using a built-in VOC (Volatile Organic Compounds) sensor, your thermostat measures the room air quality and shows the air quality status symbol on the local idle screen. In the mobile app, the status is indicated by text instead. Symbol on the Text in the Description... - Page 43 9 Operating the thermostat from the mobile application 9.1 Downloading the application You can download the “Siemens Smart Thermostat RDS” application from Google Play or App Store. 9.2 Account creation and pairing Create an account and associate it with thermostat(s) for wireless control.
- Page 44 You can filter devices or locations by entering one of the following keywords in the "Filter" field under "Locations" or "Setup": ● Location name ● Location address ● Device room name ● Device model name, for example, RDS110 ● Device state, for example, Online 44 | 59 A6V10877569_en--_f...
- Page 45 Operating the thermostat from the mobile application Viewing and controlling devices in different locations Device connection state Online The thermostat is connected to the cloud server. Offline The thermostat is not connected to the cloud server. Several reasons may result in disconnection: ●...
-
Page 46: Setting Schedules
Operating the thermostat from the mobile application Viewing and controlling devices in different locations When viewed horizontally, the widget also allows you to scroll among available pages. NOTE: You can show/hide the trend in the chart by tapping the specific legend atop. -
Page 47: Switching Between Heating And Off Modes
Operating the thermostat from the mobile application Viewing and controlling devices in different locations 3. On the vertical time line, tap a specific time to set a switching point. A switching point marker displays next to the time. To fine-tune the switching point, drag the switching point marker to the desired time. - Page 48 Operating the thermostat from the mobile application Checking device notifications Control humidifying/dehumidifying from the mobile app , and then tap “Humidify” or "Dehumidify". 1. On any widget screen, tap 2. Select “OFF” or “AUTO”. 9.5 Checking device notifications The mobile application notifies you of condensation risks and universal contact state changes.
-
Page 49: Device Setup
Operating the thermostat from the mobile application Device setup 9.6 Device setup 9.6.1 Configuring device locations If multiple devices are added to an account, all devices are grouped in the default location. Move some of them to a different location for better device management. Move newly added devices to a different location 1. -
Page 50: Viewing Device Information
Operating the thermostat from the mobile application Viewing mobile app info Activate account Users are invited and an account activation email is sent with a code within an hour. The mobile app is downloaded and installed. 1. In the login page, tap "Activate account". 2. -
Page 51: Access Support
Operating the thermostat from the mobile application Viewing mobile app info Access Support ◈ > “Info” > "Support". A6V10877569_en--_f 51 | 59... -
Page 52: Disassembly And Disposal
Your thermostat is designed for maintenance-free operations. Disassembling should only be done after the power supply is off and is only limited to the licensed installers only for disposal purpose. Siemens doesn’t guarantee the user’s safety if the disassembly process is managed by any unlicensed installers. -
Page 53: Frequently Asked Questions
Appendices Frequently asked questions 11 Appendices 11.1 Frequently asked questions 11.1.1 What should I do if I forget the screen lock code? Try using the administrator password to unlock the screen. Unlock the screen using the administrator password 1. On the hardware unit screen indicating that the screen lock code is incorrect, tap the question mark >... - Page 54 Appendices Frequently asked questions 11.1.5 What is the difference between Administrated WLAN and Private WLAN? “Administrated WLAN *” is supposed to connect to an infrastructure network managed by facility managers; “Private WLAN” fits for owner cases and is supposed to connect to a home network. Selecting the WLAN connection type differently only affects the entry to WLAN management: ●...
-
Page 55: What Does The "Pump/Valve Kick" Function Mean
Appendices Frequently asked questions ● The thermostat connected to a WLAN network once and could display time correctly. ● The thermostat hasn't been powered off for more than three minutes. Lacking either of the above conditions may result in incorrect time display. 11.1.11 Can I set the time manually? No, you can’t. -
Page 56: What Should I Do If I Forget My Account's Password
Appendices Frequently asked questions See Account creation and pairing for more information about account creation. 11.1.18 What should I do if I forget my account’s password? You must reset the password following the on-screen instructions in the app. 11.1.19 How long are date and time valid, if power fails and the thermostat has no connection to the cloud? If the power fails and thermostat powers up within five minutes, date and time are correct. -
Page 57: Technical Specifications
11.4 Limited warranty The software included in this product is licensed for use subject to the Siemens end-user license agreement (EULA) posted at www.siemens.com/smart-thermostat or this software identified by product model or part number on the website. The open source software (OSS) information about the software can also be found from the same website. - Page 58 Index Index add ..............24 configuration ............. 24 account connect ............. 23 creation ............. 43 push button ............24 management ............. 43 administrator passwords ........25 screen lock create ..............26 create ..............25 manage ............. 26 modify ............... 25 remove ..............
- Page 59 Issued by Siemens Switzerland Ltd Smart Infrastructure Global Headquarters Theilerstrasse 1a CH-6300 Zug +41 58 724 2424 www.siemens.com/buildingtechnologies © Siemens Switzerland Ltd, 2021 Technical specifications and availability subject to change without notice. A6V10877569_en--_f...