Table of Contents
Advertisement
Quick Links
TK-D240
TK-D340
TK-D348R
VHF DIGITAL TRANSCEIVER
UHF DIGITAL TRANSCEIVER
USER GUIDE
This User Guide covers only the basic operations
of your radio. Ask your dealer for information on
any customized features they may have added to
your radio. For using details instruction manual
(User Manual), refer to the following URL.
http://manual.kenwood.com/en_contents/search/keyword
B5A-0931-10 (M, C)
Advertisement
Chapters
Table of Contents

Related Manuals for Kenwood TK-D340


Summary of Contents for Kenwood TK-D340
- Page 1 TK-D240 TK-D340 TK-D348R VHF DIGITAL TRANSCEIVER UHF DIGITAL TRANSCEIVER USER GUIDE This User Guide covers only the basic operations of your radio. Ask your dealer for information on any customized features they may have added to your radio. For using details instruction manual (User Manual), refer to the following URL.
-
Page 2: Table Of Contents
SELECTING A ZONE AND CHANNEL ........... 15 TRANSMITTING ................15 RECEIVING.................. 16 LED INDICATOR STATUS ............16 Firmware Copyrights The title to and ownership of copyrights for fi rmware embedded in KENWOOD product memories are reserved for JVC KENWOOD Corporation. -
Page 3: Notices To The User
JVC KENWOOD. The user could lose the authority to operate this equipment if an unauthorized change or modification is made. INFORMATION TO THE DIGITAL DEVICE USER REQUIRED BY THE FCC This equipment has been tested and found to comply with the limits for a Class B digital device, pursuant to Part 15 of the FCC Rules. -
Page 4: Precautions
Ensure that there are no metallic items located between the transceiver and the battery pack. • Do not use options not specifi ed by KENWOOD. • If the die-cast chassis or other transceiver part is damaged, do not touch the damaged parts. - Page 5 If an abnormal odor or smoke is detected coming from the transceiver, switch the transceiver power off immediately, remove the battery pack from the transceiver, and contact your KENWOOD dealer. • Use of the transceiver while you are driving may be against traffi c laws.
- Page 6 Information concerning the battery pack: The battery pack includes fl ammable objects such as organic solvent. Mishandling may cause the battery to rupture producing fl ames or extreme heat, deteriorate, or cause other forms of damage to the battery. Please observe the following prohibitive matters.
- Page 7 DANGER • Use only the specifi ed charger and observe charging requirements! If the battery is charged in unspecifi ed conditions (under high temperature over the regulated value, excessive high voltage or current over regulated value, or with a remodeled charger), it may overcharge or an abnormal chemical reaction may occur.
- Page 8 DANGER • Do not touch a ruptured and leaking battery! If the electrolyte liquid from the battery gets into your eyes, wash your eyes with fresh water as soon as possible, without rubbing your eyes. Go to the hospital immediately. If left untreated, it may cause eye-problems.
-
Page 9: Unpacking And Checking Equipment
fi le a claim with the carrier immediately. SUPPLIED ACCESSORIES • Antenna <TK-D340 C type only> ..........1 • Speaker/ microphone jack cover ..........1 • Speaker/ microphone locking bracket ........1 • Belt clip (KBH-10) ..............1 •... -
Page 10: Installing The Channel Stopper
INSTALLING THE CHANNEL STOPPER You can set the channel stopper position for channels 2, 4, 6, 8, 10, 12, and 14. Inserting the Channel stopper prevents unnecessarily selecting channels which do not exist. • Selecting a channel which does not exist causes a continuous error tone to sound. -
Page 11: Installing/ Removing The Battery Pack
INSTALLING/ REMOVING THE BATTERY PACK The battery pack is not charged at the factory; charge it before use. CAUTION ◆ Do not short the battery terminals or dispose of the battery by fi re. ◆ Never attempt to remove the casing from the battery pack. 1 Align the battery pack with the back of the transceiver, then press the battery pack... -
Page 12: Installing The Belt Clip
INSTALLING THE BELT CLIP If necessary, attach the belt clip Belt clip using the two supplied M3 x 8 mm screws. Note: ◆ If the belt clip is not installed, its mounting location may get hot during continuous transmission or when left sitting in a hot environment. -
Page 13: Installing The Optional Speaker/ Microphone (Or Headset)
• To remove the cap, hold the top of the cap in place with your fi nger while inserting a 2 mm or smaller fl at blade screwdriver under the bottom of the cap. Slowly slide the screwdriver in until its tip touches the tab inside the cap, then gently pry the cap up (handle of screwdriver moving away from the transceiver) to remove the cap. -
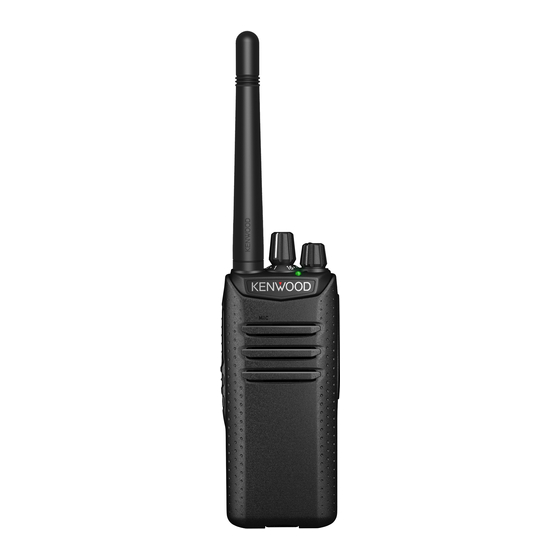
Page 14: Orientation
ORIENTATION Microphone Speaker Antenna Battery pack a Selector Rotate to change the operating channel. b LED indicator For the LED indicator status, refer to page 16. c Power switch/ Volume control Turn clockwise to switch ON the transceiver. To switch OFF the transceiver, turn counterclockwise until a click sounds. -
Page 15: Basic Operations
BASIC OPERATIONS SWITCHING POWER ON/OFF Turn the Power switch/ Volume control clockwise to switch the transceiver ON. Turn the Power switch/ Volume control counterclockwise fully to switch the transceiver OFF. ADJUSTING THE VOLUME Rotate the Power switch/ Volume control to adjust the volume. Clockwise increases the volume and counterclockwise decreases it. -
Page 16: Receiving
RECEIVING Select the desired zone and channel. If signaling has been programmed on the selected channel, you will hear a call only if the received signal matches your transceiver settings. Receiving Group Calls When you receive a group call and the received group ID matches the ID set up on your transceiver, you can hear the caller’s voice. - Page 17 TK-D240 TK-D340 TK-D348R VHF 数字手持对讲机 UHF 数字手持对讲机 用户指南 本用户指南只涵盖了您对讲机的基本操作。关于经 销商可能给您的对讲机添加的任何定制功能的信 息,请询问您的经销商。关于使用说明书(用户手 册)的使用详情,请参阅以下 URL。 http://manual.kenwood.com/en_contents/search/keyword 使用之前请阅读以下信息 : 使用产品前请仔细阅读本用户指 南,并请妥善保管。...
- Page 18 鸣谢惠购 我们感谢您选择 KENWOOD 作为您的数字对讲机应用程序。 目录 用户注意事项 ................ 3 注意事项..................4 拆开包装箱并检查设备 ............9 随机附件..................9 准备工作 ................9 安装天线..................9 安装信道止动器................ 10 安装 / 拆卸电池组 ..............11 安装皮带夹................12 安装扬声器 / 麦克风插孔盖 ............ 12 安装扬声器 / 麦克风选件(或头戴式耳机) ......13 介绍 ..................14 基本操作...
-
Page 19: 用户注意事项
用户注意事项 ◆ 政府法律禁止在政府控制的区域内使用未经当局许可的无线 电发射机。 ◆ 非法使用将会受到罚款或监禁处罚。 ◆ 只能由有资格的技术人员进行维修。 安全性: 操作人员应该知道并了解对讲机操作的一般危险。 本产品所包含的A M B E +2 语音编码技术受Digital Voice System, Inc. 知识产权( 包括专利权、版权和贸易机密) 的保护。 该语音编码技术仅许可用于本通信设备。该技术的使用人员明确禁止 尝试提取、移除、破译、反向编译或拆除目标代码, 或以其他方式将目标代码转换为人类可读形式。美国专利编号 #8,315,860, #8,595,002, #6,199,037, #6,912,495, #8,200,497, #7,970,606, and #8,359,197. 产品中有毒有害物质或元素的名称及含量 有毒有害物质或元素 部件名称 铅 汞 镉 六价铬 多溴联苯... -
Page 20: 注意事项
注意事项 • 对讲机和电池潮湿时请勿对其充电。 • 对讲机和电池之间应确保无金属物品。 • 请勿使用非KENWOOD指定的选件。 • 如果压铸底盘和对讲机的其他部件损坏,请勿接触损坏的 部件。 • 如果头戴式耳麦或头戴耳机连接到对讲机上,请减小对讲机 的音量。当打开静噪时,一定要注意音量。 • 靠近各种机械和电器时,请勿将麦克风电缆挂在颈部周围, 因为机械和电器可能会使电缆缠住。 • 请勿将对讲机放置在不稳定的表面上。 • 应确保天线的末端不会碰到您的眼睛。 • 对讲机长时间用于发射时,散热器和底座会变热。更换电池 时,请勿接触这些位置。 • 请勿将对讲机浸入水中。 • 安装选件前,一定要关闭对讲机的电源。 • 充电器是将装置与交流电源线断开的设备。应随时提供交流 插头。 • 若处理电池,一定要符合您所在国家或地区的法律和法规。 警告 在下列场合要关闭对讲机的电源: • 易爆环境(易燃气体、粉尘、金属粉末以及粒状粉末等)。 • 加油时或停在加油站时。 • 在易爆场所附近。... - Page 21 注意 • 请勿因任何理由拆卸或改装对讲机。 • 汽车正在行驶时,请勿将对讲机放在安全气囊上或其附近。 安全气囊打开时,对讲机可能会弹出,击中驾驶员或乘客。 • 当接触天线端时或天线罩露出任何金属部件时,请勿发射。 此时发射可能会引起高频灼伤。 • 如果对讲机发出异常气味或冒烟,请立即关闭对讲机的电 源,从对讲机中取出电池,并与KENWOOD经销商联系。 • 驾车时使用对讲机可能违反交通方面的法律。请查阅并遵 守您所在地区的驾车法规。 • 请勿将对讲机暴露于极热或极冷的气候条件下。 • 请勿将电池(或电池盒)与金属物体放在一起携带,因为 金属物体可能会使电池端子短路。 • 如果更换的电池不正确,会有爆炸的危险。请务必更换相 同类型的电池。 • 对讲机安装了市场销售的条带时,请不要拿着条带挥舞对 讲机。打着人可能会造成伤害,碰着物品可能损坏对讲机。 • 在空气干燥地区操作对讲机时容易产生电荷(静电)。当 在这样的情况下使用耳机附件时,可能会使对讲机通过耳 机与您的耳朵之间发生放电。在这种场合下我们建议您只 使用扬声器/麦克风,以避免放电。 • 对讲机安装了市场销售的条带时,请不要拿着条带挥舞对 讲机。打着人可能会造成伤害,碰着物品可能损坏对讲机。 • 如果使用市售的颈带,小心不要让带子夹在附近的机器上。 • 切勿将对讲机长时间暴露在阳光直射的地方,也不要将其放 置在加热设备附近。...
- Page 22 有关电池组的信息: 电池含有有机溶剂等易燃物体。错误操作可能会造成电池 裂开,从而着火或产生过热,使电池失效或造成电池其它 形式的损坏。 危险 • 请勿拆卸或改造电池! 电池具有保护功能以及一个保护电路,防止危险。若遭受 严重损坏,电池可能会产生热量或烟雾、破裂、或起火。 • 请勿造成电池短路! 请勿使用任何金属(如回形针或电线)连接+极和–极。请 勿用装金属物体(如电线、链式项链或发夹)的容器放置 或储存电池。如果电池短路,将会产生过大电流,电池可 能会发热或冒烟、破裂或着火。还将造成金属物体发热。 • 请勿焚烧或加热电池! 若绝缘体熔化,则气体排放出口或安全功能会受损,或者若 电解液点燃,电池可能会产生热量或烟雾、破裂或起火。 • 请勿将电池放置在火、炉或其他发热器附近(达到80°C 以上的区域)或在上述环境下使用电池! 如果聚合物隔离器由于高温而熔化,个别电池可能会内部 发生短路,电池可能会产生热量或烟雾、破裂或起火。 • 避免将电池浸入水中或通过其他方式将其弄湿! 如果电池潮湿,使用前用干燥的毛巾将其擦干。如果电池 保护电路受损,电池可能会在过大电流(或电压)下充 电,可能会发生异常化学反应。电池可能会产生热量或烟 雾、破裂或起火。 • 请勿在炉火或直接阳光照射下给电池充电! 如果电池保护电路受损,电池可能会在过大电流(或电压) 下充电,可能会发生异常化学反应。电池可能会产生热量或 烟雾、破裂或起火。...
- Page 23 危险 • 请勿用任何物体刺入电池、用工具打击或踩踏电池! 这有可能破坏电池或使电池变形,造成短路。电池可能会 产生热量或烟雾、破裂或起火。 • 请勿震动或抛扔电池! 一次冲击可能会造成电池泄露、产生热量或烟雾、破裂或 起火。如果电池保护电路受损,电池可能会在过大电流( 或电压)下充电,可能会发生异常化学反应。 • 若电池损坏,请勿使用! 电池可能会产生热量或烟雾、破裂或起火。 • 请勿直接在电池上焊接! 如果绝缘体熔化、或气体排放出口或安全功能受损,电池 可能会产生热量或烟雾、破裂或起火。 • 请勿颠倒电池极性(和端子)! 当反向给电池充电时,可能会发生异常化学反应。在某些 情况下,放电时可能会有大的意想不到的电流流过。电池 可能会产生热量或烟雾、破裂或起火。 • 请勿反向给电池充电或反向连接! 电池具有正负极。如果电池未能轻易地与充电器或操作设备 连接,请勿强迫连接; 检查电池极性。如果电池反向连接到 充电器上,将会反向充电,可能会发生异常化学反应。电池 可能会产生热量或烟雾、破裂或起火。 • 请勿接触破裂以及漏液的电池! 如果电池电解液流入眼中,尽快用清水冲洗眼睛,不得揉 擦眼睛。立即去医院救治。如果未及时处理,可能会造成 眼部疾病。...
- Page 24 警告 • 电池充电请勿超过规定的时间! 如果超过规定时间后电池还在充电,请立即停止充电。电 池可能会产生热量或烟雾、破裂或起火。 • 请勿将电池放入微波容器或高压容器中! 电池可能会产生热量或烟雾、破裂或起火。 • 请将破裂和泄露的电池远离明火! 如果电池发生泄露(或电池发出难闻的气味),立即将其 远离易燃区。电池中的电解液泄露能轻易引发火灾,并可 能会产生热量或烟雾、破裂或起火。 • 请勿使用异常电池! 如果电池散发出难闻的气味、看起来颜色发生变化、变形或 由于其他原因而看起来异常,将其与充电器或操作设备断开 并不再使用。电池可能会产生热量或烟雾、破裂或起火。...
-
Page 25: 拆开包装箱并检查设备
拆开包装箱并检查设备 小心拆开通信机的包装。如果下列物品有缺失或损坏,请 立即向承运人提出书面要求。 随机附件 • 天线 <仅TK-D340 C型附带>............ 1 • 扬声器/麦克风插孔盖 ............... 1 • 扬声器/麦克风锁定架 ............... 1 • 皮带夹 (KBH-10) ............... 1 • 螺丝 (M3 x 8 mm) ..............2 • 信道止动器 ................1 • 柔性线路板 <仅TK-D348R附带>..........1 • PC板隔离柱 <仅TK-D348R附带> ..........4 •... -
Page 26: 安装信道止动器
安装信道止动器 您可以为信道2、4、6、8、10、12和14设置信道止动器位 置。插入信道止动器可防止意外选择不存在的信道。 • 选择不存在的信道可导致发出连续的出错提示音。 1 将信道开关置于信道1的位置,然后将信道开关旋钮从通 信机中抽出。 • 如果信道开关不在信道1的位置,说明旋钮可能安装不正确,此 时可能无法调换信道。 2 插入信道止动器。 3 将信道止动器的箭头置于通信机的最高信道号处。 4 重新插入信道开关旋钮。 箭头 信道止动器... -
Page 27: 安装/拆卸电池组
安装/拆卸电池组 电池组在出厂时未充电。使用前请为其充电。 注意 ◆ 请勿短接电池端子或用焚烧方式处置电池。 ◆ 切勿尝试除掉电池组的外壳。 1 将电池组与通信机的背部对 准,然后按压电池组使其与 通信机贴紧,直至通信机底 座 上 的 释 放 锁 牢 牢 锁 定 就 位。 2 若要取出电池组,请上提通 信机底座上的安全锁,然后 按压安全锁下面的释放锁。 3 在按住释放锁的同时,将电 池组从通信机中抽出。... -
Page 28: 安装皮带夹
安装皮带夹 必要时,请利用附带的两颗M3 x 皮带夹 8 mm螺丝安装皮带夹。 注 : ◆ 如果不安装皮带夹,在连续发射或 长时间置于炎热环境的情况下,其 安装位置可能会变热。 注意 ◆ 安装皮带夹时,切勿使用胶水来防止螺丝松脱,否则可能 导致通信机损坏。胶水中所含的丙烯酸酯会引起通信机的 后面板开裂。 安装扬声器/麦克风插孔盖 不使用扬声器/麦克风选件时,请安装扬声器/麦克风插孔 盖。 注 : ◆ 为保持通信机的防水效果,请务必用随带的插孔盖将扬声器 / 麦克风插孔盖好。 1 盖好插孔盖,使锁定突起插入通信机 凹槽内。 2 将插孔盖放好,然后向通信机底端方 向按压,直至插孔盖上的突起咔哒一 声就位。 • 若要取下插孔盖,请用手指握住插孔盖的顶端,同时在插孔盖 的底部插入一把厚度不超过2 mm的平刃螺丝刀。将螺丝刀缓慢 滑入,直至其尖端触及插孔盖内的突起,然后轻轻将插孔盖上 撬(螺丝刀的手柄向通信机外移动),从而将插孔盖取下。... -
Page 29: 安装扬声器/麦克风选件(或头戴式耳机
安装扬声器/麦克风选件(或头戴式耳机) 注 : ◆ 使用扬声器 / 麦克风或头戴式耳机时,通信机不具备完全防水 性能。 1 将 扬 声 器 / 麦 克 风 ( 或 头 戴 式 耳 机)插头插入通信机的扬声器/麦 克风插孔中。 2 将锁定架置于扬声器/麦克风(或 头戴式耳机)插头上,使锁定突 起插入通信机凹槽内。 • 下压锁定架,将其滑入就位。 3 将锁定架放好,然后向通信机底端 方向按压,直至锁定架上的突起咔 哒一声就位。 • 若要取下锁定架,请沿底座上推 锁定架。... - Page 30 介绍 麦克风 扬声器 天线 电池组 a 选择器 旋转可切换工作信道。 b LED指示灯 有关LED指示灯的状态,请参阅第16页。 c 电源开关/音量控制 顺时针转动可打开通信机电源。若要关闭通信机电源, 请逆时针转动,直至听到咔哒声。旋转可调整音量。 d PTT(按下通话)开关 按住此开关并对着麦克风讲话,即可进行发射。 e 侧面按键1 按下可启动其可编程功能。 f 侧面按键2 按下可启动其可编程功能。 g 扬声器/麦克风插孔 将扬声器/麦克风插头或头戴式耳机插头插入该插孔中。...
-
Page 31: 基本操作
基本操作 切换电源开/关 顺时针转动电源开关/音量控制可打开通信机电源。 逆时针将电源开关/音量控制转到底可关闭通信机电源。 音量调节 旋转电源开关/音量控制可调节音量。顺时针旋转可提高 音量,逆时针旋转则降低音量。 选择区域和信道 1 利用设置为[区域上调]或[区域下调]的键选择想要的区 域。 • 每个区域可包含多个信道。 2 利用选择器旋钮(默认)选择想要的信道。 • 每个信道均可进行发射和接收设置。 发射 1 选择想要的区域和信道。 2 按下设置为[监听]或[静噪打开]的键,检查信道是否空 闲。 • 如果信道繁忙,请等待直至信道空闲。 3 按PTT开关并对着麦克风讲话。松开PTT开关将转换到 接收状态。 • 为获得最佳的音质,嘴和麦克风之间应保持约3~4厘米的 距离。... -
Page 32: Led指示灯状态
接收 选择想要的区域和信道。如果在所选信道上设置了信令, 则只有在接收到符合通信机设置的信令时,您才能听到呼 叫。 接收组呼 接收到组呼且接收到的组ID 与通信机设置的ID 匹配时, 即可听到呼叫者的声音。 接收单呼 接收到单呼时,会响起振铃。若要响应呼叫,请按住PTT 开关并像在常规发射期间那样对着通信机讲话。 LED指示灯状态 指示灯颜色 含义 亮红色 正在发射。 亮绿色 正在接收呼叫。 闪烁蓝色 通信机密码功能被编程。 闪烁红色 发射时电池电量不足。 闪烁绿色 正在扫描。 闪烁橙色或蓝 正在接收编码后的呼叫(信令等)。 色* 闪烁红色/橙色 尚未设置或无法使用所选的信道。 * 对应对讲机操作,您的经销商可以将 LED 设定为闪烁橙色或 蓝色。...