Advertisement
Quick Links
Advertisement

Related Manuals for Electrolux E36DF76TPS


Summary of Contents for Electrolux E36DF76TPS
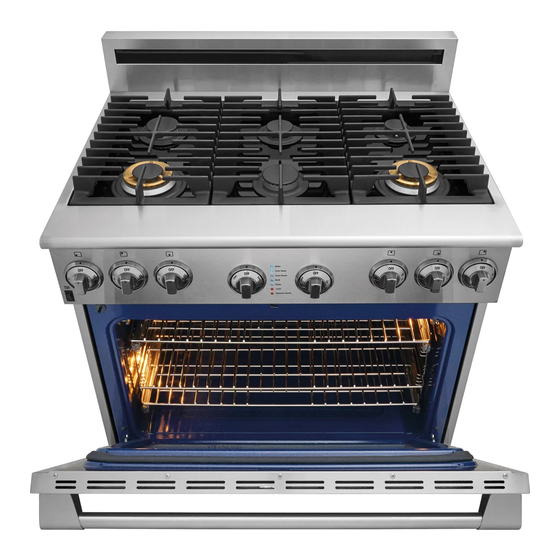
- Page 1 Dual Fuel Range Use and Care Guide 808638901 Rev A May 2017...
-
Page 2: Table Of Contents
On the Electrolux Website Want to learn more about your product or discover additional Electrolux appliances? If so, then check out the link below for product overviews, a list of features, photo galleries, product manuals (complete owner’s guide, installation instructions, wiring diagrams, product spec sheets), specifications, reviews, related accessories, and video guides. - Page 3 Important Safety Instructions Read all instructions before using this appliance. This manual contains important safety symbols and instructions. Please pay If the information in this manual is not attention to these symbols and follow all followed exactly, a fire or explosion may instructions given.
- Page 4 Important Safety Instructions Read all instructions before using this appliance. IMPORTANT INSTRUCTIONS FOR GROUNDING INSTRUCTIONS UNPACKING AND INSTALLATION Avoid fire hazard or electrical shock. Failure IMPORTANT - Read and follow the below to follow this warning may cause serious instructions and precautions for unpacking, injury, fire, or death.
- Page 5 Important Safety Instructions Read all instructions before using this appliance. IMPORTANT INSTRUCTIONS FOR USING For personal safety, the appliance must be THE APPLIANCE properly grounded. For maximum safety, the power cord must be plugged into an electrical Storage In or On Appliance—Flammable outlet that is correctly polarized and properly materials should not be stored in an oven or microwave, near surface burners or...
- Page 6 Important Safety Instructions Read all instructions before using this appliance. Do not use oven or warmer drawer (if Do not attempt to operate the appliance equipped) for storage. during a power failure. If the power fails, always turn off the appliance. If the appliance is not turned off and the power resumes, Never use your appliance as a space heater electric surface elements may resume...
- Page 7 Important Safety Instructions Read all instructions before using this appliance. Never leave surface burners unattended at Do not use a broiler pan without its insert. high heat settings — Boil overs cause Broiler pans and inserts allow dripping fat to smoking and greasy spill overs that may drain away from the high heat of the broiler.
- Page 8 Important Safety Instructions Read all instructions before using this appliance. IMPORTANT INSTRUCTIONS FOR SELF Do not touch a hot oven light bulb with a damp cloth. Doing so could cause the bulb to CLEANING OVENS break. Handle halogen lights (if equipped) with paper towels or soft gloves.
- Page 9 Before Setting Surface Controls BEFORE SETTING SURFACE CONTROLS Gas Surface Burners Setting Regular Burner Caps Your appliance is equipped with gas surface burners that have different BTU ratings. The ability to heat food quicker and in Burner Cap larger volumes increases as the burner size increases (Figure Regardless of size or location, always select cookware that is Burner Cap Lip...
- Page 10 Before Setting Surface Controls Assembling the G5 burners NOTE: When the burner ring is properly seated, it will click into place. When the burner cap is properly set in place it should not IMPORTANT! For proper ignition: Burner Ring Alignment move out of the recessed area of the burner head.
- Page 11 Before Setting Surface Controls Setting Proper Burner Flame Size Cookware Material Types The most popular materials available are: Never extend the flame beyond the outer edge of the cooking • Aluminum - Excellent heat conductor. Some types of food utensil. A higher flame wastes energy and increases your risk of will cause it to darken (Anodized aluminum cookware being burned by the flame (Figure...
- Page 12 With the griddle in position over the burners, set the griddle on top of the grates. A griddle can be purchased as an accessory by ordering online at www.electrolux-store.com/cooking-accessories.html. Always place the griddle on the grate before lighting the burner. Be sure the griddle is positioned correctly and stable before use to prevent hot spills and possible burns.
-
Page 13: Setting Surface Burners
Setting Surface Burners SETTING SURFACE BURNERS Your appliance is equipped with different sized surface burners that have different BTU ratings (Figure 9). The ability to heat food quicker and in larger volumes increases as the burner size increases. It is important to select cookware that is suitable for the amount and type of food being prepared. - Page 14 Setting Surface Burners For most cooking: Home Canning Start on the highest setting and then turn to a lower setting to Be sure to read and observe all the following points when home complete the process. Use the recommendations below as a canning with your appliance.
-
Page 15: Before Setting Oven Controls
Before Setting Oven Controls BEFORE SETTING OVEN CONTROLS Oven Vent Location The oven vent is located in the front of the oven just above the Pinholes for setting control knobs. When the oven is in use, warm air passes rack on glide through this vent for proper air circulation and provides good baking results in the upper oven. - Page 16 Before Setting Oven Controls Installing (Ladder) Rack Supports To install oven rack supports: Insert the rack supports into the rack support brackets on the oven side as shown and put back screws at their original location. Always install oven rack support before turning on the oven (when the oven is cool).
-
Page 17: Setting Oven Controls
Setting Oven Controls SETTING OVEN CONTROLS Bake Conv Bake Conv Roast Broil Clean -Lock -Remove Racks Oven Light Switch - On the left side of the oven control Oven Minimum and Maximum Control Settings panel; use to turn oven lights on or off while oven is in use. Feature Min. - Page 18 Setting Oven Controls Bake Use the bake function to cook most food items with normal cooking temperatures. The convection fan will rotate when Bake first starts. This is normal. The fan will turn off when the oven reaches the set temperature and the control will beep once to indicate the oven is ready.
- Page 19 Setting Oven Controls Convection Bake Convection bake uses a fan to circulate the oven heat evenly and continuously (Figure 19). The improved heat distribution allows for even cooking results. Cooking with multiple racks may slightly increase cook times for some food types, but the overall result will be time saved.
- Page 20 Setting Oven Controls Broil IMPORTANT! Broil Auto Shut Off: Always broil with the oven door closed. If the door is left open for more than one minute Use the broil feature to cook meats requiring direct exposure to when the oven temperature is above 350°F, the control will beep reminding you to close the door.
- Page 21 Setting Oven Controls Recommended Broiling Times Use the broiling table below for approximate recommended broiling times for the types of meat listed. It might be necessary to increase or decrease broiling times or adjust the broiling pan to different rack positions. If the food you are broiling is not listed in the table, follow the instructions provided in your recipe and watch the broiling process closely.
- Page 22 Setting Oven Controls Convection Roast IMPORTANT! The oven Conv Roast light will blink and the oven will not turn on if the temperature dial is set higher than Convection roast combines a cook cycle with the convection fan 500ºF (260ºC). and element to rapidly roast meats and poultry.
- Page 23 Setting Oven Controls Convection Roasting tips: • Preheating for convection roast is not be necessary for most meats and poultry. • Arrange oven racks so large poultry or other cuts of meat are on the lowest oven rack position. on the lowest rack of the oven.
- Page 24 Setting Oven Controls Cleaning the Oven • Do not clean the oven door gasket (Figure 25). Do not use any cleaning materials on the oven door gasket. Doing so A self cleaning oven automatically cleans itself by using much may damage the gasket. The woven material of the oven higher temperatures than those used for cooking.
- Page 25 Setting Oven Controls To start a clean cycle: To start clean after cancelling: If self clean was cancelled shortly after being started, and the oven interior did not reach high self clean temperatures, the All oven racks, rack ladders, and accessories must be removed next clean cycle may be set as soon as the oven door unlocks from the oven interior to avoid possible damage.
-
Page 26: Care And Cleaning
Care and Cleaning CARE AND CLEANING Cleaning Various Parts of Your Oven Before cleaning any part of the oven, ensure all controls are turned off and the oven is cool. Remove spills and any heavy soiling as soon as possible. Surface Type Recommendation Control knobs... - Page 27 Care and Cleaning General Cleaning Cleaning the Glass Cooktop Refer to the table at the beginning of this chapter for more detailed information about cleaning specific parts of the range. To avoid possible burns do not attempt any of the cleaning instructions provided below before turning off all surface burners and allow them to cool.
- Page 28 Care and Cleaning Cleaning the Sealed Burners Cleaning the G5 Burner Head Ignition Port Each G5 burner head has a small ignition port as shown in the illustration below (Figure 31). To avoid possible burns do not attempt any of the cleaning instructions provided below before turning off all surface burners Should you experience ignition problems it may be this port is and allow them to cool.
- Page 29 Care and Cleaning To clean the G5 surface burner head and ports: To prevent grease from baking on, remove the broiler pan from the oven as soon as cooking is completed. Use potholders or Lift the burner cap from the burner head to clean the burner oven mitts because the broiler pan is extremely hot.
- Page 30 Care and Cleaning Removing and Replacing the Oven Door Oven door The door is very heavy. For safe, temporary storage, lay the door hinge flat with the inside of the door facing down. locations To prevent possible burns, do not attempt to remove the oven door until the oven has completely cooled.
-
Page 31: Before You Call
Before You Call BEFORE YOU CALL OVEN BAKING Oven Baking For best cooking results, heat the oven before baking cookies, breads, cakes, pies, or pastries, etc. There is no need to preheat the oven for roasting meat or baking casseroles. The cooking times and temperatures needed to bake a product may vary slightly from your previously owned appliance. -
Page 32: Solutions To Common Problems
Before You Call SOLUTIONS TO COMMON PROBLEMS Before you call for service, review the following list. It may save you time and expense. Possible solutions are provided with the problem listed: Problem Solution Poor baking results • Many factors affect baking results. Use proper oven rack position. Center food in the oven and space pans to allow air to circulate. - Page 33 Before You Call Oven smokes excessively when • Incorrect setting. Follow broiling instructions in the “Broil” section on page broiling. • Meat too close to the broil element. Reposition broil rack to provide proper clearance between the meat and broil element. Remove excess fat from meat. Cut remaining fatty edges to prevent curling, but do not cut into the lean portion of the meat.
-
Page 34: Warranty
WARRANTY Your appliance is covered by a one year limited warranty. For one year from your original date of purchase, Electrolux will repair or replace any parts of this appliance that prove to be defective in materials or workmanship when such appliance is installed, used, and maintained in accor- dance with the provided instructions. - Page 35 electrolux.com/shop...