
Related Manuals for Samsung ES15A Series


Summary of Contents for Samsung ES15A Series
-
Page 1: Table Of Contents
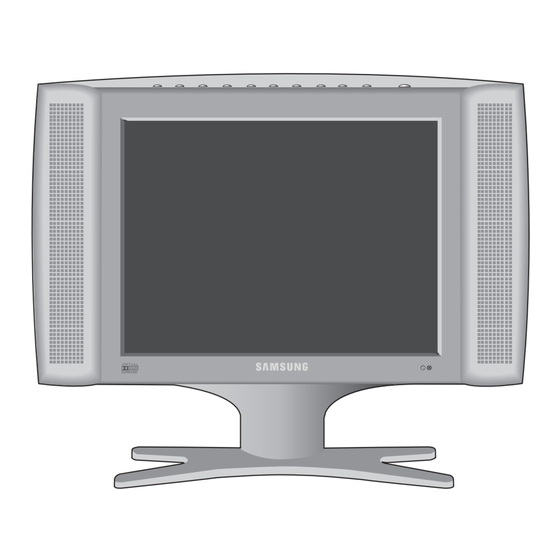
TFT-LCD MONITOR ES15A*/ES17A* SERVICE Manual TFT-LCD MONITOR CONTENTS 1. Precautions 2. Product Specifications 3. Disassembly & Reassembly 4. Alignment & Adjustments 5. Troubleshooting 6. Exploded View & Parts List 7. Electrical Parts List 8. Block Diagram 9. Wiring Diagram 10. Schematic Diagrams 11. -
Page 2: Precautions
1 Precautions Follow these safety, servicing and ESD precautions to prevent damage and to protect against potential hazards such as electrical shock. 1-1 Safety Precautions 1-1-1 Warnings For continued safety, do not attempt to modify the (READING SHOULD circuit board. NOT BE ABOVE 0.5mA) Disconnect the AC power and DC Power Jack before servicing. - Page 3 1 Precautions 1-2 Servicing Precautions WARNING: An electrolytic capacitor installed with the wrong polarity might explode. Caution: Before servicing units covered by this service manual, read and follow the Safety Precautions section of this manual. Note: If unforeseen circumstances create conflict between the following servicing precautions and any of the safety precautions, always follow the safety precautions.
-
Page 4: Product Specifications
2 Product Specifications 2-1 Specifications Description Item ES15A* ES17A* LCD Panel TFT-LCD panel, RGB vertical stripe, normaly TFT-LCD panel, RGB vertical stripe, normaly white, 15-Inch viewable, 0.297 mm pixel pitch white, 17-Inch viewable, 0.264 mm pixel pitch Scanning Frequency Horizontal : 30 kHz ~ 69 kHz (Automatic) 30 kHz ~ 81 kHz (Automatic) Vertical : 56 Hz ~ 85 Hz (Automatic) - Page 5 2 Product Specifications 2-2 Pin Assignments Sync Type Separate H/V Composite H/V Sync-on-green Pin No. Green Green Green + H/V Sync. Blue Blue Blue GND (DDC Return) GND (DDC Return) GND (DDC Return) GND-Red GND-Red GND-Red GND-Green GND-Green GND-Green GND-Blue GND-Blue GND-Blue No Connection...
- Page 6 2 Product Specifications 2-3 Timing Chart This section of the service manual describes the timing that the computer industry recognizes as standard for computer-generated video signals. Table 2-1. Timing Chart Mode VESA VGA2/ VGA3/ 640/75 Hz 640/85 Hz 800/75 Hz 800/85 Hz 1024/60Hz 1024/75Hz...
- Page 7 2 Product Specifications Memo ES15A*/ES17A*...
-
Page 8: Disassembly & Reassembly
3 Disassembly and Reassembly This section of the service manual describes the disassembly and reassembly procedures for the ES15A*/ES17A* monitor. WARNING: This monitor contains electrostatically sensitive devices. Use caution when handling these components. 3-1 Disassembly Cautions:1. Disconnect the monitor from the power source before disassembly. 2. - Page 9 3 Disassembly and Reassembly 2. Push down the stopper and slide the lamp unit. 3. Please take out the lamp units from the LCD module. 4. Please fix the new lamp units on the LCD module : opposite process 2 and 3 Replacement of lamp unit should be done at the power off state and recommended clean bench condition.
- Page 10 4 Alignments and Adjustments 4-1 General Alignment Instuction 1. Usually, a color TV-VCR needs only slight touch-up adjustment upon installation. Check the basic characteristics such as height, horizontal and vertical sync. 2. Use the specified test equipment or its equivalent. 3.
- Page 11 4 Alignments and Adjustments Memo ES15A*/ES17A*...
-
Page 12: Troubleshooting
5 Troubleshooting 5-1 No Power Does proper DC 14 V appear at Check SMPS PCB and Adapter. DC jack connected to CN801? Does proper DC 5 V appear at Check IC803. Pin 1 of IC803? Does proper DC 14V appear at Check IC803. - Page 13 5 Troubleshooting 5-2 No Video (PC Signal) Power indicator is green. Does the signal appear at C106, C107, C108 Check CN100. of R, G, B input? Does the clock pulse Check X100 and related circuit of X100. appear at X100? Does the clock pulse appear at Check related circuit of IC102.
- Page 14 5 Troubleshooting 5-3 No Picture (TV, Video, S-Video, Scart Video) Check Pin 71, 72 (S-Video) Check the CN806 (Tuner) and the and Pin 73 (VCR) and Pin 74 CN200 (Scart connector) and the (Scart-Vin) and Pin 75 (RF-CVBS) CN802 (VCR connector). of IC201 (VPC3230D).
- Page 15 5 Troubleshooting 5-4 No Sound Does the signal appear at Pin 67 (Tuner sound signal) and Check the CN803 (PC conector) and the Pin 57, 56 (PC sound) and Pin 51, 50 CN802 (VCR connector) and the CN200 (VCR sound) and Pin 48, 47 (Scart (Scart connector and the CN806 (Tuner).
- Page 16 6 Exploded View and Parts List 6-1 ES15A* ES15A*/ES17A*...
-
Page 17: Exploded View & Parts List
6 Exploded View & Parts List 6-2 ES17A* ES15A*/ES17A*... - Page 18 BN90-00210A ASSY COVER FRONT ES17AS 6003-001319 C/F+C/R SCREW-TAPTITE BH,+,B,M3,L10,NI PLT,SWRCH18A,- BN90-00019F ASSY COVER FRONT ES17AS,ABS HB,BRIGHT SILVER,SV-012P 6002-000129 SCREW-TAPPING FH,+,2S,M3,L8,ZPC(BLK),SM20C 6003-000276 SCREW-TAPTITE BH,+,B,M3,L10,ZPC(YEL),SWCH10 BN59-00214A BOARD CN17VS,FUNCTION KEY,-,-,-,-,- BN59-00216A PBA SUB CN17VS,IR PBA SUB,-,-,-,-,- BN59-00263A SPEAKER SYSTEM EOS/NIKE17,EOS/NIKE17-L,100X42,WIRE:240MM BN59-00264A SPEAKER SYSTEM EOS/NIKE17,EOS/NIKE17-R,100X42,WIRE:590MM BN63-00090A COVER-FRONT...
- Page 19 3704-000255 IC901_SOCK SOCKET-IC 32P,DIP,SN,2.54mm 3711-004270 CN700 CONNECTOR-HEADER BOX,2P,1R,2MM,ANGLE,SN 3711-004386 CN701 CONNECTOR-HEADER BOX,3P,1R,2mm,ANGLE,SN 3722-000117 CN801 JACK-DC POWER 3P,3.5MM,AG,BLK,NO 3722-000183 CN200 JACK-SCART 21P,4mm,SN,BLK,NO 3722-001055 CN803 JACK-PHONE 5P/2C,3.6PI,AG,BLK,#16-22 6003-000117 IN/PCB+SH/PCB SCREW-TAPTITE BH,+,B,M3,L6,ZPC(YEL),SWRCH18A 6003-000117 M/PCB+SH/PCB SCREW-TAPTITE BH,+,B,M3,L6,ZPC(YEL),SWRCH18A 6003-000117 SH/PCB+SH/D_SUB SCREW-TAPTITE BH,+,B,M3,L6,ZPC(YEL),SWRCH18A BN39-00047A CBF-HARNESS 100MM,100MM,BLU/WHT/GRY,UL1061,AWG28,51021-1200 BN39-00216A LEAD CONNECTOR-ASSY ES17AS,UL1571#30,UL/CSA,30P,-,-,#30,12507HS-30,FI-X30H,BK,-,-,140MM,1571#30,SJ01...
- Page 20 0403-001052 ZD201 DIODE-ZENER RD8.2MB,8.2V,7.7-8.64V,200mW,S 0403-001052 ZD202 DIODE-ZENER RD8.2MB,8.2V,7.7-8.64V,200mW,S 0403-001052 ZD203 DIODE-ZENER RD8.2MB,8.2V,7.7-8.64V,200mW,S 0403-001052 ZD204 DIODE-ZENER RD8.2MB,8.2V,7.7-8.64V,200mW,S 0403-001052 ZD205 DIODE-ZENER RD8.2MB,8.2V,7.7-8.64V,200mW,S 0403-001052 ZD206 DIODE-ZENER RD8.2MB,8.2V,7.7-8.64V,200mW,S 0403-001052 ZD811 DIODE-ZENER RD8.2MB,8.2V,7.7-8.64V,200mW,S 0403-001052 ZD812 DIODE-ZENER RD8.2MB,8.2V,7.7-8.64V,200mW,S 0403-001052 ZD813 DIODE-ZENER RD8.2MB,8.2V,7.7-8.64V,200mW,S 0403-001052 ZD814 DIODE-ZENER RD8.2MB,8.2V,7.7-8.64V,200mW,S 0403-001052 ZD815 DIODE-ZENER...
- Page 21 1203-001830 IC804 IC-SWITCH VOL. REG. 2676,TO-263,7P,-,PLASTIC,3.234/3.336V,-,-40TO+125C,3A,-,TP 1203-001831 IC803 IC-SWITCH VOL. REG. 2676,TO-263,7P,-,PLASTIC,4.900/5.100V,-,-40TO+125C,3A,-,TP 1203-002410 IC105 IC-POSI.ADJUST REG. KA317MR,D-PAK,3P,240MIL,PLASTIC,40V,-,0TO+125C,0.5A,1.2/1.3V,TP 1203-002410 IC301 IC-POSI.ADJUST REG. KA317MR,D-PAK,3P,240MIL,PLASTIC,40V,-,0TO+125C,0.5A,1.2/1.3V,TP 1203-002450 IC104 IC-VOLTAGE REGULATOR MC33375ST-2.5T3,SOT-223,4P,137MIL,PLASTIC,2.475/2.525V,-,-40TO+125C,300MA,-,TP 1204-000292 IC103 IC-VIDEO SYSTEM LM1881M,SOP,8P,150MIL,PLASTIC, 1204-001926 IC201 IC-VIDEO PROCESS VPC3230D-C5,PQFP,80P,-,PLASTIC,6V,-,0 TO 65C,TP,VPC3230D-C5 1204-002007 IC700 IC-SOUND PROCESSOR MSP3411G-QA-B8,PQFP,80P,20X14MM,PLASTIC,8.7V,1W,0TO+70C,TR,-...
- Page 22 2007-000070 R748 R-CHIP 0ohm,5%,1/16W,DA,TP,1608 2007-000070 R813 R-CHIP 0ohm,5%,1/16W,DA,TP,1608 2007-000070 R814 R-CHIP 0ohm,5%,1/16W,DA,TP,1608 2007-000070 R833 R-CHIP 0ohm,5%,1/16W,DA,TP,1608 2007-000070 R866 R-CHIP 0ohm,5%,1/16W,DA,TP,1608 2007-000070 R901 R-CHIP 0ohm,5%,1/16W,DA,TP,1608 2007-000070 R940 R-CHIP 0ohm,5%,1/16W,DA,TP,1608 2007-000071 R174 R-CHIP 22ohm,5%,1/16W,DA,TP,1608 2007-000071 R179 R-CHIP 22ohm,5%,1/16W,DA,TP,1608 2007-000071 R180 R-CHIP 22ohm,5%,1/16W,DA,TP,1608 2007-000071 R181 R-CHIP...
- Page 23 2007-000071 R922 R-CHIP 22ohm,5%,1/16W,DA,TP,1608 2007-000071 R923 R-CHIP 22ohm,5%,1/16W,DA,TP,1608 2007-000074 R104 R-CHIP 100ohm,5%,1/16W,DA,TP,1608 2007-000074 R105 R-CHIP 100ohm,5%,1/16W,DA,TP,1608 2007-000074 R106 R-CHIP 100ohm,5%,1/16W,DA,TP,1608 2007-000074 R109 R-CHIP 100ohm,5%,1/16W,DA,TP,1608 2007-000074 R111 R-CHIP 100ohm,5%,1/16W,DA,TP,1608 2007-000074 R112 R-CHIP 100ohm,5%,1/16W,DA,TP,1608 2007-000074 R115 R-CHIP 100ohm,5%,1/16W,DA,TP,1608 2007-000074 R120 R-CHIP 100ohm,5%,1/16W,DA,TP,1608 2007-000074 R121 R-CHIP...
- Page 24 2007-000074 R227 R-CHIP 100ohm,5%,1/16W,DA,TP,1608 2007-000074 R228 R-CHIP 100ohm,5%,1/16W,DA,TP,1608 2007-000074 R229 R-CHIP 100ohm,5%,1/16W,DA,TP,1608 2007-000074 R230 R-CHIP 100ohm,5%,1/16W,DA,TP,1608 2007-000074 R232 R-CHIP 100ohm,5%,1/16W,DA,TP,1608 2007-000074 R239 R-CHIP 100ohm,5%,1/16W,DA,TP,1608 2007-000074 R240 R-CHIP 100ohm,5%,1/16W,DA,TP,1608 2007-000074 R247 R-CHIP 100ohm,5%,1/16W,DA,TP,1608 2007-000074 R248 R-CHIP 100ohm,5%,1/16W,DA,TP,1608 2007-000074 R249 R-CHIP 100ohm,5%,1/16W,DA,TP,1608 2007-000074 R252 R-CHIP...
- Page 25 2007-000074 R722 R-CHIP 100ohm,5%,1/16W,DA,TP,1608 2007-000074 R723 R-CHIP 100ohm,5%,1/16W,DA,TP,1608 2007-000074 R724 R-CHIP 100ohm,5%,1/16W,DA,TP,1608 2007-000074 R753 R-CHIP 100ohm,5%,1/16W,DA,TP,1608 2007-000074 R834 R-CHIP 100ohm,5%,1/16W,DA,TP,1608 2007-000074 R836 R-CHIP 100ohm,5%,1/16W,DA,TP,1608 2007-000074 R838 R-CHIP 100ohm,5%,1/16W,DA,TP,1608 2007-000074 R839 R-CHIP 100ohm,5%,1/16W,DA,TP,1608 2007-000074 R844 R-CHIP 100ohm,5%,1/16W,DA,TP,1608 2007-000074 R845 R-CHIP 100ohm,5%,1/16W,DA,TP,1608 2007-000074 R850 R-CHIP...
- Page 26 2007-000084 R242 R-CHIP 4.7Kohm,5%,1/16W,DA,TP,1608 2007-000084 R243 R-CHIP 4.7Kohm,5%,1/16W,DA,TP,1608 2007-000084 R244 R-CHIP 4.7Kohm,5%,1/16W,DA,TP,1608 2007-000084 R245 R-CHIP 4.7Kohm,5%,1/16W,DA,TP,1608 2007-000084 R246 R-CHIP 4.7Kohm,5%,1/16W,DA,TP,1608 2007-000084 R741 R-CHIP 4.7Kohm,5%,1/16W,DA,TP,1608 2007-000084 R742 R-CHIP 4.7Kohm,5%,1/16W,DA,TP,1608 2007-000084 R749 R-CHIP 4.7Kohm,5%,1/16W,DA,TP,1608 2007-000084 R800 R-CHIP 4.7Kohm,5%,1/16W,DA,TP,1608 2007-000084 R801 R-CHIP 4.7Kohm,5%,1/16W,DA,TP,1608 2007-000084 R802 R-CHIP...
- Page 27 2007-000090 R909 R-CHIP 10KOHM,5%,1/16W,DA,TP,1608 2007-000090 R924 R-CHIP 10KOHM,5%,1/16W,DA,TP,1608 2007-000090 R929 R-CHIP 10KOHM,5%,1/16W,DA,TP,1608 2007-000091 R729 R-CHIP 12Kohm,5%,1/16W,DA,TP,1608 2007-000091 R732 R-CHIP 12Kohm,5%,1/16W,DA,TP,1608 2007-000092 R201 R-CHIP 15Kohm,5%,1/16W,DA,TP,1608 2007-000092 R903 R-CHIP 15Kohm,5%,1/16W,DA,TP,1608 2007-000093 R238 R-CHIP 20Kohm,5%,1/16W,DA,TP,1608 2007-000093 R730 R-CHIP 20Kohm,5%,1/16W,DA,TP,1608 2007-000093 R731 R-CHIP 20Kohm,5%,1/16W,DA,TP,1608 2007-000094 R203 R-CHIP...
- Page 28 2007-000947 R629 R-CHIP 47OHM,5%,1/10W,DA,TP,2012 2007-000981 R727 R-CHIP 5.6KOHM,5%,1/10W,DA,TP,2012 2007-001044 R123 R-CHIP 56ohm,5%,1/16W,DA,TP,1608 2007-001167 R127 R-CHIP 75ohm,5%,1/16W,DA,TP,1608 2007-001167 R128 R-CHIP 75ohm,5%,1/16W,DA,TP,1608 2007-001167 R129 R-CHIP 75ohm,5%,1/16W,DA,TP,1608 2007-001167 R205 R-CHIP 75ohm,5%,1/16W,DA,TP,1608 2007-001167 R206 R-CHIP 75ohm,5%,1/16W,DA,TP,1608 2007-001167 R208 R-CHIP 75ohm,5%,1/16W,DA,TP,1608 2007-001167 R211 R-CHIP 75ohm,5%,1/16W,DA,TP,1608 2007-001167 R212 R-CHIP...
- Page 29 2203-000140 C256 C-CERAMIC,CHIP 1.5nF,10%,50V,X7R,TP,1608,- 2203-000140 C704 C-CERAMIC,CHIP 1.5nF,10%,50V,X7R,TP,1608,- 2203-000140 C714 C-CERAMIC,CHIP 1.5nF,10%,50V,X7R,TP,1608,- 2203-000140 C729 C-CERAMIC,CHIP 1.5nF,10%,50V,X7R,TP,1608,- 2203-000140 C790 C-CERAMIC,CHIP 1.5nF,10%,50V,X7R,TP,1608,- 2203-000140 C791 C-CERAMIC,CHIP 1.5nF,10%,50V,X7R,TP,1608,- 2203-000189 C100 C-CERAMIC,CHIP 100nF,+80-20%,25V,Y5V,TP,1608, 2203-000189 C110 C-CERAMIC,CHIP 100nF,+80-20%,25V,Y5V,TP,1608, 2203-000189 C111 C-CERAMIC,CHIP 100nF,+80-20%,25V,Y5V,TP,1608, 2203-000189 C114 C-CERAMIC,CHIP 100nF,+80-20%,25V,Y5V,TP,1608, 2203-000189 C116 C-CERAMIC,CHIP...
- Page 30 2203-000189 C311 C-CERAMIC,CHIP 100nF,+80-20%,25V,Y5V,TP,1608, 2203-000189 C312 C-CERAMIC,CHIP 100nF,+80-20%,25V,Y5V,TP,1608, 2203-000189 C313 C-CERAMIC,CHIP 100nF,+80-20%,25V,Y5V,TP,1608, 2203-000189 C314 C-CERAMIC,CHIP 100nF,+80-20%,25V,Y5V,TP,1608, 2203-000189 C315 C-CERAMIC,CHIP 100nF,+80-20%,25V,Y5V,TP,1608, 2203-000189 C316 C-CERAMIC,CHIP 100nF,+80-20%,25V,Y5V,TP,1608, 2203-000189 C317 C-CERAMIC,CHIP 100nF,+80-20%,25V,Y5V,TP,1608, 2203-000189 C324 C-CERAMIC,CHIP 100nF,+80-20%,25V,Y5V,TP,1608, 2203-000189 C325 C-CERAMIC,CHIP 100nF,+80-20%,25V,Y5V,TP,1608, 2203-000189 C326 C-CERAMIC,CHIP 100nF,+80-20%,25V,Y5V,TP,1608, 2203-000189 C327 C-CERAMIC,CHIP...
- Page 31 2203-000189 C534 C-CERAMIC,CHIP 100nF,+80-20%,25V,Y5V,TP,1608, 2203-000189 C535 C-CERAMIC,CHIP 100nF,+80-20%,25V,Y5V,TP,1608, 2203-000189 C536 C-CERAMIC,CHIP 100nF,+80-20%,25V,Y5V,TP,1608, 2203-000189 C537 C-CERAMIC,CHIP 100nF,+80-20%,25V,Y5V,TP,1608, 2203-000189 C538 C-CERAMIC,CHIP 100nF,+80-20%,25V,Y5V,TP,1608, 2203-000189 C600 C-CERAMIC,CHIP 100nF,+80-20%,25V,Y5V,TP,1608, 2203-000189 C602 C-CERAMIC,CHIP 100nF,+80-20%,25V,Y5V,TP,1608, 2203-000189 C619 C-CERAMIC,CHIP 100nF,+80-20%,25V,Y5V,TP,1608, 2203-000189 C634 C-CERAMIC,CHIP 100nF,+80-20%,25V,Y5V,TP,1608, 2203-000189 C702 C-CERAMIC,CHIP 100nF,+80-20%,25V,Y5V,TP,1608, 2203-000189 C718 C-CERAMIC,CHIP...
- Page 32 2203-000257 C160 C-CERAMIC,CHIP 10nF,10%,50V,X7R,TP,1608 2203-000257 C163 C-CERAMIC,CHIP 10nF,10%,50V,X7R,TP,1608 2203-000257 C166 C-CERAMIC,CHIP 10nF,10%,50V,X7R,TP,1608 2203-000257 C181 C-CERAMIC,CHIP 10nF,10%,50V,X7R,TP,1608 2203-000257 C182 C-CERAMIC,CHIP 10nF,10%,50V,X7R,TP,1608 2203-000257 C185 C-CERAMIC,CHIP 10nF,10%,50V,X7R,TP,1608 2203-000257 C186 C-CERAMIC,CHIP 10nF,10%,50V,X7R,TP,1608 2203-000257 C193 C-CERAMIC,CHIP 10nF,10%,50V,X7R,TP,1608 2203-000257 C198 C-CERAMIC,CHIP 10nF,10%,50V,X7R,TP,1608 2203-000257 C199 C-CERAMIC,CHIP 10nF,10%,50V,X7R,TP,1608 2203-000257 C204 C-CERAMIC,CHIP...
- Page 33 2203-000440 C233 C-CERAMIC,CHIP 1nF,10%,50V,X7R,TP,1608,- 2203-000440 C235 C-CERAMIC,CHIP 1nF,10%,50V,X7R,TP,1608,- 2203-000440 C401 C-CERAMIC,CHIP 1nF,10%,50V,X7R,TP,1608,- 2203-000440 C404 C-CERAMIC,CHIP 1nF,10%,50V,X7R,TP,1608,- 2203-000440 C614 C-CERAMIC,CHIP 1nF,10%,50V,X7R,TP,1608,- 2203-000440 C616 C-CERAMIC,CHIP 1nF,10%,50V,X7R,TP,1608,- 2203-000440 C617 C-CERAMIC,CHIP 1nF,10%,50V,X7R,TP,1608,- 2203-000440 C621 C-CERAMIC,CHIP 1nF,10%,50V,X7R,TP,1608,- 2203-000440 C622 C-CERAMIC,CHIP 1nF,10%,50V,X7R,TP,1608,- 2203-000440 C623 C-CERAMIC,CHIP 1nF,10%,50V,X7R,TP,1608,- 2203-000440 C723 C-CERAMIC,CHIP...
- Page 34 2203-000972 C713 C-CERAMIC,CHIP 47nF,10%,16V,X7R,TP,1608 2203-000998 C295 C-CERAMIC,CHIP 0.047nF,5%,50V,NP0,TP,1608 2203-001077 C242 C-CERAMIC,CHIP 0.056nF,5%,50V,NP0,TP,2012 2203-001077 C243 C-CERAMIC,CHIP 0.056nF,5%,50V,NP0,TP,2012 2203-001077 C700 C-CERAMIC,CHIP 0.056nF,5%,50V,NP0,TP,2012 2203-001077 C706 C-CERAMIC,CHIP 0.056nF,5%,50V,NP0,TP,2012 2203-001077 C707 C-CERAMIC,CHIP 0.056nF,5%,50V,NP0,TP,2012 2203-001077 C853 C-CERAMIC,CHIP 0.056nF,5%,50V,NP0,TP,2012 2203-001077 C854 C-CERAMIC,CHIP 0.056nF,5%,50V,NP0,TP,2012 2203-001140 C253 C-CERAMIC,CHIP 68nF,10%,16V,X7R,TP,1608,- 2203-001140 C254 C-CERAMIC,CHIP...
- Page 35 2203-005065 C128 C-CERAMIC,CHIP 1000nF,+80-20%,10V,Y5V,TP,1608 2203-005065 C130 C-CERAMIC,CHIP 1000nF,+80-20%,10V,Y5V,TP,1608 2203-005065 C131 C-CERAMIC,CHIP 1000nF,+80-20%,10V,Y5V,TP,1608 2203-005065 C138 C-CERAMIC,CHIP 1000nF,+80-20%,10V,Y5V,TP,1608 2203-005065 C139 C-CERAMIC,CHIP 1000nF,+80-20%,10V,Y5V,TP,1608 2203-005065 C141 C-CERAMIC,CHIP 1000nF,+80-20%,10V,Y5V,TP,1608 2203-005065 C142 C-CERAMIC,CHIP 1000nF,+80-20%,10V,Y5V,TP,1608 2203-005065 C146 C-CERAMIC,CHIP 1000nF,+80-20%,10V,Y5V,TP,1608 2203-005065 C147 C-CERAMIC,CHIP 1000nF,+80-20%,10V,Y5V,TP,1608 2203-005065 C153 C-CERAMIC,CHIP 1000nF,+80-20%,10V,Y5V,TP,1608 2203-005065 C154 C-CERAMIC,CHIP...
- Page 36 2402-000179 C175 C-AL,SMD 47uF,20%,16V,GP,TP,6.6x6.6x5.4 2402-000179 C202 C-AL,SMD 47uF,20%,16V,GP,TP,6.6x6.6x5.4 2402-000209 C500 C-AL,SMD 22uF,20%,16V,WT,TP,5.3x5.3mm,1 2402-000209 C513 C-AL,SMD 22uF,20%,16V,WT,TP,5.3x5.3mm,1 2402-000209 C526 C-AL,SMD 22uF,20%,16V,WT,TP,5.3x5.3mm,1 2402-000209 C841 C-AL,SMD 22uF,20%,16V,WT,TP,5.3x5.3mm,1 2402-000209 C842 C-AL,SMD 22uF,20%,16V,WT,TP,5.3x5.3mm,1 2402-001006 C767 C-AL,SMD 4.7uF,20%,25V,GP,TP,3.6x6.3x3. 2402-001006 C769 C-AL,SMD 4.7uF,20%,25V,GP,TP,3.6x6.3x3. 2402-001006 C771 C-AL,SMD 4.7uF,20%,25V,GP,TP,3.6x6.3x3. 2402-001006 C773 C-AL,SMD...
- Page 37 2703-001778 L100 INDUCTOR-SMD 3.3UH,20%,3.2X2.5X2.2MM 2703-001778 L101 INDUCTOR-SMD 3.3UH,20%,3.2X2.5X2.2MM 2703-001778 L200 INDUCTOR-SMD 3.3UH,20%,3.2X2.5X2.2MM 2703-001778 L700 INDUCTOR-SMD 3.3UH,20%,3.2X2.5X2.2MM 2703-001778 L701 INDUCTOR-SMD 3.3UH,20%,3.2X2.5X2.2MM 2801-003667 X900 CRYSTAL-SMD 14.3182MHZ,50PPM,28-AAN,16,50OHM,TP 2801-003773 X201 CRYSTAL-SMD 12MHZ,30PPM,28-AAN,20PF,50OHM,TP 2801-003843 X701 CRYSTAL-SMD 18.432MHz,30ppm,28-AAN,20pF,50ohm,TP 2801-003846 X200 CRYSTAL-SMD 20.25MHz,30ppm,28-AAN,20pF,50ohm,TP 2804-001474 X100 OSCILLATOR-CLOCK 14.31818MHZ,100PPM,30PF,TP,3.3V,15MA 2901-001114 FT201 FILTER-EMI SMD...
- Page 38 ASSY ACCESSORY LW15E23CX/XEF 0203-000214 TAPE-OPP MASKING OPP/W50/CLR,T0.05,W50,L400000, 4301-000121 BATTERY-MN 1.5V,-,AAA,10.5x44.5m,HOLDER 6801-001009 CARD-WARRANTY EUROPE(12),8 6801-001016 CARD-REGISTRATION XEF,FRENCH,MOJO100,L150,W392,-,- BH39-10339H CBF POWER CORD DET,H05VV-F,250V/10,16A,BLK,25 BH59-00179A S/W DRIVER-2.6 ALL,NATURA-COLOR,ALL,- BH68-00297G MANUAL-ETC-00 WIN2000,SAMSUNG,English,W/W,MIMOJO80G,-,148,210,-,-,-,- Page 21 BH69-30348D BAG-PE LDPE,T0.05,W240*L356,Y,-,CMG73 BN39-00043A CBF SIGNAL DETACHABLE,-,15P/15P,-,-,- BN59-00217B REMOCON -,TM71,EOS,40,GR20,SILVER C/T,PAL,-,-,-,-...
- Page 39 BN68-00235A MANUAL USERS-06 LW-15E23C/LW-17E24C,SYNCMASTER,E/F/S/G/I/SW,EDC,MIMOJO80G,-,148,210,-,-,-,- ER-LW17E24CX/XEF SEC,EH-L05 ZPD BN90-00210A ASSY COVER FRONT ES17AS 6003-001319 C/F+C/R SCREW-TAPTITE BH,+,B,M3,L10,NI PLT,SWRCH18A,- BN90-00019F ASSY COVER FRONT ES17AS,ABS HB,BRIGHT SILVER,SV-012P 6002-000129 SCREW-TAPPING FH,+,2S,M3,L8,ZPC(BLK),SM20C 6003-000276 SCREW-TAPTITE BH,+,B,M3,L10,ZPC(YEL),SWCH10 BN59-00214A BOARD CN17VS,FUNCTION KEY,-,-,-,-,- BN59-00216A PBA SUB CN17VS,IR PBA SUB,-,-,-,-,- BN59-00263A SPEAKER SYSTEM EOS/NIKE17,EOS/NIKE17-L,100X42,WIRE:240MM...
- Page 40 3711-004386 CN701 CONNECTOR-HEADER BOX,3P,1R,2mm,ANGLE,SN 3722-000117 CN801 JACK-DC POWER 3P,3.5MM,AG,BLK,NO 3722-000183 CN200 JACK-SCART 21P,4mm,SN,BLK,NO 3722-001055 CN803 JACK-PHONE 5P/2C,3.6PI,AG,BLK,#16-22 6003-000117 IN/PCB+SH/PCB SCREW-TAPTITE BH,+,B,M3,L6,ZPC(YEL),SWRCH18A 6003-000117 M/PCB+SH/PCB SCREW-TAPTITE BH,+,B,M3,L6,ZPC(YEL),SWRCH18A 6003-000117 SH/PCB+SH/D_SUB SCREW-TAPTITE BH,+,B,M3,L6,ZPC(YEL),SWRCH18A BN39-00047A CBF-HARNESS 100MM,100MM,BLU/WHT/GRY,UL1061,AWG28,51021-1200 BN39-00216A LEAD CONNECTOR-ASSY ES17AS,UL1571#30,UL/CSA,30P,-,-,#30,12507HS-30,FI-X30H,BK,-,-,140MM,1571#30,SJ01 BN39-00217A LEAD CONNECTOR-ASSY ES17AS,UL2835#28,UL/CSA,6P,-,-,#28,12505HS-06,51021-0600,BK,-,-,180MM,2835#28,SJ BN40-00005A CN806 RF MODULATOR-PAL...
- Page 41 0403-001052 ZD203 DIODE-ZENER RD8.2MB,8.2V,7.7-8.64V,200mW,S 0403-001052 ZD204 DIODE-ZENER RD8.2MB,8.2V,7.7-8.64V,200mW,S 0403-001052 ZD205 DIODE-ZENER RD8.2MB,8.2V,7.7-8.64V,200mW,S 0403-001052 ZD206 DIODE-ZENER RD8.2MB,8.2V,7.7-8.64V,200mW,S 0403-001052 ZD811 DIODE-ZENER RD8.2MB,8.2V,7.7-8.64V,200mW,S 0403-001052 ZD812 DIODE-ZENER RD8.2MB,8.2V,7.7-8.64V,200mW,S 0403-001052 ZD813 DIODE-ZENER RD8.2MB,8.2V,7.7-8.64V,200mW,S 0403-001052 ZD814 DIODE-ZENER RD8.2MB,8.2V,7.7-8.64V,200mW,S 0403-001052 ZD815 DIODE-ZENER RD8.2MB,8.2V,7.7-8.64V,200mW,S 0403-001052 ZD816 DIODE-ZENER RD8.2MB,8.2V,7.7-8.64V,200mW,S 0403-001052 ZD817 DIODE-ZENER...
- Page 42 1203-002410 IC105 IC-POSI.ADJUST REG. KA317MR,D-PAK,3P,240MIL,PLASTIC,40V,-,0TO+125C,0.5A,1.2/1.3V,TP 1203-002410 IC301 IC-POSI.ADJUST REG. KA317MR,D-PAK,3P,240MIL,PLASTIC,40V,-,0TO+125C,0.5A,1.2/1.3V,TP 1203-002450 IC104 IC-VOLTAGE REGULATOR MC33375ST-2.5T3,SOT-223,4P,137MIL,PLASTIC,2.475/2.525V,-,-40TO+125C,300MA,-,TP 1204-000292 IC103 IC-VIDEO SYSTEM LM1881M,SOP,8P,150MIL,PLASTIC, 1204-001926 IC201 IC-VIDEO PROCESS VPC3230D-C5,PQFP,80P,-,PLASTIC,6V,-,0 TO 65C,TP,VPC3230D-C5 1204-002007 IC700 IC-SOUND PROCESSOR MSP3411G-QA-B8,PQFP,80P,20X14MM,PLASTIC,8.7V,1W,0TO+70C,TR,- 1205-001740 IC600 IC-TRANSMITTER DS90C385,TSSOP,56P,240MIL,PLASTIC,4V,1.63W,-10 TO +70C,ST,FPD LINK-85MHZ(LVDS) 1205-001740 IC601 IC-TRANSMITTER DS90C385,TSSOP,56P,240MIL,PLASTIC,4V,1.63W,-10 TO +70C,ST,FPD LINK-85MHZ(LVDS)
- Page 43 2007-000070 R814 R-CHIP 0ohm,5%,1/16W,DA,TP,1608 2007-000070 R833 R-CHIP 0ohm,5%,1/16W,DA,TP,1608 2007-000070 R866 R-CHIP 0ohm,5%,1/16W,DA,TP,1608 2007-000070 R901 R-CHIP 0ohm,5%,1/16W,DA,TP,1608 2007-000070 R940 R-CHIP 0ohm,5%,1/16W,DA,TP,1608 2007-000071 R174 R-CHIP 22ohm,5%,1/16W,DA,TP,1608 2007-000071 R179 R-CHIP 22ohm,5%,1/16W,DA,TP,1608 2007-000071 R180 R-CHIP 22ohm,5%,1/16W,DA,TP,1608 2007-000071 R181 R-CHIP 22ohm,5%,1/16W,DA,TP,1608 2007-000071 R182 R-CHIP 22ohm,5%,1/16W,DA,TP,1608 2007-000071 R183 R-CHIP...
- Page 44 2007-000074 R104 R-CHIP 100ohm,5%,1/16W,DA,TP,1608 2007-000074 R105 R-CHIP 100ohm,5%,1/16W,DA,TP,1608 2007-000074 R106 R-CHIP 100ohm,5%,1/16W,DA,TP,1608 2007-000074 R109 R-CHIP 100ohm,5%,1/16W,DA,TP,1608 2007-000074 R111 R-CHIP 100ohm,5%,1/16W,DA,TP,1608 2007-000074 R112 R-CHIP 100ohm,5%,1/16W,DA,TP,1608 2007-000074 R115 R-CHIP 100ohm,5%,1/16W,DA,TP,1608 2007-000074 R120 R-CHIP 100ohm,5%,1/16W,DA,TP,1608 2007-000074 R121 R-CHIP 100ohm,5%,1/16W,DA,TP,1608 2007-000074 R124 R-CHIP 100ohm,5%,1/16W,DA,TP,1608 2007-000074 R125 R-CHIP...
- Page 45 2007-000074 R229 R-CHIP 100ohm,5%,1/16W,DA,TP,1608 2007-000074 R230 R-CHIP 100ohm,5%,1/16W,DA,TP,1608 2007-000074 R232 R-CHIP 100ohm,5%,1/16W,DA,TP,1608 2007-000074 R239 R-CHIP 100ohm,5%,1/16W,DA,TP,1608 2007-000074 R240 R-CHIP 100ohm,5%,1/16W,DA,TP,1608 2007-000074 R247 R-CHIP 100ohm,5%,1/16W,DA,TP,1608 2007-000074 R248 R-CHIP 100ohm,5%,1/16W,DA,TP,1608 2007-000074 R249 R-CHIP 100ohm,5%,1/16W,DA,TP,1608 2007-000074 R252 R-CHIP 100ohm,5%,1/16W,DA,TP,1608 2007-000074 R263 R-CHIP 100ohm,5%,1/16W,DA,TP,1608 2007-000074 R264 R-CHIP...
- Page 46 2007-000074 R724 R-CHIP 100ohm,5%,1/16W,DA,TP,1608 2007-000074 R753 R-CHIP 100ohm,5%,1/16W,DA,TP,1608 2007-000074 R834 R-CHIP 100ohm,5%,1/16W,DA,TP,1608 2007-000074 R836 R-CHIP 100ohm,5%,1/16W,DA,TP,1608 2007-000074 R838 R-CHIP 100ohm,5%,1/16W,DA,TP,1608 2007-000074 R839 R-CHIP 100ohm,5%,1/16W,DA,TP,1608 2007-000074 R844 R-CHIP 100ohm,5%,1/16W,DA,TP,1608 2007-000074 R845 R-CHIP 100ohm,5%,1/16W,DA,TP,1608 2007-000074 R850 R-CHIP 100ohm,5%,1/16W,DA,TP,1608 2007-000074 R852 R-CHIP 100ohm,5%,1/16W,DA,TP,1608 2007-000074 R853 R-CHIP...
- Page 47 2007-000084 R244 R-CHIP 4.7Kohm,5%,1/16W,DA,TP,1608 2007-000084 R245 R-CHIP 4.7Kohm,5%,1/16W,DA,TP,1608 2007-000084 R246 R-CHIP 4.7Kohm,5%,1/16W,DA,TP,1608 2007-000084 R741 R-CHIP 4.7Kohm,5%,1/16W,DA,TP,1608 2007-000084 R742 R-CHIP 4.7Kohm,5%,1/16W,DA,TP,1608 2007-000084 R749 R-CHIP 4.7Kohm,5%,1/16W,DA,TP,1608 2007-000084 R800 R-CHIP 4.7Kohm,5%,1/16W,DA,TP,1608 2007-000084 R801 R-CHIP 4.7Kohm,5%,1/16W,DA,TP,1608 2007-000084 R802 R-CHIP 4.7Kohm,5%,1/16W,DA,TP,1608 2007-000084 R803 R-CHIP 4.7Kohm,5%,1/16W,DA,TP,1608 2007-000084 R827 R-CHIP...
- Page 48 2007-000090 R929 R-CHIP 10KOHM,5%,1/16W,DA,TP,1608 2007-000091 R729 R-CHIP 12Kohm,5%,1/16W,DA,TP,1608 2007-000091 R732 R-CHIP 12Kohm,5%,1/16W,DA,TP,1608 2007-000092 R201 R-CHIP 15Kohm,5%,1/16W,DA,TP,1608 2007-000092 R903 R-CHIP 15Kohm,5%,1/16W,DA,TP,1608 2007-000093 R238 R-CHIP 20Kohm,5%,1/16W,DA,TP,1608 2007-000093 R730 R-CHIP 20Kohm,5%,1/16W,DA,TP,1608 2007-000093 R731 R-CHIP 20Kohm,5%,1/16W,DA,TP,1608 2007-000094 R203 R-CHIP 22Kohm,5%,1/16W,DA,TP,1608 2007-000098 R717 R-CHIP 56Kohm,5%,1/16W,DA,TP,1608 2007-000098 R719 R-CHIP...
- Page 49 2007-001044 R123 R-CHIP 56ohm,5%,1/16W,DA,TP,1608 2007-001167 R127 R-CHIP 75ohm,5%,1/16W,DA,TP,1608 2007-001167 R128 R-CHIP 75ohm,5%,1/16W,DA,TP,1608 2007-001167 R129 R-CHIP 75ohm,5%,1/16W,DA,TP,1608 2007-001167 R205 R-CHIP 75ohm,5%,1/16W,DA,TP,1608 2007-001167 R206 R-CHIP 75ohm,5%,1/16W,DA,TP,1608 2007-001167 R208 R-CHIP 75ohm,5%,1/16W,DA,TP,1608 2007-001167 R211 R-CHIP 75ohm,5%,1/16W,DA,TP,1608 2007-001167 R212 R-CHIP 75ohm,5%,1/16W,DA,TP,1608 2007-001167 R257 R-CHIP 75ohm,5%,1/16W,DA,TP,1608 2007-001167 R258 R-CHIP...
- Page 50 2203-000140 C714 C-CERAMIC,CHIP 1.5nF,10%,50V,X7R,TP,1608,- 2203-000140 C729 C-CERAMIC,CHIP 1.5nF,10%,50V,X7R,TP,1608,- 2203-000140 C790 C-CERAMIC,CHIP 1.5nF,10%,50V,X7R,TP,1608,- 2203-000140 C791 C-CERAMIC,CHIP 1.5nF,10%,50V,X7R,TP,1608,- 2203-000189 C100 C-CERAMIC,CHIP 100nF,+80-20%,25V,Y5V,TP,1608, 2203-000189 C110 C-CERAMIC,CHIP 100nF,+80-20%,25V,Y5V,TP,1608, 2203-000189 C111 C-CERAMIC,CHIP 100nF,+80-20%,25V,Y5V,TP,1608, 2203-000189 C114 C-CERAMIC,CHIP 100nF,+80-20%,25V,Y5V,TP,1608, 2203-000189 C116 C-CERAMIC,CHIP 100nF,+80-20%,25V,Y5V,TP,1608, 2203-000189 C122 C-CERAMIC,CHIP 100nF,+80-20%,25V,Y5V,TP,1608, 2203-000189 C123 C-CERAMIC,CHIP...
- Page 51 2203-000189 C313 C-CERAMIC,CHIP 100nF,+80-20%,25V,Y5V,TP,1608, 2203-000189 C314 C-CERAMIC,CHIP 100nF,+80-20%,25V,Y5V,TP,1608, 2203-000189 C315 C-CERAMIC,CHIP 100nF,+80-20%,25V,Y5V,TP,1608, 2203-000189 C316 C-CERAMIC,CHIP 100nF,+80-20%,25V,Y5V,TP,1608, 2203-000189 C317 C-CERAMIC,CHIP 100nF,+80-20%,25V,Y5V,TP,1608, 2203-000189 C324 C-CERAMIC,CHIP 100nF,+80-20%,25V,Y5V,TP,1608, 2203-000189 C325 C-CERAMIC,CHIP 100nF,+80-20%,25V,Y5V,TP,1608, 2203-000189 C326 C-CERAMIC,CHIP 100nF,+80-20%,25V,Y5V,TP,1608, 2203-000189 C327 C-CERAMIC,CHIP 100nF,+80-20%,25V,Y5V,TP,1608, 2203-000189 C328 C-CERAMIC,CHIP 100nF,+80-20%,25V,Y5V,TP,1608, 2203-000189 C400 C-CERAMIC,CHIP...
- Page 52 2203-000189 C536 C-CERAMIC,CHIP 100nF,+80-20%,25V,Y5V,TP,1608, 2203-000189 C537 C-CERAMIC,CHIP 100nF,+80-20%,25V,Y5V,TP,1608, 2203-000189 C538 C-CERAMIC,CHIP 100nF,+80-20%,25V,Y5V,TP,1608, 2203-000189 C600 C-CERAMIC,CHIP 100nF,+80-20%,25V,Y5V,TP,1608, 2203-000189 C602 C-CERAMIC,CHIP 100nF,+80-20%,25V,Y5V,TP,1608, 2203-000189 C619 C-CERAMIC,CHIP 100nF,+80-20%,25V,Y5V,TP,1608, 2203-000189 C634 C-CERAMIC,CHIP 100nF,+80-20%,25V,Y5V,TP,1608, 2203-000189 C702 C-CERAMIC,CHIP 100nF,+80-20%,25V,Y5V,TP,1608, 2203-000189 C718 C-CERAMIC,CHIP 100nF,+80-20%,25V,Y5V,TP,1608, 2203-000189 C733 C-CERAMIC,CHIP 100nF,+80-20%,25V,Y5V,TP,1608, 2203-000189 C734 C-CERAMIC,CHIP...
- Page 53 2203-000257 C166 C-CERAMIC,CHIP 10nF,10%,50V,X7R,TP,1608 2203-000257 C181 C-CERAMIC,CHIP 10nF,10%,50V,X7R,TP,1608 2203-000257 C182 C-CERAMIC,CHIP 10nF,10%,50V,X7R,TP,1608 2203-000257 C185 C-CERAMIC,CHIP 10nF,10%,50V,X7R,TP,1608 2203-000257 C186 C-CERAMIC,CHIP 10nF,10%,50V,X7R,TP,1608 2203-000257 C193 C-CERAMIC,CHIP 10nF,10%,50V,X7R,TP,1608 2203-000257 C198 C-CERAMIC,CHIP 10nF,10%,50V,X7R,TP,1608 2203-000257 C199 C-CERAMIC,CHIP 10nF,10%,50V,X7R,TP,1608 2203-000257 C204 C-CERAMIC,CHIP 10nF,10%,50V,X7R,TP,1608 2203-000257 C265 C-CERAMIC,CHIP 10nF,10%,50V,X7R,TP,1608 2203-000257 C267 C-CERAMIC,CHIP...
- Page 54 2203-000440 C401 C-CERAMIC,CHIP 1nF,10%,50V,X7R,TP,1608,- 2203-000440 C404 C-CERAMIC,CHIP 1nF,10%,50V,X7R,TP,1608,- 2203-000440 C614 C-CERAMIC,CHIP 1nF,10%,50V,X7R,TP,1608,- 2203-000440 C616 C-CERAMIC,CHIP 1nF,10%,50V,X7R,TP,1608,- 2203-000440 C617 C-CERAMIC,CHIP 1nF,10%,50V,X7R,TP,1608,- 2203-000440 C621 C-CERAMIC,CHIP 1nF,10%,50V,X7R,TP,1608,- 2203-000440 C622 C-CERAMIC,CHIP 1nF,10%,50V,X7R,TP,1608,- 2203-000440 C623 C-CERAMIC,CHIP 1nF,10%,50V,X7R,TP,1608,- 2203-000440 C723 C-CERAMIC,CHIP 1nF,10%,50V,X7R,TP,1608,- 2203-000440 C724 C-CERAMIC,CHIP 1nF,10%,50V,X7R,TP,1608,- 2203-000440 C860 C-CERAMIC,CHIP...
- Page 55 2203-001077 C242 C-CERAMIC,CHIP 0.056nF,5%,50V,NP0,TP,2012 2203-001077 C243 C-CERAMIC,CHIP 0.056nF,5%,50V,NP0,TP,2012 2203-001077 C700 C-CERAMIC,CHIP 0.056nF,5%,50V,NP0,TP,2012 2203-001077 C706 C-CERAMIC,CHIP 0.056nF,5%,50V,NP0,TP,2012 2203-001077 C707 C-CERAMIC,CHIP 0.056nF,5%,50V,NP0,TP,2012 2203-001077 C853 C-CERAMIC,CHIP 0.056nF,5%,50V,NP0,TP,2012 2203-001077 C854 C-CERAMIC,CHIP 0.056nF,5%,50V,NP0,TP,2012 2203-001140 C253 C-CERAMIC,CHIP 68nF,10%,16V,X7R,TP,1608,- 2203-001140 C254 C-CERAMIC,CHIP 68nF,10%,16V,X7R,TP,1608,- 2203-001140 C255 C-CERAMIC,CHIP 68nF,10%,16V,X7R,TP,1608,- 2203-001158 C151 C-CERAMIC,CHIP...
- Page 56 2203-005065 C131 C-CERAMIC,CHIP 1000nF,+80-20%,10V,Y5V,TP,1608 2203-005065 C138 C-CERAMIC,CHIP 1000nF,+80-20%,10V,Y5V,TP,1608 2203-005065 C139 C-CERAMIC,CHIP 1000nF,+80-20%,10V,Y5V,TP,1608 2203-005065 C141 C-CERAMIC,CHIP 1000nF,+80-20%,10V,Y5V,TP,1608 2203-005065 C142 C-CERAMIC,CHIP 1000nF,+80-20%,10V,Y5V,TP,1608 2203-005065 C146 C-CERAMIC,CHIP 1000nF,+80-20%,10V,Y5V,TP,1608 2203-005065 C147 C-CERAMIC,CHIP 1000nF,+80-20%,10V,Y5V,TP,1608 2203-005065 C153 C-CERAMIC,CHIP 1000nF,+80-20%,10V,Y5V,TP,1608 2203-005065 C154 C-CERAMIC,CHIP 1000nF,+80-20%,10V,Y5V,TP,1608 2203-005065 C194 C-CERAMIC,CHIP 1000nF,+80-20%,10V,Y5V,TP,1608 2203-005189 C207 C-CERAMIC,CHIP...
- Page 57 2402-000209 C500 C-AL,SMD 22uF,20%,16V,WT,TP,5.3x5.3mm,1 2402-000209 C513 C-AL,SMD 22uF,20%,16V,WT,TP,5.3x5.3mm,1 2402-000209 C526 C-AL,SMD 22uF,20%,16V,WT,TP,5.3x5.3mm,1 2402-000209 C841 C-AL,SMD 22uF,20%,16V,WT,TP,5.3x5.3mm,1 2402-000209 C842 C-AL,SMD 22uF,20%,16V,WT,TP,5.3x5.3mm,1 2402-001006 C767 C-AL,SMD 4.7uF,20%,25V,GP,TP,3.6x6.3x3. 2402-001006 C769 C-AL,SMD 4.7uF,20%,25V,GP,TP,3.6x6.3x3. 2402-001006 C771 C-AL,SMD 4.7uF,20%,25V,GP,TP,3.6x6.3x3. 2402-001006 C773 C-AL,SMD 4.7uF,20%,25V,GP,TP,3.6x6.3x3. 2402-001006 C776 C-AL,SMD 4.7uF,20%,25V,GP,TP,3.6x6.3x3. 2402-001006 C836 C-AL,SMD...
- Page 58 2703-001778 L200 INDUCTOR-SMD 3.3UH,20%,3.2X2.5X2.2MM 2703-001778 L700 INDUCTOR-SMD 3.3UH,20%,3.2X2.5X2.2MM 2703-001778 L701 INDUCTOR-SMD 3.3UH,20%,3.2X2.5X2.2MM 2801-003667 X900 CRYSTAL-SMD 14.3182MHZ,50PPM,28-AAN,16,50OHM,TP 2801-003773 X201 CRYSTAL-SMD 12MHZ,30PPM,28-AAN,20PF,50OHM,TP 2801-003843 X701 CRYSTAL-SMD 18.432MHz,30ppm,28-AAN,20pF,50ohm,TP 2801-003846 X200 CRYSTAL-SMD 20.25MHz,30ppm,28-AAN,20pF,50ohm,TP 2804-001474 X100 OSCILLATOR-CLOCK 14.31818MHZ,100PPM,30PF,TP,3.3V,15MA 2901-001114 FT201 FILTER-EMI SMD 25VDC,2.0ADC,-,100nF,3.2x1.6x1 3301-001145 BD115 CORE-FERRITE BEAD AB,4.5x1.6x1.6mm,-,- 3301-001145 BD700...
- Page 59 ASSY ACCESSORY LW15E23CX/XEF 0203-000214 TAPE-OPP MASKING OPP/W50/CLR,T0.05,W50,L400000, 4301-000121 BATTERY-MN 1.5V,-,AAA,10.5x44.5m,HOLDER 6801-001009 CARD-WARRANTY EUROPE(12),8 6801-001016 CARD-REGISTRATION XEF,FRENCH,MOJO100,L150,W392,-,- BH39-10339H CBF POWER CORD DET,H05VV-F,250V/10,16A,BLK,25 BH59-00179A S/W DRIVER-2.6 ALL,NATURA-COLOR,ALL,- BH68-00297G MANUAL-ETC-00 WIN2000,SAMSUNG,English,W/W,MIMOJO80G,-,148,210,-,-,-,- Page 42 BH69-30348D BAG-PE LDPE,T0.05,W240*L356,Y,-,CMG73 BN39-00043A CBF SIGNAL DETACHABLE,-,15P/15P,-,-,- BN59-00217B REMOCON -,TM71,EOS,40,GR20,SILVER C/T,PAL,-,-,-,-...
- Page 60 BN68-00235A MANUAL USERS-06 LW-15E23C/LW-17E24C,SYNCMASTER,E/F/S/G/I/SW,EDC,MIMOJO80G,-,148,210,-,-,-,- EZ-LW17E24CX/XEF LTM170EH-L05 BN90-00210A ASSY COVER FRONT ES17AS 6003-001319 C/F+C/R SCREW-TAPTITE BH,+,B,M3,L10,NI PLT,SWRCH18A,- BN90-00019F ASSY COVER FRONT ES17AS,ABS HB,BRIGHT SILVER,SV-012P 6002-000129 SCREW-TAPPING FH,+,2S,M3,L8,ZPC(BLK),SM20C 6003-000276 SCREW-TAPTITE BH,+,B,M3,L10,ZPC(YEL),SWCH10 BN59-00214A BOARD CN17VS,FUNCTION KEY,-,-,-,-,- BN59-00216A PBA SUB CN17VS,IR PBA SUB,-,-,-,-,- BN59-00263A SPEAKER SYSTEM EOS/NIKE17,EOS/NIKE17-L,100X42,WIRE:240MM BN59-00264A...
- Page 61 3711-004386 CN701 CONNECTOR-HEADER BOX,3P,1R,2mm,ANGLE,SN 3722-000117 CN801 JACK-DC POWER 3P,3.5MM,AG,BLK,NO 3722-000183 CN200 JACK-SCART 21P,4mm,SN,BLK,NO 3722-001055 CN803 JACK-PHONE 5P/2C,3.6PI,AG,BLK,#16-22 6003-000117 IN/PCB+SH/PCB SCREW-TAPTITE BH,+,B,M3,L6,ZPC(YEL),SWRCH18A 6003-000117 M/PCB+SH/PCB SCREW-TAPTITE BH,+,B,M3,L6,ZPC(YEL),SWRCH18A 6003-000117 SH/PCB+SH/D_SUB SCREW-TAPTITE BH,+,B,M3,L6,ZPC(YEL),SWRCH18A BN39-00047A CBF-HARNESS 100MM,100MM,BLU/WHT/GRY,UL1061,AWG28,51021-1200 BN39-00216A LEAD CONNECTOR-ASSY ES17AS,UL1571#30,UL/CSA,30P,-,-,#30,12507HS-30,FI-X30H,BK,-,-,140MM,1571#30,SJ01 BN39-00217A LEAD CONNECTOR-ASSY ES17AS,UL2835#28,UL/CSA,6P,-,-,#28,12505HS-06,51021-0600,BK,-,-,180MM,2835#28,SJ BN40-00005A CN806 RF MODULATOR-PAL...
- Page 62 0403-001052 ZD203 DIODE-ZENER RD8.2MB,8.2V,7.7-8.64V,200mW,S 0403-001052 ZD204 DIODE-ZENER RD8.2MB,8.2V,7.7-8.64V,200mW,S 0403-001052 ZD205 DIODE-ZENER RD8.2MB,8.2V,7.7-8.64V,200mW,S 0403-001052 ZD206 DIODE-ZENER RD8.2MB,8.2V,7.7-8.64V,200mW,S 0403-001052 ZD811 DIODE-ZENER RD8.2MB,8.2V,7.7-8.64V,200mW,S 0403-001052 ZD812 DIODE-ZENER RD8.2MB,8.2V,7.7-8.64V,200mW,S 0403-001052 ZD813 DIODE-ZENER RD8.2MB,8.2V,7.7-8.64V,200mW,S 0403-001052 ZD814 DIODE-ZENER RD8.2MB,8.2V,7.7-8.64V,200mW,S 0403-001052 ZD815 DIODE-ZENER RD8.2MB,8.2V,7.7-8.64V,200mW,S 0403-001052 ZD816 DIODE-ZENER RD8.2MB,8.2V,7.7-8.64V,200mW,S 0403-001052 ZD817 DIODE-ZENER...
- Page 63 1203-002410 IC105 IC-POSI.ADJUST REG. KA317MR,D-PAK,3P,240MIL,PLASTIC,40V,-,0TO+125C,0.5A,1.2/1.3V,TP 1203-002410 IC301 IC-POSI.ADJUST REG. KA317MR,D-PAK,3P,240MIL,PLASTIC,40V,-,0TO+125C,0.5A,1.2/1.3V,TP 1203-002450 IC104 IC-VOLTAGE REGULATOR MC33375ST-2.5T3,SOT-223,4P,137MIL,PLASTIC,2.475/2.525V,-,-40TO+125C,300MA,-,TP 1204-000292 IC103 IC-VIDEO SYSTEM LM1881M,SOP,8P,150MIL,PLASTIC, 1204-001926 IC201 IC-VIDEO PROCESS VPC3230D-C5,PQFP,80P,-,PLASTIC,6V,-,0 TO 65C,TP,VPC3230D-C5 1204-002007 IC700 IC-SOUND PROCESSOR MSP3411G-QA-B8,PQFP,80P,20X14MM,PLASTIC,8.7V,1W,0TO+70C,TR,- 1205-001740 IC600 IC-TRANSMITTER DS90C385,TSSOP,56P,240MIL,PLASTIC,4V,1.63W,-10 TO +70C,ST,FPD LINK-85MHZ(LVDS) 1205-001740 IC601 IC-TRANSMITTER DS90C385,TSSOP,56P,240MIL,PLASTIC,4V,1.63W,-10 TO +70C,ST,FPD LINK-85MHZ(LVDS)
- Page 64 2007-000070 R814 R-CHIP 0ohm,5%,1/16W,DA,TP,1608 2007-000070 R833 R-CHIP 0ohm,5%,1/16W,DA,TP,1608 2007-000070 R866 R-CHIP 0ohm,5%,1/16W,DA,TP,1608 2007-000070 R901 R-CHIP 0ohm,5%,1/16W,DA,TP,1608 2007-000070 R940 R-CHIP 0ohm,5%,1/16W,DA,TP,1608 2007-000071 R174 R-CHIP 22ohm,5%,1/16W,DA,TP,1608 2007-000071 R179 R-CHIP 22ohm,5%,1/16W,DA,TP,1608 2007-000071 R180 R-CHIP 22ohm,5%,1/16W,DA,TP,1608 2007-000071 R181 R-CHIP 22ohm,5%,1/16W,DA,TP,1608 2007-000071 R182 R-CHIP 22ohm,5%,1/16W,DA,TP,1608 2007-000071 R183 R-CHIP...
- Page 65 2007-000074 R104 R-CHIP 100ohm,5%,1/16W,DA,TP,1608 2007-000074 R105 R-CHIP 100ohm,5%,1/16W,DA,TP,1608 2007-000074 R106 R-CHIP 100ohm,5%,1/16W,DA,TP,1608 2007-000074 R109 R-CHIP 100ohm,5%,1/16W,DA,TP,1608 2007-000074 R111 R-CHIP 100ohm,5%,1/16W,DA,TP,1608 2007-000074 R112 R-CHIP 100ohm,5%,1/16W,DA,TP,1608 2007-000074 R115 R-CHIP 100ohm,5%,1/16W,DA,TP,1608 2007-000074 R120 R-CHIP 100ohm,5%,1/16W,DA,TP,1608 2007-000074 R121 R-CHIP 100ohm,5%,1/16W,DA,TP,1608 2007-000074 R124 R-CHIP 100ohm,5%,1/16W,DA,TP,1608 2007-000074 R125 R-CHIP...
- Page 66 2007-000074 R229 R-CHIP 100ohm,5%,1/16W,DA,TP,1608 2007-000074 R230 R-CHIP 100ohm,5%,1/16W,DA,TP,1608 2007-000074 R232 R-CHIP 100ohm,5%,1/16W,DA,TP,1608 2007-000074 R239 R-CHIP 100ohm,5%,1/16W,DA,TP,1608 2007-000074 R240 R-CHIP 100ohm,5%,1/16W,DA,TP,1608 2007-000074 R247 R-CHIP 100ohm,5%,1/16W,DA,TP,1608 2007-000074 R248 R-CHIP 100ohm,5%,1/16W,DA,TP,1608 2007-000074 R249 R-CHIP 100ohm,5%,1/16W,DA,TP,1608 2007-000074 R252 R-CHIP 100ohm,5%,1/16W,DA,TP,1608 2007-000074 R263 R-CHIP 100ohm,5%,1/16W,DA,TP,1608 2007-000074 R264 R-CHIP...
- Page 67 2007-000074 R724 R-CHIP 100ohm,5%,1/16W,DA,TP,1608 2007-000074 R753 R-CHIP 100ohm,5%,1/16W,DA,TP,1608 2007-000074 R834 R-CHIP 100ohm,5%,1/16W,DA,TP,1608 2007-000074 R836 R-CHIP 100ohm,5%,1/16W,DA,TP,1608 2007-000074 R838 R-CHIP 100ohm,5%,1/16W,DA,TP,1608 2007-000074 R839 R-CHIP 100ohm,5%,1/16W,DA,TP,1608 2007-000074 R844 R-CHIP 100ohm,5%,1/16W,DA,TP,1608 2007-000074 R845 R-CHIP 100ohm,5%,1/16W,DA,TP,1608 2007-000074 R850 R-CHIP 100ohm,5%,1/16W,DA,TP,1608 2007-000074 R852 R-CHIP 100ohm,5%,1/16W,DA,TP,1608 2007-000074 R853 R-CHIP...
- Page 68 2007-000084 R244 R-CHIP 4.7Kohm,5%,1/16W,DA,TP,1608 2007-000084 R245 R-CHIP 4.7Kohm,5%,1/16W,DA,TP,1608 2007-000084 R246 R-CHIP 4.7Kohm,5%,1/16W,DA,TP,1608 2007-000084 R741 R-CHIP 4.7Kohm,5%,1/16W,DA,TP,1608 2007-000084 R742 R-CHIP 4.7Kohm,5%,1/16W,DA,TP,1608 2007-000084 R749 R-CHIP 4.7Kohm,5%,1/16W,DA,TP,1608 2007-000084 R800 R-CHIP 4.7Kohm,5%,1/16W,DA,TP,1608 2007-000084 R801 R-CHIP 4.7Kohm,5%,1/16W,DA,TP,1608 2007-000084 R802 R-CHIP 4.7Kohm,5%,1/16W,DA,TP,1608 2007-000084 R803 R-CHIP 4.7Kohm,5%,1/16W,DA,TP,1608 2007-000084 R827 R-CHIP...
- Page 69 2007-000090 R929 R-CHIP 10KOHM,5%,1/16W,DA,TP,1608 2007-000091 R729 R-CHIP 12Kohm,5%,1/16W,DA,TP,1608 2007-000091 R732 R-CHIP 12Kohm,5%,1/16W,DA,TP,1608 2007-000092 R201 R-CHIP 15Kohm,5%,1/16W,DA,TP,1608 2007-000092 R903 R-CHIP 15Kohm,5%,1/16W,DA,TP,1608 2007-000093 R238 R-CHIP 20Kohm,5%,1/16W,DA,TP,1608 2007-000093 R730 R-CHIP 20Kohm,5%,1/16W,DA,TP,1608 2007-000093 R731 R-CHIP 20Kohm,5%,1/16W,DA,TP,1608 2007-000094 R203 R-CHIP 22Kohm,5%,1/16W,DA,TP,1608 2007-000098 R717 R-CHIP 56Kohm,5%,1/16W,DA,TP,1608 2007-000098 R719 R-CHIP...
- Page 70 2007-001044 R123 R-CHIP 56ohm,5%,1/16W,DA,TP,1608 2007-001167 R127 R-CHIP 75ohm,5%,1/16W,DA,TP,1608 2007-001167 R128 R-CHIP 75ohm,5%,1/16W,DA,TP,1608 2007-001167 R129 R-CHIP 75ohm,5%,1/16W,DA,TP,1608 2007-001167 R205 R-CHIP 75ohm,5%,1/16W,DA,TP,1608 2007-001167 R206 R-CHIP 75ohm,5%,1/16W,DA,TP,1608 2007-001167 R208 R-CHIP 75ohm,5%,1/16W,DA,TP,1608 2007-001167 R211 R-CHIP 75ohm,5%,1/16W,DA,TP,1608 2007-001167 R212 R-CHIP 75ohm,5%,1/16W,DA,TP,1608 2007-001167 R257 R-CHIP 75ohm,5%,1/16W,DA,TP,1608 2007-001167 R258 R-CHIP...
- Page 71 2203-000140 C714 C-CERAMIC,CHIP 1.5nF,10%,50V,X7R,TP,1608,- 2203-000140 C729 C-CERAMIC,CHIP 1.5nF,10%,50V,X7R,TP,1608,- 2203-000140 C790 C-CERAMIC,CHIP 1.5nF,10%,50V,X7R,TP,1608,- 2203-000140 C791 C-CERAMIC,CHIP 1.5nF,10%,50V,X7R,TP,1608,- 2203-000189 C100 C-CERAMIC,CHIP 100nF,+80-20%,25V,Y5V,TP,1608, 2203-000189 C110 C-CERAMIC,CHIP 100nF,+80-20%,25V,Y5V,TP,1608, 2203-000189 C111 C-CERAMIC,CHIP 100nF,+80-20%,25V,Y5V,TP,1608, 2203-000189 C114 C-CERAMIC,CHIP 100nF,+80-20%,25V,Y5V,TP,1608, 2203-000189 C116 C-CERAMIC,CHIP 100nF,+80-20%,25V,Y5V,TP,1608, 2203-000189 C122 C-CERAMIC,CHIP 100nF,+80-20%,25V,Y5V,TP,1608, 2203-000189 C123 C-CERAMIC,CHIP...
- Page 72 2203-000189 C313 C-CERAMIC,CHIP 100nF,+80-20%,25V,Y5V,TP,1608, 2203-000189 C314 C-CERAMIC,CHIP 100nF,+80-20%,25V,Y5V,TP,1608, 2203-000189 C315 C-CERAMIC,CHIP 100nF,+80-20%,25V,Y5V,TP,1608, 2203-000189 C316 C-CERAMIC,CHIP 100nF,+80-20%,25V,Y5V,TP,1608, 2203-000189 C317 C-CERAMIC,CHIP 100nF,+80-20%,25V,Y5V,TP,1608, 2203-000189 C324 C-CERAMIC,CHIP 100nF,+80-20%,25V,Y5V,TP,1608, 2203-000189 C325 C-CERAMIC,CHIP 100nF,+80-20%,25V,Y5V,TP,1608, 2203-000189 C326 C-CERAMIC,CHIP 100nF,+80-20%,25V,Y5V,TP,1608, 2203-000189 C327 C-CERAMIC,CHIP 100nF,+80-20%,25V,Y5V,TP,1608, 2203-000189 C328 C-CERAMIC,CHIP 100nF,+80-20%,25V,Y5V,TP,1608, 2203-000189 C400 C-CERAMIC,CHIP...
- Page 73 2203-000189 C536 C-CERAMIC,CHIP 100nF,+80-20%,25V,Y5V,TP,1608, 2203-000189 C537 C-CERAMIC,CHIP 100nF,+80-20%,25V,Y5V,TP,1608, 2203-000189 C538 C-CERAMIC,CHIP 100nF,+80-20%,25V,Y5V,TP,1608, 2203-000189 C600 C-CERAMIC,CHIP 100nF,+80-20%,25V,Y5V,TP,1608, 2203-000189 C602 C-CERAMIC,CHIP 100nF,+80-20%,25V,Y5V,TP,1608, 2203-000189 C619 C-CERAMIC,CHIP 100nF,+80-20%,25V,Y5V,TP,1608, 2203-000189 C634 C-CERAMIC,CHIP 100nF,+80-20%,25V,Y5V,TP,1608, 2203-000189 C702 C-CERAMIC,CHIP 100nF,+80-20%,25V,Y5V,TP,1608, 2203-000189 C718 C-CERAMIC,CHIP 100nF,+80-20%,25V,Y5V,TP,1608, 2203-000189 C733 C-CERAMIC,CHIP 100nF,+80-20%,25V,Y5V,TP,1608, 2203-000189 C734 C-CERAMIC,CHIP...
- Page 74 2203-000257 C166 C-CERAMIC,CHIP 10nF,10%,50V,X7R,TP,1608 2203-000257 C181 C-CERAMIC,CHIP 10nF,10%,50V,X7R,TP,1608 2203-000257 C182 C-CERAMIC,CHIP 10nF,10%,50V,X7R,TP,1608 2203-000257 C185 C-CERAMIC,CHIP 10nF,10%,50V,X7R,TP,1608 2203-000257 C186 C-CERAMIC,CHIP 10nF,10%,50V,X7R,TP,1608 2203-000257 C193 C-CERAMIC,CHIP 10nF,10%,50V,X7R,TP,1608 2203-000257 C198 C-CERAMIC,CHIP 10nF,10%,50V,X7R,TP,1608 2203-000257 C199 C-CERAMIC,CHIP 10nF,10%,50V,X7R,TP,1608 2203-000257 C204 C-CERAMIC,CHIP 10nF,10%,50V,X7R,TP,1608 2203-000257 C265 C-CERAMIC,CHIP 10nF,10%,50V,X7R,TP,1608 2203-000257 C267 C-CERAMIC,CHIP...
- Page 75 2203-000440 C401 C-CERAMIC,CHIP 1nF,10%,50V,X7R,TP,1608,- 2203-000440 C404 C-CERAMIC,CHIP 1nF,10%,50V,X7R,TP,1608,- 2203-000440 C614 C-CERAMIC,CHIP 1nF,10%,50V,X7R,TP,1608,- 2203-000440 C616 C-CERAMIC,CHIP 1nF,10%,50V,X7R,TP,1608,- 2203-000440 C617 C-CERAMIC,CHIP 1nF,10%,50V,X7R,TP,1608,- 2203-000440 C621 C-CERAMIC,CHIP 1nF,10%,50V,X7R,TP,1608,- 2203-000440 C622 C-CERAMIC,CHIP 1nF,10%,50V,X7R,TP,1608,- 2203-000440 C623 C-CERAMIC,CHIP 1nF,10%,50V,X7R,TP,1608,- 2203-000440 C723 C-CERAMIC,CHIP 1nF,10%,50V,X7R,TP,1608,- 2203-000440 C724 C-CERAMIC,CHIP 1nF,10%,50V,X7R,TP,1608,- 2203-000440 C860 C-CERAMIC,CHIP...
- Page 76 2203-001077 C242 C-CERAMIC,CHIP 0.056nF,5%,50V,NP0,TP,2012 2203-001077 C243 C-CERAMIC,CHIP 0.056nF,5%,50V,NP0,TP,2012 2203-001077 C700 C-CERAMIC,CHIP 0.056nF,5%,50V,NP0,TP,2012 2203-001077 C706 C-CERAMIC,CHIP 0.056nF,5%,50V,NP0,TP,2012 2203-001077 C707 C-CERAMIC,CHIP 0.056nF,5%,50V,NP0,TP,2012 2203-001077 C853 C-CERAMIC,CHIP 0.056nF,5%,50V,NP0,TP,2012 2203-001077 C854 C-CERAMIC,CHIP 0.056nF,5%,50V,NP0,TP,2012 2203-001140 C253 C-CERAMIC,CHIP 68nF,10%,16V,X7R,TP,1608,- 2203-001140 C254 C-CERAMIC,CHIP 68nF,10%,16V,X7R,TP,1608,- 2203-001140 C255 C-CERAMIC,CHIP 68nF,10%,16V,X7R,TP,1608,- 2203-001158 C151 C-CERAMIC,CHIP...
- Page 77 2203-005065 C131 C-CERAMIC,CHIP 1000nF,+80-20%,10V,Y5V,TP,1608 2203-005065 C138 C-CERAMIC,CHIP 1000nF,+80-20%,10V,Y5V,TP,1608 2203-005065 C139 C-CERAMIC,CHIP 1000nF,+80-20%,10V,Y5V,TP,1608 2203-005065 C141 C-CERAMIC,CHIP 1000nF,+80-20%,10V,Y5V,TP,1608 2203-005065 C142 C-CERAMIC,CHIP 1000nF,+80-20%,10V,Y5V,TP,1608 2203-005065 C146 C-CERAMIC,CHIP 1000nF,+80-20%,10V,Y5V,TP,1608 2203-005065 C147 C-CERAMIC,CHIP 1000nF,+80-20%,10V,Y5V,TP,1608 2203-005065 C153 C-CERAMIC,CHIP 1000nF,+80-20%,10V,Y5V,TP,1608 2203-005065 C154 C-CERAMIC,CHIP 1000nF,+80-20%,10V,Y5V,TP,1608 2203-005065 C194 C-CERAMIC,CHIP 1000nF,+80-20%,10V,Y5V,TP,1608 2203-005189 C207 C-CERAMIC,CHIP...
- Page 78 2402-000209 C500 C-AL,SMD 22uF,20%,16V,WT,TP,5.3x5.3mm,1 2402-000209 C513 C-AL,SMD 22uF,20%,16V,WT,TP,5.3x5.3mm,1 2402-000209 C526 C-AL,SMD 22uF,20%,16V,WT,TP,5.3x5.3mm,1 2402-000209 C841 C-AL,SMD 22uF,20%,16V,WT,TP,5.3x5.3mm,1 2402-000209 C842 C-AL,SMD 22uF,20%,16V,WT,TP,5.3x5.3mm,1 2402-001006 C767 C-AL,SMD 4.7uF,20%,25V,GP,TP,3.6x6.3x3. 2402-001006 C769 C-AL,SMD 4.7uF,20%,25V,GP,TP,3.6x6.3x3. 2402-001006 C771 C-AL,SMD 4.7uF,20%,25V,GP,TP,3.6x6.3x3. 2402-001006 C773 C-AL,SMD 4.7uF,20%,25V,GP,TP,3.6x6.3x3. 2402-001006 C776 C-AL,SMD 4.7uF,20%,25V,GP,TP,3.6x6.3x3. 2402-001006 C836 C-AL,SMD...
- Page 79 2703-001778 L200 INDUCTOR-SMD 3.3UH,20%,3.2X2.5X2.2MM 2703-001778 L700 INDUCTOR-SMD 3.3UH,20%,3.2X2.5X2.2MM 2703-001778 L701 INDUCTOR-SMD 3.3UH,20%,3.2X2.5X2.2MM 2801-003667 X900 CRYSTAL-SMD 14.3182MHZ,50PPM,28-AAN,16,50OHM,TP 2801-003773 X201 CRYSTAL-SMD 12MHZ,30PPM,28-AAN,20PF,50OHM,TP 2801-003843 X701 CRYSTAL-SMD 18.432MHz,30ppm,28-AAN,20pF,50ohm,TP 2801-003846 X200 CRYSTAL-SMD 20.25MHz,30ppm,28-AAN,20pF,50ohm,TP 2804-001474 X100 OSCILLATOR-CLOCK 14.31818MHZ,100PPM,30PF,TP,3.3V,15MA 2901-001114 FT201 FILTER-EMI SMD 25VDC,2.0ADC,-,100nF,3.2x1.6x1 3301-001145 BD115 CORE-FERRITE BEAD AB,4.5x1.6x1.6mm,-,- 3301-001145 BD700...
- Page 80 ASSY ACCESSORY LW15E23CX/XEF 0203-000214 TAPE-OPP MASKING OPP/W50/CLR,T0.05,W50,L400000, 4301-000121 BATTERY-MN 1.5V,-,AAA,10.5x44.5m,HOLDER 6801-001009 CARD-WARRANTY EUROPE(12),8 6801-001016 CARD-REGISTRATION XEF,FRENCH,MOJO100,L150,W392,-,- BH39-10339H CBF POWER CORD DET,H05VV-F,250V/10,16A,BLK,25 BH59-00179A S/W DRIVER-2.6 ALL,NATURA-COLOR,ALL,- BH68-00297G MANUAL-ETC-00 WIN2000,SAMSUNG,English,W/W,MIMOJO80G,-,148,210,-,-,-,- Page 63 BH69-30348D BAG-PE LDPE,T0.05,W240*L356,Y,-,CMG73 BN39-00043A CBF SIGNAL DETACHABLE,-,15P/15P,-,-,- BN59-00217B REMOCON -,TM71,EOS,40,GR20,SILVER C/T,PAL,-,-,-,-...
- Page 81 BN68-00235A MANUAL USERS-06 LW-15E23C/LW-17E24C,SYNCMASTER,E/F/S/G/I/SW,EDC,MIMOJO80G,-,148,210,-,-,-,- S5-LW17E24CX/XEF LTM170EH-L05 ZPD BN90-00210A ASSY COVER FRONT ES17AS 6003-001319 C/F+C/R SCREW-TAPTITE BH,+,B,M3,L10,NI PLT,SWRCH18A,- BN90-00019F ASSY COVER FRONT ES17AS,ABS HB,BRIGHT SILVER,SV-012P 6002-000129 SCREW-TAPPING FH,+,2S,M3,L8,ZPC(BLK),SM20C 6003-000276 SCREW-TAPTITE BH,+,B,M3,L10,ZPC(YEL),SWCH10 BN59-00214A BOARD CN17VS,FUNCTION KEY,-,-,-,-,- BN59-00216A PBA SUB CN17VS,IR PBA SUB,-,-,-,-,- BN59-00263A SPEAKER SYSTEM EOS/NIKE17,EOS/NIKE17-L,100X42,WIRE:240MM...
- Page 82 3711-004386 CN701 CONNECTOR-HEADER BOX,3P,1R,2mm,ANGLE,SN 3722-000117 CN801 JACK-DC POWER 3P,3.5MM,AG,BLK,NO 3722-000183 CN200 JACK-SCART 21P,4mm,SN,BLK,NO 3722-001055 CN803 JACK-PHONE 5P/2C,3.6PI,AG,BLK,#16-22 6003-000117 IN/PCB+SH/PCB SCREW-TAPTITE BH,+,B,M3,L6,ZPC(YEL),SWRCH18A 6003-000117 M/PCB+SH/PCB SCREW-TAPTITE BH,+,B,M3,L6,ZPC(YEL),SWRCH18A 6003-000117 SH/PCB+SH/D_SUB SCREW-TAPTITE BH,+,B,M3,L6,ZPC(YEL),SWRCH18A BN39-00047A CBF-HARNESS 100MM,100MM,BLU/WHT/GRY,UL1061,AWG28,51021-1200 BN39-00216A LEAD CONNECTOR-ASSY ES17AS,UL1571#30,UL/CSA,30P,-,-,#30,12507HS-30,FI-X30H,BK,-,-,140MM,1571#30,SJ01 BN39-00217A LEAD CONNECTOR-ASSY ES17AS,UL2835#28,UL/CSA,6P,-,-,#28,12505HS-06,51021-0600,BK,-,-,180MM,2835#28,SJ BN40-00005A CN806 RF MODULATOR-PAL...
- Page 83 0403-001052 ZD203 DIODE-ZENER RD8.2MB,8.2V,7.7-8.64V,200mW,S 0403-001052 ZD204 DIODE-ZENER RD8.2MB,8.2V,7.7-8.64V,200mW,S 0403-001052 ZD205 DIODE-ZENER RD8.2MB,8.2V,7.7-8.64V,200mW,S 0403-001052 ZD206 DIODE-ZENER RD8.2MB,8.2V,7.7-8.64V,200mW,S 0403-001052 ZD811 DIODE-ZENER RD8.2MB,8.2V,7.7-8.64V,200mW,S 0403-001052 ZD812 DIODE-ZENER RD8.2MB,8.2V,7.7-8.64V,200mW,S 0403-001052 ZD813 DIODE-ZENER RD8.2MB,8.2V,7.7-8.64V,200mW,S 0403-001052 ZD814 DIODE-ZENER RD8.2MB,8.2V,7.7-8.64V,200mW,S 0403-001052 ZD815 DIODE-ZENER RD8.2MB,8.2V,7.7-8.64V,200mW,S 0403-001052 ZD816 DIODE-ZENER RD8.2MB,8.2V,7.7-8.64V,200mW,S 0403-001052 ZD817 DIODE-ZENER...
- Page 84 1203-002410 IC105 IC-POSI.ADJUST REG. KA317MR,D-PAK,3P,240MIL,PLASTIC,40V,-,0TO+125C,0.5A,1.2/1.3V,TP 1203-002410 IC301 IC-POSI.ADJUST REG. KA317MR,D-PAK,3P,240MIL,PLASTIC,40V,-,0TO+125C,0.5A,1.2/1.3V,TP 1203-002450 IC104 IC-VOLTAGE REGULATOR MC33375ST-2.5T3,SOT-223,4P,137MIL,PLASTIC,2.475/2.525V,-,-40TO+125C,300MA,-,TP 1204-000292 IC103 IC-VIDEO SYSTEM LM1881M,SOP,8P,150MIL,PLASTIC, 1204-001926 IC201 IC-VIDEO PROCESS VPC3230D-C5,PQFP,80P,-,PLASTIC,6V,-,0 TO 65C,TP,VPC3230D-C5 1204-002007 IC700 IC-SOUND PROCESSOR MSP3411G-QA-B8,PQFP,80P,20X14MM,PLASTIC,8.7V,1W,0TO+70C,TR,- 1205-001740 IC600 IC-TRANSMITTER DS90C385,TSSOP,56P,240MIL,PLASTIC,4V,1.63W,-10 TO +70C,ST,FPD LINK-85MHZ(LVDS) 1205-001740 IC601 IC-TRANSMITTER DS90C385,TSSOP,56P,240MIL,PLASTIC,4V,1.63W,-10 TO +70C,ST,FPD LINK-85MHZ(LVDS)
- Page 85 2007-000070 R814 R-CHIP 0ohm,5%,1/16W,DA,TP,1608 2007-000070 R833 R-CHIP 0ohm,5%,1/16W,DA,TP,1608 2007-000070 R866 R-CHIP 0ohm,5%,1/16W,DA,TP,1608 2007-000070 R901 R-CHIP 0ohm,5%,1/16W,DA,TP,1608 2007-000070 R940 R-CHIP 0ohm,5%,1/16W,DA,TP,1608 2007-000071 R174 R-CHIP 22ohm,5%,1/16W,DA,TP,1608 2007-000071 R179 R-CHIP 22ohm,5%,1/16W,DA,TP,1608 2007-000071 R180 R-CHIP 22ohm,5%,1/16W,DA,TP,1608 2007-000071 R181 R-CHIP 22ohm,5%,1/16W,DA,TP,1608 2007-000071 R182 R-CHIP 22ohm,5%,1/16W,DA,TP,1608 2007-000071 R183 R-CHIP...
- Page 86 2007-000074 R104 R-CHIP 100ohm,5%,1/16W,DA,TP,1608 2007-000074 R105 R-CHIP 100ohm,5%,1/16W,DA,TP,1608 2007-000074 R106 R-CHIP 100ohm,5%,1/16W,DA,TP,1608 2007-000074 R109 R-CHIP 100ohm,5%,1/16W,DA,TP,1608 2007-000074 R111 R-CHIP 100ohm,5%,1/16W,DA,TP,1608 2007-000074 R112 R-CHIP 100ohm,5%,1/16W,DA,TP,1608 2007-000074 R115 R-CHIP 100ohm,5%,1/16W,DA,TP,1608 2007-000074 R120 R-CHIP 100ohm,5%,1/16W,DA,TP,1608 2007-000074 R121 R-CHIP 100ohm,5%,1/16W,DA,TP,1608 2007-000074 R124 R-CHIP 100ohm,5%,1/16W,DA,TP,1608 2007-000074 R125 R-CHIP...
- Page 87 2007-000074 R229 R-CHIP 100ohm,5%,1/16W,DA,TP,1608 2007-000074 R230 R-CHIP 100ohm,5%,1/16W,DA,TP,1608 2007-000074 R232 R-CHIP 100ohm,5%,1/16W,DA,TP,1608 2007-000074 R239 R-CHIP 100ohm,5%,1/16W,DA,TP,1608 2007-000074 R240 R-CHIP 100ohm,5%,1/16W,DA,TP,1608 2007-000074 R247 R-CHIP 100ohm,5%,1/16W,DA,TP,1608 2007-000074 R248 R-CHIP 100ohm,5%,1/16W,DA,TP,1608 2007-000074 R249 R-CHIP 100ohm,5%,1/16W,DA,TP,1608 2007-000074 R252 R-CHIP 100ohm,5%,1/16W,DA,TP,1608 2007-000074 R263 R-CHIP 100ohm,5%,1/16W,DA,TP,1608 2007-000074 R264 R-CHIP...
- Page 88 2007-000074 R724 R-CHIP 100ohm,5%,1/16W,DA,TP,1608 2007-000074 R753 R-CHIP 100ohm,5%,1/16W,DA,TP,1608 2007-000074 R834 R-CHIP 100ohm,5%,1/16W,DA,TP,1608 2007-000074 R836 R-CHIP 100ohm,5%,1/16W,DA,TP,1608 2007-000074 R838 R-CHIP 100ohm,5%,1/16W,DA,TP,1608 2007-000074 R839 R-CHIP 100ohm,5%,1/16W,DA,TP,1608 2007-000074 R844 R-CHIP 100ohm,5%,1/16W,DA,TP,1608 2007-000074 R845 R-CHIP 100ohm,5%,1/16W,DA,TP,1608 2007-000074 R850 R-CHIP 100ohm,5%,1/16W,DA,TP,1608 2007-000074 R852 R-CHIP 100ohm,5%,1/16W,DA,TP,1608 2007-000074 R853 R-CHIP...
- Page 89 2007-000084 R244 R-CHIP 4.7Kohm,5%,1/16W,DA,TP,1608 2007-000084 R245 R-CHIP 4.7Kohm,5%,1/16W,DA,TP,1608 2007-000084 R246 R-CHIP 4.7Kohm,5%,1/16W,DA,TP,1608 2007-000084 R741 R-CHIP 4.7Kohm,5%,1/16W,DA,TP,1608 2007-000084 R742 R-CHIP 4.7Kohm,5%,1/16W,DA,TP,1608 2007-000084 R749 R-CHIP 4.7Kohm,5%,1/16W,DA,TP,1608 2007-000084 R800 R-CHIP 4.7Kohm,5%,1/16W,DA,TP,1608 2007-000084 R801 R-CHIP 4.7Kohm,5%,1/16W,DA,TP,1608 2007-000084 R802 R-CHIP 4.7Kohm,5%,1/16W,DA,TP,1608 2007-000084 R803 R-CHIP 4.7Kohm,5%,1/16W,DA,TP,1608 2007-000084 R827 R-CHIP...
- Page 90 2007-000090 R929 R-CHIP 10KOHM,5%,1/16W,DA,TP,1608 2007-000091 R729 R-CHIP 12Kohm,5%,1/16W,DA,TP,1608 2007-000091 R732 R-CHIP 12Kohm,5%,1/16W,DA,TP,1608 2007-000092 R201 R-CHIP 15Kohm,5%,1/16W,DA,TP,1608 2007-000092 R903 R-CHIP 15Kohm,5%,1/16W,DA,TP,1608 2007-000093 R238 R-CHIP 20Kohm,5%,1/16W,DA,TP,1608 2007-000093 R730 R-CHIP 20Kohm,5%,1/16W,DA,TP,1608 2007-000093 R731 R-CHIP 20Kohm,5%,1/16W,DA,TP,1608 2007-000094 R203 R-CHIP 22Kohm,5%,1/16W,DA,TP,1608 2007-000098 R717 R-CHIP 56Kohm,5%,1/16W,DA,TP,1608 2007-000098 R719 R-CHIP...
- Page 91 2007-001044 R123 R-CHIP 56ohm,5%,1/16W,DA,TP,1608 2007-001167 R127 R-CHIP 75ohm,5%,1/16W,DA,TP,1608 2007-001167 R128 R-CHIP 75ohm,5%,1/16W,DA,TP,1608 2007-001167 R129 R-CHIP 75ohm,5%,1/16W,DA,TP,1608 2007-001167 R205 R-CHIP 75ohm,5%,1/16W,DA,TP,1608 2007-001167 R206 R-CHIP 75ohm,5%,1/16W,DA,TP,1608 2007-001167 R208 R-CHIP 75ohm,5%,1/16W,DA,TP,1608 2007-001167 R211 R-CHIP 75ohm,5%,1/16W,DA,TP,1608 2007-001167 R212 R-CHIP 75ohm,5%,1/16W,DA,TP,1608 2007-001167 R257 R-CHIP 75ohm,5%,1/16W,DA,TP,1608 2007-001167 R258 R-CHIP...
- Page 92 2203-000140 C714 C-CERAMIC,CHIP 1.5nF,10%,50V,X7R,TP,1608,- 2203-000140 C729 C-CERAMIC,CHIP 1.5nF,10%,50V,X7R,TP,1608,- 2203-000140 C790 C-CERAMIC,CHIP 1.5nF,10%,50V,X7R,TP,1608,- 2203-000140 C791 C-CERAMIC,CHIP 1.5nF,10%,50V,X7R,TP,1608,- 2203-000189 C100 C-CERAMIC,CHIP 100nF,+80-20%,25V,Y5V,TP,1608, 2203-000189 C110 C-CERAMIC,CHIP 100nF,+80-20%,25V,Y5V,TP,1608, 2203-000189 C111 C-CERAMIC,CHIP 100nF,+80-20%,25V,Y5V,TP,1608, 2203-000189 C114 C-CERAMIC,CHIP 100nF,+80-20%,25V,Y5V,TP,1608, 2203-000189 C116 C-CERAMIC,CHIP 100nF,+80-20%,25V,Y5V,TP,1608, 2203-000189 C122 C-CERAMIC,CHIP 100nF,+80-20%,25V,Y5V,TP,1608, 2203-000189 C123 C-CERAMIC,CHIP...
- Page 93 2203-000189 C313 C-CERAMIC,CHIP 100nF,+80-20%,25V,Y5V,TP,1608, 2203-000189 C314 C-CERAMIC,CHIP 100nF,+80-20%,25V,Y5V,TP,1608, 2203-000189 C315 C-CERAMIC,CHIP 100nF,+80-20%,25V,Y5V,TP,1608, 2203-000189 C316 C-CERAMIC,CHIP 100nF,+80-20%,25V,Y5V,TP,1608, 2203-000189 C317 C-CERAMIC,CHIP 100nF,+80-20%,25V,Y5V,TP,1608, 2203-000189 C324 C-CERAMIC,CHIP 100nF,+80-20%,25V,Y5V,TP,1608, 2203-000189 C325 C-CERAMIC,CHIP 100nF,+80-20%,25V,Y5V,TP,1608, 2203-000189 C326 C-CERAMIC,CHIP 100nF,+80-20%,25V,Y5V,TP,1608, 2203-000189 C327 C-CERAMIC,CHIP 100nF,+80-20%,25V,Y5V,TP,1608, 2203-000189 C328 C-CERAMIC,CHIP 100nF,+80-20%,25V,Y5V,TP,1608, 2203-000189 C400 C-CERAMIC,CHIP...
- Page 94 2203-000189 C536 C-CERAMIC,CHIP 100nF,+80-20%,25V,Y5V,TP,1608, 2203-000189 C537 C-CERAMIC,CHIP 100nF,+80-20%,25V,Y5V,TP,1608, 2203-000189 C538 C-CERAMIC,CHIP 100nF,+80-20%,25V,Y5V,TP,1608, 2203-000189 C600 C-CERAMIC,CHIP 100nF,+80-20%,25V,Y5V,TP,1608, 2203-000189 C602 C-CERAMIC,CHIP 100nF,+80-20%,25V,Y5V,TP,1608, 2203-000189 C619 C-CERAMIC,CHIP 100nF,+80-20%,25V,Y5V,TP,1608, 2203-000189 C634 C-CERAMIC,CHIP 100nF,+80-20%,25V,Y5V,TP,1608, 2203-000189 C702 C-CERAMIC,CHIP 100nF,+80-20%,25V,Y5V,TP,1608, 2203-000189 C718 C-CERAMIC,CHIP 100nF,+80-20%,25V,Y5V,TP,1608, 2203-000189 C733 C-CERAMIC,CHIP 100nF,+80-20%,25V,Y5V,TP,1608, 2203-000189 C734 C-CERAMIC,CHIP...
- Page 95 2203-000257 C166 C-CERAMIC,CHIP 10nF,10%,50V,X7R,TP,1608 2203-000257 C181 C-CERAMIC,CHIP 10nF,10%,50V,X7R,TP,1608 2203-000257 C182 C-CERAMIC,CHIP 10nF,10%,50V,X7R,TP,1608 2203-000257 C185 C-CERAMIC,CHIP 10nF,10%,50V,X7R,TP,1608 2203-000257 C186 C-CERAMIC,CHIP 10nF,10%,50V,X7R,TP,1608 2203-000257 C193 C-CERAMIC,CHIP 10nF,10%,50V,X7R,TP,1608 2203-000257 C198 C-CERAMIC,CHIP 10nF,10%,50V,X7R,TP,1608 2203-000257 C199 C-CERAMIC,CHIP 10nF,10%,50V,X7R,TP,1608 2203-000257 C204 C-CERAMIC,CHIP 10nF,10%,50V,X7R,TP,1608 2203-000257 C265 C-CERAMIC,CHIP 10nF,10%,50V,X7R,TP,1608 2203-000257 C267 C-CERAMIC,CHIP...
- Page 96 2203-000440 C401 C-CERAMIC,CHIP 1nF,10%,50V,X7R,TP,1608,- 2203-000440 C404 C-CERAMIC,CHIP 1nF,10%,50V,X7R,TP,1608,- 2203-000440 C614 C-CERAMIC,CHIP 1nF,10%,50V,X7R,TP,1608,- 2203-000440 C616 C-CERAMIC,CHIP 1nF,10%,50V,X7R,TP,1608,- 2203-000440 C617 C-CERAMIC,CHIP 1nF,10%,50V,X7R,TP,1608,- 2203-000440 C621 C-CERAMIC,CHIP 1nF,10%,50V,X7R,TP,1608,- 2203-000440 C622 C-CERAMIC,CHIP 1nF,10%,50V,X7R,TP,1608,- 2203-000440 C623 C-CERAMIC,CHIP 1nF,10%,50V,X7R,TP,1608,- 2203-000440 C723 C-CERAMIC,CHIP 1nF,10%,50V,X7R,TP,1608,- 2203-000440 C724 C-CERAMIC,CHIP 1nF,10%,50V,X7R,TP,1608,- 2203-000440 C860 C-CERAMIC,CHIP...
- Page 97 2203-001077 C242 C-CERAMIC,CHIP 0.056nF,5%,50V,NP0,TP,2012 2203-001077 C243 C-CERAMIC,CHIP 0.056nF,5%,50V,NP0,TP,2012 2203-001077 C700 C-CERAMIC,CHIP 0.056nF,5%,50V,NP0,TP,2012 2203-001077 C706 C-CERAMIC,CHIP 0.056nF,5%,50V,NP0,TP,2012 2203-001077 C707 C-CERAMIC,CHIP 0.056nF,5%,50V,NP0,TP,2012 2203-001077 C853 C-CERAMIC,CHIP 0.056nF,5%,50V,NP0,TP,2012 2203-001077 C854 C-CERAMIC,CHIP 0.056nF,5%,50V,NP0,TP,2012 2203-001140 C253 C-CERAMIC,CHIP 68nF,10%,16V,X7R,TP,1608,- 2203-001140 C254 C-CERAMIC,CHIP 68nF,10%,16V,X7R,TP,1608,- 2203-001140 C255 C-CERAMIC,CHIP 68nF,10%,16V,X7R,TP,1608,- 2203-001158 C151 C-CERAMIC,CHIP...
- Page 98 2203-005065 C131 C-CERAMIC,CHIP 1000nF,+80-20%,10V,Y5V,TP,1608 2203-005065 C138 C-CERAMIC,CHIP 1000nF,+80-20%,10V,Y5V,TP,1608 2203-005065 C139 C-CERAMIC,CHIP 1000nF,+80-20%,10V,Y5V,TP,1608 2203-005065 C141 C-CERAMIC,CHIP 1000nF,+80-20%,10V,Y5V,TP,1608 2203-005065 C142 C-CERAMIC,CHIP 1000nF,+80-20%,10V,Y5V,TP,1608 2203-005065 C146 C-CERAMIC,CHIP 1000nF,+80-20%,10V,Y5V,TP,1608 2203-005065 C147 C-CERAMIC,CHIP 1000nF,+80-20%,10V,Y5V,TP,1608 2203-005065 C153 C-CERAMIC,CHIP 1000nF,+80-20%,10V,Y5V,TP,1608 2203-005065 C154 C-CERAMIC,CHIP 1000nF,+80-20%,10V,Y5V,TP,1608 2203-005065 C194 C-CERAMIC,CHIP 1000nF,+80-20%,10V,Y5V,TP,1608 2203-005189 C207 C-CERAMIC,CHIP...
- Page 99 2402-000209 C500 C-AL,SMD 22uF,20%,16V,WT,TP,5.3x5.3mm,1 2402-000209 C513 C-AL,SMD 22uF,20%,16V,WT,TP,5.3x5.3mm,1 2402-000209 C526 C-AL,SMD 22uF,20%,16V,WT,TP,5.3x5.3mm,1 2402-000209 C841 C-AL,SMD 22uF,20%,16V,WT,TP,5.3x5.3mm,1 2402-000209 C842 C-AL,SMD 22uF,20%,16V,WT,TP,5.3x5.3mm,1 2402-001006 C767 C-AL,SMD 4.7uF,20%,25V,GP,TP,3.6x6.3x3. 2402-001006 C769 C-AL,SMD 4.7uF,20%,25V,GP,TP,3.6x6.3x3. 2402-001006 C771 C-AL,SMD 4.7uF,20%,25V,GP,TP,3.6x6.3x3. 2402-001006 C773 C-AL,SMD 4.7uF,20%,25V,GP,TP,3.6x6.3x3. 2402-001006 C776 C-AL,SMD 4.7uF,20%,25V,GP,TP,3.6x6.3x3. 2402-001006 C836 C-AL,SMD...
- Page 100 2703-001778 L200 INDUCTOR-SMD 3.3UH,20%,3.2X2.5X2.2MM 2703-001778 L700 INDUCTOR-SMD 3.3UH,20%,3.2X2.5X2.2MM 2703-001778 L701 INDUCTOR-SMD 3.3UH,20%,3.2X2.5X2.2MM 2801-003667 X900 CRYSTAL-SMD 14.3182MHZ,50PPM,28-AAN,16,50OHM,TP 2801-003773 X201 CRYSTAL-SMD 12MHZ,30PPM,28-AAN,20PF,50OHM,TP 2801-003843 X701 CRYSTAL-SMD 18.432MHz,30ppm,28-AAN,20pF,50ohm,TP 2801-003846 X200 CRYSTAL-SMD 20.25MHz,30ppm,28-AAN,20pF,50ohm,TP 2804-001474 X100 OSCILLATOR-CLOCK 14.31818MHZ,100PPM,30PF,TP,3.3V,15MA 2901-001114 FT201 FILTER-EMI SMD 25VDC,2.0ADC,-,100nF,3.2x1.6x1 3301-001145 BD115 CORE-FERRITE BEAD AB,4.5x1.6x1.6mm,-,- 3301-001145 BD700...
- Page 101 ASSY ACCESSORY LW15E23CX/XEF 0203-000214 TAPE-OPP MASKING OPP/W50/CLR,T0.05,W50,L400000, 4301-000121 BATTERY-MN 1.5V,-,AAA,10.5x44.5m,HOLDER 6801-001009 CARD-WARRANTY EUROPE(12),8 6801-001016 CARD-REGISTRATION XEF,FRENCH,MOJO100,L150,W392,-,- BH39-10339H CBF POWER CORD DET,H05VV-F,250V/10,16A,BLK,25 BH59-00179A S/W DRIVER-2.6 ALL,NATURA-COLOR,ALL,- BH68-00297G MANUAL-ETC-00 WIN2000,SAMSUNG,English,W/W,MIMOJO80G,-,148,210,-,-,-,- Page 84 BH69-30348D BAG-PE LDPE,T0.05,W240*L356,Y,-,CMG73 BN39-00043A CBF SIGNAL DETACHABLE,-,15P/15P,-,-,- BN59-00217B REMOCON -,TM71,EOS,40,GR20,SILVER C/T,PAL,-,-,-,-...
- Page 102 BN68-00235A MANUAL USERS-06 LW-15E23C/LW-17E24C,SYNCMASTER,E/F/S/G/I/SW,EDC,MIMOJO80G,-,148,210,-,-,-,- Page 85...
-
Page 103: Block Diagram
8 Block Diagram Green ES15A*/ES17A*... - Page 104 8 Block Diagrams Memo ES15A*/ES17A*...
-
Page 105: Wiring Diagram
9 Wiring Diagram KEY0 KEY1 CN600 CN601 KEY2 CN800 KEY3 KEY4 KEY5 KEY6 SPK OUT R + CN105 SPK OUT -R- SPK OUT L + CN104 SPK OUT L- CN804 AUDIO R IN AUDIO L IN VCR CVB S LED_GRN LED_RED CN802 CN805... - Page 106 9 Schematic Diagrams Memo ES15A*/ES17A*...
-
Page 107: Schematic Diagrams
10 Schematic Diagrams 10-1 PC & JAG-1 Part Schematic Diagram +3.3V_JAG IC120 LP3961EMP-2.5 ???????????????? BLM41P600S VOUT +2.5V_JAGA +2.5V +3.3V_JAG BD114 SENSE C189 C188 C187 C186 C185 C184 C183 C182 C181 R102 R101 100nF 100nF 100nF 10nF 10nF 100nF 100nF 10nF 10nF 180K 180K... - Page 108 10 Schematic Diagrams 10-2 ES15A*/ES17A*...
- Page 109 10 Schematic Diagrams 10-2 SCART & TTX & VPC Part Schematic Diagram 2-2 2-3 +3.3V +14V_SW +5V_A IC204 74LCX125MX +5V_A IC200 R259 L200 TTX_SW BA17805FP C250 3.3UH R260 100nF INOUT +3.3V Scart_blin UV(0:7) C200 C201 C202 R261 47uF 100nF 47uF nTTX_SW +3.3V R262...
- Page 110 10 Schematic Diagrams 10-4 ES15A*/ES17A*...
- Page 111 10 Schematic Diagrams 10-3 FLI_Deinterlacer Part Schematic Diagram D_DATA(31:0) D_ADDR(10:0) +3.3V (IFORMAT(2:0) = (110) = Y/Cb/Cr(D1, with embedded timing ) R300 R301 1/16W 1/16W (OFORMAT(2:0) = (010) = Y Cb/Cr + Y CbCr (double rate D1, with external/separate syncs ) C324 C325 C326...
- Page 112 10 Schematic Diagrams 10-6 ES15A*/ES17A*...
- Page 113 10 Schematic Diagrams 10-4 JAG-2 Part Schematic Diagram +3.3V +2.5V_JAG2 C422 C423 C424 C425 C426 C427 C428 C429 C430 100nF 100nF 100nF 10nF 10nF 100nF 100nF 10nF 10nF J2TSA(0:10) J2SD(0:31) +3.3V C421 10uF VSS0 VSS1 VSS2 VSS3 VSS4 VSS5 +2.5V_FLI VSS6 +2.5V_JAG2 VSS7...
- Page 114 10 Schematic Diagrams 10-8 ES15A*/ES17A*...
- Page 115 10 Schematic Diagrams 10-5 Sdram for JAGS Part Schematic Diagram +3.3V +3.3V C500 C501 C502 C503 C504 C505 C506 C507 C508 C509 C510 C511 C512 C513 C514 C515 C516 C517 C518 C519 C520 C521 C522 C523 C524 C525 22uF 100nF 100nF 100nF 100nF...
- Page 116 10 Schematic Diagrams 10-6 LVDS Part Schematic Diagram VCC_PANEL 15" FT600 FP(0) FP(8) FP(16) FP(24) FP(1) FP(9) FP(17) FP(25) FP(32) FP(40) FP(2) FP(10) FP(18) FP(26) FP(33) FP(41) C600 C601 C602 FP(3) FP(11) FP(19) FP(27) FP(34) FP(42) 100nF 10uF 100nF FP(4) FP(12) FP(20) FP(28)
- Page 117 10 Schematic Diagrams ES15A*/ES17A* 10-11...
- Page 118 10 Schematic Diagrams 10-7 Audio Part Schematic Diagram +14V_SW +8V_AUDIO QSS_IF IC701 +12V_AUDIO BA178M08FP INOUT C734 C735 C702 100nF 10uF R733 C743 100nF 150nF R710 C701 C732 C738 C700 C733 10uF 3.3uF 56PF 100nF C741 C742 C736 T116 150nF R700 R701 R702 R703...
- Page 119 10 Schematic Diagrams ES15A*/ES17A* 10-13...
- Page 120 10 Schematic Diagrams 10-8 Peripheral + Power Part Schematic Diagram +5V_LIVE ZD818 CN803 CHECK POWER RLZ8.2 RLZ8.2 dcjhp_4_1 ZD819 R800 R801 R802 R803 C846 4.7K 4.7K 4.7K 4.7K R834 4.7uF SCL1 CN800 R835 slcon10p C845 100K ZD820 RLZ8.2 330PF RLZ8.2 ZD821 PC_AGND R804...
- Page 121 10 Schematic Diagrams 10-9 Microcontroller Part Schematic Diagram +5V_LIVE +5V_LIVE R900 R904 NOTE R902 4.7K 1/16W 1/16W IC900 KIA7045RTF +5V_LIVE GND_2 ZD900 Q900 INOUT Configuration 2SC2412K-Q GND_1 +5V_LIVE BD907 HB-1M2012-800JT R901 Data +3.3V +5V_LIVE +5V_LIVE C901 C904 C902 C903 C905 C913 10uF 10nF...
- Page 122 10 Schematic Diagrams Memo 10-16 ES15A*/ES17A*...
- Page 123 Samsung Electronics Co.,Ltd. 416, Maetan-3Dong, Paldal-Gu, Suwon City, Kyungki-Do, Korea. Printed in Korea P/N : BN68-00232A-00 http://www.samsungmonitor.com (SyncMaster Worldwide) http://www.samsung-monitor.com (SyncMaster USA) http://www.sec.co.kr/monitor (Korea)