Table of Contents
Advertisement
Quick Links
Advertisement
Table of Contents

Related Manuals for Electrolux ESF5559LOX


Summary of Contents for Electrolux ESF5559LOX
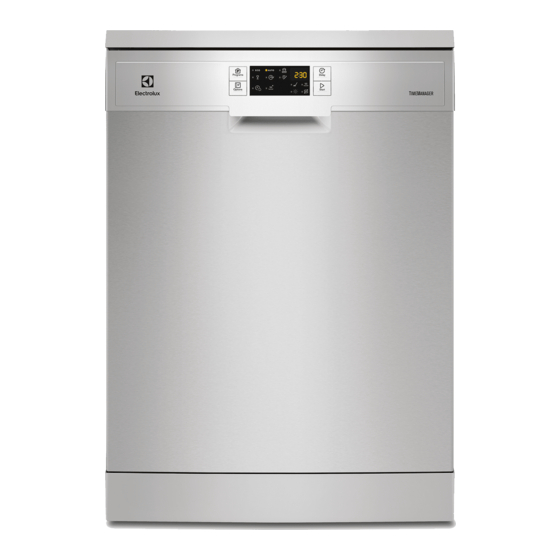
- Page 1 ESF5559LOX Dishwasher User Manual...
-
Page 2: Table Of Contents
14. SAUDI ARABIA - CUSTOMER SERVICE ............. 25 WE’RE THINKING OF YOU Thank you for purchasing an Electrolux appliance. You’ve chosen a product that brings with it decades of professional experience and innovation. Ingenious and stylish, it has been designed with you in mind. So whenever you use it, you can be safe in the knowledge that you’ll get great results every time. -
Page 3: Safety Information
ENGLISH SAFETY INFORMATION Before the installation and use of the appliance, carefully read the supplied instructions. The manufacturer is not responsible for any injuries or damage that are the result of incorrect installation or usage. Always keep the instructions in a safe and accessible location for future reference. -
Page 4: Safety Instructions
The operating water pressure (minimum and • maximum) must be between 0.5 (0.05) / 8 (0.8) bar (MPa) Follow the maximum number of 13 place settings. • If the supply cord is damaged, it must be replaced by •... - Page 5 ENGLISH • Connect the mains plug to the mains • Dishwasher detergents are socket only at the end of the dangerous. Follow the safety installation. Make sure that there is instructions on the detergent access to the mains plug after the packaging.
-
Page 6: Product Description
2.7 Disposal displays, pressure switches, thermostats and sensors, software and firmware including reset software. WARNING! Please note that some of these spare Risk of injury or suffocation. parts are only available to • Disconnect the appliance from the professional repairers, and that not all mains supply. -
Page 7: Control Panel
ENGLISH Lower basket Upper basket 4. CONTROL PANEL On/off button Start button Programs button Indicators Programme indicators Options button Display Delay button 4.1 Indicators Indicator Description Salt indicator. It is on when the salt container needs refilling. It is al‐ ways off while the programme operates. - Page 8 Programme Degree of soil Programme pha‐ Options Type of load • Normal soil • Prewash • TimeManager • Crockery and • Wash 50 °C • XtraDry cutlery • Rinses • Dry • All • Prewash • XtraDry • Crockery, cut‐...
-
Page 9: Settings
ENGLISH Water Energy Duration 1) 2) Programme (kWh) (min) 7 - 12 0.7 - 1.5 45 - 160 13 - 15 1.4 - 1.6 140 - 160 13 - 14 0.9 - 1.1 70 - 85 1) The pressure and the temperature of the water, the variations of the mains supply, the options, the quantity of dishes and the degree of soil can change the values. - Page 10 6.2 The water softener The water softener should be adjusted according to the hardness of the water in The water softener removes minerals your area. Your local water authority can from the water supply, which would have advise you on the hardness of the water a negative effect on the washing results in your area.
- Page 11 ENGLISH In case of the high water softener setting, • The display shows the current it may occur also in the middle of the setting: e.g. = level 5. programme, before the rinse (twice 2. Press Programs repeatedly to during a programme). Regeneration change the setting.
-
Page 12: Options
When AirDry opens the door, the display shows the remaining time of the running programme. To improve the drying performance refer to the XtraDry option or activate AirDry. CAUTION! If children have access to the appliance, it is advised to deactivate AirDry as opening the door may pose a danger. -
Page 13: Before First Use
ENGLISH automatically used in next cycles. This washing and the drying phases are configuration can be changed at any shorter. time. The total programme duration decreases by approximately 50%. Every time The washing results are the same as activated, XtraDry is off and with the normal programme duration. -
Page 14: Daily Use
CAUTION! The compartment (A) is for rinse aid only. Do not fill it with detergent. CAUTION! Only use rinse aid designed specifically for dishwashers. 6. Turn the cap of the salt container 1. Press the release button (D) to open clockwise to close the salt container. - Page 15 ENGLISH 3. Press Programs again and again CAUTION! until the indicator of the programme Only use detergent you want to select comes on. specifically designed for The display shows the programme dishwashers. duration. 4. Set the applicable options. 1. Press the release button (B) to open 5.
-
Page 16: Hints And Tips
Make sure that there is detergent in the Do not try to close the detergent dispenser before you start a appliance door within 2 new program. minutes after AirDry automatically opens it as this End of the programme may cause damage to the appliance. - Page 17 ENGLISH – Make sure that the current level of 3. Start the shortest programme with a the water softener agrees with the rinsing phase. Do not add detergent hardness of the water supply. and do not put dishes in the baskets. –...
-
Page 18: Care And Cleaning
• The correct quantity of detergent is 2. First remove items from the lower used. basket, then from the upper basket. After the programme is 10.6 Unloading the baskets completed, water can still remain on the inside 1. Let the tableware cool down before surfaces of the appliance. - Page 19 ENGLISH 2. Wash the spray arm under running 7. Reassemble the filters (B) and (C). water. Use a thin pointed tool, e.g. a 8. Put back the filter (B) in the flat filter toothpick, to remove particles of soil (A). Turn it clockwise until it locks. from the holes.
-
Page 20: Troubleshooting
11.4 Internal cleaning 11.5 Removal of foreign objects • Carefully clean the appliance, Check the filters and the sump after each including the rubber gasket of the use of the dishwasher. Foreign objects door, with a soft damp cloth. - Page 21 ENGLISH Problem and alarm code Possible cause and solution The appliance does not fill • Make sure that the water tap is open. with water. • Make sure that the pressure of the water supply is The display shows i10 or not too low.
- Page 22 Problem and alarm code Possible cause and solution The programme lasts too • Select the TimeManager option to shorten the pro‐ long. gramme duration. • If the delayed start option is set, cancel the delay set‐ ting or wait for the end of the countdown.
- Page 23 ENGLISH 12.1 The washing and drying results are not satisfactory Problem Possible cause and solution Poor washing results. • Refer to "Daily use", "Hints and tips" and the basket loading leaflet. • Use more intensive washing programmes. • Clean spray arm jets and filter. Refer to "Care and Cleaning".
-
Page 24: Technical Information
Problem Possible cause and solution There are residues of deter‐ • The detergent tablet was stuck in the dispenser gent in the dispenser at the and therefore was not completely washed away by end of the programme. water. • Water cannot wash away the detergent from the dispenser. -
Page 25: Saudi Arabia - Customer Service
ENGLISH Left-on mode (W) Power consumption Off-mode (W) 0.10 1) Refer to the rating plate for other values. 2) If the hot water comes from alternative source of energy (e.g. solar panels), use the hot water supply to decrease energy consumption. 3) In accordance with the 1059/2010 regulation. - Page 28 www.electrolux.com/shop...