
Related Manuals for Toshiba 43PH46P


Summary of Contents for Toshiba 43PH46P
- Page 1 All manuals and user guides at all-guides.com FILE NO. 030-200407 SERVICE MANUAL Projection Television WH4 Chassis 43PH46P 50PH46P Published in Japan, Jun. 2004 (YC)
-
Page 2: Table Of Contents
All manuals and user guides at all-guides.com TABLE OF CONTENTS CHAPTER 1 GENERAL ADJUSTMENTS SAFETY INSTRUCTIONS ............................3 CRT ASSEMBLY REPLACEMENT AND MOUNTING ..................... 4 PICTURE TUBE COMPONENTS ADJUSTMENT ....................6 SERVICE POSITION ..............................9 SERVICE MODE ..............................10 DESIGN MODE ..............................13 ELECTRICAL ADJUSTMENT .......................... -
Page 3: Chapter 1 General Adjustments
All manuals and user guides at all-guides.com CHAPTER 1 GENERAL ADJUSTMENTS SAFETY INSTRUCTIONS WARNING: BEFORE SERVICING THIS CHASSIS, READ THE “X-RAY RADIATION PRECAUTION”, “SAFETY PRECAU- TION” AND “PRODUCT SAFETY NOTICE” INSTRUCTIONS BELOW. X-RAY RADIATION PRECAUTION 1. Excessive high voltage can produce potentially hazardous 2. -
Page 4: Crt Assembly Replacement And Mounting
All manuals and user guides at all-guides.com CRT ASSEMBLY REPLACEMENT AND MOUNTING CAUTION : DO NOT LOOSEN THE HEX HEAD BOLTS WITH SPRINGS (12 PCS), BECAUSE THOSE ARE FOR SEALING OF CRT COOLANT. Attention Serviceman The Hex Head Bolts with Springs. - Page 5 All manuals and user guides at all-guides.com TO REMOVE CRT (Same procedure for R, G, B) 1. Remove CRT DRIVE Board, S. V. M. COIL and DEF. YOKE from CRT. 2. Remove Lens Assembly. 3. Detach CRT Anode Cap from CRT. Anode Cap 4.
-
Page 6: Picture Tube Components Adjustment
All manuals and user guides at all-guides.com WARNING : BEFORE SERVICING THIS CHASSIS, READ THE "X-RAY RADIATION PRECAUTION", "SAFETY PRE- CAUTION" AND "PRODUCT SAFETY NOTICE" ON PAGE 3 OF THIS MANUAL. PICTURE TUBE COMPONENTS ADJUSTMENT ADJUSTING PROCEDURE IN REPLACING CRT RGB FOCUS ADJUSTMENT 1. - Page 7 All manuals and user guides at all-guides.com In case of warming up of more than 2 hours under a condition Note: Keep in mind that only the BLUE electric focus is ad- that the large anode current is running through the projection justed with the black cross-hatch.
- Page 8 All manuals and user guides at all-guides.com LOCATION OF SCREEN AND FOCUS VR'S To remove the Speaker grille and Front panel. R G B SCREEN VR's FOCUS VR's Speaker grille REPLACEMENT OF HIGH VOLTAGE CABLE 1. When replacing Anode Lead or Anode Cap with new one, remove Lead Holder from old lead as shown in ANODE LEAD figure below, and put it on new lead.
-
Page 9: Service Position
All manuals and user guides at all-guides.com WARNING : BEFORE SERVICING THIS CHASSIS, READ THE "X-RAY RADIATION PRECAUTION", "SAFETY PRE- CAUTION" AND "PRODUCT SAFETY NOTICE" ON PAGE 3 OF THIS MANUAL. SERVICE POSITION In order to assure the performance, processed wires shall be replaced after the repair work. Work procedures are as follows: 1. -
Page 10: Service Mode
All manuals and user guides at all-guides.com SERVICE MODE 1. ENTERING TO SERVICE MODE 1) Press o button once on 2) Press o button again to 3) While pressing the o button, Remote Control. keep pressing. press MENU button on TV set. Item Data or Sound Mute... - Page 11 All manuals and user guides at all-guides.com 4. SELECTING THE ADJUSTING ITEMS 1)Every pressing of CHANNEL button in the service mode changes the adjustment items in the order of table-2. button for reverse order) Refer to table-2 for preset data of adjustment mode. (See SETTING &...
- Page 12 All manuals and user guides at all-guides.com 8. SELF DIAGNOSTIC FUNCTION 1) Press “9” button on Remote Control during display of adjustment menu in the service mode. The diagnosis will begin to check if interface among IC’s are executed properly. 2) During diagnosis, the following displays are shown.
-
Page 13: Design Mode
All manuals and user guides at all-guides.com DESIGN MODE 1. ENTERING TO DESIGN MODE 1) Select the Service mode. 2) While pressing CALL button on Remote 3) Press MENU button on TV. and press MENU button on TV. ITEM Press DATA Press (Design mode) -
Page 14: Electrical Adjustment
All manuals and user guides at all-guides.com ELECTRICAL ADJUSTMENT ITEM ADJUSTMENT PROCEDURE WIDTH 1. Call up the adjustment mode display, then select the item WID. 2. Press the VOLUME t button to get the picture so the left (WID) or right edges of raster begins to lack. (Picture size wide) 3. - Page 15 All manuals and user guides at all-guides.com C03P: Series (Reference factory adjustment) - 15 -...
- Page 16 All manuals and user guides at all-guides.com Green Alignment/Astigmatic Adjustments Adjustment items Adjusting methods Alignment Adjustment Procedures (Make this adjustment by using a lens cap. This adjustment should be made after adjusting the electrical focus nd lens focus rough and making a Centering Adjustment.) 1.
- Page 17 All manuals and user guides at all-guides.com Adjustment items Adjusting methods Focus adjustment (Conditions) - User adjustment: Dynamic mode, Cinema mode - To be performed after centering magnet adjustment. - Signal : Lens: R ..Crosshatch (PAL) G ..Crosshatch (PAL) B ..
- Page 18 All manuals and user guides at all-guides.com Adjustment items Adjusting methods Focus adjustment Concerning items 1), 2), 3), and 5) of G adjustment, these are common to the ones on the previous page. 3. R adjustment 1) Set to the R monochrome by lens cap. 2) Receive the image of the internal crosshatched pattern.
- Page 19 All manuals and user guides at all-guides.com - 19 -...
- Page 20 All manuals and user guides at all-guides.com Deflection amplitude setting for 43PH46P (HIT/WID adjusting method under muted convergence) * Green patter n under the m uted con vergence Screen edge 0 point 3rd flag 1st flag Castration border line Hor izontal amplitude: : Left and right register marks of Philips pattern C + D = 9 (See A of the upper figure. . )
-
Page 21: Convergence Adjustment
All manuals and user guides at all-guides.com CONVERGENCE ADJUSTMENT 1. SCREEN ADJUSTMENT Note: The adjustment is carried out on six screens: 1 PAL 100Hz Wide/4:3 The convergence circuit is a circuit to eliminate screen distor- 2 PAL 100Hz Super live tion and can not make a drastic correction such as to correct 3 PAL 100Hz Cinema entire screen size. - Page 22 All manuals and user guides at all-guides.com 1-2. Remote Control Key o key ....Push this key twice and the set con- sole menu key to enter the service mode. 7 key ....Push 7 key to enter and cancel the convergence menu.
- Page 23 All manuals and user guides at all-guides.com 1-3. Adjusting Screen 1) Adjusting menu Item Description ADJUST PAL 100 Hz Used for manual adjustment of PAL 100Hz WIDE screen. WIDE (This item is selectable when input-source is PAL) PAL WIDE TO OTHERS Automatically converted from the PAL 100Hz WIDE screen data to the data of the other screens;...
- Page 24 All manuals and user guides at all-guides.com 2) Adjustment Screen X : 1 Y : 1 C : R S : 08 Wide Displayed when the cursor blinks and cleared Displayed when the cursor blinks and when the cursor lights steady. cleared when the cursor lights steady.
- Page 25 All manuals and user guides at all-guides.com 2. Case Study In many cases, color matching problems can be solved by returning the HIT and WID data for main deflection to the initial adjustment values. Convergence cannot be re-adjusted in the following cases. 2-1 When the CRT has been replaced Main deflection re-adjustment and color matching are necessary when the CRT has been replaced.
- Page 26 All manuals and user guides at all-guides.com 3. Screen adjustment dimensions 3-1 PAL (4:3mode/16:9mode) SCREEN SIZE 43: 874 x 655 (mm) 50: 1014 x 760 CENTER a´ b´ c´ d´ A´ B´ C´ D´ GEOMETRY 1) HORIZONTAL (All mode) MODEL A, A' B, B' C, C'...
- Page 27 All manuals and user guides at all-guides.com 3-2 NTSC (4:3mode, 16:9mode) GEOMETRY 1) HORIZONT (All mode) MODEL A, A' B, B' C, C' D, D' 73.5 220.6 367.8 422.8 85.3 255.9 426.7 490.5 2) VERTICAL (4:3mode) MODEL a, a' b, b' c, c' 130.4 260.8...
-
Page 28: Screen And Mirror Alignments
All manuals and user guides at all-guides.com SCREEN AND MIRROR ALIGNMENTS ASSEMBLING OF MOUNTING OF FRONT SCREEN FRONT SCREEN 5 screws Fresnel sheet Lenticular shield 5 screws FRONT 5 screws Lenticular sheet FRONT Fresnel sheet 5 screws Stick cotton cloth tape Label with part Label with part number... -
Page 29: Circuit Checks
All manuals and user guides at all-guides.com CIRCUIT CHECKS HIGH VOLTAGE CHECK CAUTION: There is no HIGH VOLTAGE ADJUSTMENT on this chassis. Checking should be done following the steps below. 1. Connect an accurate high voltage meter to the anode of the picture tube. 2. -
Page 30: Chapter 2 Specific Informations
All manuals and user guides at all-guides.com CHAPTER 2 SPECIFIC INFORMATIONS SETTING & ADJUSTING DATA SAFETY INSTRUCTIONS 43", 50" HIGH VOLTAGE AT ZERO BEAM: 30.1 kV MAX HIGH VOLTAGE: 32.1 kV AC VOLTAGE 230 VAC Table-1 SERVICE MODE ADJUSTING ITEMS AND DATAS IN THE SERVICE MODE: Item Adjustment Reference data... -
Page 31: Location Of Controls
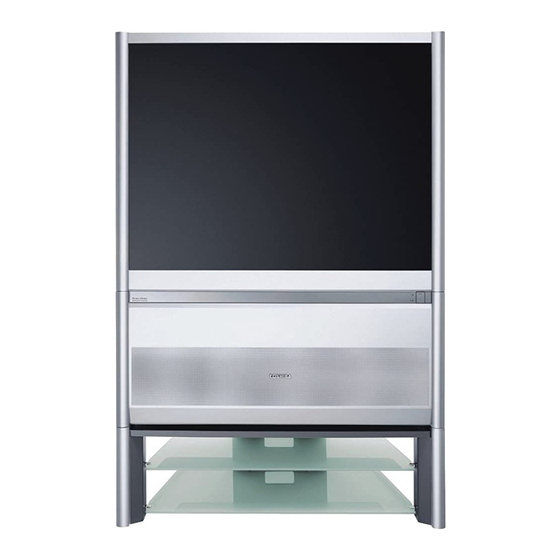
All manuals and user guides at all-guides.com LOCATION OF CONTROLS Front 43PH46 50PH46 RED – Power On Power Button GREEN – Timer is set RED – Power On Power Button GREEN – Timer is set EXT 4 EXT 4 Back SCART 3 (EXT 3) SCART 1 (EXT 1) SCART 2 (EXT 2) - Page 32 OK to confirm your selection Teletext control buttons No function on this model Bass Boost/Super woofer To select mode To mute the sound When using a TOSHIBA VCR or DVD: When in television mode: press to PAUSE Still Picture press...
-
Page 33: Mechanical Disassembly
All manuals and user guides at all-guides.com MECHANICAL DISASSEMBLY (For 43PH46P) K502 SCREWS K601 K501 SCREWS A001 (A420) Labels A424 A201 4 SCREWS 8 SCREWS A258 K101 K102 K103 - 33 -... - Page 34 All manuals and user guides at all-guides.com MECHANICAL DISASSEMBLY 1 Speaker Grille Removal 2 Control Panel Removal 3 Front Mask Removal A420 10 screws A201 A201 A223 (POWER BUTTON) A213 A110 (DOOR) A225 (CONTROL PANEL) K502 K501 A258 A268 4 Lens Removal Mirror Removal Back Board Removal 4 screws...
-
Page 35: Chassis And Cabinet Replacement Parts List
• The part number must be used when ordering parts, in order to assist in processing, be sure to include the Model number and Description. ∗ • The PC board assembly with mark is no longer available after the end of the production. Model : 43PH46P/50PH46P Capacitors ..... CD Ceramic Disk : Plastic Film : Electrolytic Resistors .... - Page 36 All manuals and user guides at all-guides.com Location Location Parts No. Description Parts No. Description C512 24100104 CERAMIC CHIP, 25V F 0.1UF Z C806 24092281 CERAMIC DISC, AC250V E 4700PF C513 24109103 CERAMIC CHIP, 50V B 0.01UF K C810 24086934 ELECTROLYTIC, 450V 560UF M 35F C514 24100104...
- Page 37 All manuals and user guides at all-guides.com Location Location Parts No. Description Parts No. Description C2113 24092730 CERAMIC CHIP, 16V B 0.1UF K C7810 24092511 CERAMIC CHIP, 50V CH 470PF B C2114 24092730 CERAMIC CHIP, 16V B 0.1UF K C7811 24105471 CERAMIC CHIP, 50V CH 470PF J C4401...
- Page 38 All manuals and user guides at all-guides.com Location Location Parts No. Description Parts No. Description CE35 24793101 ELECTROLYTIC, 10V 100UF M CH526 24105050 CERAMIC CHIP, 50V CH 5PF C CE36 24109103 CERAMIC CHIP, 50V B 0.01UF K CH527 24105181 CERAMIC CHIP, 50V CH 180PF J CE37 24793470 ELECTROLYTIC CE04G 10V 47UF M...
- Page 39 All manuals and user guides at all-guides.com Location Location Parts No. Description Parts No. Description CS20 24797478 ELECTROLYTIC, 50V 0.47UF M R345 24000445 CHIP JUMPER, 1608TYPE CS21 24797229 ELECTROLYTIC, 50V 2.2UF M R346 24382391 OXIDE METAL FILM, 1W 390 OHM J CS22 24797229 ELECTROLYTIC, 50V 2.2UF M...
- Page 40 All manuals and user guides at all-guides.com Location Location Parts No. Description Parts No. Description R441 24533331 FUSIBLE, 2W 330 OHM J R614 24011103 CHIP, METAL FILM, 1/20W 10K OHM J R442 24383102 OXIDE METAL FILM, 2W 1K OHM J R615 24011104 CHIP, METAL FILM, 1/20W 100K OHM J...
- Page 41 All manuals and user guides at all-guides.com Location Location Parts No. Description Parts No. Description R911 24366101 CARBON FILM, 1/6W 100 OHM J R7008 24872152 CHIP, 1/16W 1.5K OHM J R913 24552471 OXIDE METAL FILM, 1/2W 470 OHM J R7009 24872333 CHIP, 1/16W 33K OHM J R915...
- Page 42 All manuals and user guides at all-guides.com Location Location Parts No. Description Parts No. Description R7752 24011822 CHIP, METAL FILM, 1/20W 8.2K OHM J R9503 24872152 CHIP, 1/16W 1.5K OHM J R7753 24011101 CHIP, METAL FILM, 1/20W 100 OHM J R9504 24872152 CHIP, 1/16W 1.5K OHM J...
- Page 43 All manuals and user guides at all-guides.com Location Location Parts No. Description Parts No. Description RA71 24366272 CARBON FILM, 1/6W 2.7K OHM J @U906A RH201 24011472 CHIP, METAL FILM, 1/20W 4.7K OHM J 24011102 CHIP, METAL FILM, 1/20W 1K OHM J @U902 RH202 24011472 CHIP, METAL FILM, 1/20W 4.7K OHM J...
- Page 44 All manuals and user guides at all-guides.com Location Location Parts No. Description Parts No. Description RH661 24011911 CHIP, METAL FILM, 1/20W 910 OHM J RS18 24011223 CHIP, METAL FILM, 1/20W 22K OHM J RH662 24019388 CHIP, METAL FILM, 1/16W 10K OHM F RS19 24011101 CHIP, METAL FILM, 1/20W 100 OHM J...
- Page 45 All manuals and user guides at all-guides.com Location Location Parts No. Description Parts No. Description RV61 24552101 OXIDE METAL FILM, 1/2W 100 OHM J L888 23248321 COIL, CHOKE 15X23H 22MMH 4.2A TLN3462AH RV62 24011101 CHIP, METAL FILM, 1/20W 100 OHM J L891 23103145 FERRITE CHOKE, TEM2011AA...
- Page 46 All manuals and user guides at all-guides.com Location Location Parts No. Description Parts No. Description LH124 24000445 CHIP JUMPER, 1608TYPE Q409 23205006 TRANSISTOR, KTC4075Y LH125 23103244 BEAD INDUCTOR, 121OMH, TEM2147AD Q410 23205006 TRANSISTOR, KTC4075Y LH126 23103244 BEAD INDUCTOR, 121OMH, TEM2147AD Q411 23205006 TRANSISTOR, KTC4075Y...
- Page 47 All manuals and user guides at all-guides.com Location Location Parts No. Description Parts No. Description Q2104 23314174 TRANSISTOR, 2SA1162-GR QH570 23009976 IC, REGULATOR +3.3V 1% SSOP5 BH33FB1WG-TR Q2105 23314174 TRANSISTOR, 2SA1162-GR QR02 23906666 IC, TA1287F(EL) Q2106 23314174 TRANSISTOR, 2SA1162-GR QR03 23314993 TRANSISTOR, 2SC4081 Q Q2107...
- Page 48 All manuals and user guides at all-guides.com Location Location Parts No. Description Parts No. Description D603 23316231 DIODE, 1SS355 DE31 23316825 DIODE, EU2YX D604 23316231 DIODE, 1SS355 DE32 23316825 DIODE, EU2YX D605 23316231 DIODE, 1SS355 DE34 23316719 DIODE, ZENER, MTZJ12B D606 23316231 DIODE, 1SS355...
- Page 49 All manuals and user guides at all-guides.com Location Location Parts No. Description Parts No. Description E989 23969684 TAPE, GLASS-CLOTH, W/ADHESIVE W=90 T=0.18 PB13A 23368579 CONNECTOR, PLUG 5P, 2.5MM G JST-EH, B5B-EH-F1-TV4 PH005 23164786 CONNECTOR, PLUG 6P F801 23144654 FUSE, CARTRIDGE 5X20 250V 5.0A F801A 23165433 FUSE HOLDER, 5.2 SOC...
- Page 50 K902 23306435 REMOCON HAND UNIT IR, CTVPAL CT-90101 23306435 REMOCON HAND UNIT IR, CTVPAL CT-90101 Y101A 23566324 OWNERS MANUAL, ENGLISH MANUAL ENG 43PH46P Y101E 23566325 OWNERS MANUAL, EURO MANUAL EUR 43PH46P CABINET PARTS A001 #1 23429100 CABINET, WOOD CABINET 43PH46P...
- Page 51 All manuals and user guides at all-guides.com SIGNAL BOARD PD1727 (U902) TOP (COMPONENT) SIDE JP014 PB11A PB12A PA01 P880A JP020 PB13A QE31 QE30 DE32 QA05 DA03 JP019 CE33 CA04 QE30A QE31A CE32 JP016 CA06 CA07 CA06 CA08 C619 DE30 JP015 QA04 JP003 P605A...
-
Page 52: Pc Boards Bottom View
All manuals and user guides at all-guides.com SIGNAL BOARD PD1727 (U902) BOTTOM (FOIL) SIDE P880A DE31 QE31 QE30A PA01 PB13A PB11A RA05 R635 DS-1108 23547585 7 6 5 4 3 2 1 R635 R634 CE32 DE32 QE31A CA08 D608 CA04 PB12A LA13 LA14... - Page 53 All manuals and user guides at all-guides.com POWERDEF BOARD PD1728 (U903) BOTTOM (FOIL) SIDE P831A P880A R883 D881 Q862 CCP-3400S R864 R874 R868 R475 Q370 C370 C316 R873 R370 C898 D885A D885 C854 R371 R373 L889 C862 D864 R364 R374 L888 L864 Q330...
- Page 54 All manuals and user guides at all-guides.com CRT-R BOARD PD1729A1 (U901A) CRT-G BOARD PD1729A2 (U901B) BOTTOM (FOIL) SIDE BOTTOM (FOIL) SIDE Q902 Q912 L917 R911 L907 R901 R964 P902B R965 P902C R965 C962 R969 R906 R916 D942 R966 Q913 Q962 C933 R9507 D940...
- Page 55 All manuals and user guides at all-guides.com FRONT IN BOARD PD1740A1 (43PH46P) (U906A) BOTTOM (FOIL) SIDE SA01 POS UP SA02 POS DN SA03 VOL UP VOL DN SA06 MENU PV40 P661 CC49 RV46 RA72 RA71 RC60 CC47 CC48 RA75 RA73...
-
Page 56: Terminal View Of Transistors
All manuals and user guides at all-guides.com TERMINAL VIEW OF TRANSISTORS 2SD2253 2SC3852 2SC752 2SA1788 2SC752GTM 2SD1763A (old) 2SC2482 2SA562TM 2SC5243 2SC1569 2SA1015 2SC2655 2SC4544 2SC4721P 2SC1815 2SA1788 2SC2878 2SA1306 2SC1740S 2SA1186A 2SC2120 2SA9335 RN2203 2SD1554 ON4409 RN2201 2SD2253 RN2004 2SD1556 RN1203 2SC5143... - Page 57 All manuals and user guides at all-guides.com SCHEMATIC DIAGRAM MODEL : 43PH46P/50PH46P WARNING: BEFORE SERVICING THIS CHASSIS, READ THE "X-RAY RADIATION PRECAUTION", "SAFETY PRECAUTION" AND "PRODUCT SAFETY NOTICE" ON THE MANUAL FOR THIS MODEL. CAUTION: The international hazard symbols "...
- Page 58 All manuals and user guides at all-guides.com - 64 -...
-
Page 59: Specifications
All manuals and user guides at all-guides.com SPECIFICATIONS Broadcast systems/channels Programme Positions PAL-I UHF UK21-UK69 Stereo Nicam PAL-B/G UHF E21-E69 2 carrier system VHF E2-E12, S1-S41 Visible Screen Size 43PH ???cm SECAM-L UHF F21-F69 (approx.) 50PH ???cm VHF F1-F10, B-Q Display 16:9 SECAM-D/K UHF R21-R69... - Page 60 All manuals and user guides at all-guides.com...
- Page 61 All manuals and user guides at all-guides.com SCHEMATIC DIAGRAM MODEL : 43PH46P/50PH46P WARNING: BEFORE SERVICING THIS CHASSIS, READ THE "X-RAY RADIATION PRECAUTION", "SAFETY PRECAUTION" AND "PRODUCT SAFETY NOTICE" ON THE MANUAL FOR THIS MODEL. CAUTION: The international hazard symbols "...
- Page 62 All manuals and user guides at all-guides.com...
- Page 63 TLB0017 TLB0044 1.8V CE37 CE38 10V47 10V100 TLB0019 TLB0020 TLB0021 TLB0022 TLB0023 +4.5V TLB0024 +4.5V QE34 2SC3852 TLB0025 TLB0042 +11V CE39 25V47 TLB0026 CE40 +11V 16V100 TLC480 RE34 1/6P2.2k 10-A7 DE34 MTZJ12B 43PH46P/50PH46P SIGNAL (POWER SUPPLY AND REGULATION) SHEET-1/10 (1/16)
- Page 64 RA83 RA76 PL150 OPEN GRA07 TLC004 RM73B1HR00OD TLC009 TLC013 RA78 RA79 CA25 100p TLC003 TLC007 TLC002 QA11 CA22 RA74 QA10 TLC008 RA82 10V1u 2.2k TLC001 V_AV TLC010 2SA1576A\\2SA1586Y 2SC4081Q\\2SC4116-Y 43PH46P/50PH46P RA75 RA80 CA23 SIGNAL (TEXT MICOM) QA09 2SA1576A\\2SA1586-Y SHEET-2/10 (2/16)
- Page 65 AYout 8-F2 C517 C526 Vdddacy 25V0.1 25V0.1 C592 16V10 3.3V_A C516 25V0.1 X501 VSP_BLK VSP_BLK 20.25MHz C590 C509 1.8V_A 3.3V_D 1.8V_D TLB0059 VSP_GND TLB0060 Y_VSP TLB0058 CB_VSP TLB0057 CR_VSP TP02 TP01 TPG01 TPY1 43PH46P/50PH46P SIGNAL (SCART/VIEO FRONT END) SHEET-3/10 (3/16)
- Page 66 TLC131 3.9k TLC135 CR08 25V0.1 B_CONV B_MICRO RR15 RR01 TLC523 1.5k RR16 YS_MICRO QR03 DR02 2SC4081-Q DR03 RR05 1SS355-TE17\\MA111-(TX) DR01 YS_CONV 1SS355-TE17\\MA111-(TX) 1SS355-TE17\\MA111-(TX) RR06 43PH46P/50PH46P RR07 2.2k 7-D2 RR04 2.2k TLC522 3.3k SIGNAL (BEP) OE_CONV QR07 8-F2 RN1402 SHEET-4/10 (4/16)
- Page 67 WOUT_GND RS21 RS22 TEM2121M QS08 2.2k 2.2k TLB0074 KTC2875B\\2SC3326B TLC319 R_VARI CS24 50V2.2 7-D2 RB46 QB42 CB41 2SA1576A B2200 RB49 TV_SYNC CB42 RB34 QB43 CH560 3.9k CB40 2SC4081-Q 10V1 RB32 CB43 RB35 RB33 B3300 3.9k 43PH46P/50PH46P SIGNAL (AV) SHEET-5/10 (5/16)
- Page 68 C623 1SS355\\MA111 220k OPEN BA4558\\TA75458P 2-D2 MUTE R624 TLC347 8.2k 10-A7 R625 8.2k R626 C625 8.2k 16V220 C624 D628 25V100 R628 MA8120-M\\MA8120-L\\MA8120-M TLC335 R629 D605 4.7k TLC332 TLC334 Q620 2-D3 WOOFER_SW 1SS355\\MA111 R630 2SC4081-Q\\2SC4116Y 100k 43PH46P/50PH46P SIGNAL (AUDIO) SHEET-6/10 (6/16)
- Page 69 C111 GR690 R_APRO D101 B25V0.01 9-F3 MTZJ33C RM73B1HR00OD GND_A TLB0112 TLB0119 GR691 L_APRO C103 C106 RM73B1HR00OD B25V0.01 50V10 GND_A W_APRO 7-C5 8-F2 L103 L104 TEM2121M TEM2121M 8-F2 6-C2 6-C2 32V_VT R170 Q171 KTC4075Y-RTK R171 R172 43PH46P/50PH46P SIGNAL (TUNER/IMA) SHEET-7/10 (7/16)
- Page 70 TLC575 HD_IN TLC387 CH019 100p CH011 GND_q005 CH017 7L10V220u CH018 TLC558 TLC372 TLC377 TLC379 TLC383 LH003 TEM2143AD TLC388 TLC586 TLC564 TLC567 RH053 TLC378 TLC380 TLC382 TLC376 RH052 KETSU 43PH46P/50PH46P CH051 25V0.1 SIGNAL (DIGITAL CONVER 1/2 ) RH072 TLC569 SHEET-8/10 (8/16)
- Page 71 KETSU KETSU KETSU KETSU TLC743 LH708 RH424 TEM2147AD LH991 LH997 LH992 LH996 LH989 LH994 TLC634 TEM2147AD KETSU TEM2147AD KETSU KETSU KETSU ADCKVD CH415 KETSU TLC640 TLC641 TLC400 TLC402 TLC403 TLC404 TLC405 TLC398 TLC399 43PH46P/50PH46P SIGNAL (DIGITAI CONVFR 2/2) SHEET-9/10 (9/16)
- Page 72 TLA070 D7806 1SS355-TE17 R7881 R7883 C7800 4.7k 16V22u P711 TLA067 TLA071 CONVER TLC444 TLA068 YOKE TLA072 TLC434 P710 TLA0002 R7771 Q769 4.7k TLC445 TLA091 CONVER R7775 TLA0003 YOKE TLA134 TLC438 R7770 D7792 1SS355-TE17 C7753 50V470u 43PH46P/50PH46P SIGNAL (CONVFR-OUT) SHEET-10/10 (10/16)
- Page 73 2kV100 PS2581L1 RD10ESAB1 50V2.2 D899 TLC003 INR15G471K C801Z D841 OPEN MA8056-H TLC011 TLC028 C801 D842 AC250V0.47 MA8043-H D848 C842 Q840 RD10ESAB1 MIP290 43PH46P/50PH46P 63V0.10 TLC016 C814 AC250V470P DEF/POWER (POWER) TLA0024 TLA0026 LIVE AREA TLA0025 TLA0027 SHEET-1/3 P800 Lock 2P_11.88mm_S (11/16)
- Page 74 Q410 R409 R410 R437 TEM2014AA KTC4075Y 3R22 3R22 C449 R419 R490 Q411 TLC174 1/2R330 KTC4075Y R471 L408 1/6P220k TLC158 TEM2014AA TLC164 D425 TLC146 TLC151 FR105-FL Q428 C460 KTC4075Y Q425 R469 200V22 FET 2SK2920 D426 MA8180-M 43PH46P/50PH46P DEF/POWER (DEF) SHEET-2/3 (12/16)
- Page 75 TLA0011 TLA0012 TLA0013 TLA0014 TLB0050 TLB0051 TLB0052 TLB0053 TLB0054 TLB0056 P402 P405 P404 P403 P401 B03B-DVS-L 6P_5mm_5A 9P_2.5mm_1.5A_Beige 6P_5mm_5A 6P_5mm_5A TO FOCUS P ACK TO CRT DRIVE TO SVM L463 L462 L464 TDY707AS(R) TDY707AS(R) TDY707AS(R) 43PH46P/50PH46P DEF/POWER (CONNECTION) SHEET-3/3 (13/16)
- Page 76 TLA505 TLA506 16V47 TLC501 U916A PV15A TLA507 TLA508 TLA509 TLA403 TLA404 TLA405 PB11B P605B PLUG 7P PB12B PB13B U916B TLA415 TLA416 TLA418 TLA419 TLA421 TLA423 TLA424 4P_2.5mm_1.5A_Beige PLUG 3P PLUG 5P-L PLUG 6P-L to signal 43PH46P/50PH46P FRONT (43PH46P) SHEET-1/2 (14/16)
- Page 77 All manuals and user guides at all-guides.com 43PH46P/50PH46P FRONT (50PH46P) SHEET -2/2 (15/16)
- Page 78 TLB0053 P905 1SS133 VM GND SHORT R921 1/6P100 B-OUT P910 TLC180 TLC227 D944 1SS133 C923 B560p R929 R925 TLC291 P707A C9200 R9620 R928 B820p R926 +120V 1 FROM TLB0063 CR BLOOK TLB0064 HV_DET TLB0065 VM GND 43PH46P/50PH46P CRTD SVM (16/16)