Canon VIXIA HF R10 Instruction Manual
Canon vixia hd dual flash camcorder instruction manual
Hide thumbs
Also See for VIXIA HF R10:
- Instruction manual (184 pages) ,
- Pocket manual (50 pages) ,
- Software manual (60 pages)
Table of Contents
Advertisement
Quick Links
Advertisement
Table of Contents

Related Manuals for Canon VIXIA HF R10


Summary of Contents for Canon VIXIA HF R10
-
Page 1: Instruction Manual
PUB. DIE-0342-000 HD Camcorder Instruction Manual... -
Page 2: Important Usage Instructions
HD Camcorder, VIXIA HF R11 A / VIXIA HF R10 A / VIXIA HF R100 A systems This device complies with Part 15 of the FCC Rules. Operation is subject to the following two conditions: (1) This device may not cause harmful interference, and (2) this device must accept any interference received, including interference that may cause undesired operation. - Page 3 The Mains plug is used as the disconnect device. The Mains plug shall remain readily operable to disconnect the plug in case of an accident. CAUTION: • Danger of explosion if the wrong type of batteries are attached. Use only the same type of batteries.
-
Page 4: Important Safety Instructions
IMPORTANT SAFETY INSTRUCTIONS In these safety instructions the word “apparatus” or “product” refers to the Canon HD Camcorder VIXIA HF R11 A / VIXIA HF R10 A / VIXIA HF R100 A and all its accessories. Read these instructions. Keep these instructions. - Page 5 Replacement Parts — When replacement parts are required, be sure the service technician has used replacement parts that are specified by Canon or that have the same characteristics as the original part. Unauthorized substitutions may result in fire, electric shock or other hazards.
- Page 6 Model Name: VIXIA HF R11 A / VIXIA HF R10 A / VIXIA HF R100 A Date of Purchase: Purchased From: Dealer Address: Dealer Phone No.:...
-
Page 7: Exciting Features And New Functions
( “Full HD 1080” refers to Canon camcorders compliant with high-definition video composed of 1,080 vertical pixels (scanning lines). Video is recorded at this resolution only when the recording mode is set to FXP mode. -
Page 8: Image Stabilization
Face Detection The camcorder automatically detects people’s faces and adjusts the focus and other settings accordingly for beautiful results. Just point the camcorder and it will automatically select the best settings for your subject Image Stabilization 133) Dynamic IS compensates for camcorder shake when you shoot video while walking. - Page 9 * Refer to the instruction manual of the device. Depending on the device used, cor- rect playback may not be possible even if the device is AVCHD-compatible. In such case, play back the recordings on the memory card using the camcorder. Connect the camcorder to...
-
Page 10: Table Of Contents
Setting the Date and Time Changing the Language Changing the Time Zone Using a Memory Card Memory Cards Compatible for Use with the Camcorder Inserting and Removing a Memory Card Initializing the Built-in Memory ( Memory Card Table of contents... - Page 11 Video Basic Recording Shooting Video Selecting the Video Quality (Recording Mode) Zooming Quick Start Function Basic Playback Playing Back the Video Selecting what Recordings to Play Back Searching for Scenes Pre-selecting Recordings from the Index Screen Deleting Scenes Advanced Functions Programmed AE and Special Scene Recording Programs Cinema Mode: Giving a Cinematic Look to Your...
- Page 12 Protecting Photos 100 Printing Photos Printing Photos (Direct Print) Print Orders External Connections 106 Terminals on the Camcorder Connection Diagrams Playback on a TV Screen 111 Saving and Sharing Your Recordings Saving Recordings on a Computer Saving Movies onto High-Definition Discs...
- Page 13 130 Appendix: Menu Options Lists FUNC. Menu Setup Menus Onscreen Icons and Displays 147 Trouble? Troubleshooting List of Messages 163 Do’s and Don’ts Handling Precautions Maintenance/Others Using the Camcorder Abroad 169 General Information Accessories Optional Accessories Product Codes Specifications Index Table of contents...
-
Page 14: About This Manual
About this Manual Thank you for purchasing the Canon VIXIA HF R11 / VIXIA HF R10 / VIXIA HF R100. Please read this manual carefully before you use the camcorder and retain it for future reference. Should your camcorder fail... - Page 15 NOTES • The camcorder uses a variable bit rate (VBR) to encode video so the actual recording times will vary depending on the content of the scenes. • The camcorder retains the last setting used even if you set the cam- corder to mode.
-
Page 16: Getting To Know The Camcorder
Getting to Know the Camcorder Supplied Accessories and CD-ROMs The following accessories are supplied with the camcorder: * CA-590E including power cord, in Asia. Introduction CA-590 Compact Power Adapter* BP-2L5 Battery Pack IFC-300PCU USB Cable STV-250N Stereo Video Cable Yellow • Red • White plugs CTC-100/S Component Cable Red •... - Page 17 The following CD-ROMs and software are supplied with the camcorder: • PIXELA Application - Disc 1 CD-ROM* and ‘PIXELA Applications’ Installation Guide - ImageMixer 3 SE Transfer Utilities - Software for saving and transferring movies and music files you can use as background music.
-
Page 18: Names Of Parts
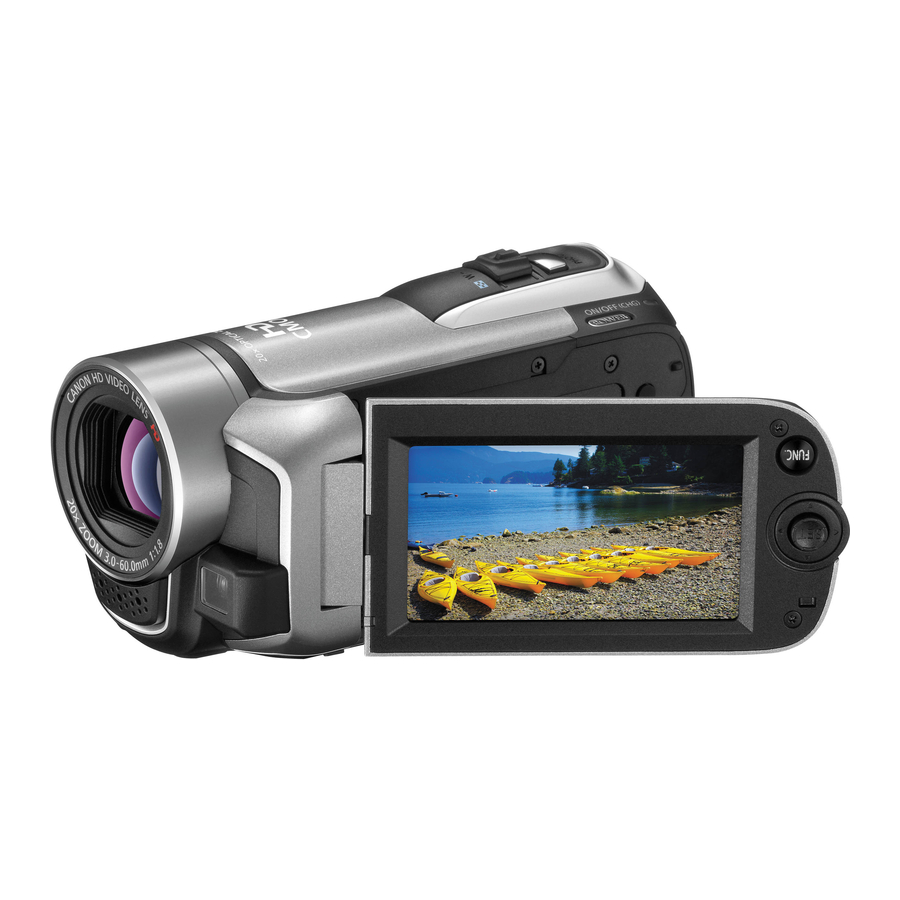
Names of Parts Left side view Right side view Front view Introduction (camera/play) button ( VIDEO SNAP (video snapshot) button WEB button ( button ( INDEX SEL. (index selection) button ( PLAYLIST button ( DISP. (on-screen display) button ACCESS indicator ( Strap mount ( Speaker ( Grip belt (... - Page 19 Top view LCD panel Back view Zoom lever ( PHOTO button ( POWER button ON/OFF (CHG) (charge) indicator: Green – On Orange – Standby ( Red – Charging ( LCD screen ( Joystick ( FUNC. button ( 31, 130) USB terminal ( 106, 109) HDMI OUT terminal ( COMPONENT OUT terminal...
- Page 20 Bottom view Introduction Tripod socket ( 163) Memory card slot Battery compartment Battery release latch Battery compartment cover/Memory card slot cover Serial number The serial number label is located on the battery compartment cover.
-
Page 21: Preparations
Getting Started Charging the Battery Pack The camcorder can be powered with a battery pack or directly using the com- pact power adapter. Charge the battery pack before use. - Page 22 7 Charging will start when the camcorder is turned off. • If the camcorder was on, the green ON/OFF (CHG) indicator will go out when you turn off the camcorder. After a moment, the ON/OFF (CHG) indicator will start flashing in red (battery pack charging).
- Page 23 • The first time you use a battery pack, fully charge it and then use the camcorder until the battery pack is completely exhausted. • Do not connect to the camcorder’s DC IN terminal or to the compact power adapter any electrical equipment that is not expressly recom- mended for use with this camcorder.
-
Page 24: Preparing The Accessories
1 Lift the padded handgrip’s flap and detach the strap from the Velcro pad. 2 Pull the strap to remove it first from the front bracket on the camcorder, then to unthread it from the handgrip and finally to remove it from the rear bracket on the camcorder. Preparations... -
Page 25: Adjusting The Position And Brightness Of The Lcd Screen
To attach an optional wrist strap Pass the attaching end of the wrist strap through the rear bracket on the cam- corder, thread the wrist strap through the loop and fasten. You can also attach the wrist strap to the strap mount on the grip belt to use both for extra convenience and protection. - Page 26 When recording in bright places it may be difficult to use the LCD screen. Turn on the LCD backlight to make it brighter. With the camcorder on, hold 2 seconds. • Repeat this action to switch the LCD backlight between off (normal) and on (bright).
-
Page 27: Basic Operation Of The Camcorder
Basic Operation of the Camcorder Operating Modes Recording The camcorder offers two basic modes for recording video and photos: Smart AUTO ( ) mode for beginners or if you just prefer not to bother with detailed camcorder settings, and flexible recording ( mode, which lets you change the camcorder’s settings to your prefer-... -
Page 28: Smart Auto Icons
Background → (color of the icon) Subject ↓ People (stationary) People (moving) Subjects other than people, such as landscapes Close objects Preparations mode, the camcorder will automatically Bright Blue skies (grey) (light blue) Dark (dark blue) Spotlight Vivid colors Sunsets... - Page 29 - Video snapshot length - Auto slow shutter - All settings under the setup menu’s • Even in flexible recording mode, the camcorder can help you with the settings. For example, you can use the Special Scene recording pro- grams ( 55) to set at once all the optimal settings to match special recording conditions.
-
Page 30: Joystick And Joystick Guide
When switching to a playback mode, the memory selected for playback will be the same currently used for recording. Joystick and Joystick Guide Use the joystick to operate the camcorder’s menus. Push the joystick up, down, left or right ) to select an item or change settings. -
Page 31: Using The Menus
Using the Menus Many of the camcorder’s functions can be adjusted from the menus that open FUNC. after pressing menus cannot be accessed and, except in a few cases, most menu settings will return to their default values. For details about the available menu... - Page 32 Selecting an Option from the Setup Menus FUNC. 1 Press 2 Select ( press to open the setup menus. You can also hold down for more than 1 second to open directly the setup menus screen. 3 Select ( ) the tab of the desired menu. 4 Select ( ) the setting you want to change and press •...
-
Page 33: First Time Settings
) [OK] and press setup screen. NOTES • When you do not use the camcorder for about 3 months, the built-in rechargeable lithium battery may discharge completely and the date and time setting may be lost. In such case, recharge the built-in lithium battery ( 166) and set the time zone, date and time again. -
Page 34: Changing The Language
Menu] Desired language NOTES • The displays the name of buttons on the camcorder and will not change, regardless of the language selected. Changing the Time Zone Change the time zone to match your location. The default setting is New York. -
Page 35: Using A Memory Card
Using a Memory Card Memory Cards Compatible for Use with the Camcorder You can use commercially available memory cards and ever, depending on the memory card, you may not be able to record movies. Refer to the table below. As of October 2009, the movie recording function has been tested using SD/SDHC memory cards made by Panasonic, Toshiba and SanDisk. -
Page 36: Inserting And Removing A Memory Card
• Memory cards have front and back sides that are not interchangeable. Inserting a memory card facing the wrong direction can cause a malfunc- tion of the camcorder. Be sure to insert the memory card as described in step 3. Preparations... -
Page 37: Selecting The Memory For The Recordings
DVDs ( Relay Recording If the memory becomes full while you are recording a movie, relay recording allows the camcorder to automatically continue recording on to the memory card. Operating modes: 1 Insert a memory card that does not contain any movies. -
Page 38: Initializing The Built-In Memory
[Rec Media for Movies] to [Mem. Card] Initializing the Built-in Memory ( Initialize memory cards when you use them with this camcorder for the first time. You can also initialize a memory card or the built-in memory only) to permanently delete all the recordings it contains. -
Page 39: Memory Card
• Windows users: Use the supplied software ImageMixer 3 SE to trans- fer music files from the supplied Camcorder Supplemental Disc to the memory card again. For details, refer to the ‘ImageMixer 3 SE Software Guide’. -
Page 40: Basic Recording
Failing to do so may result in permanent data loss or damage to the memory. - Do not open the memory card slot cover. - Do not disconnect the power source or turn off the camcorder. - Do not change the camcorder’s operating mode. Video... -
Page 41: Selecting The Video Quality (Recording Mode)
• Be sure to save your recordings regularly ( ing important recordings. Canon shall not be liable for any loss or cor- ruption of data. NOTES • About the Power Save mode: If On], the camcorder will shut off automatically to save power when it is powered by a battery pack and is left without any operation for 5 minutes. -
Page 42: Zooming
At the time of purchase, the built-in memory contains about 75 MB of music files. Zooming The camcorder offers optical (20x) and digital (400x) zoom. You can turn on the digital zoom with the Operating modes: Move the zoom lever toward W (wide angle) to zoom out. -
Page 43: Quick Start Function
ON/OFF (CHG) indicator is lit in orange). NOTES • The camcorder will not enter standby mode if the LCD panel is closed while the ACCESS indicator is on or flashing, while a menu is being dis- played, or while the PHOTO button is pressed down halfway. The cam-... - Page 44 • The camcorder will shut off if left in standby mode for 10 minutes, regardless of the turn on the camcorder. • You can select the length of time until shut-off or turn off the Quick Start function altogether with the •...
-
Page 45: Basic Playback
Basic Playback Playing Back the Video Operating modes: 1 Press • The original movies index screen will appear in most cases. • If a photo appears in single photo view, move the zoom lever toward W to open the photo index screen. Switch to the original movies index screen ( 47). - Page 46 - Do not disconnect the power source or turn off the camcorder. - Do not change the camcorder’s operating mode. • You may not be able to play back with this camcorder movies recorded on a memory card using another device.
-
Page 47: Selecting What Recordings To Play Back
( only). In addition, you can switch to the index screens that contain scenes used by other functions in this camcorder, such as video snapshot and the playlist. Operating modes: Select ( to skip to the next scene. - Page 48 1 In the index screen, move ( tabs on the top of the screen. 2 Select ( ) the tab corresponding to the recordings you want to play back. 3 Return ( ) to the index screen to select a scene or photo. By default, the index screen will show up to 6 items (scenes or photos).
-
Page 49: Searching For Scenes
For scenes in the built-in memory: press For scenes on the memory card: press [Playlist]. Press PLAYLIST To open the index screen for scenes converted into standard definition ( You can also open the index screen for scenes converted into standard definition for Web upload ( 125) or DVD authoring ( Open the original movies index screen on the... - Page 50 • You can select the original movies in the built-in memory or on the memory card. VIDEO SNAP • You can press snapshot scenes. 2 Open the calendar screen. FUNC. • The calendar screen appears. • Dates that contain scenes (that is, movies were recorded on that date) appear in white.
- Page 51 Selecting Only Scenes in which People’s Faces Were Detected If you recorded movies with the Face Detection function ( vated, the camcorder can narrow down the scenes shown in the index screen, leaving only those scenes where a face was detected. This function is not available from the index screen for video snapshot scenes.
-
Page 52: Pre-Selecting Recordings From The Index Screen
NOTES • You can press FUNC. Pre-selecting Recordings from the Index Screen You can select in advance a number of original movies or photos from the index screen in order to perform certain actions on them collec- tively, all at once. mode: Delete, copy* or add the selected scenes to the playlist. -
Page 53: Deleting Scenes
[OK] NOTES • The pre-selection of scenes/photos will be canceled if you turn off the camcorder or change the operating mode. • Scenes in the playlist cannot be included in the pre-selection. Deleting Scenes You can delete those scenes that you are not interested in keeping. - Page 54 • Observe the following precautions while the ACCESS indicator is on or flashing (while scenes are being deleted). - Do not open the memory card slot cover. - Do not disconnect the power source or turn off the camcorder. - Do not change the camcorder’s operating mode. NOTES •...
-
Page 55: Advanced Functions
FUNC. Programmed AE] Special Scene Recording Programs Select a Special Scene recording program to easily make recordings in a variety of situations by letting the camcorder take control of various settings. FUNC. Programmed AE] display the Special Scene (SCN) recording programs... - Page 56 Sports] To record sports scenes such as tennis or golf. Snow] To record in bright ski resorts without the subject being underexposed. Beach] To record on a sunny beach without the subject being underexposed. Sunset] To record sunsets in vibrant colors. Night Scene] lower noise.
-
Page 57: Cinema Mode: Giving A Cinematic Look To Your Recordings
(for movies only). • [ Fireworks]: - To avoid camcorder blur (blur due to the camcorder moving) we recommend using a tripod. - When you take photos, slower shutter speeds are used so blur is more likely to occur. Stabilize the camcorder, for example, by mounting it on a tripod. -
Page 58: Video Snapshot
2 Press START/STOP • The camcorder records for about 4 seconds (the blue frame serves as a visual progress bar) and then automatically returns to record pause mode. • You can change the length of video snapshot scenes with the [Video Snapshot Length] setting. -
Page 59: Pre-Recording Function
NOTES • While pre-recording is activated, the camcorder will not emit any notifi- cation sounds. • The camcorder will not record the full 3 seconds prior to pressing START/STOP if the button was pressed within 3 seconds of having turned on pre-recording or having finished the previous recording. -
Page 60: Manual Exposure Adjustment
PHOTO For photos: Press and then fully. The camcorder will record the photo after a 10-second countdown. The countdown appears on the screen. NOTES • Once the countdown has begun, any of the following actions will cancel the self timer. -
Page 61: Manual Focus Adjustment
Focus] and press The current focus is locked and appears. 3 Push the joystick ( verify if the image is focused. twice to return the camcorder to • Fast moving subjects • Through wet windows • Night scenes [MF] ) or (... -
Page 62: Face Detection
When there are a number of people in the picture, one person (with the white face frame) will be determined to be the main subject. You can also select the main subject manually, so the camcorder optimizes the settings for the person selected. -
Page 63: White Balance
To select the main subject If there is more than one person in the picture, the camcorder will auto- matically select one person it determines is the main subject. The main subject is indicated by a white face detection frame and the camcorder will optimize the settings for that person. - Page 64 Custom WB], do not press the following procedure. To set the custom white balance 1 Point the camcorder at a white object so it fills the whole screen and press When the adjustment is completed, The camcorder retains the custom setting even if you turn off the camcorder.
-
Page 65: Image Effects
Image Effects You can use the image effects to change the color saturation and con- trast to record movies and photos with special color effects. Operating modes: POINTS TO CHECK • Select a recording program other than the Special Scene recording pro- grams. - Page 66 Options ( Default value) Digital Effect Off] to use the digital effects. Fade Trigger] end a scene with a fade from or to a black screen. Black & White] white. Sepia] Records movies and photos in sepia tones for an “old”...
-
Page 67: Recordings Video Snapshot
About the Data Code With every scene or photo recorded, the camcorder keeps a data code (date/time of recording, information about the camera setup, etc.). In mode, this information is displayed on the bottom bar and as information icons;... -
Page 68: Audio Recording Level
• The audio level selected will be locked and the audio level adjustment bar will turn white. • Press twice to return the camcorder to automatic adjustment of the audio recording level. To display the audio level indicator Usually, the audio level indicator will be displayed only after activating the manual adjustment of the audio recording level. -
Page 69: Using Headphones
NOTES • When the audio level meter reaches the red point (0 dB mark), the sound may be distorted. • If the audio level is too high and the sound gets distorted, activate the microphone attenuator with the • We recommend using headphones to check the sound level while adjusting the audio recording level or when the microphone attenuator is activated. -
Page 70: Using An External Microphone
Using an External Microphone When recording in very quiet surroundings, the built-in microphone may pick up the sound of the camcorder’s internal machinery. In such case, we recommend using an external microphone. Operating modes: Connect the external microphone to the MIC terminal. -
Page 71: Selecting The Playback Starting Point
6 seconds to 6 minutes. If you recorded movies with the Face Detection function ( into segments every time the camcorder registered a change in the main subject of the scene. Operating modes: Movie Timeline 1 Open the original movies or playlist index screen. - Page 72 • The [Timeline by Faces] screen appears. The large thumbnail shows the point at which a face was first detected. Below it, frames are taken from the scene every time the main subject detected by the camcorder changed. DISP. • Press to return to the [Scenes with Faces] index screen.
- Page 73 Segment ruler Page slidebar 3 Select ( ) the playback starting point from the segment ruler. 4 Press to begin the playback. You can select another scene and move between segment ruler pages in the same way as in the movie timeline screen ( NOTES •...
-
Page 74: Scene And Playlist Operations
Operating modes: Using a Supplied Music Track as Background Music The supplied Camcorder Supplemental Disc contains three music tracks you can use as background music. tracks come pre-installed in the built-in memory. - Page 75 POINTS TO CHECK • You will need a commercially available audio cable with at least one mini-stereo plug (to connect to the MIC terminal on the camcorder); the other end will depend on the terminal used by the external audio player.
- Page 76 2 Activate the external audio input. FUNC. 3 Connect the external player to the camcorder’s MIC terminal. 4 Adjust the audio input as necessary. • Start the music playback on the external player and adjust its volume according to the onscreen indications. When the audio input is in the correct range, stop the music playback.
- Page 77 • Windows users: Use the supplied software ImageMixer 3 SE to trans- fer music files from the supplied Camcorder Supplemental Disc to the memory card again. For details, refer to the ‘ImageMixer 3 SE Software Guide’.
-
Page 78: Dividing Scenes
Dividing Scenes You can divide scenes (original scenes only) in order to leave out the best parts and later cut out the rest. Operating modes: 1 Open the original movies index screen. You can select the original movies in the built-in memory or on the memory card ( 2 Select ( ) the scene you want to divide. -
Page 79: Editing The Playlist: Adding, Deleting, Moving And Playing Back
- Video snapshot scenes and other scenes that are too short (less than 3 seconds). - Scenes that were edited using the supplied software ImageMixer 3 SE and were then written back to the memory. • Scenes cannot be divided within 1 second from the beginning or the end of the scene. - Page 80 • When the operation is completed [Scene(s) added to the playlist] will be displayed. • Scenes are added to the playlist on the same memory they are recorded on. • To open the playlist index screen from the original movies index screen: For scenes in the built-in memory, press For scenes on the memory card, press...
- Page 81 FUNC. Delete] FUNC. * If you selected [All Scenes], you can press is in progress. Some scenes will be deleted nevertheless. Options [All Scenes] Deletes all the scenes from the playlist. [This Scene] Deletes from the playlist only the scene marked with the orange selection frame.
-
Page 82: Capturing Video Snapshot Scenes From A Movie
1 Play back the movie containing the scene you want to capture. START/STOP 2 Press • The camcorder captures a video snapshot scene (the blue frame serves as a visual progress bar) and then automatically changes to playback pause mode. -
Page 83: Copying Scenes To A Memory Card
Copying Scenes to a Memory Card You can copy original movies or the entire playlist only from the built-in memory to the corresponding location on the memory card. See Photos to a Memory Card memory card. Operating modes: Copying Original Movies 1 Open the index screen of original movies recorded in the built-in memory. - Page 84 Failing to do so may result in permanent data loss. - Do not open the memory card slot cover. - Do not disconnect the power source or turn off the camcorder. - Do not change the camcorder’s operating mode.
- Page 85 • Scenes that were edited using the supplied software ImageMixer 3 SE and were then written back to the camcorder cannot be copied to the memory card. Video...
-
Page 86: Basic Recording
Basic Recording Taking Photos Operating modes: 1 Turn on the camcorder. • By default, photos are recorded in the built-in memory. You can set the memory card as the recording media for photos 37). -
Page 87: Selecting Photo Size And Quality
Failing to do so may result in permanent data loss. - Do not open the memory card slot cover. - Do not disconnect the power source or turn off the camcorder. - Do not change the camcorder’s operating mode. - Page 88 NOTES • The actual number of photos that can be recorded will vary depending on the subject and shooting conditions. • The camcorder retains the last setting used even if you set the cam- corder to mode. • When printing photos, use the following guidelines as a reference for selecting the print size.
-
Page 89: Basic Playback
Basic Playback Viewing Photos Operating modes: 1 Press • The original movies index screen will appear in most cases. • If a photo appears in single photo view, move the zoom lever toward W to open the photo index screen. Proceed to step 3. -
Page 90: Deleting Photos
Failing to do so may result in permanent data loss. - Do not open the memory card slot cover. - Do not disconnect the power source or turn off the camcorder. - Do not change the camcorder’s operating mode. - Page 91 FUNC. Delete] appears on the screen. 2 Select ( ) the photo you want to delete and press 3 Select ( ) [Yes] and press 4 Repeat steps 2-3 to delete additional photos or press to close the menu. Deleting Photos from the Index Screen 1 Open the photo index screen.
-
Page 92: Magnifying Photos During Playback
Magnifying Photos during Playback In single photo view, photos can be magnified up to 5 times. appear for photos that cannot be enlarged. Operating modes: 1 Move the zoom lever toward T. • The photo is magnified by 2 times and a frame appears indicating the position of the magnified area. -
Page 93: Additional Functions
Additional Functions Slideshow You can play a slideshow of all the photos and even set it to music 74). Operating modes: 1 Open the photo index screen. 2 Select the background music to use when playing back the photo slideshow ( 74). -
Page 94: Rotating Photos
To change the slideshow’s transition effects FUNC. Menu] Desired option Options ( Default value) Off] Photos in the slideshow advance without any transition effect. Dissolve] The current photo fades out as the next photo fades in. Slide Image] NOTES • The background music may not be played back correctly when playing back a slideshow from a memory card with slow transfer rates. -
Page 95: Histogram Display
Histogram Display In single photo view, you can display the histogram and the icons of all the functions used at the time of recording. Use the histogram as a ref- erence to verify the correct exposure of the photo. Operating modes: The area to the right of the histogram represents highlights and the left side represents shadows. -
Page 96: Protecting Photos
2 Pause the playback at the point you want to capture. PHOTO 3 Press fully. IMPORTANT • When capturing photos on an Eye-Fi card, photos will be uploaded automatically if you are within the range of a configured network. Always verify that Eye-Fi cards have been approved in the country/region of Using an Eye-Fi card use. -
Page 97: Copying Photos To A Memory Card
Protecting Photos from the Index Screen 1 Open the photo index screen. You can select the photos in the built-in memory or on the memory card. 2 Select ( ) the photo you want to protect. FUNC. Protect] FUNC. Options [Individual Photos] Protecting Single Photos to protect the photo. - Page 98 In the index screen, select the zoom lever toward T to return to single photo view. 2 Open the photo selection screen. FUNC. Copy ( Copy ( 3 Select ( ) the photo you want to copy and press 4 Select ( ) [Yes] and press 5 Repeat steps 3-4 to copy additional photos or press to close the menu.
- Page 99 Failing to do so may result in permanent data loss. - Do not open the memory card slot cover. - Do not disconnect the power source or turn off the camcorder. - Do not change the camcorder’s operating mode.
-
Page 100: Printing Photos
You can mark in advance the photos you want to print and set the desired number of copies as a print order ( Canon printers: SELPHY printers of the CP, DS and ES series and PIXMA printers marked with the PictBridge logo. - Page 101 NOTES • will appear for photos that cannot be printed. • We recommend powering the camcorder using the compact power adapter. • Refer also to the printer’s instruction manual. • If you have no intention to use the optional DW-100 DVD Burner, you...
- Page 102 [x photos/sheet]: Printing multiple photos on the same sheet When using Canon printers you can print the same photo multiple times on the same sheet of paper. Use the following table as a guideline for the recommended number of copies depending on the [ Size] setting.
-
Page 103: Print Orders
If that option is not available, select [Stop] and press and then restart printing from the beginning. • Other printers or if the error still persists with a Canon printer: If printing does not resume automatically, disconnect the USB cable and turn off the camcorder. - Page 104 POINTS TO CHECK • Only photos on the memory card can be set for print orders. Marking Single Photos with Print Orders 1 In single photo view, open the photo selection screen. FUNC. appears on the screen. 2 Select ( ) the photo you want to mark with a print order.
- Page 105 Options [Individual Photos] [Selected Photos (1 copy each)] of the photos selected in advance (marked with a Pre-selecting Recordings from the Index Screen Refer to [Remove All] Removes all the print orders. NOTES • To set print orders set for photos recorded in the built-in memory, copy the photos to the memory card in advance.
-
Page 106: External Connections
TV, VCR, or computer. Terminals on the Camcorder * When connecting a cable to the camcorder, make sure to align the triangle marks on the cable’s connector and on the camcorder’s terminal ( External Connections USB Terminal Access: Open the left rear terminal cover. -
Page 107: Connection Diagrams
HDMI terminal, you can enjoy video and audio playback at the highest quality. - The HDMI OUT terminal on the camcorder is for output only. Do not connect it to an HDMI output terminal on an external device, as this may damage the camcorder. - Page 108 Change Type: Analog Quality: Standard definition Output only Connect to a standard TV or a VCR with audio/video input terminals. Change the following on the camcorder: Connection the TV cannot automatically detect and change the aspect ratio STV-250N Stereo Video Cable...
- Page 109 • To be able to write back scenes and to transfer music files from the computer to the camcorder, power the camcorder using the compact power adapter and only then connect it to the computer using the supplied USB cable.
-
Page 110: Playback On A Tv Screen
Playback on a TV Screen Connect the camcorder to a TV to enjoy your recordings with family and friends. Playback on an HDTV using one of the high-definition con- nections will ensure the best playback quality. Operating modes: 1 Turn off the camcorder and the TV. -
Page 111: Saving And Sharing Your Recordings
Install the Photo Application module on the supplied Camcorder Supplemental Disc. Refer to Installing Photo Application. PHOTO • Windows users only: The first time you connect the camcorder to the computer, you also need to select the CameraWindow auto-launch setting. only) or on the memory card. Because PDF file). - Page 112 - Do not open the memory card slot cover and do not remove the memory card. - Do not access, change or delete any of the camcorder’s folders or files directly from the computer as this may result in permanent data loss.
-
Page 113: Saving Movies Onto High-Definition Discs
• If you connect the camcorder to the computer while it is set to mode, the process of creating scene thumbnails will start automatically. - Page 114 Connecting to the DW-100 DVD Burner and Creating a Disc 1 Turn on the DVD burner. Creating DVDs. Refer to DW-100 2 Connect the camcorder to the DVD burner using the supplied USB cable. • Connection . Refer to Connections DW-100 •...
- Page 115 IMPORTANT • While the camcorder is connected to the DVD burner, do not open the memory card slot cover and do not remove the memory card. • Observe the following precautions while the ACCESS indicator on the camcorder is on or flashing.
-
Page 116: Saving Movies Onto Standard-Definition
• If a scene does not fit entirely in one disc, it may be divided and con- tinue on the next disc. • When the camcorder contains a large number of scenes to be saved on discs, it may take a long time for the connection to the DVD burner (step 2 above) to be completed. - Page 117 Convert high-definition scenes in the built-in memory to standard defi- nition before creating a DVD disc. Converted scenes will be saved to the memory card. 1 Power the camcorder using the compact power adapter. 2 Insert a memory card with sufficient available space in the camcorder.
- Page 118 • The time required to convert scenes is approximately equal to the scenes’ total running time. Because conversion generally takes longer on a computer, we recommend using the camcorder to convert scenes. External Connections Converts all the scenes selected in advance checkmark).
- Page 119 - Do not open the memory card slot cover. - Do not disconnect the USB cable. - Do not disconnect the power source or turn off the camcorder or the computer. Connecting to the DW-100 DVD Burner and Creating DVD Discs Operating modes: 1 Power the camcorder using the compact power adapter.
- Page 120 IMPORTANT • While the camcorder is connected to the DVD burner, do not open the memory card slot cover and do not remove the memory card. • Observe the following precautions while the ACCESS indicator on the camcorder is on or flashing.
-
Page 121: Creating Photo Dvds
• The procedure is the same as that for burning AVCHD discs 114). IMPORTANT • While the camcorder is connected to the DVD burner, do not open the memory card slot cover and do not remove the memory card. • Observe the following precautions while the ACCESS indicator on the camcorder is on or flashing. -
Page 122: Playing Back Discs Using The Dw-100 Dvd Burner
) the scene you want to play back and press to begin the playback. IMPORTANT • While the camcorder is connected to the DVD burner, do not open the memory card slot cover and do not remove the memory card. NOTES •... -
Page 123: Copying Your Recordings To An External Video Recorder
In Standard Definition You can copy your movies by connecting the camcorder to a VCR or a digital video recorder with analog audio/video inputs. Video output will be in standard definition, although the original scenes are in high defi- nition. -
Page 124: Uploading Movies To Video Sharing Web Sites
2 Turn on the camcorder and set it to Verify that [AV/Headphones] is set to [ 3 Camcorder: Locate the scene you wish to copy and pause the playback just before the desired scene. 4 Camcorder: Resume playback. • Push the joystick ( •... - Page 125 See ‘ImageMixer 3 SE Software Guide’ (PDF file). Operating modes: Converting Scenes into Standard Definition in the Camcorder 1 Power the camcorder using the compact power adapter. 2 Insert a memory card with sufficient available space in the camcorder. 3 Open the index screen in the built-in memory that contains the scenes you want to convert.
- Page 126 6 When the conversion is completed, a confirmation screen will appear. Connect the camcorder to the computer at this point ( continue uploading the converted videos to the Web or select [End Without Connecting] to connect to the computer later.
- Page 127 Failing to do so may result in permanent data loss. - Do not open the memory card slot cover. - Do not disconnect the USB cable. - Do not disconnect the power source or turn off the camcorder or the computer. INDEX SEL.
- Page 128 Refer to the instruction manual of the Eye-Fi card. Please read the IMPORTANT section ( card. 1 Insert your Eye-Fi card in the camcorder and make sure there is sufficient available space on the card. 2 Convert the desired movie ( •...
- Page 129 • Wireless transfer will decrease the effective usage time of the battery pack. You can power the camcorder using the compact power adapter so the battery pack will not be consumed. • While files are being uploaded, the camcorder’s automatic power off function will be disabled.
-
Page 130: Appendix: Menu Options Lists
Additional Information This chapter contains troubleshooting advice, screen mes- sages, handling and maintenance tips, and other information. Appendix: Menu Options Lists Menu items not available appear grayed out. For details about how to select an item, refer to Using the Menus ( function, see the reference page. - Page 131 Menu item Recording mode Photo size/quality Setup Menus FUNC. Menu (Playback Modes) (movie playback), in the original index screen; able in both; — - not available in either. (photo playback): the photo index screen; Menu item [Select Music] [Off], list of background music tracks [Select] [Individual Scenes], [Remove All Selections]...
-
Page 132: Setup Menus
Menu item [Protect] – [Individual Photos], [Selected Photos], [Remove All] [Print Orders] 0-99 copies [Individual Photos], [Selected Photos (1 copy each)], [Remove All] [Rotate] – [Delete] [All Scenes], [All Scenes (this date)], [This Scene], [Selected Scenes] [All Scenes], [This Scene] [No], [Yes] [All Photos], [This Photo], [Selected Photos]... - Page 133 • Use this function to record video only when you intend to play back your recordings on an HDTV compatible with x.v.Color, connected to the camcorder using an HDMI cable. If recordings made with x.v.Color are played back on a non-compatible TV, colors may not be reproduced correctly.
- Page 134 Off]: Use this setting when the camcorder is mounted on a tripod. • If the degree of camcorder shake is too high, the image stabilizer may not be able to fully compensate. The image stabilizer may not be able to successfully eliminate all blur if the camcorder or the subject is moving too much.
- Page 135 • If a trailing afterimage appears, set the slow shutter to [ • If (camcorder shake warning) appears, we recommend stabilizing the camcorder, for example, by mounting it on a tripod. [Auto Backlight Correction]: source behind them, you can have the camcorder automatically correct for the backlight.
- Page 136 (vertically and/or horizontally). • Using the onscreen markers will not affect the recordings. [Wind Screen]: The camcorder automatically reduces the background sound of wind when recording outdoors. • Some low-frequency sounds will be suppressed along with the sound of wind.
- Page 137 [Headphone Volume] [Speaker Volume] [Ext. Audio] [Demo Mode] Option not available when the camcorder is connected to an HDTV using an HDMI cable. Option not available from the original movies index screen. [Output Onscreen Displays]: screen displays will appear also on the screen of a TV or monitor con- nected to the camcorder.
- Page 138 [LCD Screen Dimmer]: Doing so is ideal when using the camcorder in locations where the LCD’s illumination could become a nuisance to others. Hold down for about 2 seconds to restore the LCD’s normal brightness. • Dimming the LCD screen does not affect the brightness of your record- ings or the brightness of the playback image on a TV.
- Page 139 [Photo Numbering] [Firmware] [Reset All] [Eye-Fi Communication] Option not available when the camcorder is connected to an HDTV using an HDMI cable. Option available only from the original movies index screen. [Notification Sounds]: ing on the camcorder, the self-timer countdown, etc.
- Page 140 ( TV while it is set to a recording mode, depending on the TV used, turn- ing off the TV will automatically turn off the camcorder even if it is recording at the time. • We recommend not connecting more than 3 HDMI-CEC compatible devices at a time.
- Page 141 Language and Date/Time Setup Menu item [Language [Time Zone/DST] [Date/Time] [Date Format] [Calendar Start Day] [Date Format]: Select the date format to be used for most on-screen dis- plays, and (if selected) for the date printed on photos. [Calendar Start Day]: endar display ( 49).
- Page 142 [Memory Info]/[Memory Card Info]: ify how much of the built-in memory or the memory card is currently in use total recording time and space remains available for recording. • Estimated figures about available movie recording time and available number of photos are approximate and based on the recording mode and photo quality/size settings currently in use.
-
Page 143: Onscreen Icons And Displays
Appendix: Onscreen Icons and Displays Recording Movies Operating mode ( Recording program ( White balance ( Image effect ( Digital effect ( Recording mode ( Flicker reduction ( Pre-recording ( Memory operation ( Instant AF ( MF Manual focus ( Eye-Fi wireless communication ( Remaining battery time ( While recording/during playback: Scene... - Page 144 Number of available photos On the memory card In the built-in memory Playing Movies (During Playback) Data code ( Scene number External audio input ( Additional Information Camcorder shake warning ( Face detection ( AF frame ( Focus and exposure lock ( 133)
- Page 145 Viewing Photos Histogram ( Current photo / Total number of photos Photo number ( 139) Protected photo mark ( Date and time of recording * The light metering mode cannot be changed. File size Manual exposure ( Photo size ( Aperture value Evaluative light metering* Shutter speed...
-
Page 146: Memory Operation
• When you attach an empty battery pack, the power may turn off without displaying • Depending on the conditions under which the camcorder and the battery pack are used, the actual battery charge may not be indicated accurately. -
Page 147: Trouble
- please read the “CHECK THIS FIRST” box before going on to the more detailed problems and solutions. Consult your dealer or a Canon Service Center if the problem persists. CHECK THIS FIRST Power supply •... - Page 148 - The camcorder may become hot after using it continuously for long periods of time; this is not a malfunction. If the camcorder becomes unusually hot or it becomes hot after using it only for a short while, it may indicate a problem with the camcorder. Consult a Canon Service Cen- ter.
- Page 149 Cannot move scenes in the playlist. - The memory is full. Delete some recordings ( free some space. Cannot delete a scene. - You may not be able to delete scenes recorded or edited using another device. Deleting scenes takes longer than usual. - When the memory contains a large number of scenes, some operations may take longer than usual.
- Page 150 LOCK switch. - Data could not be read from the Eye-Fi card. Turn off the camcorder and turn it on again. If the problem persists, it may indicate a problem with the Eye-Fi card. Contact the card manufac- turer’s customer care.
- Page 151 [Reset All] menu option to reset all the camcorder’s settings to default values. Video noise appears on screen. - Keep a distance between the camcorder and devices that emit strong electromagnetic fields (plasma TVs, cellular phones, etc.). Horizontal bands appear on the screen.
- Page 152 Connections with External Devices Video noise appears on the TV screen. - When using the camcorder in a room where a TV is located, keep a distance between the compact power adapter and the power or antenna cables of the TV.
-
Page 153: List Of Messages
- Disconnect the USB cable and turn off the camcorder. After a short while, turn it on again and restore the connection. - Connect the camcorder to a different USB port on the computer. - The camcorder will not be recognized while all photos are being deleted or all print orders are being removed. - Page 154 ( 38). Cannot access the built-in memory - There is a problem with the built-in memory. Contact a Canon Service Center. Cannot convert - Cannot access the memory card. Check the memory card and make sure it is inserted cor- rectly.
- Page 155 ( 35). Cannot play the movies on this memory card Initialize only using the camcorder - The memory card in the camcorder was initialized using a computer. Initialize the memory card with this camcorder ( Cannot record - You cannot capture video snapshot scenes from scenes recorded or edited using another device.
- Page 156 USB cable before using the camcorder. - To be able to write back scenes and to transfer music files to the camcorder, use the com- puter’s Safely Remove Hardware function to end the connection, disconnect the USB cable, power the camcorder using the compact power adapter and only then connect it to the com- puter again.
- Page 157 USB cable before using the camcorder. - To be able to write back scenes and to transfer music files to the camcorder, power the cam- corder using the compact power adapter and only then connect it to the computer using the supplied USB cable.
- Page 158 Need to recover files from the memory card. Change the position of the LOCK switch on the memory card. - This message will appear the next time you turn on the camcorder if power supply was acci- dentally interrupted while the camcorder was writing on the memory card and later the posi- tion of the card’s LOCK switch was changed to prevent erasure.
- Page 159 - Movies that were protected/edited with other devices cannot be deleted with this camcorder. Some scenes were recorded using another device and cannot be copied. - Scenes that were not recorded with this camcorder cannot be copied to the memory card. Task in progress. Do not disconnect the power source.
- Page 160 - The memory card slot cover is open. Close the cover after correctly inserting the memory card. Connect the compact power adapter - The camcorder is being powered by the battery pack. Connect the compact power adapter to the camcorder. Disc access failure. Check the disc.
-
Page 161: Direct Print Related Messages
- The paper settings of the camcorder conflict with the printer’s settings. Ink absorber full - Select [Continue] to resume printing. Consult a Canon Service Center (refer to the list included with the printer) to replace the ink absorber. Ink error - The ink level cannot be detected correctly or the ink cartridge is out of ink. - Page 162 - Close the printer cover securely. Printer error - A malfunction has occurred that may require repairs. (Canon PIXMA printers: the printer’s green power lamp and orange error lamp flash alternately.) - Disconnect the USB cable and turn off the printer. Unplug the printer’s power cord from the power outlet and contact the appropriate customer support center or service center.
-
Page 163: Handling Precautions
111) and save them on a regular basis. This will protect your impor- tant recordings in case of damage and create more free space on the memory. Canon shall not be liable for any data loss. • Do not carry the camcorder by the LCD panel. Be careful when closing the LCD panel. -
Page 164: Battery Pack
Long-term storage If you do not intend to use the camcorder for a long time, store it in a place free of dust, in low humidity, and at temperatures not higher than 30 °C (86 °F). - Page 165 • We recommend backing up the recordings on the memory card onto your computer. Data may be corrupted or lost due to memory card defects or exposure to static electricity. Canon shall not be liable for lost or corrupted data.
- Page 166 3 months. To recharge the built-in lithium battery: Connect the compact power adapter to the camcorder and leave it connected for 24 hours with the camcorder off. Disposal When you delete movies or initialize the memory, only the file allocation table is altered and stored data is not physically erased.
-
Page 167: Maintenance/Others
Maintenance/Others Cleaning Camcorder Body • Use a soft, dry cloth to clean the camcorder body. Never use chemically treated cloths or volatile solvents such as paint thinner. Lens and Instant AF Sensor • If the lens surface or Instant AF sensor is dirty, autofocus may not work properly. -
Page 168: Using The Camcorder Abroad
You can use the compact power adapter to operate the camcorder and to charge battery packs in any country with power supply between 100 and 240 V AC, 50/60 Hz. Consult a Canon Service Center for information on plug adapters for overseas use. -
Page 169: Accessories
WS-20 Wrist Strap CA-590 Compact Power Adapter* DW-100 DVD Burner IFC-300PCU USB Cable** * CA-590E including power cord, in Asia. ** Supplied with the camcorder; not available as an optional accessory. Card reader/writer Computer Memory card DTC-100 D Terminal Cable... -
Page 170: Optional Accessories
Use of genuine Canon accessories is recommended. This product is designed to achieve excellent performance when used with genuine Canon accessories. Canon shall not be liable for any dam- age to this product and/or accidents such as fire, etc., caused by the malfunction of non-genuine Canon accessories (e.g., a leakage and/or... -
Page 171: Recording And Playback Times
Recording and Playback Times Recording and playback times given in the following tables are approxi- mate and vary according to recording mode and charging, recording or playback conditions. The effective usage time of the battery pack may decrease when recording in cold surroundings, when using the brighter screen settings, etc. - Page 172 This cable sends both video and audio signals. This mark identifies genuine Canon video accessories. When you use Canon video equipment, we recommend Canon-brand accessories or products bearing the same mark.
-
Page 173: Product Codes
Product Codes Provided Accessories CA-590 Compact Power Adapter BP-2L5 Battery Pack STV-250N Stereo Video Cable IFC-300PCU USB Cable Optional Accessories NB-2LH Battery Pack CB-2LW Battery Charger CBC-NB2 Car Battery Charger HTC-100 HDMI Cable CTC-100 Component Cable SS-650 Shoulder Strap SS-600 Shoulder Strap WS-20 Wrist Strap SC-2000 Soft Carrying Case D85-1671-000... -
Page 174: Specifications
Photos: DCF (Design rule for Camera File system), compatible with Exif* Ver. 2.2 and with DPOF** Image compression: JPEG (Super Fine, Fine, Normal) * This camcorder supports Exif 2.2 (also called “Exif Print”). Exif Print is a standard for enhancing the communication between camcorders and printers. By connecting to an Exif Print-compliant printer, the camcorder’s image data at the time of shooting is used and optimized, yielding extremely high... - Page 175 Effective pixels (all figures are approximate values) Movies: 1,040,000 pixels (optical zoom, [Image Stabilizer] set to [Dynamic]) 1,560,000 pixels ([Image Stabilizer] set to [Off] or [Standard]) 16:9 photos: 1,560,000 pixels 4:3 photos: 1,730,000 pixels • LCD Screen: 2.7 in., wide, TFT color, approx. 112,000 dots •...
- Page 176 2.8 W (SP mode, AF on, LCD normal brightness) • Operating temperature: 0 – 40 °C (32 – 104 °F) • Dimensions [W x H x D] (excluding the grip belt): • Weight (camcorder body only): CA-590 Compact Power Adapter • Power input • Rated output •...
- Page 177 About the music files The specifications of the music files compatible with the camcorder are as follows. Audio encoding: Linear PCM Audio sampling: 48 kHz, 16 bits, 2 channels Minimum length: 1 second File extension: WAV The music data is saved in the memory under the following folder structure.
-
Page 178: Index
... . .57 24p Cinema Mode Abroad, using the camcorder Aspect ratio of a connected TV ....137 (TV type) . - Page 179 ....65 Image effects ....133 Image stabilizer ....45, 47 Index screen Initialization (built-in memory*/memory card)
- Page 180 ....42 Telephoto ....34 Time zone/DST ....71 Timeline Transferring recordings to a .
- Page 181 B) If the Equipment is defective as a result of leaking batteries, sand, dirt or water damage; C) If defects or damages are caused by the use of unauthorized parts or by service other than by Canon USA’s factory service centers or authorized service facilities;...
- Page 182 THE USE, MISUSE OR INABILITY TO USE THE EQUIPMENT, REGARDLESS OF THE LEGAL THEORY ON WHICH THE CLAIM IS BASED, AND EVEN IF CANON USA HAS BEEN ADVISED OF THE POSSIBILITY OF SUCH DAMAGES. NOR SHALL RECOVERY OF ANY KIND AGAINST CANON USA BE GREATER THAN THE PURCHASE PRICE OF THE EQUIPMENT SOLD BY CANON USA AND CAUSING THE ALLEGED DAMAGE.
- Page 183 Ship your Equipment in its original carton, box or equivalent, properly packed, fully insured with shipping charges prepaid, together with a copy of your bill of sale or other proof of purchase and a description of the problem to any of the Canon Service Facilities in Canada.
- Page 184 2828 16th Street NE, Calgary, AB T2E 7K7 CANON CANADA INC. MONTREAL 8801 Route Transcanadienne, Saint-Laurent, QC H4S 1Z6 If you have any questions, call the Canon Canada Information Center toll free (in Canada only) at 1-800-OK-CANON (1-800-652-2666). Si vous avez des questions, veuillez téléphoner 1-800-OK-CANON (1-800-652-2666, sans frais au Canada seulement).