Table of Contents
Advertisement
Advertisement
Table of Contents

Related Manuals for JVC RD-D227B


Summary of Contents for JVC RD-D227B
- Page 1 Instruction Manual Wireless Flat panel DAB Hi-Fi RD-D227B...
-
Page 3: Table Of Contents
Contents Safety Warnings ..........................5 Unpacking ............................7 Product Overview ..........................8 Front View .................................. 8 Rear View ................................... 8 Top View ..................................9 Remote Control ..........................10 Operating Your Remote Control ....................12 Replace the Remote Control Battery ......................12 Remote Control Operation Range ....................13 Wall Mounting ..........................13 Connections ..........................14 Using the AUX Connection..........................14... - Page 4 CD/MP3 Operation ........................22 Playback ...................................22 To Pause Playback ..............................23 To Stop Playback ..............................23 Skipping to Another Track ..........................23 Random Playback ..............................23 Repeat Playback ..............................23 Programme Setting ..............................23 USB Operation ..........................24 Bluetooth® Operation ........................25 NFC Operation ..........................26 AUX Operation ..........................26 Maintenance ..........................27 Cleaning the Unit ..............................27 Handling Discs ...............................27 Cleaning Discs ................................27...
-
Page 5: Safety Warnings
Safety Warnings Ventilation • Read all the instructions carefully before using the unit and keep them for future • To prevent the risk of electric shock or reference. fire hazard due to overheating, ensure • Retain the manual. If you pass the unit that curtains and other materials do not onto a third party make sure to include this obstruct the ventilation vents. - Page 6 Supervision • This equipment is a Class II or double insulated electrical appliance. It has • Children should be supervised to ensure been designed in such a way that it that they do not play with the unit and the does not require a safety connection remote control.
-
Page 7: Unpacking
Thank you for purchasing your new product. We recommend that you spend some time reading this instruction manual in order that you fully understand all the operational features it offers. You will also find some hints and tips to help you resolve any issues. Read all the safety instructions carefully before use and keep this instruction manual for future reference. -
Page 8: Product Overview
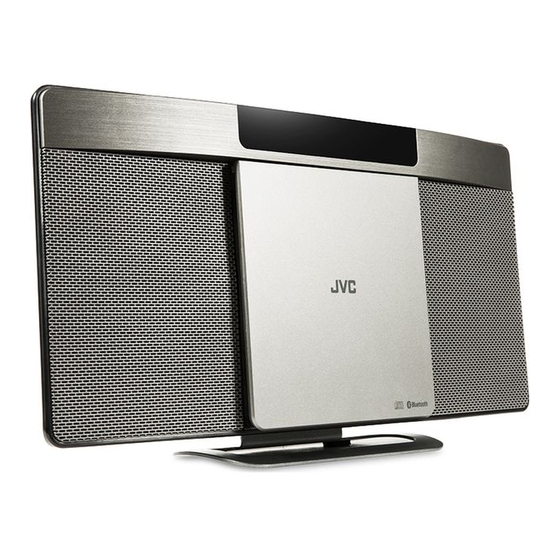
Product Overview Front View Rear View R AUX L 1. Display 2. Remote Sensor Receive signals from the remote control. 3. Speakers 4. CD Tray 5. USB Socket 6. AUX L/R Sockets 7. AC~ Socket Connect the mains cable to the mains socket. -
Page 9: Top View
Top View SCAN SOURCE VOL– VOL+ 5 6 7 9 10 1. NFC Sensor /SCAN Button • Play/pause/resume playback. 2. Aerial • Press to confirm a selection. Button • Press to perform auto scan for radio Switch the unit between the On and stations in FM and DAB mode. -
Page 10: Remote Control
Remote Control Button Switch the unit between the ON and STANDBY mode. 2. SOURCE Buttons PAIR Switch between CD/USB, DAB/FM, BT or AUX mode. FM ST/MONO INFO INTRO REPEAT SHUFFLE 3. INFO Button CLEAR ALBUM/PRESET Display DAB radio station information. 4. - Page 11 11. REPEAT Button Select repeat play mode in DISC and USB mode. Button PAIR Mute or resume the sound. /SCAN Button FM ST/MONO INFO INTRO REPEAT SHUFFLE • Play/pause/resume playback. CLEAR • Press to confirm a selection. ALBUM/PRESET • Press to perform auto scan for radio stations in FM and DAB mode.
-
Page 12: Operating Your Remote Control
Operating Your Remote Control When you first time use remote control, remove the protective tab to activate the remote control battery. Replace the Remote Control Battery 1. Pull out the battery tray. 2. Remove the old battery 3. Replace new CR2025 battery into the battery tray with correct polarity as indicated. -
Page 13: Remote Control Operation Range
Remote Control Operation Range • The remote control sensor on the front unit is sensitive to the remote control’s commands up to a maximum of 5 metres away and within a maximum of a 40° arc. • Please note that the operating distance may vary depending on the brightness of the room. -
Page 14: Connections
3. Leave a 5 mm gap between the wall and the screw’s head. Lift the unit with the attached wall brackets over the heads of the screws and slot into place. The wall where the unit is to be installed must be capable of long- term support of the total load of the unit. -
Page 15: Connecting To The Mains Supply
Connecting to the Mains Supply To the mains socket • This unit is designed to operate with an AC power supply. • Connecting the unit to any other power source R AUX L may cause damage to the unit. Unwind the mains cable to its full length. -
Page 16: Adjusting The Sound Effect
Adjusting the Sound Effect Press the EQ button the remote control repeatedly to select Pop, Classic, Jazz or Rock for your desired sound effect. Adjusting the Brightness Press the DIMMER button to select the brightness level. Setting of the Clock Manual Setting of the clock can only be done in STANDBY mode. -
Page 17: Activate And Deactivate The Alarm Timer
Activate and Deactivate the Alarm Timer After setting the alarm timer, press the SLEEP/TIMER button on the remote control to • view the alarm settings. • The alarm is active when “ ” is shown on the display. • When the alarm rings, press button to turn off the alarm. To deactivate the alarm, press the SLEEP/TIMER button twice. -
Page 18: Dab Operation
DAB Operation To listen to the tuned stations press the button. Each time you press the button, you will skip to the previous or next stored station (including primary and secondary station). The unit will display the station name. Auto Scan The auto scan will search for all DAB Band III channels. -
Page 19: Recalling A Preset Station
Recalling a Preset Station 1. Once you have saved a station to one of the preset buttons, you can recall it by pressing button on the remote control to select your desired preset number. 2. Preset number and station name will show on the display to indicate the preset station you are listening to. -
Page 20: Dab Display Modes
DAB Display Modes Every time you press the INFO button on the remote control, the display will cycle through the following display modes. Station Name When a radio station is received, the name of that station will Station Name be displayed. Ensemble Name A Ensemble/multiplex is a collection of radio stations that are bundled and transmitted on one frequency. -
Page 21: Fm Operation
FM Operation Scanning for Radio Stations The unit will automatically select a FM radio station with a good signal. 1. Press the SOURCE button repeatedly on the main unit or DAB/FM button on the remote control to select FM mode. 2. -
Page 22: Compatible Disc Types
Compatible Disc Types Disc Types Disc Logo Recorded Content CD-R (CD Recordable) AUDIO CD-RW (CD-Rewritable) AUDIO AUDIO-CD (Compact Disc Digital Audio) AUDIO CD/MP3 Operation Press the SOURCE button repeatedly on the unit or press the CD/USB button on the remote control to select DISC mode. Playback 1. -
Page 23: To Pause Playback
To Pause Playback 1. Press the button on the unit or press the button on the remote control to pause the playback. 2. To resume playback, press the button on the unit or press the button on the remote control again. To Stop Playback Press the button on the remote control to stop playback. -
Page 24: Usb Operation
USB Operation 1. When a USB device is connected to the unit, press SOURCE button repeatedly on the unit or press USB button on the remote control to select USB mode. 2. The unit will automatically display the total number of the folders and tracks at the same R AUX L time. -
Page 25: Bluetooth® Operation
BT mode. “BT READY” will show on display. 2. Activate your Bluetooth® device and select the search mode. 3. Select RD-D227B” and enter “0000” for the password if necessary. The unit will prompt “Paired”, and “BT” will show on display. -
Page 26: Nfc Operation
NFC Operation Pair your NFC-enabled mobile device directly with this unit by just a single tap. 1. Activate NFC on your mobile device. 2. Place the mobile device on the icon of the unit. Your unit will switch to Bluetooth® mode automatically. -
Page 27: Maintenance
Maintenance Cleaning the Unit Ensure the unit is fully unplugged from the mains socket before cleaning. • To clean the unit, wipe the case with a slightly moist, lint-free cloth. • Do not use any cleaning fluids containing alcohol, ammonia or abrasives. •... -
Page 28: Hints And Tips
Hints and Tips If a problem does occur, it may often be due to something very minor. The following table contains various tips. If you require additional assistance For UK, please call our UK Call Centre on 0344 561 1234. •... -
Page 29: Product Fiche And Specifications
Product Fiche and Specifications Brand Model RD-D227B Power Requirement AC 220-240 V~ 50/60 Hz Power Consumption 30 W Speaker Output Power 5 W rms × 2 500 mA (max.) Bluetooth® Bluetooth® Version Bluetooth® 3.0 Maximum power 7 dBm transmitted Frequency bands... -
Page 30: Useful Information And Licences
Useful Information and Licences For general information about appliances, and handy hints and tips check out Kit Guides at teamknowhow.com or call UK: 0344 561 1234 Ireland: 1890 818 575 Visit Partmaster.co.uk today for the easiest way to buy electrical spares and accessories. - Page 32 3rd Floor Office Suite, Omni Park SC Santry, Dublin 9, Republic of Ireland The product is distributed and warranted exclusive by DSG Retail Ltd. “JVC” is the trademark of JVC KENWOOD Corporation, used by DSG Retail Ltd. under license. IB-RD-D227B-190415V6...