Advertisement
Quick Links
マーチングドラムキャリア
Marching Drum Carrier
MSH9500 MSH9500S
マーチングスネアドラム用
for Marching Snare Drum
适用于行进小军鼓
MTH9500 MTH9500S
マーチングマルチタム用
for Marching Multi-Toms
适用于行进组鼓
行进鼓固定器
MBH9500 MBH9500S
マーチングバスドラム用
for Marching Bass Drum
适用于行进大军鼓
MKH9500 MKH9500S
マーチングベル&マーチングシロフォン用
for Marching Bell & Marching Xylophone
适用于行进钢片琴&行进木琴
取扱説明書
Owner's Manual
使用说明书
JA
EN
ZH
Advertisement

Related Manuals for Yamaha MSH9500


Summary of Contents for Yamaha MSH9500
- Page 1 マーチングドラムキャリア 取扱説明書 Marching Drum Carrier Owner’s Manual 行进鼓固定器 使用说明书 MSH9500 MSH9500S MBH9500 MBH9500S マーチングスネアドラム用 マーチングバスドラム用 for Marching Snare Drum for Marching Bass Drum 适用于行进小军鼓 适用于行进大军鼓 MTH9500 MTH9500S MKH9500 MKH9500S マーチングマルチタム用 マーチングベル&マーチングシロフォン用 for Marching Multi-Toms for Marching Bell & Marching Xylophone 适用于行进组鼓...
- Page 2 Marching Drum Carrier Owner’s Manual MSH9500 MSH9500S for Marching Snare Drum MBH9500 MBH9500S for Marching Bass Drum MTH9500 MTH9500S for Marching Multi-Toms MKH9500 MKH9500S for Marching Bell & Marching Xylophone...
-
Page 3: Please Read Carefully Before Proceeding
• If some of the parts are broken and/or lost, immedi- ately stop using the carrier. Using a defective carrier can cause injury. Yamaha cannot be responsible for damage caused by improper use or modifications to the instrument. Marching Drum Carrier Owner's Manual... -
Page 4: Maintenance
Notice Handling • The black coatings on the surface might be removed by friction. This is no problem and does not affect the functionality or durability of the product. • Always use the carrier with all the bolts securely tightened. Failure to do so can cause the instru- ment to fall over or loss of parts of the carrier. - Page 5 Welcome Thank you for purchasing the Yamaha Marching Drum Carrier. This product is a carrier for marching instruments, designed with enhanced adjust- ability to fit different body sizes. Please read this Owner's Manual carefully before using the product in order to take full advantage of its various features. When you have finished reading the manual, keep it in a safe, accessible place, and refer to it when you need to better understand an operation or function.
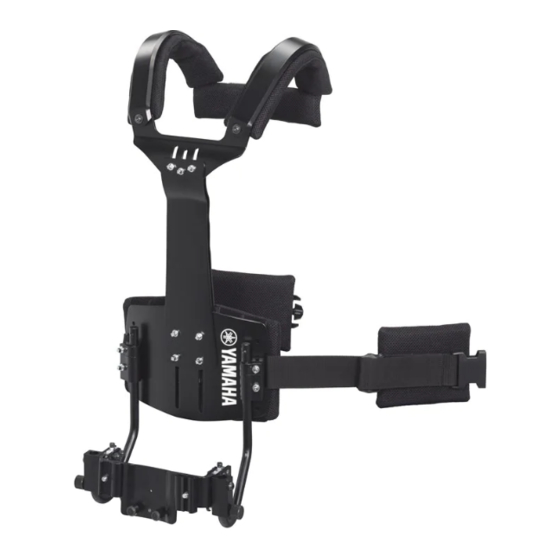
- Page 6 Carriers can be adjusted to fit different body sizes. Make sure to adjust the carrier to the player before mounting the instrument on the carrier. The adjustable parts are the same for all carrier models. Intended only for instructional purposes, the illustration below shows the carrier for the marching snare drum (MSH9500, MSH9500S). Shoulder rests ...
- Page 7 Adjusting the Carrier Arms By adjusting the arms, the mounting position of the instrument can be changed. Arm holder Adjust the height of the arms and the spread angles. Bolt Tighten the bolts of the arm holders with a tuning key. NOTICE Always tighten the bolts with the arms passing through the arm holders.
- Page 8 Adjusting the Carrier Adjusting the arm position When the height is not sufficient, change the arm Belly plate Bolts attachment positions on the belly plate. The height can be adjusted in four levels. Adjust the height of arm position. Use the supplied hexagonal wrench to tighten the two bolts.
- Page 9 Setting the Snare Drum Make sure to install the attachment to the instrument before mounting the instrument on the carrier. 1. Installing the attachment to the instrument NOTE When installing the attachment to a snare drum with a slide-attachment, follow the instructions of “Previous Attachment settings for snare drum with slide- attachment”...
- Page 10 Setting the Snare Drum Previous settings for snare drum with slide-attachment Before installing the attachment to the snare drum, you must remove the lug holders from the attachment and assemble the tongue plate MAST600 (sold separately). Remove both lug holders (see illustration) from Attachment the attachment.
- Page 11 Setting the Snare Drum 2. Mounting the instrument on the carrier Insert the arms into the arm brackets of the attach- ment installed to the instrument. Carrier Tighten the arm fixing screws by hand. Marching snare drum Attachment Arm fixing screw Arms Arm bracket Arms...
- Page 12 Setting the Bass Drum Carrier Marching bass drum Arms Mounting an instrument on the carrier Hook Mounting should be carried out by at least Attaching two persons. ring Snap the drum harness hooks into the bass drum attaching rings. With the heads of the bass drum perpendicular to Equally spaced the drummer's body, open both the holder's right and left support arms so they are centered and hold...
- Page 13 Setting the Marching Multi-Toms Marching multi-toms Carrier Arms 1. Mounting the instrument on the carrier Insert the arms of carrier into the arm brackets of the instrument. Tighten the arm fixing screws by hand to fix the arms. Arm fixing screw Arm bracket 2.
- Page 14 Setting the Marching Bell & Xylophone Make sure to install the frame to the instrument before mounting the instrument on the carrier. 1. Installing the frame to the instrument Lay the marching bell & xylophone face down. Use the supplied hexagonal wrench to loosen the screws A on the carrier frame so that the brackets can slide. Set the carrier frame on the instrument, as shown in the illustration below, and slide the brackets on the carrier frame so that they align with the carrier mounting plates on the bottom of the instrument.
- Page 15 Setting the Marching Bell & Xylophone Carrier frame Carrier Marching bell/ Marching xylophone Arms 2. Mounting the instrument on the carrier Insert the arms of the carrier into the arm brackets of the carrier frame installed to the instrument. Tighten the arm fixing screws by hand. Arm fixing screw Arm bracket...
- Page 16 Manual Development Group © 2017 Yamaha Corporation Published 08/2018 改版 POCP*.*-**C0 〒430-8650 静岡県浜松市中区中沢町10-1 Printed in Japan * 都合により、住所、電話番号、名称、営業時間、URLなどが変更になる ZW01190 版次:C0 場合がございますので、あらかじめご了承ください。...