Table of Contents
Advertisement
:. ...... : :. : .......
" _;;
: : :..":
;.:'i,ii...
i:..:...
......:..
::..,i:.:
:.:
...
:".:
:::
: :-.
i_on.:
aa.n;u.ai:
:.:....
::i::i::;::::ii::
:ii:
:
::::i:i : ]
::i: : :: :carefull_
liltS H A R Pi'i". ' .:...
i
Important
i.".!
i..
i:i. For assistance in reporting the theft or loss of
•:
:i:,tVIEWOAM ,:: : :i:
this product, record ontheline
belowthe
model number and serial number which
.... ;.....
:
are located on the bottom of the unit.
i.."
Please retain this information.
. .. . ,.....:-. ....... ,.: ..... . :::":.".
Model No.:
...
......
• .
.
........
.
:.-
. .........
....
.......
. ..
__
• :..'. . ..".
._ ,_•
Serial No.:
• " ...
"._The
.l]l_.lOgoiS:_it_adematk,
:. . .. ....
.:.,
. ... " .". '..."
':
.".
--
.......
.. :....":.::.:. :...;:..: ..."...'.......:..:.: .:;.:;:......"...:. :..:...: ..., ;:..:::.: .:.:.:..:.:;::. ..:.....See:.page:93.fQi.use;0fDemo.niode:....::.:....::..:.:
..... '".. ., •'.". ..".:.. : . . ': :. ..... . . ".:...",
:.:..." ."
. : ' ::". :".. :,Theimages
of tiie VIEWCAM.in
tliiS..
"... .... . ...... •
•..: :".
." '.. '..: • .: .. "
" .."... " " ' .."... " .:". .." '.. ::.'.:.: '::"..::".:":opefat 0i_.maiiua .a[e.basedupon.the..:...
:.....".: . ...
•., .... :.. :. !'. .....,
... .: . .":....
., .': . .......
.. :.::......:.
• .. .:.. :" :. '".. '. : :: :. VE.-WI_50U. ....::.."..
..: .:.:.
'.. :: . . : . .". ". "::.: :."; '. ".:. :..:"..
";.." :...:
Advertisement
Table of Contents

Related Manuals for Sharp Viewcam VL-WD450U


Summary of Contents for Sharp Viewcam VL-WD450U
- Page 1 :..: :. : ... " _;; : : :..": ;.:'i,ii... i:..:... ::i::i::;::::ii:: :ii: liltS H A R Pi'i". ' .:... i.".! :i:,tVIEWOAM ,:: : :i: •: ... ;..,...:-..,.: ..:::":.". • . •...
- Page 2 CAUTION If the AC adapter is misplaced or needs to be replaced, obtain the same type of adapter from a SHARP service center of your dealer. and allow you to capture those yourself with the section your video world.
- Page 3 It is the intent of SHARP that this unit be used in full compliance with the copyright that prior permission be obtained from copyright owners whenever necessary.
- Page 4 IMPORTANT SAFEGUARDS Read Instructions--All operating instructions before the product Retain Instructions--The operating instructions retained for future reference. Heed Warnings--All product and in the operating tions should be adhered Follow Instructions--All use instructions should Cleaning--Unplug wall outlet before cleaning. liquid cleaners or aerosol cleaners.
- Page 5 15.Power Lines--An outside antenna system s hould n ot b elocated vicinity of overhead power lines or other electric light or power circuits, it can fall into such power lines or circuits. When installing antenna system, extreme be taken to keep from touching power lines or circuits as contact them might be fatal.
- Page 6 Quick Operation Guide Please consult this operation manual further for details on these and other functions of your camcorder. Charging the Battery Connect the supplied AC power socket on the AC adapter/ battery charger, and insert the AC plug into a power outlet.
- Page 7 Inserting a Mini DV Cassette Attach the power source to the camcorder, then slide the cassette compartment door release and open the cassette compartment door. Insert the cassette fully with the window facing outwards, and with the erasure protect tab facing upwards.
- Page 8 (telephoto) or W (_) (wide angle) side. Power Zoom control Tape Playback Press the LCD monitor button (_), is inserted. to a 90 ° angle to the camcorder (®). Lock button Adjust the LCD monitor allows easy viewing on the on-screen button to picture.
- Page 9 Press the STILL button to begin recording. AUTO Card Playback card is Press the LCD monitor button (_), to a 90 ° angle to the camcorder (®). 90° Adjust the LCD monitor Lock button allows easy viewing on the on-screen picture.
- Page 10 Shoulder strap UBNDSOOIOTASA CDSKAOO59TA01 SmartMedia card Zoom RMICCOO98TAZZ protective case charger and battery If this camcorder Please refer to the part numbers charger and battery pack. and 4 write-protect seals. Power cord DC cable QCNW-1957TAZZ Audio/video CR2025 type (RCA type)
- Page 11 Note: The listed model names are for U.S. accessories. For optional and additional accessories, ries and Supply Center at 1-800-642-2122, (http://www.sharp-usa.com). Extended-life battery pack BT-L441 [] contact your local dealer, call the Sharp Accesso- or visit SHARP's website Zoom microphone VR-5MCN...
- Page 12 Precautions • When the camcorder is not in use, remem- ber to remove the cassette tape, turn off the power, and disconnect the camcorder from the power source. • Do not aim the lens at the sun. Do not allow direct sunlight to strike the...
-
Page 13: Table Of Contents
On-screen Display Index ... Warning Indicators Charging the Battery Pack ... Attaching and Removing the Battery Powering the Camcorder from an AC Outlet ... Inserting and Removing a Mini DV Cassette Installing the Lithium Memory Selecting the Language for the On-screen Display ... - Page 14 Contents Useful Features Advanced Features xiii Quick Return ... Edit Search Fade In and Fade Out ... Wide Screen (16:9) ... Still Recording on Tape ... Still Recording Effects ... Letting the Subject Monitor the Shot ... Auto Focus ... Macro Shots ...
- Page 15 SmartMedia Card Features I Appendix • Gufa de operaciSn r&pida en espaSol ... • Visualizaciones en pantalla • Affichages sur 6cran en fran_ais Camera Recording Inserting and Removing a SmartMedia Card Recording Selecting the Picture Resolution Recording with the Self-timer Formatting a SmartMedia Card ...
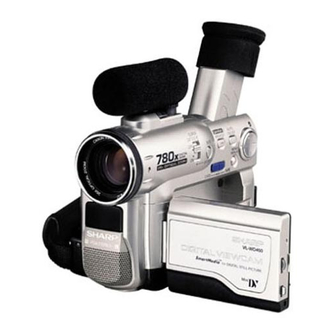
- Page 16 Part Names For details on the use of each part, refer to the page number indicated in brackets. W/B (White Balance) button [p. 52]/ IR (Infrared) LIGHT button [p. 35] SUPER CAT'S EYE switch [p. 35] Lens hood Zoom lens Infrared light transmitter [p.
- Page 17 Zoom microphone mounting hole [p.55] LCD monitor [p.19] LCD monitor OPEN r elease button [p.19] Card slot cover Viewfinder [p.18] Lithium battery compartment door Shoulder strap loop [p. 17] [p.13] Tripod socket Diopter adjustment Power source PUSH release button [pp. 10, 11 ] Power source mounting surface [pp.
- Page 18 Operation References [pp. 39, 40, 61, 74] S-VIDEO socket [pp. 24, 65, 66] VIDEO jack [pp. 24, 65, 66] AUDIO L jack [pp. 24, 65, 66] AUDIO R jack [pp. 24, 65, 66] Hand strap [p. 17] Power Zoom Wide angle/ Telephoto control [p.
- Page 19 Quick Reference List Below are some examples of camcorder's • To record the subject with higher-quality -- See page 31 (Selecting the 16-bit Audio Recording Mode) • To record powerful close-up images. -- See page 32 (Setting the Digital Zoom) •...
- Page 20 Operation References On-screen Display Index For details on the use of each function, refer to the page number indicated. TAPE-CAMERA mode p!. zo,28 AUTO P,P2031 =====J--=_ LIGHT AUro 12[bit p. 22 p. 31 pp. 34, 35 Jl_ 30iin sP--p. 30 p.
- Page 21 CARD-CAMERA mode p. 31 AUTO --_CARD p. 28 10190 _ p. 74 p. 74 AU_rO_p. 22 ORMAL 101901 p. 75 CARD-VCR mode p. 78 Note: • See pages 26 to 29 for the procedure Easy mode (p. 28) p. 75 p.
- Page 22 The fluorescent LAMP close to the end of its service life. Call your local authorized Sharp dealer to have it replaced. When the vertical rotation of the LCD monitor is between 135 ° and 180 ° in TAPE-CAMERA or CARD-CAMERA ,÷...
- Page 23 MEMORY CARD The selected READ ERROR card to use it with this camcorder CANNOT The SmartMedia card cannot record any data due to a problem with STORE DATA the card or data on the card. Replace the SmartMedia card (see page 73).
-
Page 24: Charging The Battery Pack
SHARP model BT-L221 or BT-L441 personal injury and damage. over time. To limit the deterioration it is recommended at least once every six indicator of the charger turns off. -
Page 25: Attaching And Removing The Battery Pack
SmartMedia card, rendering unwritable. • Remove the battery you will not use the camcorder of time. • Use only SHARP model battery packs with this camcorder. batteries may present iiiiii!iiii:i!!ii!i Pack PUSH release pack... -
Page 26: Powering The Camcorder From An Ac Outlet
• BEFORE ALWAYS AND TURN THE POWER cable damage the video head drum SmartMedia unwritable. • Disconnect if you will not use the camcorder period power cord to the AC is supplied DC OUT jack POWER indicator To power outlet... -
Page 27: Inserting And Removing A Mini Dv Cassette
• If you do not correctly step 3, the cassette camcorder repeat the insertion • Do not attempt to pick up the camcorder cassette compartment Notes: • If the battery power is too low, you may not be able to eject the cassette. -
Page 28: Installing The Lithium Memory Battery
OPEN release Note: • Replace the battery with a new CR2025 lithium LCD monitor OPEN battery when the time indicator of the camcorder starts to fall behind the correct time. Notes on the Use of the Lithium battery REPLACE BATTERY WITH TOSHIBA, MATSUSHITA OR HITACHI MAXELL TYPE CR2025 ONLY. -
Page 29: Selecting The Language For The On-Screen Display
MENU/DISPLAY button Power switch _ration button Setting the Language When using the camcorder for the first time, select the desired language for the on-screen display by performing the procedure Press the LCD monitor OPEN release... -
Page 30: Setting The Area, Date And Time
Preparation Setting the Area, Date and Time Example: Setting the date to June 2, 2002 (JUN. 2.2002) and the time to 10:30 am iiiii!!i!iiiii !i!!iiiiiii!iii ! !,ii i!ii!i!i!i!iiii i! i!!i (10:30 AM) in New York. Notes: • Before performing the procedure sure that the lithium battery (see page 13). -
Page 31: Displaying The Date And Time Of Recording
9 Press • or =-/ in to select "2002" (year), and then press _,_. 10 Press • or _-/li to select"10AM" (hour), and then press _,_. 1 1 Press • or =-/ in to select "30" (minute), and then press _. •... -
Page 32: Adjusting The Hand Strap
REC START/STOP button Seal the velcro fasteners strap and the hand strap flap. Caution: • Do not swing the camcorder by the hand strap. Using the Lens Cap Attach the strap of the lens cap to the hand strap as shown below. -
Page 33: Using The Viewfinder
• A picture is displayed in the viewfinder. Closing the viewfinder Lower the viewfinder. Cautions: • Do not use excessive viewfinder. • Do not pick up the camcorder Notes: • The viewfinder LCD monitor is opened. rotation of the monitor however, the viewfinder... -
Page 34: Using The Lcd Monitor
LCD monitor Press the LCD monitor button (_), and open the LCD monitor to a 90 ° angle to the camcorder (®). Adjust the LCD monitor to an angle that allows easy viewing picture. • The LCD monitor rotates 270 ° vertically. -
Page 35: In Full Auto Mode
• Battery power is consumed in Recording mode. Turn off the power if you will not be recording again soon. • If the camcorder remains in Recording Standby mode for more than 5 minutes in TAPE-CAMERA mode, the power will automatically turn off to save... -
Page 36: Basic Operations
To create images that are easy to watch during playback, while steadying your camcorder image from shaking. Holding the camcorder Put your right hand through the hand strap, and Tele- place your left hand under the camcorder photo support. Basic posture view (_}). against Shooting... -
Page 37: Remaining Recording Time Display
(The tape has reached TAPE Time Remaining Display When using the camcorder pack as the power source, you can turn on and off the remaining battery power indicator by pressing the MENU/DISPLAY button. If the battery power becomes very low, a warning indicator will appear. -
Page 38: Playback
Lock bu_on Volume Control When the camcorder push the Volume control to the + or - side to AUDIO1 +2 increase (_) or decrease (_2_)the volume. The volume level indicator will appear on the... -
Page 39: Watching The Playback On A Tv
Watching the Playback You can connect the camcorder allow a larger audience to enjoy playback. Open the jack cover on the camcorder. Jack cover Connect the camcorder to your TV (or VCR) with the supplied audio/video cable, as shown. ._..;._..: ... -
Page 40: Video Search
5 minutes. during search. This in TAPE-VCR mode. in TAPE-VCR mode, press AUDI01+2 press _ / ii is off in Still mode. the tape, the camcorder automatically to normal playback if it is left in Still mode... -
Page 41: Selecting The Camcorder Mode
Selecting the Camcorder This camcorder includes functions for use as both a video camera for recording and playing back images on tapes and as a digital still camera for recording and playing back still images on SmartMedia cards. One of the following... -
Page 42: Useful Features
Useful Features Using the Controls The following controls on the camcorder be used to select and operate the various functions, settings and on-screen displays. MENU/DISPLAY _iii ! Operation button Power switch To turn the power on, hold down the Lock button and set the Power switch to CAMERA or VCR. -
Page 43: Selecting The User Mode
Selecting the User Mode This camcorder features three user modes for the camera recording functions. The selectable items on the menu screen are different depending on the user mode. User mode Auto mode (AUTO): Lets you adjust all menu settings except manual settings. -
Page 44: Using The Menu Screens
Useful Features Using the Menu Screens The menu screens can be used to adjust the various settings of camcorder. Set the Media Selection switch to TAPE or CARD. Hold down the Lock button and set the Power switch to CAMERA or VCR. -
Page 45: Recording In Lp (Long Play Recording) Mode
LP (Long Play Recording) mode for approximately 50% more recording time with the same picture quality as that in SP (Standard Play Recording) mode. Set the camcorder toTAPE-CAMERA mode. Press the MENU/DISPLAY the menu screen appears. MENU/ DISPLAY... -
Page 46: Selecting The 16-Bit Audio Recording Mode
Select "ON" in step 4 above. (DIS) function is compensating for relatively minor AUTO DIS indicator on a tripod), turn off Set the camcorder toTAPE-CAMERA or CARD-CAMERA mode. Press the MENU/DISPLAY button until the menu screen appears. Select I_l, then press _,_ on the Operation button. -
Page 47: Setting The Digital Zoom
• As the image is enlarged digitally, quality decreases when higher settings are used. Set the camcorder toTAPE-CAMERA or CARD-CAMERA mode. Press the MENU/DISPLAY the menu screen appears. MENU/ _SPLAY Select I_, then press _ Operation button. Select "DGTL ZOOM"... -
Page 48: Gamma Brightness Compensation
Useful Features Camera Recording Gamma Brightness Compensation When the subject is backlit, the image will appear dark if it is recorded gamma brightness compensation improves the picture by increasing the brightness of the subject while leaving the brighter portion of the image unaffected. GAMMA/BRIGHTER In TAPE-CAMERA or CARD-CAMERA press the GAMMA/BRIGHTER... -
Page 49: Gain-Up
Gain-up When you are recording in a dark or poorly- illuminated location, "LIGHT" is displayed the screen. Use the gain-up function to record a brighter picture. Note: • At locations where lighting is adequate, will not appear. The gain-up function used in this case. -
Page 50: Night Recording (Super Cat's Eye)
I IR LIGHT button To cancel Night Recording Set the SUPERCAT'S EYEswitch to OFF. Notes: • The picture • The camcorder mode, • Infrared • The following • You can obtain button. to "IR LIGHT", the camcorder... -
Page 51: Quick Return
When you have been playing back what you have recorded on the tape, and wish to quickly return to recording from the end of the last recorded scene, use the quick return function. Set the camcorder toTAPE-CAMERA mode. In Recording Standby mode, press the... -
Page 52: Fade In And Fade Out
This is especially dramatic change in scenery. Fade in Fade out Setting Fade Mode Set the camcorder to TAPE-CAMERA mode. Press the MENU/DISPLAY the menu screen appears. !ii_ii_iiiiiiiii:!iiiili!i_!i_i_i!_i!_!ii!_!i;!_iii:ili_!i_i_i ¸ 3 Select a,... -
Page 53: Wide Screen (16:9)
2 to 5 in 16:9. Normal screen button at after Fade Set the camcorder toTAPE-CAMERA mode. Press the MENU/DISPLAY the menu screen appears. Select I_, Operation press _ Press press <,I. -
Page 54: Still Recording On Tape
Press • or _-/ll to select the desired still recording mode, then press <,I. Press the MENU/DISPLAY button to turn off the menu screen. Still Recording Set the camcorder to TAPE-CAMERA mode. In Recording Standby mode, press the STILL button. -
Page 55: Still Recording Effects
16 FRAMES: A still picture is recorded intervals of 1/10 of a second using a 16-frame picture. Selecting a still recording Set the camcorder to TAPE-CAMERA or CARD-CAMERA mode. Press the MENU/DISPLAY the menu screen appears. Select €'_'h, then press _ Operation button. - Page 56 Useful Features Camera Recording Using P-IN-P mode Perform the steps in "Selecting a still recording effect" to select "P-IN-P" (see page 40). In Recording Standby mode, press the STILL button. • An inset image of the subject is displayed. • To change the position of the inset image, press _ tion button.
-
Page 57: Letting The Subject Monitor The Shot
Open the LCD monitor and rotate it 180 ° vertically so that the screen faces the other way and the subject can monitor the shot while you are recording with the viewfinder. If the camcorder is steadied, you can record yourself in the scene by watching the LCD monitor. -
Page 58: Auto Focus
Power Zoom control to the W side, and then move the camcorder closer to the subject until you obtain the desired angle of view. The camcorder automatically focus on the subject when the lens is set for the widest angle. - Page 59 Open the LCD monitor completely (_), then rotate it 180° vertically (_2_). Set the Media Selection camcorder to TAPE or CARD. Set the Power switch on the camcorder to CAMERA or VCR. Aim the remote control at the remote sensor of the camcorder, control buttons for operation.
-
Page 60: Playback
To view slow playback in reverse, press the (111 button. To return to normal playback, button (_). Note: • To protect the tape, the camcorder returns to normal playback mode for more than 10 minutes. Frame Advance with the The frame advance function allows you to play back still images frame by frame. -
Page 61: Using The Time Code
Using the Time Code The time code shows the hour, minute and second of recording, and the frame number (1 frame = approx. 1/30 sec.). This is automati- cally recorded along with the subject when you are recording on the tape. You can display the time code on the screen as an accurate counter in both TAPE-VCR and TAPE-CAMERA modes. -
Page 62: Manualfocus
)eated appear in the center of the scene patterns. Fast-speed shutter being used under fluorescent lighting. Set the camcorder to TAPE-CAMERA or CARD-CAMERA mode. Press the AUTO ON/OFF select Manual mode. to Manual Focus Press the MENU/DISPLAY the menu screen appears. - Page 63 _8PLAY 30min To cancel After performing then press 4,(. 12bit Notes: • The camcorder correctly feet (1.8 m). Set the zoom and then try refocusing. • If the lens is dirty or fogged, BUTTON] not be able to correctly • When "MF"...
-
Page 64: Setting The Shutter Speed
Set the camcorder toTAPE-CAMERA or CARD-CAMERA mode. Press the AUTO ON/OFF select Manual mode Press the MENU/DISPLAY the menu screen appears... - Page 65 Recommended Shutter Speeds The faster the shutter speed, the darker the picture becomes. Select the most appropriate shutter speed for the ambient light. • Recording outdoor sports a partially cloudy day. • Recording an outside scene through a car window (when you want to minimize blur...
-
Page 66: Manual Exposure
• Decrease the exposure level to allow less light through the lens. Set the camcorder to TAPE-CAMERA or CARD-CAMERA mode. Press the AUTO ON/OFF select Manual mode. Press the MENU/DISPLAY the menu screen appears. Select a,... -
Page 67: White Balance Lock
Easy mode or the SUPER CAT'S EYE switch is set to ON. W/B button Set the camcorder to TAPE-CAMERA or CARD-CAMERA mode. Press the W/B button to display the white balance lock screen. AUTO... -
Page 68: Digital Picture Effects
NEGA: To record a picture whose blacks and whites of the image are reversed and colors of the image are inverted. Set the camcorder toTAPE-CAMERA or CARD-CAMERA mode. Press the MENU/DISPLAY the menu screen appears. -
Page 69: Scene Menu (Program Ae)
Scene Menu (Program You can set the camcorder to the shooting mode that will create the best results for a specific situation. Just select one of four scene settings shown below. The camcorder automatically set the exposure, white balance, and shutter speed to produce the optimum picture quality for the selected situation. -
Page 70: Using The Zoom Microphone
Press the MENU/DISPLAY turn off the menu screen. Note: • When the camcorder is in Easy mode, the Zoom Microphone mode is fixed to "AUTO" and cannot be selected on the menu screen. mode when the is mounted. -
Page 71: Windbreak
Windbreak The windbreak function allows you to reduce annoying noise from strong winds when recording. Set the camcorder to TAPE-CAMERA mode. Press the MENU/DISPLAY the menu screen appears. Select L_, then press _,_ on the Opera- tion button. Select "WIND" (_), press _ (_2_). -
Page 72: World Clock
• Set the area, date and time for your home time zone if they have not already been set (see page 15). Example: Changing the clock from New York time to Los Angeles time. Set the camcorder toTAPE-CAMERA or CARD-CAMERA mode. AUTO 30min Press the MENU/DISPLAY the menu screen appears. - Page 73 Area Table LONDON England, PARIS Austria, land, Portugal, CAIRO Egypt, Finland, MOSCOW Ethiopia, (Moscow) DUBAI United Arab KARACHI Maldives, DACCA Bangladesh, BANGKOK Cambodia, HNGKNG Australia Philippines, TOKYO Japan, SYDNEY Australia SOLOMON New Caledonia WLLNGTN Fiji, New Zealand SAMOA Western HAWAII Hawaii Is., Tahiti, HST (Hawaii ANCHRGE U.S.A.
-
Page 74: Selecting Daylight Saving Time
Selecting Daylight Time Perform the procedure below to advance the clock of the camcorder one hour to daylight saving time. Set the camcorder toTAPE-CAMERA or CARD-CAMERA mode. AUTO 30min Press the MENU/DISPLAY the menu screen appears. MENU/ _$PLAY Select CE), then press _,_ on the Operation button. -
Page 75: Playback Zoom
Playback Zoom The playback zoom function allows you to magnify the playback picture up to 10 times its original size and to shift the magnified by using the remote control (see pages 43 and 44 for use of the remote control). •... -
Page 76: Gamma Playback
Advanced Features Playback Gamma Playback The gamma playback function improves the playback picture in TAPE-VCR mode by increasing the brightness leaving the brighter portions of the image unaffected. GAMMA/BRIGHTER During playback in TAPE-VCR mode, press the GAMMA/BRIGHTER button once. • "GAMMA1" appears, and the picture becomes brighter. -
Page 77: Playback Effects
Playback Effects Playback effects can be used to create an interesting scene transition between a still image and the following image during play- back in TAPE-VCR mode. Type of Playback Effects OVERLAP: A still image fades out as the next image fades in, replacing the previous image. -
Page 78: Picture Effect Playback
Advanced Features Playback Picture Effect Playback These picture effects let you play back images with a more dramatic effect. Type of Picture Effects B/W: The picture is displayed white. SEPIA: The picture is displayed similar to that of an old photograph. MOSAIC*: The picture is divided up into tiles. -
Page 79: Picture/Backlight Adjustments
Operation select "BACKLIGHT" (®). button until then button. Press "NORMAU' AUTO: The camcorder switches between "NORMAL" and "BRIGHT" depending lighting. This mode is only available in TAPE-CAMERA mode. NORMAL: For use indoors or under moderate lighting conditions. BRIGHT: For use outdoors under strong lighting conditions, daylight. -
Page 80: Editing
(see page 46). Then, rewind the tape to before the beginning you wish to keep. Load a video cassette into the recording VCR. Press _- / l= on the camcorder Recording playback, button on the VCR to begin recording. Press the Pause/Still... -
Page 81: Recording From An External Source
VCR.) To Record Set the camcorder to TAPE-VCR mode. Begin playback connected • Check the camcorder the picture is being properly received. Press the REC START/STOP Recording the camcorder. -
Page 82: Editing With The Dv Terminal (Ieee1394)
Editing with the DV Terminal (IEEE1394) This camcorder enables you to perform digital video editing. Connect the camcorder to video equipment with a DV terminal using a commer- cially available DV cable. A DV cable is able to transfer all dubbing signals including and audio. -
Page 83: Audio Dubbing Feature
Audio Dubbing Feature You can add narration to recordings this camcorder, while preserving the original audio and video recordings. Microphone for Audio Dubbing You can use the built-in stereo microphone record narration. Built-in stereo microphone Note: • Audio dubbing cannot be performed terminal. - Page 84 "Selecting page). dubbing. AUDIO1+2 dubbing button. The audio cannot be used with record- that you use Audio Dubbing made with this camcorder. made with other digital may result in poor audio quality. dubbing will automatically pause audio changes from 12-bit mode to 16-...
-
Page 85: Selecting The Audio Playback Mode
Selecting the Audio Playback Mode You can select any of the following audio playback modes. Audio 1+2 • 12-bit recording in stereo (Audio 1 and Audio 2 channels) • 16-bit recording in stereo (left and right channels) Audio 1 • 12-bit recording in stereo (Audio 1 channel only) •... -
Page 86: Configuring Software For Pc Connection
Double click on the "Setup.exe" Followthe instructions on the PC monitor until the installation complete. Restart the PC. Connecting the camcorder to a Personal Computer Turn off the PC. Connect the camcorder • Before connecting with Intel ® Pentium ®... - Page 87 Using the Software For tips on how to use the Video Capture Software, refer to the operation manual located on the CD-ROM in PDF format. Follow the steps below to open the PDF file containing manual. Note: • For the latest product information, read the "Readme"...
-
Page 88: Smartmedia Card
Perform steps 1 and 2 above, and then pull the SmartMedia Notes: • The supplied for immediate • Be sure not to apply cover, as the camcorder image card into the slot Card card straight out as shown below. SmartMedia card is preformatted use. -
Page 89: Card Recording
SmartMedia Media Selection switch STILL button Power Zoom control Po_ 'er switch Insert a SmartMedia card into the camcorder. Remove the lens cap, and lift up the viewfinder. Set the Media Selection switch to CARD. Hold down... -
Page 90: Selecting The Picture Resolution
SmartMedia Card Features Camera Recording Selecting the Picture Resolution The picture quality of still images recorded the SmartMedia card depends tion setting. Select the appropriate match the purpose of recording. Type of resolution NORMAL: Records images with standard picture quality. FINE: Records images with higher quality than in NORMAL mode but with a lower number of recordable... -
Page 91: Recording With The Self-Timer
Self-timer AUTO CARD _)NORMAL CANCEL [STILL] Notes: • When recording with the self-timer, camcorder in the horizontal to a tripod, etc. • To cancel the self-timer, again in step 3 above. • Self-timer mode will be canceled one image. -
Page 92: Formatting A Smartmedia Card
You also need to format a SmartMedia card when one of the following warning indicators appears, order to use the card with the camcorder. • "FORMAT MEMORY CARD" • "MEMORY CARD ERROR" • "MEMORY CARD READ ERROR"... -
Page 93: Card Playback
Card Playback It is possible to play back and view still images recorded on a SmartMedia card on the LCD monitor. Media Selection switch Operation button Open the LCD monitor and adjust the angle. Set the Media Selection switch to CARD. Hold down the Lock button and set the Power switch to VCR. -
Page 94: Slide Show Playback
SmartMedia card at intervals of 5 seconds. This is useful when confirming recorded on a SmartMedia card. Set the camcorder Press _ or m,_ to select the image from which you want to begin slide show playback. Press the MENU/DISPLAY the menu screen appears. -
Page 95: Delete-Protection
Delete-protection It is possible to prevent your important recorded on the SmartMedia card from being accidentally erased. In CARD-VCR mode, press the MENU/ DISPLAY button until the menu screen appears. Select then press _,_ on the Operation button. Select "PROTECT" (_), then press _,_ (_). -
Page 96: Deleting One Stored Image
SmartMedia Card Features Playback Deleting One Stored Image You can delete unwanted images to free up memory of a SmartMedia card for new images. Note: • Deleted images cannot be restored. whether or not you want the images performing the procedure In CARD-VCR mode, press the MENU/ DISPLAY... -
Page 97: Deleting All Stored Images
Deleting All Stored Images You can delete all images stored on a SmartMedia card in one operation. Notes: • Deleted images cannot be restored. whether or not you want the images performing the procedure below. • If you want to keep some images SmartMedia card, first delete-protect... -
Page 98: Print Order
SmartMedia Card Features Playback Print Order The print order function allows you to add print information called DPOF to still images recorded on a SmartMedia card. About DPOF DPOF is an abbreviation Format". This format defines print information such as the specified printed. - Page 99 Press _- / ii to set the print order, then press •. • The FJindicator appears. • If you want to assign another print order, repeat steps 4 to 6. Print order indicator O PRINT BUTTON] BUTTON] Press •, then press the MENU/ DISPLAY button to turn off the menu screen.
-
Page 100: Transferring The Data On A Smartmedia Card To A Computer
DVC00001.JPG DVC00002.JPG i_!i!i i_ilii_i!i!_i Adapters for the SmartMedia Card Via a floppy disk adapter PC connect- card by using a using the camcorder Via a card as shown below. adapter Notes: • Be careful when • Remove Sub-folder of still •... -
Page 101: Useful Information
Useful Information Hints for Better Shooting • Position the subject in the center of the scene. When you are using auto focus, whatever is in the center of the scene is kept in focus. Position the subject Focus manually the center, need to position subject pages... - Page 102 • Clear color reproduction color contamination Provides three times the color resolution of conventional VCRs (based on Sharp models). Clear images with virtually no distracting color contamination (which usually appears as red). • Standard use of TBC (Time Base Corrector)
- Page 103 Precautions when using a Mini DV cassette • Be sure to use only Mini DV cassettes with the M_°_l_r m ark. • This camcorder can record and play back using Mini DV cassettes with cassette memory, but it cannot record or play back this memory.
- Page 104 • Do not expose the card to fire. • The card has a life expectancy. period of use, the card will become incapable of recording • Do not remove the card from the camcorder or turn off the camcorder recording accidental card.
- Page 105 See page 20 for the approximate recording for the battery packs. Note: • Use only SHARP BT-L221 or BT-L441 battery packs. These are designed specifically for use with this camcorder. Storage • Store the battery pack in a fully discharged state.
- Page 106 LCD monitor. If the monitor becomes dark or difficult to view, the fluores- cent lamp may need to be replaced. Contact the nearest SHARP service center or your dealer for further advice. Dew Formation • What is "dew formation"? When cold water is poured into a glass, dew drops form on the glass.
- Page 107 If the video heads become clogged, O indicator appears on the screen. Contact the nearest SHARP service center or your dealer for further advice. Using a Cleaning Tape (Commer- cially Available)
-
Page 108: Demonstration Mode
• The demonstration is only displayed in English. Watching the Demonstration Remove the Mini DV cassette from the camcorder (see page 12), and set the SUPER CAT'S EYE switch to OFF. Hold down the Lock button and set the Power switch to CAMERA. -
Page 109: Before Requesting
Camcorder Automatically zooms out without operating zooming Power Zoom control. (1.8 m), and automatically out until it focuses No subject On-screen displays Camcorder is in Demo mode. automatically change. No image appears Video connected TV screen. channel ii_iiii,ilE!!iiii Audio/video connected. - Page 110 Obstacle between remote control and camcorder remote sensor. Its performance could be adversely the power sources to resume operation. or on the LCD monitor appear to malfunction, the power source, insert the lithium battery, and should be normal. Set the date and time, then resume operation.
- Page 111 (with optical black) power zoom lens (F1.6, auto focus (7.5 cm) (VL-WD650U) full-color lock (with gain-up, F1.6) (Exif2.1) (SSFDC) in Full Auto (during camera recording Ibs (735 g) (VL-WD650U) and lens cap) product literature, accessories, or visit SHARP's...
-
Page 112: Gufa De Operacisn R&Pida En Espasol
Carga de la bateria Conecte el cable de alimentaci6n suministrado al z6calo de alimentaci6n de CA del adaptador baterias, y enchufe la clavija de CA en una toma de corriente. Alinee la marca • de la bateria con la marca • del cargador la bateria gui&ndola Presionando la bateria... - Page 113 Insercibn de un minivideocasete Coloque la fuente de alimentaci6n videoc&mara, y luego deslice el control de abertura de la puerta del compartimento del videocasete puerta del compartimento videocasete. Inserte completamente con la ventanilla hacia fuera y con la lengQeta de protecci6n hacia la parte superior.
- Page 114 Guia de operacibn rbpida en espa_ol Grabacibn f_cil con la videoc_mara en una cinta Asegerese de que se encuentre insertado un casete. Quite la tapa del objetivo visor. Ponga el conmutador selector de medio en TAPE. c*._T_E Mantenga pulsado el bot6n de bloqueo y ponga el interruptor de alimentaci6n en CAMERA.
- Page 115 Grabacibn con tarjeta AsegQrese de que se encuentre insertado una tarjeta SmartMedia. Quite la tapa del objetivo visor. Ponga el conmutador selector de medio en CARD.c_D_DTAp Mantenga pulsado el bot6n de bloqueo y ponga el interruptor de alimentaci6n en CAMERA. Pulse el bot6n STILL para iniciar la grabaci6n.
-
Page 116: Visualizaciones En Pantalla En Espasol
Cuando se selecciona "ESPAI_IOL" como idioma de la visualizacion siguientes visualizaciones Modo TAPE-CAMERA 1" 12 bits Modo TAPE-VCR AUDIO1+2 I" indicadas a continuacion. Modo f&cil (FACIL) en pantalla aparecen... - Page 117 _.- Modo CARD-CAMERA AUTOM. _TAR] 10/90 TAR] NORMAL 10/90 I AU'_TOM, Modo CARD-VCR l& NO_'_ 100- 0006 TAR]...
-
Page 118: Affichages Sur 6Cran En Fran_Ais
Les affichages sur _cran suivants apparaissent langue de I'affichage. AUTO LUMI. 30rain 12bits Mode TAPE-VCR AUDIOI÷2 Iorsque "FRAN(_AIS" est s_lectionn_ Mode facile (FACILE) 1 pour la... - Page 119 _.- Mode CARD-CAMERA _CARTE 10/90 AUTO 1" _CARTE NORMAL 10/90 ,..- Mode CARD-VCR ° ,o_Oo_!! ile (FACILE) 1 CARTE...
- Page 120 Sharp The warranttes descnbed heretn shall be the sole and exclustve warranttes granted by Sharp and shall be the sole and excluswe remedy avatlable to the purchaser for the pertod of ttme descrtbed responstbthttes...