Table of Contents
Advertisement
Advertisement
Table of Contents

Related Manuals for Samsung AM160FNBDEH


Summary of Contents for Samsung AM160FNBDEH
- Page 1 “EEE Yönetmeliğine Uygundur” “This EEE is compliant with RoHS”...
-
Page 2: Installation Manual
DVM Hydro unit / Hydro unit HT installation manual This manual is made with 100% recycled paper. imagine the possibilities Thank you for purchasing this Samsung product. To receive more complete service, please register your product at www.samsung.com/register EN ES... -
Page 3: Table Of Contents
Contents Safety precautions ..................... . . 2 Preparing the installation . - Page 4 SEVERE WARNING SIGNS Installation must be requested to a qualified installer. If the user installs a product improperly on their own, it may cause refrigerant leakage and lead to electric shock or fire in worst case scenario. Install the unit in a place where it is strong enough to hold the product weight. When installed in place where it is not strong enough to withhold the product weight, the unit could fall and cause injury.
- Page 5 Safety precautions CAUTION SIGNS Read the installation manual thoroughly before installing the product. Make sure to transport the product with its packages on. In case if you must remove the packaging, use soft materials to carry the product to prevent any damages on the product. Perform the drainage/piping work securely according to the installation manual.
-
Page 6: Preparing The Installation
Preparing the installation Tools required for installation General tools ① Vacuum pump ② Torque wrench ③ Pipe cutter ④ Reamer ⑤ Pipe bender ⑥ Spirit level ⑦ Screw driver ⑧ Spanner ⑨ Drill ⑩ L wrench ⑪ Measuring tape Tools for operation ①... -
Page 7: Selecting Installation Location
Preparing the installation Selecting installation location Choose a place with ventilation duct or opening to cool down the heat generated from the product and maintain the surrounding temperature within Hydro unit : 5 ~ 40 °C, humidity 80 % Hydro unit HT : 5 ~ 35 °C humidity 80 %. Choose a place where structure can bear the weight and vibration of the DVM Hydro unit / Hydro unit HT. -
Page 8: Hydro Unit
Hydro unit (Unit: mm) Service space H beam <When installing one product on top of the other one> Hydro unit HT If the Hydro unit / Hydro unit HT is needed to installed closed to the walls unavoidably, prevent the vibration generated from the product to the walls with cushioning materials etc. -
Page 9: Base Construction And Installation Of The Dvm Hydro Unit / Hydro Unit Ht
Base construction and installation of the DVM Hydro unit / Hydro unit HT If this product is installed in residential area, apply anti-vibration product to prevent the vibration from transferring to the building. WARNING Manufacturer is not responsible for the damage occurred by not following the installation standards. 1. - Page 10 DVM Hydro unit HT installation Considering the vibration and weight of the DVM Hydro unit HT, strength of the base ground must be strong enough to prevent noise and the top part of the base ground has to be flat. Level Controller Fixed Bracket Adjust the level controller to make fixed controller has to be min.
- Page 11 Base construction and installation of the DVM Hydro unit / Hydro unit HT Anchor specification Diameter of Fastening Size Anchor length (b) Sleeve length (c) Insert depth drill bit (a) torque 14 mm 75 mm 40 mm 50 mm 30 N·m Dimension of the DVM Hydro unit (Unit: mm) Water outlet pipe...
- Page 12 Dimension of the Hydro unit HT (Unit: mm) Communication cable Power cable Gas pipe Liquid pipe Water outlet pipe Water inlet pipe Model of the Hydro unit AM✴✴✴FNBF*B Liquid side connection part 3/8” (ø9.52) Refregerant side Gas side connection part 5/8”...
-
Page 13: Refrigerant Pipe Installation
Refrigerant pipe installation Refrigerant pipe work Use exclusive tools and accessories for R-410A to respond to pressure of the R-410A and prevent foreign substances from entering into the pipes. The length of refrigerant pipe should be as short as possible and the height difference between the DVM Hydro unit / Hydro unit HT and outdoor unit should be minimized. - Page 14 Tools used for refrigerant pipe installation Product using R-410A/R-134a refrigerant requires exclusive tools. Check the conventional tools for compatibility before installation. Tool Work Compatibility with conventional tool Pipe cutter Pipe cutting Compatible Flaring tool Pipe flaring Refrigerating machine Apply refrigerant oil on Use exclusive ether oil, ester oil, alkali benzene Refrigerant pipe work flared part...
- Page 15 Refrigerant pipe installation Selecting refrigerant pipe Install the refrigerant pipe according to main pipe size for each capacities of DVM Hydro unit / Hydro unit HT. ADN160BDE✴✴ ADN320BDE✴✴ ADN500BDE✴✴ Model name of DVM Hydro unit AM160FNBD✴✴ AM320FNBD✴✴ AM500FNBD✴✴ AM✴✴✴FNBF✴✴ Liquid side 3/8”...
- Page 16 Refrigerant pipe welding and safety information Important information for refrigerant pipe work Make sure there is no moisture inside the pipe. Make sure there are no foreign substances and impurities in the pipe. Make sure there is no leakage. Make sure to follow the instruction when welding or storing the pipe. Nitrogen flushing welding (DVM Hydro unit) When welding the refrigerant pipes, flush them with nitrogen gas as shown in the picture.
- Page 17 Refrigerant pipe installation Refrigerant pipe work on DVM Hydro unit Wet cloth Gas pipe Liquid pipe Caution for welding the pipe to a DVM Hydro unit - When welding the pipe to the product, the unit may get damaged by the heat and flame from welding. Use a CAUTION flame proofing cloth to protect the unit from a brazing fire or flame.
- Page 18 Refrigerant pipe work on DVM Hydro unit HT DVM Hydro unit HT has refrigerant pipes of two different types. Liquid side pipe Gas side pipe Make sure there are no foreign substances and impurities in the pipe. There is no nitrogen gas inside of connected pipes of Hydro unit HT and the outdoor unit. DVM Hydro unit HT is using the new refrigerant, R-134a.
-
Page 19: Performing Leak Test And Insulation
Performing leak test and insulation Before completing the installation (insulating hose and pipes), you must check for gas leakage and when there is no leakage, you may insulate the pipes and hoses. Leak test Use a gas detector to check the connection part of the pipes for gas leakage. Gas side Gas side Liquid side... -
Page 20: Installing The Drain Pipe
Installing the drain pipe Installing the drain pipe Use a spirit level to make sure that product is horizontally leveled. Choose one of the 2 drain holes on the bottom of the product and insert the provided drain plug, then connect the drain pipe. -
Page 21: Water Pipe Installation
Water pipe installation 1. You do not need to equip extra expansion tank when there's open type expansion tank on top part of the existing thermal storage tank. However, if you do not have expansion tank, you will need to construct closed type pipe system and equip expansion tank. - Page 22 Installing under floor heating Hydro unit On site Heat installation exchanger Ball valve (Used as on water Hot water tank cleaning hole) ⑧ side Under floor ② ③ ⑭ Cleaning device ④ heating coil ① Water out ⑤ ⑩ ⑥ ⑨...
- Page 23 Water pipe installation 2) Water pipe socket must be connected with a less tightening torque value stated in the below table. If you apply more torque, it may cause damage to the product. Diameter of water pipe (Outer diameter, mm) ø10~20 ø21~30 ø31~50...
- Page 24 11) Water scale may occur on the plate type heat exchanger depending on the water quality and the type of plate heat exchanger so regular chemical cleaning is necessary. When installing water pipes, install a heat source water shut-off valve and also install the flushing pipe with a ball valves (for chemical cleaning) on the pipe installed between the shut-off...
- Page 25 Water pipe installation Circle (O) marks in the chart show the factor relevant to corrosion or water scale. When the water temperature is over 40˚C, steels without protective coating may corrode when expose to water. NOTE Applying corrosion prevention material or degassing can be effective measure to prevent corrosion. For the cooling water and the make-up water, used under closed circuit water system with closed circuit cooling tower, should satisfy the standard shown in above table.
- Page 26 Pressure drop graphs ADN160BDE✴✴ / AM160FNBD✴✴ ADN320BDE✴✴ / AM320FNBD✴✴ Water flow rate (ℓ/min) Water flow rate (ℓ/min) ADN500BDE✴✴ / AM500FNBD✴✴ AM✴✴✴FNBF✴✴ Water flow rate (ℓ/min) Water flow rate (ℓ/min)
-
Page 27: Connecting Power And Communication Cable
Water pipe installation Connecting strainer Use a strainer with 50 mesh (Diameter of each hole must be under 0.4 mm, excluding punching plate) Connect the strainer after checking the direction of the strainer on the water inlet hole as shown in the illustration. Wind the Teflon tape more than 15 times on the thread of the water pipe before connecting it. - Page 28 ❋ Table for current (Single installation) Indoor unit Model Rated current (A) MCA ( A) MFA( A) ADN✴✴✴BDE✴✴ DVM Hydro unit 0.05 2.75 AM✴✴✴FNBD✴✴ AM160FNBFE✴ 14.3 24.15 30.19 AM250FNBFE✴ 23.1 32.15 40.19 DVM Hydro unit HT AM160FNBFG✴ 4.85 12.88 16.1 AM250FNBFG✴...
- Page 29 Connecting power and communication cable Overall system configuration DVM Hydro unit / Hydro unit HT use 220~240 V or three phase, 380~415 V(DVM Hydro unit HT) Distribution board Outdoor unit Indoor unit ELCB ELCB + 3 Phase 1 Phase ELCB ELCB Communication cable Earth...
- Page 30 Power supply and communication cable configuration Withdraw a main power cable and a grounding cable through the cable outlet on the right side of the DVM Hydro unit / Hydro unit HT. When connecting external contact signal wire, connect them to the PCB terminal board through the cable outlets in the right side of the outdoor unit.
- Page 31 Connecting power and communication cable Specifications of the cable protection tube Name Material Applicable conditions Flexible PVC When the cable tube is installed indoor and not exposed to outside, because it is conduit embedded in concrete structure Class 1 flexible When the cable tube is installed indoor but exposed to outside so there are risk Galvanized steel sheet conduit...
- Page 32 PBA connection diagram ADN160BDE✴✴ Wired remote controller Outdoor unit (Communication cable) Power cable (1 Phase AC 220~240 V) AM✴✴✴FNBD✴✴ Wired remote controller Outdoor unit (Communication cable) Power cable (1 Phase AC 220~240 V)
- Page 33 Connecting power and communication cable AM✴✴✴FNBF✴✴ - Single phase - Three phase DVM Hydro unit / DVM Hydro unit / Hydro unit HT Hydro unit HT 1(L) 2(N) 1(L) 2(N) L1(R) L3(T) L2(S) cable tie cable tie Power cable 1 phase AC Power cable 1 phase AC Communication cable Communication cable...
- Page 34 Wiring diagram for connecting 2 wired remote controllers ADN✴✴✴BDE✴✴ Wired remote controller (slave) Wired remote controller (master) AM✴✴✴FNBD✴✴ / AM✴✴✴FNBD✴✴ Wired remote controller (slave) Wired remote controller (master)
- Page 35 Connecting power and communication cable Connecting the power terminal Connect the cables to the terminal board using a solderless ring terminal. Properly connect the cables by using certified and rated cables and make sure to fix them properly so that external force is not applied to the terminal.
- Page 36 Selecting solderless ring terminal Select a solderless ring terminal for a power cable according to the nominal dimensions for cable. Silver solder Apply insulation coating to the connection part of the solderless ring terminal and the power cable. Nominal dimensions for cable (mm Nominal dimensions for screw (mm) Standard dimension (mm) Allowance (mm)
-
Page 37: Connecting External Contact
Connecting external contact External contact connection diagram Wired remote controller Outdoor unit (communication cable) Ⓠ Water IN/OUT (Hydro unit HT) Water IN/OUT (Hydro unit) EVA IN/OUT (Hydro unit / Hydro unit HT) Flow switch Defrost Ⓐ Main power Connected as factory default Ⓑ... - Page 38 Maximum Explanation Terminal No. Input / Output AC/DC allowable current Power L, N Input 2.5 A Operation check B1, B2 Contact output 0.5 A Alarm B3, B4 Contact output 0.5 A Water pump B5, B6 Contact output 0.5 A Booster heater B7, B8 Contact output 0.5 A...
- Page 39 Connecting external contact Refer to the below table for the terminal numbers that needs on the site for connecting external contact. Terminal No. External contact Operation status / inspection checklist Remarks Check on/off status for operation lamp of the control panel on B1, B2 Operation check Optional...
- Page 40 Water pump connection Connect a water pump to B5, B6 of the PBA terminal block. Water pump Relay Terminal board Controller Pump Power Terminal of this product is for water pump and the maximum allowable current is 0.5 A CAUTION Specification table Part Specification...
- Page 41 Connecting external contact Booster heater connection Connect a booster heater to B7, B8 of the PBA terminal block. Booster heater Relay Terminal board Controller Booster heater Power Specification table Part Specification Terminal block (Output) B7, B8 Connection type Booster heater (No-voltage contact)
- Page 42 3Way valve connection Check the type of 3Way valve and connect it to the terminal board as shown in the illustration. Use a rated wire and connect it as shown in the illustration. Initial setting of the valve is 'closed (no flow)' . 3Way valve 1: Change the water flow direction to the indoor and hot water tank.
- Page 43 Connecting external contact Example of installation (Danfoss H-series valve) Connecting the valve Brown Brown Blue Blue 3-port diverter valves Brown Brown Blue Blue Grey Grey 3-port mid-position valves Example of wiring Brown Brown Blue Blue 3-port diverter valves Brown Brown Blue Blue Grey...
- Page 44 Connecting 2Way valve Connect a 2Way valve to B15, B16 and B17 of the PBA terminal block. 2Way valve is interlocked with 3Way valve 1. 2Way valve ❋ Initially, relay is connected between L and B17 of the terminal block. Terminal of this product is for 2Way valve and the maximum allowable current is 0.5 A CAUTION Specification table...
- Page 45 Connecting external contact Wiring 2Way valve Use a rated wire to connect it as shown in the illustration and fix it with a cable tie. Initial setting of the valve is 'closed (no flow)' . Normal close type When it is closed When it is opened 2Way valve (N/C...
- Page 46 AC 230V or AC 24V thermostat Connect the indoor thermostat to B19~B26 of the PBA terminal block. Connect a thermostat to the designated terminal as stated in the rated table. Only 1 type of thermostat can be connected. (B19~B22 or B23~B26) Product will not operate when signal for cooling and heating mode is inputted at the same time.
- Page 47 Connecting external contact AC 230 V thermostat Cooling mode Heating mode Thermostat Thermostat AC 24 V thermostat Cooling mode Heating mode Thermostat Thermostat...
- Page 48 Connecting temperature sensor of water tank and flow switch Connect the temperature sensor of water tank to number 7 and 8 of the terminal block located on the bottom side. Connect 4~20mA temperature sensor for water tank. Temperature sensor must be connected to water tank for hot water operation.
- Page 49 Connecting external contact Connecting solar pump Connect the signal wire for solar pump to number 13 and 14 of the terminal block located on the bottom side. 9 10 11 12 13 14 15 16 17 18 19 20 Solar pump Controller Power <DVM Hydro unit>...
- Page 50 Grounding work A ground rod must be installed if the grounding terminal on the power circuit does not exist or meet the standard. Additional accessories required for installation must be purchased separately since they are not supplied with DVM Hydro unit / Hydro unit HT.
-
Page 51: Setting An Indoor Unit Address And Installation Option
Setting an indoor unit address and installation option Set the indoor unit address and installation option with remote controller option. Set the each option separately since you cannot set the ADDRESS setting and indoor unit installation setting option at the same time.You need to set twice when setting indoor unit address and installation option. The procedure of option setting Entering mode for Option setting mode... - Page 52 Option setting Status 1. Setting SEG2, SEG3 option Press Low Fan button( ) to enter SEG2 value. Press High Fan button( ) to enter SEG3 value. Each time you press the button, … will be selected in rotation. SEG2 SEG3 2.
- Page 53 Setting an indoor unit address and installation option Option setting Status 13. Setting SEG16, SEG17 option Press Low Fan button( ) to enter SEG16 value. Press High Fan button( ) to enter SEG17 value. Each time you press the button, …...
- Page 54 Setting an indoor unit address (MAIN/RMC) 1. Check whether power is supplied or not. - When the indoor unit is not plugged in, there should be additional power supply in the indoor unit. 2. The panel(display) should be connected to an indoor unit to receive option. 3.
- Page 55 Setting an indoor unit address and installation option Setting an indoor unit installation option (suitable for the condition of each installation location) 1. Check whether power is supplied or not. - When the indoor unit is not plugged in, there should be additional power supply in the indoor unit. 2.
- Page 56 Option SEG7 SEG8 SEG9 SEG10 SEG11 SEG12 Opening the electronic Use of drain Use of electronic expansion valve of an Explanation PAGE Use of hot water heater Master / Slave pump heater indoor unit when heating operation stops. Remote Controller Display Indication Details Indication Details Indication Details...
- Page 57 Setting an indoor unit address and installation option ■ 05 series installation option(Detailed) Option No. : 05XXXX-1XXXXX-2XXXXX-3XXXXX Option SEG1 SEG2 SEG3 SEG4 SEG5 SEG6 PAGE MODE Explanation Remote Controller Display Indication Details Indication Details Indication and Details Option SEG7 SEG8 SEG9 SEG10 SEG11...
- Page 58 Changing a particular option You can change each digit of set option. Option SEG1 SEG2 SEG3 SEG4 SEG5 SEG6 The option mode The tens’ digit of an The unit digit of an Explanation PAGE MODE you want to option SEG you will option SEG you will The changed value change...
-
Page 59: Product Maintenance
Product maintenance 1. Water quality management - Plate type heat exchanger is designed in a impossible way to disassemble part for cleaning or replace the parts. To prevent corrosion or water scale on the plate type heat exchanger, you must manage the cooling water quality in compliance with national standards. -
Page 60: Failure Diagnosis
Failure diagnosis When there is problem on DVM Hydro unit / Hydro unit HT, error will be displayed on the Main PCB and the display of the remote controller. Display on the remote controller display when error is detected Error indications are displayed as seen below. 1. -
Page 61: Error Code
Error code Please follow below instruction when there is error on sensor. Check the resistance of the sensor - Hydro unit : Water pipe inlet/outlet, R-410A EVA IN/OUT 10 kΩ @ 25 °C - Hydro unit HT : Water pipe inlet/outlet 200 kΩ... - Page 62 Display Explanation Error on the sensor of water inlet pipe (Short or Open) Error on the sensor of water outlet pipe (Short or Open) Error on water tank (Short or open) Error due to pipe rupture protection Error due to freeze prevention(Re-operation is possible) Error due to freeze prevention(Re-operation is impossible) Water temperature sensor on water outlet pipe is detached Flow switch off...
-
Page 63: Using The Pcb Switch
Using the PCB Switch Switch is located on the main PCB. 1. Check the power between DVM Hydro unit / Hydro unit HT and the distribution board. - Single phase: L, N - Three phase: R, S, T, N 2. Check the outdoor unit. 1) Check if power and communication cable of the outdoor unit is connected properly. -
Page 64: Completing The Installation
Completing the installation Measure the power terminal (1 phase : L, N) and the grounding of the outdoor unit using a DC 500 V insulation resistance meter before connecting the power. The measured value should be over 30 MΩ Never measure the communication terminal to prevent the communication circuit from being damaged. Check the short-circuit of the communication terminal using a general circuit tester. -
Page 65: Appendix
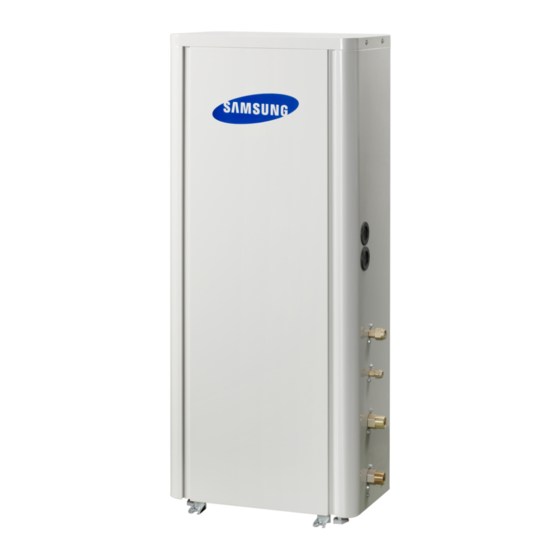
Appendix Model specification (weight and dimension) Type Model Net weight Net dimension (W x D x H) AM160FNBDEH/EU 29.0 kg 518 x 330 x 627 mm DVM Hydro unit AM320FNBDEH/EU 33.0 kg 518 x 330 x 627 mm AM500FNBDEH/EU 40.0 kg... - Page 66 Memo...