Table of Contents
Advertisement
Quick Links
Advertisement
Table of Contents

Related Manuals for LG T280


Summary of Contents for LG T280
- Page 2 Important notice for user Chapter1.
- Page 3 1-1. Read this carefully before using the Notebook PC. ▶ Regulatory Notices Important notice for user...
- Page 4 Important notice for user...
- Page 5 Important notice for user...
- Page 6 Important notice for user...
- Page 7 Important notice for user...
- Page 8 Important notice for user...
- Page 9 Important notice for user...
- Page 10 ▶ How to protect the human body from the hazardous RF energy exposure. We recommend that the human body should be kept off at least 15 mm from the external antenna plug-in-radio-card or the internal antenna located in screen section during the operation or moving.
-
Page 11: Energy Star
Energy Star Energy Star Compliance As an Energy Star partner, LG has determined that standard configurations of this product meet ENERGY STAR guidelines for energy efficiency. ENERGY STAR program is a partnership with electronic equipment manufacturers to promote energy-efficient products. - Page 12 3. Help: Helps you to find the answers to your questions and solve problems. ▶ Ez User's Guide Thank you for purchasing the LG Electronics product. This machine is built on cutting-edge technology and has been tested reliably. For the sake of convenient use, please read this manual in advance.
- Page 13 WOW HD TruSurround HD technology is incorporated under license from SRS Labs, inc.. Copyright (C) 2009, LG Electronics Inc., DigitalMate Co., Ltd. Please be understanding that this manual may contain incorrect parts despite our dedicated efforts Important notice for user...
- Page 14 The examplified figures in this manual may not exactly the same as the real products. LG Electronics Inc. has rights to modify any part of this manual for the better without prior notice. Unauthorized reproduction or duplication of any part of this manual is strictly prohibited.
- Page 15 - Displays the explanation of the selected item. ▶ When using the computer, sit in the good posture as shown below. 1. Do not have light directly reflected on the monitor. 2. Set the upper part of the screen to be on the even level with or slightly lower level than your eyes. 3.
- Page 16 ■ Before using the headset, check if the volume is too high. ■ Do not use the headset too long. ■ A headphone that has a resistance higher than 20 can cause electromagnetic interference. Therefore, we recommend you to use a headphone that has a resistance less than 20 ▶...
-
Page 17: Important Safety Information
The resulting impairment may cause an injury, explosion, or fire. Use batteries certified and acknowledged by LG Electronic Inc. Otherwise, an explosion or fire may occur. Prevent the battery from being contact with any metallic object like a car ignition key or a paper clip. - Page 18 Do not dispose of a spent (backup) battery arbitrarily. It may explode or cause a fire. Disposal methods may differ by country and region. Dispose of the spent battery in accordance with the laws and safety rules of the country and region. If you find leakage or smell bad odor from the battery, remove the battery and contact the local service center.
- Page 19 Do not use the laptop on top of carpet, blanket or bed. Also, do not put the adapter under the blanket. The product may malfunction, cause a fire or burn the user due to temperature rise. Read the directions printed on the battery pack carefully before use. Keep the battery at room temperature.
- Page 20 Place the machine in a safe place so that it does not fall. If dropped, the machine could be damaged and even cause an injury. Do not leave or use the computer near a magnetic object. Otherwise, the H/D and the system may be damaged and fail to operate properly. Never place the computer on a bag with magnetic objects including magnetic buttons.
- Page 21 Pull the plug, not the cord, to disconnect the power. Otherwise, a fire may occur or the product may get damaged. Operate the product at the proper voltage. Excessive voltage may result in damage on the product, electric shock or fire. Use power outlets with an earth pin installed and proper supply of rated electricity.
- Page 22 Always keep the power cord and the outlet clean. A fire may occur. Do not impair the cord by bending or pressing it too hard. Keep children and pets from dam- aging the power cord. An impaired cord could damage computer parts causing a fire or electric shock. Disconnect the machine completely from others before cleaning it.
- Page 23 Do not leave a cup or other containers filled with watery substance near the computer. If the machine is soaked, a fire or electric shock may occur. Do not connect the modem to a key telephone system. A fire may occur or the product may get damaged. If you have dropped or damaged the computer, disconnect the power and contact the local service center for a safety check.
- Page 24 Do not leave any object such as a pen on the keypad. You might break the LCD panel by unwittingly shutting it down with the object re- maining on the pad. Do not press or scratch the LCD panel with a sharp object. It may cause an impairment.
- Page 25 When handling computer parts, follow the instructions in the manual. Otherwise, damage may be inflicted. Do not put your finger or an object in the PC card slots. An injury or electric shock may occur. Install a vaccine program on your computer and do not download illegal programs nor ac- cess any corruptive web site such as those pushing pornographic contents.
- Page 26 Do not insert other devices than designated ones in the ports. Otherwise, the product may get damaged. Do not use a damaged CD-ROM disk or floppy disk. It may cause product damage or physical injury. Prevent children from thrusting their finger in the CD drive tray. The finger may be stuck in the tray and injured.
- Page 27 When you disassemble and upgrade the machine, prevent children from swallowing any parts including bolts. If a child swallowed a nut, they may get suffocated. In that case, see the doctor immediately. Please use parts certified by LG Electronics Inc. Otherwise, a fire or product damage may occur. Important notice for user...
- Page 28 Consult our service engineer before you use a peripheral device not manufactured by Electronics Inc. The product may get damaged. Do not disassemble or moderate the machine arbitrarily. You could get an electric shock and would not be able to receive the warranty service for that.
- Page 29 Do not carry the machine with the LCD panel open. Otherwise, the product may get damaged. When leaving the machine in a car, keep it in shadow. The product may be deformed or caught on fire due to temperature rise. Protect the machine from any shock while carrying it.
- Page 30 Handle the computer with care to prevent a data loss. Since the hard disk is sensitive to shocks, please make a back-up file of important data all the time. The manufacturer will not be responsible for any hard-disk data loss caused by your mistake.
- Page 31 Important notice for user...
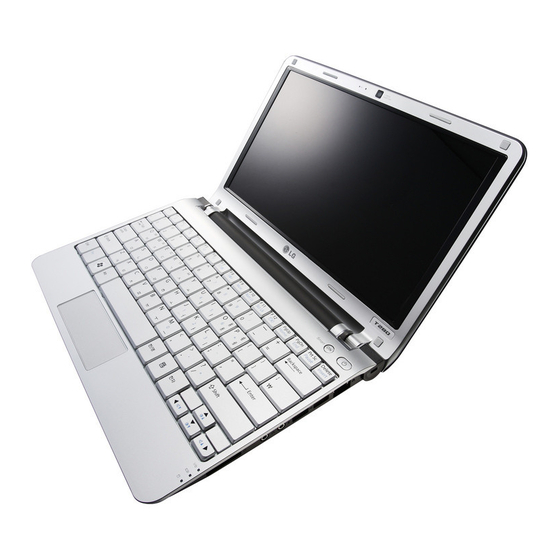
- Page 32 Notebook PC Tour Chapter2.
- Page 33 2-1. Opening/Closing Notebook PC 1. Raise the Notebook PC cover upward. ※ Adjust the angle for the best convenient position. 2. Be sure to close the computer after use. Notebook PC Tour...
- Page 34 2-2. Operation Status Lamps 1. Power Lamp - Blinking: System Standby - On: The system is running on the AC power or battery. - Off: The system is turned off or in Hibernates. 2. AC Power and Battery Status Lamp - Off: The AC adapter is not connected.
- Page 35 Notebook PC Tour...
- Page 36 Using the system Chapter3.
- Page 37 3-1. Running on Battery Notebook PC runs on AC power or battery. This section describes the procedure that the user should take initially for a new system. The provided AC adapter can be used from 100 V to 240 V. Charge the new battery with the AC adapter before use.
- Page 38 4. Remove the battery pack as shown in the diagram below. Use batteries certified and acknowledged by LG Electronic Inc. ■ Uncertified batteries may explode. ■ Ensure the power is off before changing the battery pack. Keep the battery pack removed when the machine is not in use.
- Page 39 The battery capacity may change due to chemical reactions during charge and discharge. ■ The system checks the charge status of LG batteries frequently, and then calculates and indicates the actual battery duration on the current system setup.
- Page 40 3-2. Charging Battery with AC Adapter Notebook PC runs on AC power or battery. This section describes the procedure that the user should take initially for a new system. ※ The provided AC adapter can be used from 100 V to 240 V. 1.
- Page 41 3-3. Windows 7 Overview Windows 7 has many advantagies in terms of information management and security, enhancing your productivity. Windows 7 allows you to access information in your computer or in your corporate network more easily and provides better security for your data. ※...
-
Page 42: Start Menu
▶ Windows 7 Desktop ※ Desktop may differ by model type and software version. Start button - Unfolds Start menu when clicked. Start menu - Displays Windows programs that you can start directly from the menu. - To find an application or a file from here, input search terms in the Instant Search field and start search. 3. -
Page 43: Help And Support
▶ Start menu Includes all programs needed to start Windows. ※ Desktop and Start menu may differ by model type and software version. 1. Fixed Items 2. Recently Used Programs - The order of the programs is subject to change. 3. - Page 44 1. Click Start button and Help and Support Start menu. 2. Follow the instructions on the screen to use Help and Support. - Helps you with many such troubles as learning about the features of Windows 7 and getting troubleshooting information through appropriate items.
- Page 45 corresponding windows are displayed on the desktop. Click a window in the Preview to open the window. 2. Preview My Computer/Windows Explorer ▶ Convenient Features of Windows Windows 7 is designed to help you use frequently used functions more easily. Utilize the following features to use your system more efficiently.
- Page 46 ※ If you want to display the windows again, click and shake the title bar of the open window again. Switch Window Mode Quickly : Click the title bar of a window and drag it to the top of the screen to maximize it.
- Page 47 ▶ Changing User Account Control Settings User Account Control prevents any unauthorized alteration to system configurations. When someone tries to change settings or install a program that could affect others' system use, User Account Control confirms his or her authority first. We recommend that User Account Control not be disabled.
- Page 48 2. When the Change Visual Effect and Sound window appears, select [Windows 7 Basic ] in the [Basic and High Contrast Theme] menu. 3. The Aero theme is disabled. ▶ Using Windows Flip 3D Windows Flip 3D allows you to view all the open windows on the Desktop on one screen. Flip 3D displays all the open windows in 3D, stacked view.
- Page 49 3. When the intended window is displayed at the top, release the Windows logo ( ) key. To display a window without flipping through the stack, hold down the Windows logo key and click the intended window. ■ If you want to display windows in the Flip 3D state constantly, press Ctrl + Windows logo (...
- Page 50 and switch users fast without logging off. Click the arrow button on the right of the [Shutdown] button to display more shutdown options. 1. Switch User - Logs on using another user account registered in the system. 2. Log Off - Exits all programs and logs off from the user account.
- Page 51 3-4. LG Smart Care LG Smart Care is an application that allows you to diagnose and optimize the system conveniently. ※ The figures herein are subject to change without prior notice. ※ You can download and install LG Smart Care...
- Page 52 3-5. CyberLink YouCam Cyberlink YouCam is the program that can take picture or moving images through the Camera. ※ The figures herein are subject to change without prior notice. ※ Web Camera is optional, and so it may not be installed in some models. ※...
- Page 53 Snapshot: Takes pictures. Burst: Takes pictures continuously. Capture : Records movie clips. Timed Recording: Records a movie clip at the date and time set by the user. Draw: Enables you to edit the pictures using a pen or stamp. Upload Movie Clip to YouTube: Uploads movie clips to YouTube. Send Media File Using E-mail: Sends the taken pictures or moving images through E-mail.
- Page 54 Input/Output Device Chapter4.
-
Page 55: Using The Keyboard
4-1. Using the Keyboard The keyboard allows the user to input data or give commands. ※ The keyboard may look different depending on model type. ▶ Keyboard Overview The keyboard consists of character and numeric keys as well as function keys. 1. - Page 56 ▶ Using Special Keys 1. Esc key - Terminates or stops a program. 2. Caps Lock key - You can enter capital letters using the keyboard when this key is pressed. To type lowercase letters, press this key again. 3. Shift key - used to type uppercase letters or as part of hot keys.
-
Page 57: Hot Keys
■ Toggle Caps Lock key to turn the Caps Lock lamp ON or OFF. The on/off status is displayed through the lamp on the notebook PC body. ■ To change the input mode temporarily, you can press the Shift key together with the letter you wan to enter. - Page 58 Fn + F4 Windows Executes the mode defined in the Power Save Mode. (Example: Standby Mode, Maximum Power Saving Mode) Fn + F5 When the user presses Fn + F5 keys, the touchpad mode toggles from Touchpad Disable, to Touchpad Auto-Disable (upon connection of external USB mouse), to Touchpad Enable in order.
- Page 59 Fn + Delete Works as Insert. Input/Output Device...
- Page 60 ※ The touchpad and a USB-type mouse can be used together on the same system. ※ T280 Series provides not a touch type but a button type for users to left/right-click. ※ The touchpad scroll function is not supported in the model that supports the gesture function.
- Page 61 ▶ Moving the Cursor (Pointer) on the Screen Place a finger on the touchpad and glide the finger. ▶ Click (Select) Press and release the left button swiftly. (Or tap the touchpad once.) Do this, for example, to select a menu or icon and to place the cursor to type on a word processor file.
- Page 62 ▶ Drag & Drop To drag, click and hold an icon, for example, and move it to another location. To drop, release the dragged icon in the location you want. To move a file icon, for example, to another folder or to Recycle Bin, place the cursor (or the pointer) on the icon, press and hold the left button, and glide another finger on the touchpad until the icon...
- Page 63 1. Click [Mouse Properties] icon in Notification Area. 2. Select Activate click-free dragging (T) and click [Setup] button to adjust the time span for which you should press the left button to execute the feature. ▶ Scrolling The touchpad supports the scrolling feature. To scroll vertically or horizontally, glide your finger along the right or bottom edge.
- Page 64 ※ Scroll area may differ by model type. Input/Output Device...
- Page 65 4-3. Using Touchpad Gesture The touchpad gesture function allows you to use Windows programs more easily by utilizing different touching methods. ※ The touchpad gesture function may not work in some applications that are not provided by Windows. ※ The touchpad gesture function may not work in some models. ▶...
- Page 66 Rotate Image: Place the thumb on the bottom right of the touchpad and move another finger in a spiral pattern on the touchpad to rotate the slide. Zoom an Image: Place the thumb and index finger on the touchpad and increase or decrease the distance between the fingers to enlarge or reduce the image respectively, as shown in the figure.
- Page 67 Scroll Using Two Fingers: Place two fingers on the touchpad and move up/down/left/right to scroll the screen. ▶ Setting Touchpad Functions You can change the touchpad functions or enable/disable the gesture function. ※ The figures herein may differ by language selection and be subject to change without prior notice. 1.
- Page 68 2. When the following screen appears, select the [Device Settings] tab and click [Settings...]. 3. When the following screen appears, change the settings as required and click [OK]. Input/Output Device...
- Page 69 Input/Output Device...
- Page 70 Connecting Peripherals Chapter5.
- Page 71 5-1. Connecting USB 2.0 Following peripherals can be connected to the Notebook PC. ※ Those peripherals need to be purchased separately. The notebook PC can be connected with other USB supporting devices such as USB keyboard, Hub, digital camera, etc. Connecting Peripherals...
- Page 72 5-2. Connecting Monitor Monitor Toggle Features (Converting the Screen Using the Shortcut Key) ※ If you have an external monitor connected to the computer, press the Fn + F7 keys to rotate the display mode between LCD only, Monitor only, and LCD + Monitor both in order. ■...
- Page 73 5-3. Using IVT BlueSoleil IVT BlueSoleil is a Windows-based IVT software which establishes wireless connection between Bluetooth-enabled desktop or notebook PC and other Bluetooth-enabled devices. IVT BlueSoleil allows the user to access various Bluetooth-enabled digital devices such as camera, cell phone, headset, printer, GPS receiver, etc.
- Page 74 2. Minimize/Exit Button: Minimizes the Bluesoleil window or exits the program. 3. Available Services: Displays the list of services available for a Bluetooth device. Bluetooth Device Status: Displays the Bluetooth device information and their status for the current notebook PC. Connecting Peripherals...
- Page 75 Connecting Peripherals...
- Page 76 System Setup Chapter6.
-
Page 77: Starting System Setup
6-1. Starting System Setup System setup means storing the hardware configuration information of the computer in the CMOS RAM. Through system setup, the computer retrieves various information including current date and time, memory capacity, and hard disk capacity and type. You setup the system when you set passwords, change the booting order, and add new peripheral devices to the machine. - Page 78 3. A while later, the system setup home screen appears. ▶ Keys Used in System Setup Keys Function Enter Selects the current item. To deselect the current item or to move to the previous screen. (Arrow Moves the cursor up, down, left, and right. keys) +, - Increases or decreases the item value.
-
Page 79: Setting The Password
6-2. Setting the Password This process is to set a password so that other people cannot use the notebook PC or change the settings. The user can set a password while booting the system or setting up the system. ■ Without the registered password, if any, access to the system will be denied. Write down and keep the password in a safe place. - Page 80 4. When the following message appears, press [Enter]. 5. To save the changes in system setup, press [F10]. 6. When the following message appears, select [Yes] and press [Enter]. The notebook PC will restart. ■ With Supervisor Password, you are authorized to set all items in the CMOS setup menu and to set...
- Page 81 2. When the following screen appears, select Set User Password with the arrow keys and press [Enter]. 3. When the following message appears, input the password and press [Enter]. The password must not exceed 8 characters of letter (A - Z), number (0 - 9) or their combination. 4.
- Page 82 6. When the following message appears, select [Yes] and press [Enter]. The notebook PC will restart. ■ UserPassword allows limited access to the items in CMOS setup compared to the Supervisor Password item. ▶ Power on password Power on password feature protects the system by requesting Set Supervisor Password Set User...
- Page 83 3. Select Power on password and press Enter to display a pop-up window. Select [Enable] and press Enter to set Power on password. ▶ Set ALL HDD Password HDD Password is to set a password in the separately from the Supervisor Password.
- Page 84 3. When the following message appears, input the password and press [Enter]. The password must not exceed 8 characters of letter (A - Z), number (0 - 9) or their combination. 4. When the following message appears, press [Enter]. 5. To save the changes in system setup, press [F10]. 6.
- Page 85 6-3. Changing or Deleting the Password You can delete or change the password only after inputting the current password. ▶ Changing the Password 1. Execute the System Setup, enter the password, and press [Enter] . 2. Change the password in the same way as setting one. ▶...
- Page 86 2. After opening the system setup screen, use the arrow keys to move to the Security menu. Then select Set Supervisor Password and press Enter. 3. When the following message appears, enter the current password in the Please type in your password field.
- Page 87 5. When the following message appears, select [Continue] and press [Enter]. 6. To save the changes in system setup, press [F10]. 7. When the following message appears, select [Yes] and press [Enter] . The notebook PC will restart. System Setup...
- Page 88 6-4. Restore the Default Settings If you have changed the system setup by mistake, you can restore the default settings. 1. After opening the system setup screen, use the arrow keys to move to Exit. 2. Use the arrow keys to select Load Optimal Defaults, and press Enter.
- Page 89 System Setup...
- Page 90 Using LG Smart Recovery Chapter7.
-
Page 91: System Backup
※ The backup locations may vary depending on product specifications. 4. Choose Complete Backup or Partial Backup and click Browse button. ※ You can select Incremental Backup only when you have previously run Full Backup and the system has Using LG Smart Recovery... - Page 92 ※ If you have selected Incremental Backup, choose the existing Full backup data and click Open. 6. Once you complete the process to set the Complete Backup location, click Next. 7. Check the system backup preferences you have selected and click button. Using LG Smart Recovery...
- Page 93 ※ Depending on product specifications and backup file size, the system may need longer time to load the file. Do not turn off the power forcibly or reboots the system while it is loading the file. 9. After the system backup is complete, click to finish the process. Using LG Smart Recovery...
- Page 94 LG Smart Recovery. ※ When Windows 7 does not operate normally, restart the computer. When "PRESS F11 TO RUN LG RECOVERY.." appears on the screen during the booting process, press F11 to start LG Smart Recovery. ※ Backup important data by using Tools menu before starting the System Restore process.
- Page 95 ※ The Protected Hard Disk Area option will be presented only if you have selected the Safe Backup when you run LG Smart Recovery for the first time. ※ If you select the Protected Hard Disk Area, the system will be restored to the initial status when you have bought it. Using LG Smart Recovery...
- Page 96 ※ Depending on product specifications and backup file size, the system may need longer time to load the file. Do not turn off the power forcibly or reboots the system while it is loading the file. Using LG Smart Recovery...
- Page 97 7. Once the system restoration process completes, click and the system will automatically restart in 10 seconds. Using LG Smart Recovery...
- Page 98 2. Explorer: This tool shows drive disks and other hardware connected to the computer. ※ By using the Explorer, you can back up user data before proceeding the system restore. Delete Disk: You can delete rewritable disks. Using LG Smart Recovery...
- Page 99 Using LG Smart Recovery...
- Page 100 Using Smart Recovery Chapter8.
- Page 101 Center Using LG Smart Recovery Center...
- Page 102 2. When the booting completes, the System Restore screen will appear. 3. Click the System Restoration button. ※ Backup important data by using Tools menu before starting the System Restoration process. 4. Click Start button. Using LG Smart Recovery Center...
- Page 103 6. When it completes the restoration process, the system will present the Completed the Restoration message. 7. Click to restart the system automatically after 10 seconds. ※ Remove the LG Smart Recovery Center from the DVD-ROM once the System Restoration process completes. Using LG Smart Recovery Center...
- Page 104 Reinstalling the Driver Chapter9.
- Page 105 9-1. Reinstalling the Driver ※ The figures herein may differ by language selection and be subject to change without prior notice. ▶ Reinstalling the Driver Using LG Intelligent Update 1. Select Start > All Programs > LG Software > LG Intelligent Update to continue.
- Page 106 ▶ Installing LG Intelligent Update ※ LG Intelligent Update comes preinstalled in your system. You can also download the application from the Internet. 1. Go to "www.lge.com", download LG Intelligent Update and install the program. 2. When the installation screen appears, click Next >...
- Page 107 Reinstalling the Driver...
- Page 108 Using the Internet Chapter10.
-
Page 109: Using The Internet
10-1. Using the Internet There are various methods to access the Internet. Choose the most desirable method for user environments and system specifications. ※ Items displayed during the process may differ by model type and spec. ▶ Using LAN LAN refers to high speed network environments linking companies and households. 1. - Page 110 3. Click Change Adapter Settings. 4. Right-click Local Area Connections and select Properties. Using the Internet...
- Page 111 5. Select Internet Protocol Version 4 (TCP/IPv4) and click Properties. 6. On the General tab, select Obtain an IP address automatically. Using the Internet...
- Page 112 7. Click the button when the Internet Protocol (TCP/IP) properties are set. ▶ Using Wireless LAN ※ The Wireless LAN card is optional, and so it may not be installed in some models. Wireless LAN supports multi-terminal networking at home and office. Wireless network offers general network features (e.g.
- Page 113 button to search for the wireless network again. 2. Select the Access Point (wireless network) you want to use and click [Connect] to connect to the Access Point. Using the Internet...
- Page 114 ※ If a password is set for the wireless network, the Enter Password window appears. 3. Click the button to see if the Access Point is connected to the network. ■ Ensure the network is secured to share the computer and be careful not to share confidential data.
- Page 115 Using the Internet...
- Page 116 Secondary Storage Device Chapter11.
- Page 117 and Memory Secondary Storage Device and Memory...
-
Page 118: Using The Memory Card
11-1. Using the Memory Card ▶ Checking Available Memory Card ※ This product supports SD, MMC, Memory Stick memory cards. SD, MMC, Memory Stick cards are mobile storage devices like a floppy disk, widely used in many digital products these days. To use a mini micro SD... -
Page 119: Removing Memory Card
■ When the memory card is formatted, the data stored in the memory card will be deleted. Check whether there are important data before formatting the memory stick. ■ To format a memory card, right-click the memory card drive and select Format. When Format window appears, click Start to continue. - Page 120 To safely removing a memory card: 1. Click Safely Remove Hardware icon on the taskbar. 2. Click Safely Remove Hardware (S). 3. When Safety Remove Hardware window appears, click Stop. 4. When Stop Hardware window appears, click OK. Secondary Storage Device and Memory...
-
Page 121: About Memory
DDR3 SDRAM. ※ For T280 Series models that are installed with 1 GB(1024 MB) memory, you can replace 1 GB memory with 2 GB(2048 MB) one. ※ T280 Series provides 1 memory slot, and we recommend 2 GB(2048 MB) memory for memory upgrade. -
Page 122: Replacing The Memory
2. Speed: 1066 MHz (533 MHz x 2) / 1333 Mhz(667 Mhz x 2) 3. Type: 2 GB(2048 MB) ▶ Replacing the Memory ※ Main board configuration, memory socket and memory type may differ by model. 1. Loosen the screw on the rear side of the notebook PC to remove the cover. 2. - Page 123 3. Insert the memories to be replaced into the memory socket. 4. Push the memory in the direction of the arrow until you hear a "click" sound. Secondary Storage Device and Memory...
- Page 124 ■ Check the memory capacity during the second booting. If the memory capacity is not correct, install the main memory again. ■ Use only the expandable main memory module manufactured by LG. Using a main memory module other than recommended products may cause malfunctioning of the notebook PC.
- Page 125 Secondary Storage Device and Memory...
- Page 126 Appendix Chapter12.
-
Page 127: Specifications
12-1. Specifications ▶ Available Processors Intel Pentium Intel Core 2 Duo processor(L2 Cache Size: 2 MB) are supported. ※ The user must not replace or expand the CPU capacity arbitrarily. The CPU capacity differs depends on model type. ▶ Main Memory One 1 GB(1024 MB) or two 1 GB(1024 MB) memories are provided as main memory. -
Page 128: Hspa Modem
RJ 45 Jack ※ The LAN specifications may differ depending on the model. ▶ HSPA modem LG Electronics LUM850T or LUM900D (HSPA Modem) ※ The HSPA modem is optional, and so it may not be available in some models. ▶ Wireless LAN... - Page 129 ※ Wireless LAN specifications may differ by model type and cannot be arbitrarily changed by the user. ※ Manufacturers and installers cannot provide services related to human safety as this wireless device may cause radio interference. ▶ Weight Full Installation: About 1.4 kg (including 6-cell battery) / 1.5 kg (including 9-cell battery) Battery: Less than 310 g (6 cells) / 460 g (9 cells) ※...
-
Page 130: Power Consumption
12-2. Power Supply and Environments ▶ AC Adapter (Free Voltage) Power Capacity: 65 W ※ Input: AC 100 to 240 V, 1.5 A, 50 / 60 Hz ※ Output: DC 19 V, 3.42 A ※ Caution: Use a rated and legitimate AC adapter, suitable for the model. ▶...