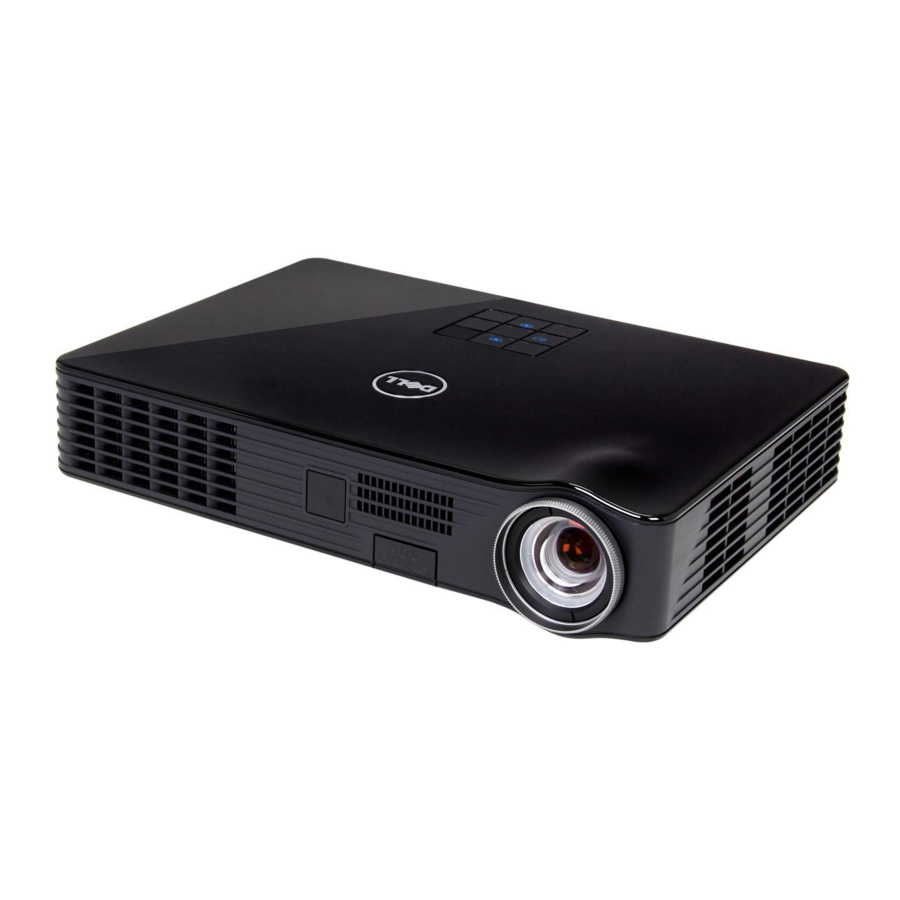
Dell M900HD User Manual
Hide thumbs
Also See for M900HD:
- User manual (84 pages) ,
- Setup manual (11 pages) ,
- Quick start manual (2 pages)

Related Manuals for Dell M900HD


Summary of Contents for Dell M900HD
- Page 1 Dell™ Mobile Projector (M900HD) User’s Guide Downloaded From projector-manual.com DELL Manuals...
- Page 2 Reproduction of these materials in any manner whatsoever without the written permission of Dell Inc. is strictly forbidden. Trademarks used in this text: Dell and the DELL logo are trademarks of Dell Inc.; DLP and DLP logo and DLP BrilliantColor are trademarks of T...
-
Page 3: Table Of Contents
......Appendix: Glossary ....Contents Downloaded From projector-manual.com DELL Manuals... -
Page 4: Your Dell Projector
Your Dell Projector Your projector comes with all the items shown below. Ensure that you have all the items, and contact Dell™ if anything is missing. Package Contents Power cable 1.2 m USB cable (USB-A to USB-A) Remote control Carrying case CD User’s Guide and Documentation Sleeve cover... -
Page 5: About Your Projector
Ensure that the projector is mounted in a well-ventilated area. Do not block the ventilation slots and openings on the projector. Ensure the projector operates between ambient temperatures (5 °C to 35 °C). Your Dell Projector Downloaded From projector-manual.com DELL Manuals... - Page 6 •Recommended Projector ceiling mount Kit (P/N: C3505). For more information, see the Dell Support website at dell.com/support. •For more information, see the Safety Information that shipped with your projector. •The M900HD projector can only be used indoors. Your Dell Projector Downloaded From projector-manual.com DELL Manuals...
-
Page 7: Connecting Your Projector
SD card slot for multimedia Audio-out connector playback (Video/ Music/ Photo/ Office Viewer) CAUTION: Before you begin any of the procedures in this section, follow the Safety Instructions as described on page 5. Connecting Your Projector Downloaded From projector-manual.com DELL Manuals... -
Page 8: Connecting To A Computer
Plug and Play. Only one USB (type A to A) cable is shipped with your projector. An additional USB (type A to A) cable can be purchased on the Dell website at www.dell.com. Connecting Your Projector Downloaded From projector-manual.com DELL Manuals... - Page 9 Refer to your computer’s documentation on how to configure a wireless connection. ® NOTE: To connect a computer via Intel WiDi, your computer must ® be Intel WiDi compatible. Connecting Your Projector Downloaded From projector-manual.com DELL Manuals...
-
Page 10: Connecting To Smartphone Or Tablet Using Wi-Fi
Android or iOS devices wirelessly. After installing and launching the application on your mobile device, enable Wi-Fi on your mobile device and connect to the projector network, Dell M900HD. For more Information, please visit go to Dell Support site at dell.com/support. -
Page 11: Connecting A Dvd Player
STANDBY/ON ENTER DVD/USB HOME RETURN MENU Power cord HDMI cable NOTE: The HDMI cable is not shipped with your projector. You can purchase the HDMI cable on the Dell website at www.dell.com. Connecting Your Projector Downloaded From projector-manual.com DELL Manuals... -
Page 12: Connecting To Multimedia
Connecting to Multimedia Connecting Multimedia Using a USB Flash Disk Power cord USB flash disk NOTE: The USB flash disk is not shipped with your projector. Connecting Your Projector Downloaded From projector-manual.com DELL Manuals... - Page 13 Connecting Multimedia Using a SD Card Power cord SD card NOTE: The SD card is not shipped with your projector. Connecting Your Projector Downloaded From projector-manual.com DELL Manuals...
-
Page 14: Using Your Projector
Press the Power button again. The cooling fans continue to operate for 120 seconds. To power off the projector quickly, press the Power button and hold for 1 second while the projector’s cooling fans are still running. Using Your Projector Downloaded From projector-manual.com DELL Manuals... -
Page 15: Adjusting The Projected Image
Lowering the Projector Height Press the Elevator button. Lower the projector, and then release the button to lock the elevator foot into position. 2 Elevator button Elevator foot (Angle of tilt: 0 to 9.6 degrees) Using Your Projector Downloaded From projector-manual.com DELL Manuals... -
Page 16: Adjusting The Projector Focus
Rotate the focus ring until the image is clear. The projector focuses at distances ranging between 2.98 ft to 7.87 ft (91 cm to 240 cm). Focus ring Using Your Projector Downloaded From projector-manual.com DELL Manuals... -
Page 17: Adjusting Projection Image Size
Adjusting Projection Image Size 80" (203.2 cm) 70" (177.8 cm) 60" (152.4 cm) 50" (127.0 cm) 40" (101.6 cm) 30" (76.2 cm) 2.98' (0.91 m) Using Your Projector Downloaded From projector-manual.com DELL Manuals... - Page 18 65 x 41 1.21 86 x 54 1.51 108 x 67 129 x 80 150 x 94 171 x 107 113 * This graph is for user reference only. * Offset Ratio: 105±5% Using Your Projector Downloaded From projector-manual.com DELL Manuals...
-
Page 19: Using The Control Panel
Press to navigate through the On-Screen Display (OSD) Menu items. Power Turns the projector on or off. For more information, see "Turning Your Projector On" on page 14 and "Turning Your Projector Off" on page 14. Using Your Projector Downloaded From projector-manual.com DELL Manuals... - Page 20 Display (OSD) Menu items. ® Press to toggle through Intel WiDi, Wi-Fi, DoUSB, HDMI, USB, SD, and Internal Memory sources when multiple sources are connected to the projector. Enter Press to confirm the selected item. Using Your Projector Downloaded From projector-manual.com DELL Manuals...
-
Page 21: Using The Remote Control
Pressing the Video Mode button again will switch between modes. Aspect ratio Press to change aspect ratio of a displayed image. Blank screen Press to hide/unhide the image. Using Your Projector Downloaded From projector-manual.com DELL Manuals... - Page 22 Press to stop playing media file. 16 Right Press to navigate through the On-Screen Display (OSD) Menu items. Volume up Press to increase the volume. 18 Volume down Press to decrease the volume. Using Your Projector Downloaded From projector-manual.com DELL Manuals...
-
Page 23: Installing The Remote Control Battery
NOTE: When you use the remote control for the first time, there is a plastic sheet between the battery and its contact. Remove the sheet before use. Replace the battery holder. Using Your Projector Downloaded From projector-manual.com DELL Manuals... -
Page 24: Operating Range With Remote Control
Operating range Angle ±20° Distance 7 m/22.97 feet Angle NOTE: Actual operating range may slightly differ from the diagram. Weak battery will also prevent the remote control from properly operating the projector. Using Your Projector Downloaded From projector-manual.com DELL Manuals... -
Page 25: Using The On-Screen Display
35. NOTE: — You may also connect USB cable in Internal Memory TORAGE source to execute copy, delete, move and more instructions from your computer to projector internal memory and SD card. Using Your Projector Downloaded From projector-manual.com DELL Manuals... - Page 26 Custom (set your preferred settings) mode. VOLUME The Volume menu allows you adjust the volume setting of your projector. — Press to decrease the volume and to increase the volume. OLUME Using Your Projector Downloaded From projector-manual.com DELL Manuals...
- Page 27 —Press and use to display white HITE NTENSITY intensity. NOTE: If you adjust the settings for Brightness, Contrast, Color Temperature, and White Intensity the projector automatically switches to Custom mode. Using Your Projector Downloaded From projector-manual.com DELL Manuals...
- Page 28 —Press to activate the Zoom AVIGATION Navigation menu. to navigate the projection screen. — Select and press to activate projector settings. ROJECTOR ETTINGS The projector settings menu provides the following options: Using Your Projector Downloaded From projector-manual.com DELL Manuals...
- Page 29 2 seconds. You can also invoke the test pattern 2 by pressing and holding down buttons on the control panel simultaneously for 2 seconds. Test Pattern 1: Test Pattern 2: Using Your Projector Downloaded From projector-manual.com DELL Manuals...
- Page 30 By default, this function is disabled. You can enable this feature by selecting Enable. If the password has been set before, key in the password first and select the function. This password Using Your Projector Downloaded From projector-manual.com DELL Manuals...
- Page 31 If you have entered an incorrect password, you will be given two more chances. After three invalid attempts, the projector will automatically turn off. NOTE: If you forget your password, contact DELL or a qualified service person. To disable the password function, select the Disable option to close the function.
- Page 32 To delete the password, select the Delete option. —Key in the original password. Then, enter HANGE ASSWORD the new password and confirm the new password again. Using Your Projector Downloaded From projector-manual.com DELL Manuals...
- Page 33 Normal mode operates at full power level. ECO mode operates at a lower power level which may provide longer LED life, quieter operation, and dimmer luminance output on the screen. — The information menu displays the current M900HD NFORMATION projector settings. Using Your Projector...
- Page 34 LANGUAGE Allows you to set the language for the OSD. Press to select different languages and press to change the language. Using Your Projector Downloaded From projector-manual.com DELL Manuals...
-
Page 35: Multimedia Introduction
Max. Sample Rate (KHz) Max. Bit Rate (Kbps) LPCM 48 KHz 320 Kbps MPEG-1 Layer 3 48 KHz 320 Kbps 48 KHz 320 Kbps 48 KHz 320 Kbps 48 KHz 320 Kbps Using Your Projector Downloaded From projector-manual.com DELL Manuals... - Page 36 Follow these steps to playback the Photo, Video, or Music files on your projector: Connect the power cable and turn on the projector by pressing the power button. Plug in a USB flash disk to your projector. Using Your Projector Downloaded From projector-manual.com DELL Manuals...
- Page 37 Select the multimedia files: Photo, Video, Music, or Office Viewer, and then press the to start playing. Or select the Setup option to change multimedia settings. See "Multimedia Setup" on page 43. Using Your Projector Downloaded From projector-manual.com DELL Manuals...
- Page 38 Connect the power cable and turn on the projector by pressing the power button. Plug in a SD card to your projector. The image input source will be automatically switched to SD screen when you plug in a SD card. Using Your Projector Downloaded From projector-manual.com DELL Manuals...
- Page 39 Select the multimedia files: Photo, Video, Music, or Office Viewer, to start playing. Or select the Setup option to and then press the change multimedia settings. See "Multimedia Setup" on page 43. Using Your Projector Downloaded From projector-manual.com DELL Manuals...
- Page 40 Follow these steps to playback the Photo, Video, or Music files on your projector: Connect the power cable and turn on the projector by pressing the power button. Access the Input Source menu, select the Internal Memory option and press the button. Using Your Projector Downloaded From projector-manual.com DELL Manuals...
- Page 41 Select the multimedia files: Photo, Video, Music, or Office Viewer, and then press the to start playing. Or select the Setup option to change multimedia settings. See "Multimedia Setup" on page 43. Using Your Projector Downloaded From projector-manual.com DELL Manuals...
- Page 42 Use the up, down, left, and right buttons for navigation and button on your projector's control panel or remote control to select. Button Down Left Right Enter Menu Back to Previous Next page previous function function page function menu Using Your Projector Downloaded From projector-manual.com DELL Manuals...
- Page 43 Options OVIE are: Once, Loop one, Loop all, and Shuffle. — Press to select movie play mode. Options USIC are: Once, Loop one, Loop all, and Shuffle. Using Your Projector Downloaded From projector-manual.com DELL Manuals...
-
Page 44: Intel® Wireless Display (Widi) Installation
Advanced-N 6200, 6205, 6230, or 6235 ® ® Intel Centrino Advanced-N 6205 for Desktop ® ® Intel Centrino Wireless-N + WiMAX 6150 ® ® Intel Centrino Advanced-N + WiMAX 6250 ® ® Intel Centrino Ultimate-N 6300 Using Your Projector Downloaded From projector-manual.com DELL Manuals... - Page 45 Windows 8 32-bit and 64-bit editions ® For more information, see the Intel WiDi website at www.intel.com/go/widi. ® Enable Intel WiDi on the Projector Connect the power cable and press the power button. Using Your Projector Downloaded From projector-manual.com DELL Manuals...
- Page 46 Select the input source as Intel WiDi. ® The Intel WiDi Guide Screen shown below appears: Take note of the ADAPTER NAME and PIN CODE. You will need this information to log in later. Using Your Projector Downloaded From projector-manual.com DELL Manuals...
- Page 47 ® Intel WiDi, you will see the “Intel WiDi” application in your search results. Connect your computer to Dell M900HD. Login ® Login with the PIN Code provided in Step 4 of Intel Wireless Display (WiDi) Installation, then click OK.
-
Page 48: Wi-Fi Display Installation
A supported WLAN adapter for a WLAN connection (any NDIS-compliant 802.11b or 802.11g or 802.11n Wi-Fi device) Web browser Microsoft Internet Explorer 6.0 or 7.0 (recommended) or 8.0, Firefox 2.0, Safari 3.0, and above Using Your Projector Downloaded From projector-manual.com DELL Manuals... - Page 49 Connect the power cable and press the power button. Press the Menu button on your projector control panel or remote control. NOTE: buttons to navigate and to select. Select the input source as Wi-Fi. Using Your Projector Downloaded From projector-manual.com DELL Manuals...
- Page 50 The Wireless Guide Screen shown below appears: Take note of the Wireless Network (SSID), IP Address, and Access Code. You will need this information to log in later. Using Your Projector Downloaded From projector-manual.com DELL Manuals...
- Page 51 Connect your computer to the M900HD wireless network. NOTE: • Your computer must have wireless network function to detect the connection. • When you connect to the M900HD wireless network, you will lose wireless connectivity with other wireless networks. ® NOTE: Remember to turn off all proxies.
- Page 52 If the web page does not load automatically, enter the IP address (default IP address is 192.168.100.10) noted from the projector’s screen in the browser’s address bar. The M900HD Web Management page opens. For first time use, click Download. Select the appropriate operating system, then click Download.
- Page 53 If you are unable to install the application because of inadequate rights on the computer, please contact your network administrator. The installation software will launch. Follow the on-screen instructions to complete setup. Using Your Projector Downloaded From projector-manual.com DELL Manuals...
- Page 54 If the program does not launch automatically, you can double-click the icon on the desktop to start the application. Select the Dell M900HD Wireless Mobile, and then click OK. Login Login with the Access Code provided in Step 4 of Wi-Fi Display Installation, then click OK.
- Page 55 Click to activate the share mode. Display mode Click to change the display mode. Pause Click to pause projection. Play Click to project the image in full screen. Sound Click to enable the sound. Using Your Projector Downloaded From projector-manual.com DELL Manuals...
- Page 56 Using the Settings Click to display the settings menu. — Allows you to setup the resolution. ESOLUTION — Allows you to setup the default projection mode. ISPLAY Using Your Projector Downloaded From projector-manual.com DELL Manuals...
- Page 57 — Allows you to change the audio settings. UDIO USB D — Allows you to create USB dongle. See "Make Application ONGLE Token" on page 70. Using Your Projector Downloaded From projector-manual.com DELL Manuals...
- Page 58 — Displays the application version. BOUT Using Your Projector Downloaded From projector-manual.com DELL Manuals...
-
Page 59: Managing The Projector From Web Management
IP address at the web browser (default IP address is 192.168.100.10). • Select the language for web management from the list. • Click any menu item on the left tab to access the page. Using Your Projector Downloaded From projector-manual.com DELL Manuals... - Page 60 Download the Dell Projector Connection Manager See also "Wi-Fi Display Installation" on page 48. Click the Download button of the corresponding operating system of your computer. Using Your Projector Downloaded From projector-manual.com DELL Manuals...
- Page 61 An administrator password is required to access the Admin page. • Admin Password: Enter the administrator password and then click Login. The default password is "admin". To change the password, see "Change Passwords" on page 66. Using Your Projector Downloaded From projector-manual.com DELL Manuals...
- Page 62 System Status Displays the Network Status, Connection Status, and Projector Status information. Using Your Projector Downloaded From projector-manual.com DELL Manuals...
- Page 63 DHCP Server Setup • Choose Auto to automatically set up the Start IP, End IP, Subnet Mask, Default Gateway, and DNS Server address from a DHCP server, or Disable to disable this function. Using Your Projector Downloaded From projector-manual.com DELL Manuals...
- Page 64 Key: If Encryption is enabled, you have to set key value according to the Encryption mode you selected. Click the Apply button to save and apply changes. The projector must be restarted for the changes to take effect. Using Your Projector Downloaded From projector-manual.com DELL Manuals...
- Page 65 • Use the following code: Enter a 4-digit code. This code will be used to log in to the system. Click the Apply button to save and apply changes. The projector must be restarted for the changes to take effect. Using Your Projector Downloaded From projector-manual.com DELL Manuals...
- Page 66 This page allows you to change the administrator password. • Enter New Password: Enter the new password. • Confirm New Password: Enter the password again and click Apply. NOTE: Contact Dell if you forget your administrator password. Using Your Projector Downloaded From projector-manual.com DELL Manuals...
- Page 67 Reset to Default Click the Apply button to restore the wireless/network setup to its factory default settings. Using Your Projector Downloaded From projector-manual.com DELL Manuals...
- Page 68 Use the Firmware Upgrade page to update your projector’s Wi-Fi and Intel WiDi firmware. To start firmware update, follow these steps: You can download the firmware files from dell.com/support. Press Browse to select the file to update. Click the Update button to start. Wait while the system updates the firmware in your device.
- Page 69 Reboot System Click Reboot to reboot the system. Using Your Projector Downloaded From projector-manual.com DELL Manuals...
-
Page 70: Make Application Token
The following screen appears. Click Next. Plug a flash drive into any of the USB ports on your computer. Select the drive from the list, then click Next. Click Finish to close the wizard. Using Your Projector Downloaded From projector-manual.com DELL Manuals... -
Page 71: Troubleshooting Your Projector
Troubleshooting Your Projector If you experience problems with your projector, see the following troubleshooting tips. If the problem persists, contact Dell (see Contacting Dell™ on page 79). Problem Possible Solution • Ensure that the projector is turned on. No image appears on the •... - Page 72 If you experience difficulty in changing resolutions, or if your monitor freezes, restart all the equipment and the projector. If you are not using a Dell™ portable computer, see your documentation. If images are not displayed properly, please upgrade the video driver of your computer.
- Page 73 Display over USB Should run automatically. To manually run USB display, go to My Computer and run "USB_Display.exe". NOTE: You may require administrator level access to install the driver. Contact your network administrator for support. Troubleshooting Your Projector Downloaded From projector-manual.com DELL Manuals...
-
Page 74: Guiding Signals
If the problem persists, contact Dell. One of the fans has failed. The AMBER breakdown projector automatically shuts down. Flashing If the problem persists, contact Dell. LED failure LED defective. AMBER R-LED driver Air vents might be blocked or the R over-heated LED driver has overheated. -
Page 75: Specifications
Standby mode: < 0.5 W Audio 1 speaker x 3 watt RMS Noise Level Full-on mode: Typical: 36 dB(A), Maximum: 38 dB(A) Eco mode: Typical: 34 dB(A), Maximum: 36 dB(A) Weight 3.5 lbs (1.59 Kg) Specifications Downloaded From projector-manual.com DELL Manuals... - Page 76 The USB thumb drive can support up to 32 GB. SD card slot: One SD connector for supporting multimedia playback (Video/Music/Photo/Office Viewer). The SD card can support up to 32 GB. Specifications Downloaded From projector-manual.com DELL Manuals...
- Page 77 Usage of a projector in stressful conditions which may include dusty environments, under high temperatures, many hours per day, and abrupt powering-off will most likely result in a LED’s shortened operating life span or possible LED failure. Specifications Downloaded From projector-manual.com DELL Manuals...
- Page 78 1680 x 1050 59.954 65.290 146.250 1280 x 960 85.002 85.938 148.500 1920 x 1080 60.000 67.500 148.500 1024 x 768 119.989 97.551 115.500 NOTE: Support HDMI 1024x768@120 Hz DLP Link 3D, Frame sequential Specifications Downloaded From projector-manual.com DELL Manuals...
-
Page 79: Contacting Dell
Dell™ provides several online and telephone-based support and service options. Availability varies by country and product, and some services may not be available in your area. To contact Dell for sales, technical support, or customer service issues: 1 Visit go to www.dell.com/contactDell. -
Page 80: Appendix: Glossary
Diagonal Screen — A method of measuring the size of a screen or a projected image. It measures from one corner to the opposite corner. A 9 Glossary Downloaded From projector-manual.com DELL Manuals... - Page 81 Reverse Image — Feature that allows you to flip the image horizontally. When used in a normal forward projection environment text, graphics, etc. are backwards. Reverse image is used for rear projection. SVGA — Super Video Graphics Array — 800 x 600 pixels count. Glossary Downloaded From projector-manual.com DELL Manuals...
- Page 82 Zoom Lens Ratio — Is the ratio between the smallest and largest image a lens can project from a fixed distance. For example, a 1.4:1 zoom lens ratio means that a 10 foot image without zoom would be a 14 foot image with full zoom. Glossary Downloaded From projector-manual.com DELL Manuals...
- Page 83 Audio-out connector 7 HDMI connector 7 On-Screen Display 25 Power cord connector 7 Input Source 25 Security cable slot 7 Contact Dell 4, 73 Control Panel 19 Password 30 phone numbers 79 Power Saving 33 Index Downloaded From projector-manual.com DELL Manuals...
- Page 84 Noise Level 75 Number of Pixels 75 Power Consumption 75 Power Supply 75 Projection Distance 75 Projection Lens 75 Projection Screen Size 75 Uniformity 75 Video Compatibility 75 Weight 76 support contacting Dell 79, 80 Index Downloaded From projector-manual.com DELL Manuals...