Table of Contents
Advertisement
E439BBD_EN.book Page 2 Wednesday, May 31, 2006 4:01 PM
Introduction
Precautions
WARNING :
TO REDUCE THE RISK OF FIRE OR ELECTRIC SHOCK, DO NOT EXPOSE
THIS APPLIANCE TO RAIN OR MOISTURE.
RISK OF ELECTRIC SHOCK
DO NOT OPEN
CAUTION:
TO REDUCE THE RISK OF ELECTRIC SHOCK, DO NOT
REMOVE COVER (OR BACK). NO USER SERVICEABLE
PARTS INSIDE. REFER SERVICING TO QUALIFIED
SERVICE PERSONNEL.
The important note is located on the rear of the cabinet.
Laser Safety
This unit employs a laser. Only a qualified service
personnel should remove the cover or attempt to
service this unit, due to the possibility of eye injury.
CAUTION:
USE OF CONTROLS OR
ADJUSTMENTS OR PERFORMANCE
OF PROCEDURES OTHER THAN
THOSE SPECIFIED HEREIN MAY
RESULT IN HAZARDOUS RADIATION
EXPOSURE.
CAUTION:
VISIBLE AND INVISIBLE LASER
RADIATION WHEN OPEN AND
INTERLOCK DEFEATED. DO NOT
STARE INTO BEAM.
LOCATION: INSIDE, NEAR THE DECK
MECHANISM.
Power Supply
The power supply is connected and the unit is live
when the mains cable is plugged into a 220–240 V ,
50 Hz AC outlet. To operate the unit, press
[
ON / STANDBY].
WARNING: LIVE PARTS INSIDE.
DO NOT REMOVE ANY SCREWS.
2
EN
CAUTION
The lightning flash with
arrowhead symbol, within an
equilateral triangle, is intended to
alert the user to the presence of
uninsulated "dangerous
voltage" within the product's
enclosure that may be of
sufficient magnitude to constitute
a risk of electric shock to persons.
The exclamation point within an
equilateral triangle is intended
to alert the user to the presence
of important operating and
maintenance (servicing)
instructions in the literature
accompanying the appliance.
Caution
1. Do not attempt to open the cabinet. There are no
parts inside you can service. Refer all servicing to
qualified service personnel.
2. Slots and openings in the cabinet at the sides and
underneath are provided for ventilation. To ensure
reliable operation and to protect the unit from
overheating, these openings must not be blocked
or covered.
Avoid installation in enclosed spaces such as
bookcases unless suitable ventilation is provided.
3. Keep the unit away from radiators and other heat
sources.
4. Avoid use near strong magnetic fields.
5. Do not push objects of any kind into the unit
through the cabinet slots or openings as they
could touch electrically live parts or short circuit
parts resulting in a fire or electric shock.
6. Do not spill liquid on the unit. If liquid is spilled
and enters the unit, consult qualified service
personnel.
7. Do not stand the unit vertically. Use the unit in a
horizontal (flat) position only.
8. This product is in Stand-by mode when turned off
while the mains cable is connected.
9. Do not place any combustible objects on the
device (candles, etc.).
10. Before moving the unit, be sure to remove any
discs and unplug the mains cable from the AC
outlet.
11. Disconnect the mains plug to shut off when find
troubles or not in use.
12. The mains plug shall remain readily operable.
13. Read both manual instructions to ensure correct
and safe installation and interconnection of the
unit in multimedia systems.
14. Keep the distances 20 cm around apparatus of
ventilation openings.
Advertisement
Table of Contents

Related Manuals for Toshiba RD-XV45KB


Summary of Contents for Toshiba RD-XV45KB
-
Page 1: Introduction
E439BBD_EN.book Page 2 Wednesday, May 31, 2006 4:01 PM Introduction Precautions WARNING : TO REDUCE THE RISK OF FIRE OR ELECTRIC SHOCK, DO NOT EXPOSE THIS APPLIANCE TO RAIN OR MOISTURE. The lightning flash with CAUTION arrowhead symbol, within an equilateral triangle, is intended to RISK OF ELECTRIC SHOCK alert the user to the presence of... -
Page 2: Declaration Of Conformity
We declare that the following product: For your own safety read the following instructions HDD & DVD / Video Cassette Recorder carefully before attempting to connect this unit to Model RD-XV45KB mains. Trade Name: TOSHIBA The wires in this mains lead are coloured in is in compliance with following Regulations. - Page 3 E439BBD_EN.book Page 4 Wednesday, May 31, 2006 4:01 PM Avoid the Hazards of Electrical Shock and Fire • Do not handle the mains cable with wet hands. • Do not pull on the mains cable to disconnect it from AC outlet. Grasp it by the plug. •...
-
Page 4: Accessories Supplied
E439BBD_EN.book Page 5 Wednesday, May 31, 2006 4:01 PM Accessories Supplied HDD HANDLING • HDD is a precision apparatus that is susceptible to • Remote control with two R6 (AA) batteries vibration, strong impact or dirt. Depending on the installation environment or OPEN/ TIMER INPUT... -
Page 5: Table Of Contents
E439BBD_EN.book Page 6 Wednesday, May 31, 2006 4:01 PM Table of contents Introduction ..........2 Editing ...........69 Precautions ............2 Disc editing ............69 Features ..............7 Deleting titles ............70 Choosing a disc............. 9 Protecting / Undo protecting titles......72 Guide to the Owner’s Manual...... -
Page 6: Features
E439BBD_EN.book Page 7 Wednesday, May 31, 2006 4:01 PM Features Automatic DVD Menu Making (Video mode only) Page 50] The following features are available with this unit. DVD Menus are made automatically when a Video mode disc is finalised. Recording Automatic Finalise (Video mode only) This unit allows you to record on the HDD, a DVD-RW Page 50]... - Page 7 E439BBD_EN.book Page 8 Wednesday, May 31, 2006 4:01 PM Editing Deleting Titles [ Pages 70-71] You can delete titles which you do not need anymore. Making Playlists [ Pages 70-80] While the Original List remains as it is, you can edit titles in the Playlist.
-
Page 8: Choosing A Disc
• Handle the disc according to the disc instruction manual. • Toshiba cannot guarantee that all discs bearing the DVD or CD logos will operate as expected. Additionally, Toshiba cannot guarantee those discs recorded in this device will operate properly in other DVD players, recorders and/or personal computer drives. - Page 9 • This unit cannot play the DVD-R discs recorded in VR mode (Video Recording Format). • Toshiba is not liable for any damage or loss caused directly or indirectly by the malfunction of this recorder, including, without limitation, any one of the following: •...
- Page 10 E439BBD_EN.book Page 11 Wednesday, May 31, 2006 4:01 PM On DVD-R discs Marks on DVD video discs The following are examples of marks and the Standards meanings. • DVD-R for General Ver. 2.0 discs can be used for recording and playback. Mark Meanings •...
-
Page 11: Structure Of Disc Contents
E439BBD_EN.book Page 12 Wednesday, May 31, 2006 4:01 PM Structure of disc contents On handling discs Normally, DVD video discs are divided into titles, and • Do not touch the playback side of the disc. the titles are subdivided into chapters. Video CDs/Audio CDs are divided into tracks. - Page 12 E439BBD_EN.book Page 13 Wednesday, May 31, 2006 4:01 PM Discs and purposes The table shows main functions which are available on this recorder per disc category. This will help you choose discs. DVD-RW disc Video mode DVD-RW disc VR mode DVD-R disc Video mode Characteristics on this Suitable for saving data in...
-
Page 13: Guide To The Owner's Manual
E439BBD_EN.book Page 14 Wednesday, May 31, 2006 4:01 PM Guide to the Owner’s Manual Symbols used in the Owner’s Manual To show what recording mode or disc type applies to each function, the following symbols appear at the beginning of each operating item. Symbol Description Available to (internal) HDD... -
Page 14: Functional Overview
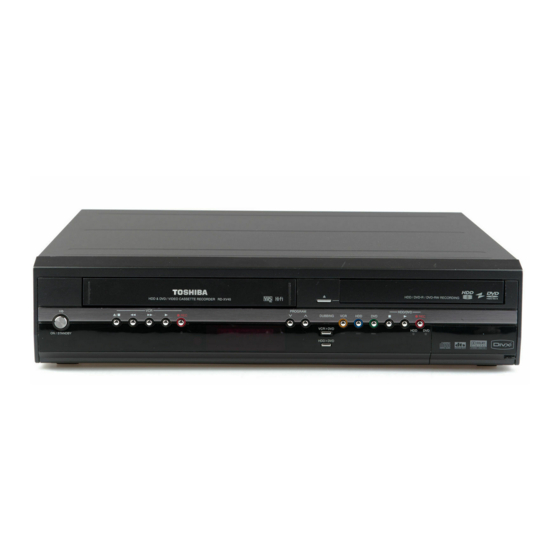
E439BBD_EN.book Page 15 Wednesday, May 31, 2006 4:01 PM Functional Overview Front Panel 8 9 10 11 HDD/DVD PROGRAM DUBBING ON / STANDBY S-VIDEO VIDEO 16 15* ON / STANDBY button 16 Device Select Buttons / Indicators : Press to turn the unit on / off. -
Page 15: Rear Panel
E439BBD_EN.book Page 16 Wednesday, May 31, 2006 4:01 PM Rear Panel HDD / DVD / VCR HDD/DVD AUDIO S-VIDEO DIGITAL AV2 (DECODER) AUDIO OUT HDD/DVD/VCR AERIAL COAXIAL AV1 (TV) RF OUT 1 Mains cable 5 AUDIO OUT jacks (HDD / DVD) •... -
Page 16: Remote Control
E439BBD_EN.book Page 17 Wednesday, May 31, 2006 4:01 PM Remote Control 4 MENU / LIST button (HDD / DVD) Displays the Disc Menu. Changes the Original List and the Playlist. OPEN/ TIMER INPUT CLOSE PROG. SELECT 5 Cursor buttons : Selects items or settings. - Page 17 E439BBD_EN.book Page 18 Wednesday, May 31, 2006 4:01 PM Device Select Buttons: 20 TOP MENU button (HDD / DVD) : Displays the Title List. 28 VCR button 21 ENTER button : Press to confirm or select Press to activate the remote control in VCR menu items.
-
Page 18: Installing Batteries In The Remote Control
E439BBD_EN.book Page 19 Wednesday, May 31, 2006 4:01 PM Installing batteries in the remote HDD / DVD / VCR modes control switching Install two R6 (AA) batteries (supplied) into the Because this product is a combination of a VCR, a remote control, carefully match with the polarity HDD and a DVD recorder, you must select first which indicated inside the battery compartment. -
Page 19: Guide To Display Information
E439BBD_EN.book Page 20 Wednesday, May 31, 2006 4:01 PM Guide to Display Information Guide to Setup Menu The Display Menu gives you information on the This unit uses the following on-screen menu for most playback status of the HDD or DVD. operations. -
Page 20: Front Panel Display Guide
E439BBD_EN.book Page 21 Wednesday, May 31, 2006 4:01 PM Front Panel Display Guide TIME SHIFT CD R W 1 TIME SHIFT 5 Disc type and current status of the unit Appears during the Time Shift Playback (HDD). : Appears when an Audio CD or a disc with MP3 / JPEG / DivX files is on the disc tray. -
Page 21: Connections
E439BBD_EN.book Page 22 Wednesday, May 31, 2006 4:01 PM Connections To Aerial jack Antenna Cable Audio/Video cable (not supplied) Signal Scart/RCA cable (not supplied) Scart cable (not supplied) Scart adaptor (not supplied) RF cable (supplied) HDD / DVD / VCR HDD/DVD DIGITAL AUDIO... -
Page 22: Digital Audio For Better Sound Quality
E439BBD_EN.book Page 23 Wednesday, May 31, 2006 4:01 PM For clear digital sound quality, use Note the DIGITAL AUDIO OUT (COAXIAL) • When you record a TV programme from a Satellite jack to connect your digital audio Box, you must connect a Scart cable to equipment. -
Page 23: Basic Setup
E439BBD_EN.book Page 24 Wednesday, May 31, 2006 4:01 PM Basic Setup For the first time use Right after the purchase of the unit, do the Initialise Setting by doing the following procedures. This menu may not appear if you have already turned on the unit. - Page 24 E439BBD_EN.book Page 25 Wednesday, May 31, 2006 4:01 PM Select “Position” using To skip a preset channel [Cursor ], then press [Cursor You can set the unit to skip channels you can no longer receive or seldom watch when you access Select the position number you want channels using [PROG.
-
Page 25: Setting The Clock
E439BBD_EN.book Page 26 Wednesday, May 31, 2006 4:01 PM Note Setting the clock • If you want to cancel “Auto Clock Setting”, select “Off” using [Cursor ] at step 5, and then press [ENTER]. Auto Clock Setting • The default setting of “Auto Clock Setting” is “On”. •... -
Page 26: Selecting The Tv Aspect Ratio
E439BBD_EN.book Page 27 Wednesday, May 31, 2006 4:01 PM Select a desired option using [Cursor ], then press [ENTER]. Selecting the TV aspect ratio Your setting is activated. You can select the TV aspect ratio to match the • The default setting is “4:3 Letter Box”. formats of what you are playing back on the unit and Press [SETUP] to exit. -
Page 27: Recording
E439BBD_EN.book Page 28 Wednesday, May 31, 2006 4:01 PM Recording Information on supported media Media types ✬✬✬: Most suitable. ✬✬: Can be used. ✬: Some functions are limited. —: Cannot be used. You want to DVD-RW DVD-RW DVD-R Video ✬✬✬ ✬✬✬... - Page 28 E439BBD_EN.book Page 29 Wednesday, May 31, 2006 4:01 PM To select the Rec Mode you prefer, press Recordable discs [REC MODE]. The information of the selected media (internal HDD or DVD) will be displayed. • Discs that can be used with this recorder: DVD-R: 2x, 4x, 8x or 16x DVD-RW: 2x or 4x •...
-
Page 29: Restrictions On Recording
E439BBD_EN.book Page 30 Wednesday, May 31, 2006 4:01 PM Restrictions on recording Making discs playable in other DVD players (Finalise) You cannot record copy-protected video using this unit. Copy-protected video includes DVD-Videos and After recording, you must finalise the disc to play it some satellite broadcasts. -
Page 30: Formatting A Disc
E439BBD_EN.book Page 31 Wednesday, May 31, 2006 4:01 PM Formatting a pre-recorded disc Formatting a disc (Disc Format) Video Selecting the recording format type DVD-RW DVD-RW DVD-RW DVD-RW If you format a pre-recorded disc, all the data contained in it will be erased and the disc will return to Video DVD-RW DVD-RW... - Page 31 E439BBD_EN.book Page 32 Wednesday, May 31, 2006 4:01 PM Formatting is complete when the Creating chapter marks automatically progress bar reaches to the right end. Video DVD-RW DVD-RW DVD-RW DVD-RW DVD-R DVD-R You can sort out the recording by inserting chapter marks every set time interval.
-
Page 32: Selecting The Sound Mode
E439BBD_EN.book Page 33 Wednesday, May 31, 2006 4:01 PM Note Selecting the sound mode • The actual setting time for chapter marks may differ from the time you selected in Video mode. This unit can receive bilingual broadcasts. • Depending the recording time, a chapter with no image may be created at the end. -
Page 33: Basic Recording
E439BBD_EN.book Page 34 Wednesday, May 31, 2006 4:01 PM Setting Bilingual Recording Audio Basic Recording Video DVD-RW DVD-RW DVD-R DVD-R Video You can select either “Main” or “Sub” audio to record a DVD-RW DVD-RW DVD-RW DVD-RW DVD-R DVD-R bilingual broadcast in Video mode. Follow the steps below to record a TV programme. -
Page 34: One-Touch Timer Recording (Otr)
E439BBD_EN.book Page 35 Wednesday, May 31, 2006 4:01 PM Press [REC / OTR I] (HDD / DVD) repeatedly to change the recording One-touch Timer Recording time. (OTR) HDD MODE Video DVD-RW DVD-RW DVD-RW DVD-RW DVD-R DVD-R This is a simple way to set the recording time in blocks of 30 minutes. -
Page 35: Timer Recording
E439BBD_EN.book Page 36 Wednesday, May 31, 2006 4:01 PM 5 Recording Media (HDD or DVD): To record onto the HDD, select “HDD”. To record Timer Recording onto a disc, select “DVD”. VCR is not compatible with Timer Recording. Video 6 Rec Mode: DVD-RW DVD-RW DVD-RW... - Page 36 E439BBD_EN.book Page 37 Wednesday, May 31, 2006 4:01 PM • If the starting time and the end time are the same, it Confirmation window will appear. will be recognised as 24 hours recording. • If the starting time you entered is already in the past, Delete this Timer Program? the recording will start as soon as you activate the Yes es...
-
Page 37: Satellite Link
E439BBD_EN.book Page 38 Wednesday, May 31, 2006 4:01 PM Hints for Timer Recording Satellite Link The priority of overlapped settings: When the Timer Programmings are overlapped, you You can set the unit to start recording whenever it will receive a warning message. detects the scart control signal from the external tuner. - Page 38 E439BBD_EN.book Page 39 Wednesday, May 31, 2006 4:01 PM Select “On” using [Cursor • When a regular Timer Recording and the Satellite Link Timer Recording are overlapped, the regular then press [ENTER]. Timer Recording has priority. • “Warning The unit is now turned off to be in Satellite Link standby mode.”...
-
Page 39: Information On Dubbing
E439BBD_EN.book Page 40 Wednesday, May 31, 2006 4:01 PM One Touch Dubbing from HDD to DVD Information on dubbing Video DVD-RW DVD-RW DVD-RW DVD-RW DVD-R DVD-R With One Touch Dubbing, you can start dubbing right away with just one touch. You can copy a HDD / DVD disc to a videotape or •... - Page 40 E439BBD_EN.book Page 41 Wednesday, May 31, 2006 4:01 PM Method 3: If you press [DUBBING HDD DVD] on Note the front panel in stop mode without • You cannot switch the device mode except between selecting any title, the unit will start DVD and VCR during HDD to DVD dubbing.
-
Page 41: Front Panel
E439BBD_EN.book Page 42 Wednesday, May 31, 2006 4:01 PM Press [DUBBING VCR DVD] on the Dubbing from HDD / DVD to videotape front panel. The dubbing will start. Dubbing Dubbing You can copy the contents of the HDD / DVD to a videotape. - Page 42 E439BBD_EN.book Page 43 Wednesday, May 31, 2006 4:01 PM For HDD to VCR dubbing: Repeat the steps 4 to 5 until you Select “HDD VCR” using select all programmes to be dubbed. [Cursor ], then press [ENTER]. After selecting all the programmes For DVD to VCR dubbing: you want, press [RETURN] to go Select “DVD...
- Page 43 E439BBD_EN.book Page 44 Wednesday, May 31, 2006 4:01 PM Just Dubbing: Bi-directional Dubbing between HDD When dubbing from HDD to DVD if you select “Auto” in the Rec Mode Menu, the unit will calculate the and DVD duration of the dubbing material and the remaining time in the disc and automatically select the most suitable Rec Mode for the dubbing.
- Page 44 E439BBD_EN.book Page 45 Wednesday, May 31, 2006 4:01 PM Select “Select Program” using After selecting all the programmes [Cursor ], then press [ENTER]. you want, press [RETURN] to go back to the Dubbing Top Menu. Or Program List will appear. press [ENTER] to call up the option DUBBING window and select “Decide”.
- Page 45 E439BBD_EN.book Page 46 Wednesday, May 31, 2006 4:01 PM To stop the dubbing while in the dubbing Changing the order of the dubbing list preparation mode: • Press the Device Select Button of the recording If you are in the Dubbing Top Menu, device first (for example, if you are dubbing to DVD, press [DVD] first), then press [STOP S].
- Page 46 E439BBD_EN.book Page 47 Wednesday, May 31, 2006 4:01 PM Limitations (VCR to DVD): Example: VCR ➞ HDD • You cannot dub to the finalised Video mode DVDs. DUBBING Dubbing Direction Rec Mode • You cannot dub to the protected VR mode DVDs.
-
Page 47: Settings For External Equipment
E439BBD_EN.book Page 48 Wednesday, May 31, 2006 4:01 PM Settings for external equipment Dubbing from the external devices Connection to external equipment Video DVD-RW DVD-RW DVD-RW DVD-RW DVD-R DVD-R Video DVD-RW DVD-RW DVD-RW DVD-RW DVD-R DVD-R Before recording from an external device, connect the external device correctly by following the direction on Connect the external equipment using either the input the left, and turn the power of the unit and the external... -
Page 48: Setting Disc Protection
E439BBD_EN.book Page 49 Wednesday, May 31, 2006 4:01 PM Setting disc protection Finalising a disc DVD-RW DVD-RW Finalise To prevent accidental over-recording, editing or erasing of recordings, you can protect them using the Video Setup Menu. DVD-RW DVD-RW DVD-RW DVD-RW DVD-R DVD-R You must first finalise the disc before playing it back... - Page 49 E439BBD_EN.book Page 50 Wednesday, May 31, 2006 4:01 PM Select “Auto Finalise” using Note [Cursor ], then press [ENTER]. • If “ ” appears when [ENTER] is pressed, that Option window will appear. means the finalising process has reached the critical point and cannot be stopped.
-
Page 50: Playback
E439BBD_EN.book Page 51 Wednesday, May 31, 2006 4:01 PM Playback Disc Logo Information on playback DVD-Video Read the following information before you play back a DVD. DVD-RW Playable discs (VIDEO/VR mode, DivX files) ® You can play back all the discs listed on the right. Before attempting to play back a DVD, make sure it meets the requirements for Region Codes and Colour DVD-R... -
Page 51: Basic Playback
E439BBD_EN.book Page 52 Wednesday, May 31, 2006 4:01 PM Playback from the Title List Basic playback Video DVD-RW DVD-RW DVD-RW DVD-RW DVD-R DVD-R Hint for HDD / DVD playback If you are playing the HDD, press [HDD] first. If you are playing a disc, press [DVD] first. The contents of a HDD / DVD are generally divided Follow steps 1 to 4 in “Direct into titles. - Page 52 E439BBD_EN.book Page 53 Wednesday, May 31, 2006 4:01 PM If you want to play the title from the Playing back a DVD-Video / Video CD / CD beginning, select “Play From Start” using [Cursor DVD-V DVD-V Select “Resume Play” (HDD only) if you want to play the title from the Follow steps 1 to 4 in “Direct point where it is stopped last time.
- Page 53 E439BBD_EN.book Page 54 Wednesday, May 31, 2006 4:01 PM Press [STOP S] to stop playback. Hints for MP3 files: • Folders are known as Groups, Files are known as Tracks. Notes on JPEG: • Folders are shown with the icon. After the file is displayed for 5 seconds or 10 seconds •...
-
Page 54: Playing Back A Divx
E439BBD_EN.book Page 55 Wednesday, May 31, 2006 4:01 PM Use [Cursor ] to select “Yes” if you want to Playing back a DivX ® play back the file, or to select “No” if you do not wish to play it back. Then, press [ENTER] to confirm the selection. - Page 55 E439BBD_EN.book Page 56 Wednesday, May 31, 2006 4:01 PM • It may take awhile for audio and images to be output DivX Subtitle ® after you inserted a disc and pressed [PLAY P]. • When playing back the files recorded in high bit The subtitle created by the user can be displayed rates, the images can be interrupted in some during DivX...
- Page 56 E439BBD_EN.book Page 57 Wednesday, May 31, 2006 4:01 PM Playing back discs contains mixture DivX ® of different type of media DivX DivX ® ® For playing back a CD-RW / R that contains mixture of different type of media (DivX , MP3, JPEG etc.), you ®...
- Page 57 E439BBD_EN.book Page 58 Wednesday, May 31, 2006 4:01 PM Playing back discs using the Disc Playing back discs using the Title menu menu DVD-V DVD-V DVD-V DVD-V A DVD contains a disc menu, which lists the contents Some DVDs have a title menu, which lists the titles and enables you to customize playback.
-
Page 58: Pbc Function For Video Cds
E439BBD_EN.book Page 59 Wednesday, May 31, 2006 4:01 PM Cancelling and Recalling the PBC PBC function for Video CDs function This unit conforms to ver.1.1 and ver.2.0 of the Video CD standard playback control (PBC) function. This Insert a Video CD. enables you to play back interactive software using In stop mode, press [SETUP]. -
Page 59: Special Playback
E439BBD_EN.book Page 60 Wednesday, May 31, 2006 4:01 PM Note Special playback • For Video CDs, if you turn “PBC” on using the setting menu, the resume function is cancelled. • For MP3 and JPEG files, playback will resume from Resume playback the beginning of the track at which playback was stopped. - Page 60 E439BBD_EN.book Page 61 Wednesday, May 31, 2006 4:01 PM Slow forward / Slow reverse playback Simultaneous playback and recording Video DVD-V DVD-V DVD-RW DVD-RW DVD-RW DVD-RW Video DVD-V DVD-V DVD-RW DVD-RW DVD-RW DVD-RW DVD-R DVD-R DivX DivX DivX ® ® If you are playing the HDD, press [HDD] first.
-
Page 61: Step By Step Playback
E439BBD_EN.book Page 62 Wednesday, May 31, 2006 4:01 PM Step by step playback Zoom Video Video DVD-V DVD-V DVD-RW DVD-RW DVD-RW DVD-RW DVD-V DVD-V DVD-RW DVD-RW DVD-RW DVD-RW DVD-R DVD-R DivX DivX DivX ® DVD-R DVD-R JPEG JPEG JPEG DivX DivX DivX ®... -
Page 62: Repeat / Random / Programme Playback / Slide Show
E439BBD_EN.book Page 63 Wednesday, May 31, 2006 4:01 PM Hint Repeat / Random / Programme • To cancel the repeat playback, select “Off” at step 3. The repeat setting is also cancelled when you stop playback / Slide Show playback. Note Repeat playback •... - Page 63 E439BBD_EN.book Page 64 Wednesday, May 31, 2006 4:01 PM Programme playback Slide Show JPEG JPEG (PBC OFF) You can select the display time between 5 seconds You can programme the disc to play back in your and 10 seconds. desired order. Follow steps 1 and 2 in “Random Follow steps 1 and 2 in “Random playback”...
-
Page 64: Search
E439BBD_EN.book Page 65 Wednesday, May 31, 2006 4:01 PM Track search Search JPEG JPEG JPEG DivX DivX DivX ® ® (PBC OFF) Title / Chapter search Press [DVD] first. Video Using [SKIP B / F] buttons DVD-V DVD-V DVD-RW DVD-RW DVD-RW DVD-RW During playback, press [SKIP F] to... -
Page 65: Time Search
E439BBD_EN.book Page 66 Wednesday, May 31, 2006 4:01 PM Time search Series search Video DVD-V DVD-V DVD-RW DVD-RW DVD-RW DVD-RW You can search for the group of titles made with the DVD-R DVD-R DivX DivX ® same Periodical Timer Recordings. We refer to such a ®... -
Page 66: Selecting The Format Of Audio And Video
E439BBD_EN.book Page 67 Wednesday, May 31, 2006 4:01 PM Select a desired title to play using [Cursor ], then press Selecting the format of audio [PLAY P]. Or press [ENTER] to call and video up the Title List Menu and select your desired playback style. -
Page 67: Switching Camera Angles
E439BBD_EN.book Page 68 Wednesday, May 31, 2006 4:01 PM During playback, press [AUDIO Switching camera angles to call up the available audio settings on the TV screen. DVD-V DVD-V <Example: DVD-Video> Some DVD-Videos feature scenes shot from two or more angles. The disc case is usually marked with an 1. -
Page 68: Editing
E439BBD_EN.book Page 69 Wednesday, May 31, 2006 4:01 PM Editing 1 Selected device (HDD or DVD) and selected list type (Original List or Playlist) Disc editing 2 The number of the current Title List page / the total number of the Title List pages You can edit a disc recorded using the PAL system. -
Page 69: Deleting Titles
E439BBD_EN.book Page 70 Wednesday, May 31, 2006 4:01 PM Press [TOP MENU]. What are Original List and Playlist? Title List will appear. There are 2 types for the title list: Original List and Example: HDD Original List Playlist. PREVIOUS RECORDINGS PREVIOUS RECORDINGS Original List: Original List is the list of the recorded programmes... -
Page 70: Deleting All Titles In Hdd
E439BBD_EN.book Page 71 Wednesday, May 31, 2006 4:01 PM Select “Yes” using [Cursor With “Erase All in HDD” selected, then press [ENTER]. press [ENTER]. The selected title is deleted. Option window will appear. PREVIOUS RECORDINGS PREVIOUS RECORDINGS Er Erase All in HDD ase All in HDD Original All iginal All... -
Page 71: Protecting / Undo Protecting Titles
E439BBD_EN.book Page 72 Wednesday, May 31, 2006 4:01 PM Protecting / Undo protecting Editing title names titles Video DVD-RW DVD-RW DVD-RW DVD-RW DVD-R DVD-R DVD-RW DVD-RW [VIDEO] [VR] [ORIGINAL] [PLAYLIST] [VR] [ORIGINAL] You can name titles or change the title names from this menu. -
Page 72: Deleting A Part Of A Title
E439BBD_EN.book Page 73 Wednesday, May 31, 2006 4:01 PM Select “Edit Title Name” using [Cursor ], then press [ENTER]. Deleting a part of a title Editing Screen will appear. DVD-RW DVD-RW PROGRAM EDITING PROGRAM EDITING P02 LP _ [VR] [ORIGINAL] [PLAYLIST] B C D E b c d e Space... - Page 73 E439BBD_EN.book Page 74 Wednesday, May 31, 2006 4:01 PM Select “Scene Delete” using When it reaches the desired end [Cursor ], then press [ENTER]. point, press [ENTER], or press [PAUSE p] or [STOP S] and then Editing Screen will appear. [ENTER].
-
Page 74: Dividing A Title
E439BBD_EN.book Page 75 Wednesday, May 31, 2006 4:01 PM Select “Edit” using [Cursor Note then press [ENTER]. • If a certain scene is deleted from the title in the Original List, the title in the Playlist that contains the Edit Menu will appear. corresponding scene will be deleted also. -
Page 75: Combining Titles
E439BBD_EN.book Page 76 Wednesday, May 31, 2006 4:01 PM Select “Combine” using [Cursor ], then press [ENTER]. Combining titles The selected title will disappear temporarily, and the frame of the next title will be highlighted. DVD-RW DVD-RW PROGRAM EDITING PROGRAM EDITING ORG HDD [VR] [PLAYLIST] 01/04 0:15 P03 LP... -
Page 76: Moving Titles
E439BBD_EN.book Page 77 Wednesday, May 31, 2006 4:01 PM Select “Move” using [Cursor then press [ENTER]. Moving titles The selected title will become a single line. DVD-RW DVD-RW PROGRAM EDITING PROGRAM EDITING ORG HDD [VR] [PLAYLIST] You can move the title position. 01/05/06 04/06/06 15/06/06... -
Page 77: Chapter Marker
E439BBD_EN.book Page 78 Wednesday, May 31, 2006 4:01 PM Select “Chapter Mark” using [Cursor ], then press [ENTER]. Chapter Marker Editing Screen will appear. Adding chapter marks CHAPTER MARKING CHAPTER MARKING 0:00:00 DVD-RW DVD-RW [VR] [ORIGINAL] [PLAYLIST] You can add or delete chapter marks on each title and Update Cancel can use them for the Chapter Search. - Page 78 E439BBD_EN.book Page 79 Wednesday, May 31, 2006 4:01 PM Press [TOP MENU] to exit. Select “Chapter Mark” using [Cursor ], then press [ENTER]. Note Editing Screen will appear. • When you search for the point to add a chapter mark, you can use [SKIP B / F], CHAPTER MARKING CHAPTER MARKING [FWD f / REV r], [VARIABLE REPLAY /...
-
Page 79: Adding Titles To A Playlist
E439BBD_EN.book Page 80 Wednesday, May 31, 2006 4:01 PM Select “Add To Playlist” using [Cursor ], then press [ENTER]. Adding titles to a Playlist Confirmation window will appear. DVD-RW DVD-RW PROGRAM EDITING PROGRAM EDITING 01/04 0:15 P03 LP 01/04 0:15 P03 LP P03 LP P03 LP [VR] [ORIGINAL] [PLAYLIST]... -
Page 80: Function Setup
E439BBD_EN.book Page 81 Wednesday, May 31, 2006 4:01 PM Function Setup Tour of the Setup Menus The following table shows the items which you can change the setting and their default settings. Refer to the following table for your convenience. Selection Setup Menu Items... - Page 81 E439BBD_EN.book Page 82 Wednesday, May 31, 2006 4:01 PM Selection Setup Menu Items Contents (highlight is the default) Playback Audio Out Set whether the sound recorded at Page 85 48kHz 96kHz is down sampled to 48kHz or not. 96kHz Dolby Digital Set the type of sound signal output from the digital audio output jack.
-
Page 82: Playback Setting
E439BBD_EN.book Page 83 Wednesday, May 31, 2006 4:01 PM 1. Parental Lock (Default: All) Playback Setting You can set the Parental Lock Level to keep your children from viewing the inappropriate materials. (Follow the steps 1 to 4 on the left.) Press [SETUP]. - Page 83 E439BBD_EN.book Page 84 Wednesday, May 31, 2006 4:01 PM Select a desired level using Select a setting using [Cursor ], then press [ENTER]. [Cursor ], then press [ENTER]. “Change password?” will appear. Your setting is activated. Change password? 3. Audio Language (Default: Original) •...
- Page 84 E439BBD_EN.book Page 85 Wednesday, May 31, 2006 4:01 PM 5. Audio Out MPEG (Default: PCM) Set the digital audio output. MPEG Stream (Follow steps 1 to 4 on page 83 as left.) Select a setting using Select “Audio Out” using [Cursor ], then press [ENTER].
- Page 85 E439BBD_EN.book Page 86 Wednesday, May 31, 2006 4:01 PM 6. Variable Replay/Skip Speed 8. TV System (Default: PAL) Assign the [VARIABLE REPLAY] or [VARIABLE You can set the TV system. SKIP] button to rewind or skip by a certain amount of (Follow steps 1 to 4 on page 83 as left.) time.
-
Page 86: Display Setting
E439BBD_EN.book Page 87 Wednesday, May 31, 2006 4:01 PM Option window will appear. Display Setting FL Dimmer Auto Bright Press [SETUP]. Dark “Easy Setting Menu” or “Advanced Menu” will Select a setting using appear. If “Advanced Menu” is displayed, proceed [Cursor ], then press [ENTER]. -
Page 87: Reset To Factory Default
E439BBD_EN.book Page 88 Wednesday, May 31, 2006 4:01 PM Reset to factory default Resets the settings to the factory default (refer to the “Note” on this page for the exceptions). Press [SETUP]. “Easy Setting Menu” or “Advanced Menu” will appear. If “Advanced Menu” is displayed, proceed to step 3. -
Page 88: Vcr Functions
E439BBD_EN.book Page 89 Wednesday, May 31, 2006 4:01 PM VCR Functions Press [VCR]. Playback Select the recording speed using [REC MODE]. • The desired recording speed is selected in SP (standard play) or LP (long play) mode by pressing [REC MODE]. Press [ ON / STANDBY] to turn on Select the desired channel to record... -
Page 89: Search
E439BBD_EN.book Page 90 Wednesday, May 31, 2006 4:01 PM One-touch Timer Recording Search This feature allows you to set the recording length Index search simply by pressing [REC / OTR I] (VCR). Turn on the unit and insert a recordable tape. An index mark will be assigned at the beginning of each recording you make. -
Page 90: Other Operations
E439BBD_EN.book Page 91 Wednesday, May 31, 2006 4:01 PM Other operations Hi-Fi Stereo Sound System This unit will record and playback Hi-Fi stereo sound. In addition, it has an AV2 and NICAM stereo sound Press [VCR] first. decoder. This unit will receive stereo and bilingual broadcasts and it is possible to record in several ways To cue or review picture during playback and to play back the sound. -
Page 91: Others
E439BBD_EN.book Page 92 Wednesday, May 31, 2006 4:01 PM Others Troubleshooting Before requesting service for this unit, check the table below for a possible cause of the problem you are experiencing. Some simple checks or a minor adjustment on your part may eliminate the problem and restore proper performance. General Operation Error message Cause &... - Page 92 E439BBD_EN.book Page 93 Wednesday, May 31, 2006 4:01 PM Timer Recording / Recording & Navigator Error message Cause & Solution • The entry for the Timer Recording is invalid. The recording duration must be in Error 24 hour period. The end time must be later than the present time, and the start Prohibited timer program.
- Page 93 E439BBD_EN.book Page 94 Wednesday, May 31, 2006 4:01 PM Symptom Solution The power does not turn on. • Check that the AC power cord is connected securely. • Batteries of the remote control are weak. • If above solutions do not work, press [RESET] on the front panel with a sharp pointed object to re-start the unit.
- Page 94 E439BBD_EN.book Page 95 Wednesday, May 31, 2006 4:01 PM Symptom Solution Recording is impossible. • This unit cannot record a programmes that contains copy protection signal. This is not a malfunction. • The space of the recording media may be used up. Try deleting unnecessary titles from the Original List, or exchange it with the recordable media.
- Page 95 E439BBD_EN.book Page 96 Wednesday, May 31, 2006 4:01 PM Symptom Solution Titles cannot be edited or deleted. • The titles or the disc itself may be protected. Cancel the protection by following the steps on page 72 for title protection, and page 49 for disc protection.
-
Page 96: Language Code
E439BBD_EN.book Page 97 Wednesday, May 31, 2006 4:01 PM Language code Language Code Language Code Language Code Language Code Abkhazian 4748 French 5264 Lithuanian 5866 Sindhi 6550 Afar 4747 Frisian 5271 Macedonian 5957 Singhalese 6555 Afrikaans 4752 Galician 5358 Malagasy 5953 Siswat 6565... -
Page 97: Glossary
E439BBD_EN.book Page 98 Wednesday, May 31, 2006 4:01 PM Glossary Analogue audio Dolby Digital Playlist An electrical signal that directly A system developed by Dolby From this list you can play back represents sound. In contrast, Laboratories that compresses contents of a disc in your desired digital audio can also be an digital sound. -
Page 98: Specifications
E439BBD_EN.book Page 99 Wednesday, May 31, 2006 4:01 PM Specifications General System HDD, DVD-Video, DVD-RW / R, VCD, CD-DA, CD-RW / R, Video Cassette Tape VCR video heads Four heads Internal 3.5 inch HDD 160 GB Power requirements 220–240 V ±...