LG LRG3095ST User Manual
Gas range
Hide thumbs
Also See for LRG3095ST:
- User manual (101 pages) ,
- Guía para el uso (51 pages) ,
- Owner's manual (49 pages)
Table of Contents
Advertisement
Available languages
Available languages
operating and keep it handy
Printed in Mexico
P/No. MFL63261001
GAS RANGE
USER'S GUIDE
Please read this guide
thoroughly before
for reference at all times.
Models
LRG3097ST
LRG3095ST
LRG3095SB
LRG3095SW
To contact LG Electronics, 24 hours a day,
7 days a week:
1-888-542-2623 (CANADA)
Or visit us on the Web at: ca.lge.com (CANADA)
Advertisement
Chapters
Table of Contents

Related Manuals for LG LRG3095ST


Summary of Contents for LG LRG3095ST
- Page 1 To contact LG Electronics, 24 hours a day, 7 days a week: 1-888-542-2623 (CANADA) Or visit us on the Web at: ca.lge.com (CANADA) GAS RANGE USER’S GUIDE Please read this guide thoroughly before operating and keep it handy for reference at all times.
-
Page 2: Table Of Contents
OPERATING INSTRUCTIONS Congratulations on your purchase Parts and Features............9 Using the Surface Burners ........10-11 Using the griddle ............12 and welcome to the LG family. Control Panel—LRG3097S ...........13 Control Panel—LRG3095S ...........14 Your new LG Gas Range Using the Oven ............15–18 Using the Clock and Timer........19–20 combines precision cooking Using the Timed Baking and Roasting Features..20–21... -
Page 3: Important Safety Information
I M P O RTA N T S A F E T Y I N F O R M AT I O N READ ALL INSTRUCTIONS BEFORE USE Read and follow all instructions before using your oven to prevent the risk of fire, electric shock, personal injury, or damage when using the range. -
Page 4: Safety Precautions
I M P O RTA N T S A F E T Y I N F O R M AT I O N READ ALL INSTRUCTIONS BEFORE USE ANTI-TIP DEVICE (continued) • DO NOT step or sit on the door. Install the Anti- •... - Page 5 I M P O RTA N T S A F E T Y I N F O R M AT I O N READ ALL INSTRUCTIONS BEFORE USE SAFETY PRECAUTIONS (continued) • Make sure your range is properly adjusted by a •...
-
Page 6: Surface Burners
I M P O RTA N T S A F E T Y I N F O R M AT I O N READ ALL INSTRUCTIONS BEFORE USE SURFACE BURNERS • Always heat fat slowly, and watch as it heats. WARNING: •... - Page 7 I M P O RTA N T S A F E T Y I N F O R M AT I O N READ ALL INSTRUCTIONS BEFORE USE COOK MEAT AND POULTRY THOROUGHLY Cook meat and poultry thoroughly—meat to at least To protect against foodborne illness, cook them to an INTERNAL temperature of 160°F and poultry to at these temperatures.
- Page 8 I M P O RTA N T S A F E T Y I N F O R M AT I O N READ ALL INSTRUCTIONS BEFORE USE OVEN When opening the door of a hot oven, stand away from the range. The hot air and steam that escape can cause burns to hands, face and eyes.
-
Page 9: Operating Instructions
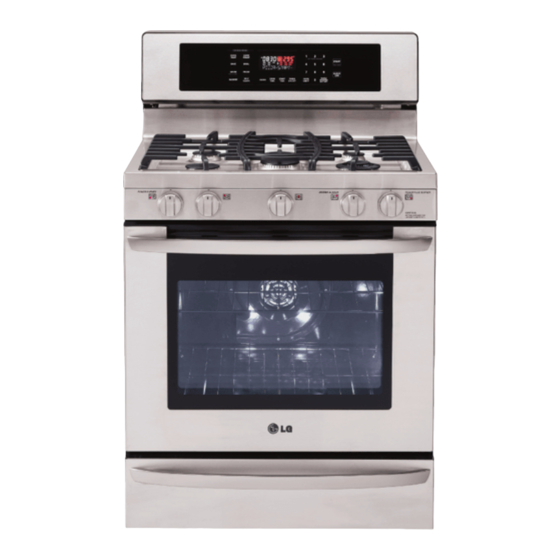
O P E R AT I N G I N S T RU C T I O N S PARTS AND FEATURES Grates Oven vent Oval burner Small burner Extra large burner Automatic oven Medium burner light switch Large burner Self clean latch Knobs (5 ea) Roast rack... -
Page 10: Using The Surface Burners
O P E R AT I N G I N S T RU C T I O N S USING THE GAS SURFACE BURNERS Throughout this manual, features and appearance may vary from your model. • Make sure all grates on the range are properly •... - Page 11 O P E R AT I N G I N S T RU C T I O N S USING THE GAS SURFACE BURNERS HOW TO SELECT FLAME SIZE NEVER let the flames extend up the sides of the Flames larger than the cookware for safe handling of cookware.
-
Page 12: Using The Griddle
O P E R AT I N G I N S T RU C T I O N S USING THE GRIDDLE Preheat the griddle according to the guide below and adjust for the desired setting. Preheat Cook Type of Food Conditions Setting Warming Tortillas... -
Page 13: Control Panel-Lrg3097S
O P E R AT I N G I N S T RU C T I O N S CONTROL PANEL—LRG3097S Throughout this manual, features and appearance may vary from your model. OVEN CONTROL, CLOCK, AND TIMER FEATURES CONVECTION BAKE PAD – Touch the pad to COOK TIME PAD –... -
Page 14: Control Panel-Lrg3095S
O P E R AT I N G I N S T RU C T I O N S CONTROL PANEL—LRG3095S Throughout this manual, features and appearance may vary from your model. OVEN CONTROL, CLOCK, AND TIMER FEATURES CONVECTION BAKE PAD – Touch the pad to COOK TIME PAD –... -
Page 15: Using The Oven
O P E R AT I N G I N S T RU C T I O N S USING THE OVEN BEFORE YOU BEGIN POWER OUTAGE The oven has 7 rack positions CAUTION: for various types of cooking. To install a rack insert the DO NOT attempt to operate the electric ignition curved end of the rack into the oven during an electrical power failure. - Page 16 O P E R AT I N G I N S T RU C T I O N S USING THE OVEN To avoid possible burns, place the racks in the desired position before you turn the oven on. HOW TO SET THE OVEN FOR BAKING OR PREHEATING AND PAN PLACEMENT ROASTING Preheat the oven if the recipe calls for it.
- Page 17 O P E R AT I N G I N S T RU C T I O N S USING THE OVEN HOW TO SET THE OVEN FOR BROILING Your oven is designed for CLOSED DOOR broiling. Serve the food immediately, and place the pan outside the Place the food on the grid of the broiler...
-
Page 18: Using The Oven
O P E R AT I N G I N S T RU C T I O N S USING THE OVEN BROILING GUIDE Broiling times will be affected by the size, weight, thickness, starting temperature and your preference of doneness. This guide is based on meats at refrigerated temperatures. -
Page 19: Using The Clock And Timer
O P E R AT I N G I N S T RU C T I O N S USING THE CLOCK AND TIMER HOW TO SET THE CLOCK HOW TO SET THE TIMER The clock should be set to the correct time of day for The timer does not control oven operations. -
Page 20: Using The Timed Baking And Roasting Features
O P E R AT I N G I N S T RU C T I O N S USING THE CLOCK AND TIMER (continued) HOW TO CANCEL THE TIMER POWER OUTAGE Touch the “TIMER ON/OFF” pad. If a flashing time is in the display, you have experienced a power failure. - Page 21 O P E R AT I N G I N S T RU C T I O N S USING THE TIMED BAKING & ROASTING FEATURES (continued) HOW TO SET A DELAYED START AND NOTE: If you would like to check the times you have set, touch the “START TIME”...
-
Page 22: Using The Convection Oven
O P E R AT I N G I N S T RU C T I O N S USING THE CONVECTION OVEN The convection oven fan shuts off when the oven CONVECTION BAKE door is opened. DO NOT leave the door open for long periods of time during convection cooking. - Page 23 O P E R AT I N G I N S T RU C T I O N S USING THE CONVECTION OVEN (continued) AUTOMATIC RECIPE CONVERSION You can use your favorite recipes in the convection Touch the “CLEAR OFF” pad when oven.
- Page 24 O P E R AT I N G I N S T RU C T I O N S USING THE CONVECTION OVEN (continued) HOW TO SET THE OVEN FOR CONVECTION BAKING OR ROASTING When the oven starts to heat, the changing Touch the “CONV.
-
Page 25: Using The Convection Oven
O P E R AT I N G I N S T RU C T I O N S USING THE CONVECTION OVEN (continued) CONVECTION ROASTNG CHART Meats Minutes/Lb. Oven Temp. Beef Rib (3 to 5 lbs.) Rare † 20–24 325°F(160°C) Medium 24–28... -
Page 26: Using The Timed Convection Baking Or Roasting Features
O P E R AT I N G I N S T RU C T I O N S USING THE TIMED CONVECTION BAKING OR ROASTING FEATURES NOTES: • DO NOT leave foods that spoil easily – such as milk, eggs, fish, stuffings, poultry and pork –... -
Page 27: Roasting Features
O P E R AT I N G I N S T RU C T I O N S USING THE TIMED CONVECTION BAKING OR ROASTING FEATURES (continued) HOW TO SET A DELAYED START AND AUTOMATIC STOP The oven will turn on at the time of day you set, cook NOTE: If you would like to check the times you have for a specific length of time and then turn off set, touch the “START TIME”... -
Page 28: Using The Favorite Feature
O P E R AT I N G I N S T RU C T I O N S USING THE FAVORITE FEATURE The “FAVORITE” pad is used to record and recall The Favorite Setting feature may be used with COOK your favorite recipe settings. -
Page 29: Setting The Proof Feature
O P E R AT I N G I N S T RU C T I O N S SETTING THE PROOF FEATURE The Proof feature maintains a warm environment for rising yeast leavened products before baking. To avoid lowering the oven temperature and Place the covered dough in a dish in lengthening proofing time,do not open the oven door the oven on rack B or C. -
Page 30: Special Features Of Your Oven Control
O P E R AT I N G I N S T RU C T I O N S SPECIAL FEATURES OF YOUR OVEN CONTROL Your new touch pad control has additional features They remain in the control’s memory until the steps that you may choose to use. - Page 31 O P E R AT I N G I N S T RU C T I O N S SPECIAL FEATURES OF YOUR OVEN CONTROL HOW TO ADJUST THE OVEN THERMOSTAT You may find that your new oven cooks differently To decrease(-) temperature adjustment than the one it replaced.
-
Page 32: Special Features Of Your Oven Control
O P E R AT I N G I N S T RU C T I O N S SPECIAL FEATURES OF YOUR OVEN CONTROL HOW TO SELECT LANGUAGE HOW TO SET PREHEATING ALARM LIGHT ON/OFF Your oven control is set to display in English but you may change this to display in Spanish or French. -
Page 33: Using The Electric Warming Drawer (On Some Models)
O P E R AT I N G I N S T RU C T I O N S USING THE ELECTRIC WARMING DRAWER (on some models) The warming drawer will keep hot, cooked foods at serving temperature. Always start with hot food. TO USE THE WARMING DRAWER WHEN USING THE WARMING DRAWER The warming drawer will keep hot, cooked foods at... -
Page 34: Using The Electric Warming Drawer
O P E R AT I N G I N S T RU C T I O N S USING THE ELECTRIC WARMING DRAWER (on some models) TEMPERATURE SELECTION CHART TO CRISP FOOD ITEMS If you keep several different foods hot, set the control •... -
Page 35: Using The Self-Cleaning Oven
O P E R AT I N G I N S T RU C T I O N S USING THE SELF-CLEANING OVEN BEFORE A CLEAN CYCLE When running a self NOTES: clean cycle, it is • Soil on the front frame of the range and outside the recommended that a gasket on the door will need to be cleaned by hand. -
Page 36: Using The Self-Cleaning Oven
O P E R AT I N G I N S T RU C T I O N S USING THE SELF-CLEANING OVEN The oven door must be closed and all controls set correctly for the cycle to work properly. HOW TO DELAY THE START OF CLEANING Make sure the clock shows the correct time of day. -
Page 37: Care And Cleaning Of The Range
C A R E A N D C L E A N I N G O F T H E R A N G E CARE AND CLEANING Make sure electrical power is off and all surfaces CAUTION: are cool before cleaning any part of the range. •... -
Page 38: Burner Caps And Heads
C A R E A N D C L E A N I N G O F T H E R A N G E BURNER CAPS AND HEADS • DO NOT use bleach on product to clean. If you want to remove burned-on food, soak the BURNER CAPS burner heads in a solution of mild liquid detergent and Lift off when cool. -
Page 39: Burner Grates
C A R E A N D C L E A N I N G O F T H E R A N G E BURNER GRATES Your range has three professional-style grates. side grate center grate side grate For maximum stability, these grates should only be used in their proper position;... -
Page 40: Stainless Steel Surfaces
C A R E A N D C L E A N I N G O F T H E R A N G E STAINLESS STEEL SURFACES DO NOT use a steel wool pad; it will scratch the To inquire about purchasing stainless steel appliance surface. -
Page 41: Oven Door
C A R E A N D C L E A N I N G O F T H E R A N G E OVEN DOOR The oven door is removable, but it is heavy. You may need help removing and replacing the door. TO REPLACE THE DOOR CAUTION: Step. -
Page 42: Oven Bottom
C A R E A N D C L E A N I N G O F T H E R A N G E OVEN BOTTOM The oven bottom has a porcelain enamel finish. DO NOT use aluminum foil on the bottom of the To make cleaning easier, protect the oven bottom range. -
Page 43: Oven Racks And Drawer Racks
C A R E A N D C L E A N I N G O F T H E R A N G E OVEN RACKS AND DRAWER RACKS If your oven is equipped with nickel oven racks, To clean the oven racks, use an abrasive cleanser. remove them from the oven before beginning the self- After cleaning, rinse the racks with clean water and clean cycle. -
Page 44: Removable Warming Drawer
C A R E A N D C L E A N I N G O F T H E R A N G E REMOVABLE WARMING DRAWER NOTE: Before performing any adjustments, cleaning or service, unplug the range. Make sure the warming drawer heating element is cool. -
Page 45: Troubleshooting
T RO U B L E S H O OT I N G BEFORE CALLING FOR SERVICE Before you call for service, review this list. It may save you time and expense. This list includes common occurrences that are not the result of a defect in workmanship or materials. Problem Possible Causes Solutions... - Page 46 T RO U B L E S H O OT I N G BEFORE CALLING FOR SERVICE Problem Possible Causes Solutions Food does not broil • Improper oven controls setting. • Make sure you touch the “BROIL HI/LO” pad. properly in the oven •...
- Page 47 T RO U B L E S H O OT I N G BEFORE CALLING FOR SERVICE Problem Possible Causes Solutions Oven door will not • The oven temperature is too high. • Allow the oven to cool below locking temperature. open after a self-clean •...
- Page 48 T RO U B L E S H O OT I N G BEFORE CALLING FOR SERVICE Problem Possible Causes Solutions Convection fan not • Preheat temperature not reached. • Fan will start automatically once the preheat working (convection temperature is reached. models) •...
-
Page 49: Product Registration Information
LG GAS OVEN LIMITED WARRANTY - Canada WARRANTY: Should your LG Gas Oven (“Product”) fail due to a defect in material or workmanship under normal home use during the warranty period set forth below, LG Canada will at its option repair or replace the Product upon receipt of proof of original retail purchase. This warranty is valid only to the original retail purchaser of the product and applies only to a Product distributed in Canada by LG Canada or an authorized Canadian distributor thereof. - Page 50 M e m o...
- Page 51 Si vous désirez contacter LG Electronics, 24 heures sur 24, 7 jours sur 7 : 1-888-542-2623 (CANADA) Ou visitez notre site Web : ca.lge.com (CANADA) CUISINIÈRE À GAZ GUIDE D'UTILISATION Veuillez lire le manuel d'utilisation avec soin avant l'utilisation et gardez-le en lieu sûr pour référence ultérieure.
- Page 52 Utilisation de la plaque de cuisson........12 bienvenue dans la famille LG. Votre Panneau de commande—LRG3097S......13 Panneau de commande—LRG3095S......14 nouvelle cuisinière à gaz LG offre des Utilisation du four ...........15–18 Utilisation de l'horloge et du minuteur .....19–20 Utilisation des fonctions de cuisson et de rôtissage fonctions de cuisson de précision...
-
Page 53: Consignes De Sécurité Importantes
C O N S I G N E S D E S É C U R I T É I M P O RTA N T E S LISEZ TOUTES LES CONSIGNES AVANT D'UTILISER L'APPAREIL É É É É É É É... -
Page 54: Précautions De Sécurité
C O N S I G N E S D E S É C U R I T É I M P O RTA N T E S LISEZ TOUTES LES CONSIGNES AVANT D'UTILISER L'APPAREIL DISPOSITIF ANTI-BASCULEMENT (suite) • NE MONTEZ PAS ET NE VOUS ASSEYEZ PAS sur la •... - Page 55 C O N S I G N E S D E S É C U R I T É I M P O RTA N T E S LISEZ TOUTES LES CONSIGNES AVANT D'UTILISER L'APPAREIL PRÉCAUTIONS DE SÉCURITÉ (suite) • NE CONSERVEZ AUCUN matériau inflammable dans le AVERTISSEMENT : four, dans le tiroir chauffe-plats ou à...
- Page 56 C O N S I G N E S D E S É C U R I T É I M P O RTA N T E S LISEZ TOUTES LES CONSIGNES AVANT D'UTILISER L'APPAREIL BRÛLEURS DE SURFACE • Suveillez bien les aliments pendant la friture à flamme AVERTISSEMENT : élevée.
- Page 57 C O N S I G N E S D E S É C U R I T É I M P O RTA N T E S LISEZ TOUTES LES CONSIGNES AVANT D'UTILISER L'APPAREIL BIEN CUIRE LA VIANDE ET LA VOLAILLE Faites bien cuire la viande et la volaille.
- Page 58 C O N S I G N E S D E S É C U R I T É I M P O RTA N T E S LISEZ TOUTES LES CONSIGNES AVANT D'UTILISER L'APPAREIL FOUR Tenez-vous à distance de la cuisinière lorsque vous ouvrez la porte d'un four chaud. L'air chaud et la vapeur peuvent provoquer des brûlures aux mains, au visage et aux yeux.
-
Page 59: Consignes De Fonctionnement
C O N S I G N E S D E F O N C T I O N N E M E N T DESCRIPTION ET PIÈCES Grilles Ventilation du four Brûleur ovale Petit brûleur Très grand brûleur Brûleur moyen Bouton d'allumage automatique de la Grand brûleur... -
Page 60: Utilisation Des Brûleurs De Surface
C O N S I G N E S D E F O N C T I O N N E M E N T UTILISATION DES BRÛLEURS DE SURFACE Dans ce manuel, il est possible que les caractéristiques et l'apparence varient de ceux de votre modèle. •... - Page 61 C O N S I G N E S D E F O N C T I O N N E M E N T UTILISATION DES BRÛLEURS DE SURFACE RÉGLAGE DE LA FLAMME Afin d'assurer le maniement sûr des ustensiles, ne Une flamme qui lèche le laissez jamais la flamme lécher le rebord de côté...
-
Page 62: Utilisation De La Plaque De Cuisson
C O N S I G N E S D E F O N C T I O N N E M E N T UTILISATION DE LA PLAQUE DE CUISSON Préchauffez la plaque de cuisson conformément au guide ci-dessous et effectuez les réglages désirés. Conditions de Réglage de la Type d'aliment... -
Page 63: Panneau De Commande-Lrg3097S
C O N S I G N E S D E F O N C T I O N N E M E N T PANNEAU DE COMMANDE—LRG3097S Dans ce manuel, il est possible que les caractéristiques et l'apparence varient de ceux de votre modèle. CARACTÉRISTIQUES DES COMMANDES DU FOUR, DE L'HORLOGE ET DU MINUTEUR TOUCHE CUISSON PAR CONVECTION –... -
Page 64: Panneau De Commande-Lrg3095S
C O N S I G N E S D E F O N C T I O N N E M E N T PANNEAU DE COMMANDE—LRG3095S Dans ce manuel, il est possible que les caractéristiques et l'apparence varient de ceux de votre modèle. CARACTÉRISTIQUES DES COMMANDES DU FOUR, DE L'HORLOGE ET DU MINUTEUR TOUCHE CUISSON PAR CONVECTION –... -
Page 65: Utilisation Du Four
C O N S I G N E S D E F O N C T I O N N E M E N T UTILISATION DU FOUR AVANT DE COMMENCER COUPURE DE COURANT Le four dispose de 7 positions de ATTENTION : plateau pour différents types de cuisson. - Page 66 C O N S I G N E S D E F O N C T I O N N E M E N T UTILISATION DU FOUR Pour éviter les brûlures éventuelles, placez les grilles dans les positions souhaitées avant d'allumer le four. RÉGLAGE DU FOUR POUR LA CUISSON OU LE PRÉCHAUFFAGE ET POSITIONNEMENT DES PLATS RÔTISSAGE...
- Page 67 C O N S I G N E S D E F O N C T I O N N E M E N T UTILISATION DU FOUR RÉGLAGE DU FOUR POUR L'UTILISATION DU GRIL Servez la nourriture immédiatement et laissez le Votre four a été...
- Page 68 C O N S I G N E S D E F O N C T I O N N E M E N T UTILISATION DU FOUR GUIDE D'UTILISATION DU GRIL La taille, le poids, l'épaisseur, la température de départ et votre préférence de cuisson ont un impact sur la durée d'utilisation du gril.
-
Page 69: Utilisation De L'horloge Et Du Minuteur
C O N S I G N E S D E F O N C T I O N N E M E N T UTILISATION DE L'HORLOGE ET DU MINUTEUR RÉGLAGE DE L'HORLOGE RÉGLAGE DU MINUTEUR L'horloge doit être réglée à l'heure exacte pour que les Le minuteur ne commande pas les opérations du four. -
Page 70: Utilisation Des Fonctions De Cuisson Et De Rôtissage Différés
C O N S I G N E S D E F O N C T I O N N E M E N T UTILISATION DE L'HORLOGE ET DU MINUTEUR (suite) ANNULATION DE LA FONCTION DU COUPURE DE COURANT MINUTEUR Si l'heure clignote à... - Page 71 C O N S I G N E S D E F O N C T I O N N E M E N T UTILISATION DES FONCTIONS DE CUISSON ET DE RÔTISSAGE DIFFÉRÉS (suite) RÉGLAGE DU DÉMARRAGE DIFFÉRÉ ET DE REMARQUE : Si vous voulez vérifier les horaires que vous avez définis, appuyez sur la touche START TIME pour L'ARRÊT AUTOMATIQUE...
-
Page 72: Utilisation Du Four À Convection
C O N S I G N E S D E F O N C T I O N N E M E N T UTILISATION DU FOUR À CONVECTION Le ventilateur du four à convection s'éteint lors de CUISSON PAR CONVECTION l'ouverture de la porte. - Page 73 C O N S I G N E S D E F O N C T I O N N E M E N T UTILISATION DU FOUR À CONVECTION (suite) CONVERSION AUTOMATIQUE DES RECETTES Vous pouvez réaliser vos recettes préférées dans le four à Appuyez sur la touche CLEAR OFF à...
- Page 74 C O N S I G N E S D E F O N C T I O N N E M E N T UTILISATION DU FOUR À CONVECTION (suite) RÉGLAGE DU FOUR POUR LA CUISSON OU LE RÔTISSAGE PAR CONVECTION Lorsque le four commence à...
- Page 75 C O N S I G N E S D E F O N C T I O N N E M E N T UTILISATION DU FOUR À CONVECTION (suite) TABLEAU DE RÔTISSAGE PAR CONVECTION Viandes Minutes/lb Temp. du four Bœuf Côtes levées (3 à...
-
Page 76: Utilisation Des Fonctions De Cuisson Et De
C O N S I G N E S D E F O N C T I O N N E M E N T UTILISATION DES FONCTIONS DE CUISSON ET DE RÔTISSAGE PAR CONVECTION REMARQUES : • Les aliments qui se gâtent rapidement, comme le lait, les œufs, le poisson, la farce, la volaille et le porc ne doivent •... - Page 77 C O N S I G N E S D E F O N C T I O N N E M E N T UTILISATION DES FONCTIONS DE CUISSON ET DE RÔTISSAGE PAR CONVECTION (suite) RÉGLAGE DU DÉMARRAGE DIFFÉRÉ ET DE L'ARRÊT AUTOMATIQUE Le four se met en marche à...
-
Page 78: Utilisation De La Fonction Favoris
C O N S I G N E S D E F O N C T I O N N E M E N T UTILISATION DE LA FONCTION FAVORIS La touche FAVORITE (FAVORIS) permet d'enregistrer et La fonction des réglages favoris peut être utilisée avec la de revoir les réglages de vos recettes préférées. -
Page 79: Réglage De La Fonction Proof (Levage)
C O N S I G N E S D E F O N C T I O N N E M E N T RÉGLAGE DE LA FONCTION PROOF (LEVAGE) La fonction Proof (Levage) maintient la chaleur pour faire lever les produits avec de la levure avant la cuisson. -
Page 80: Fonctions Spéciales Des Commandes Du Four
C O N S I G N E S D E F O N C T I O N N E M E N T FONCTIONS SPÉCIALES DES COMMANDES DU FOUR Les nouvelles commandes présentent des fonctions Ils sont conservés en mémoire jusqu'à ce que vous répétiez supplémentaires que vous pouvez choisir d'utiliser. - Page 81 C O N S I G N E S D E F O N C T I O N N E M E N T FONCTIONS SPÉCIALES DES COMMANDES DU FOUR RÉGLAGE DU THERMOSTAT DU FOUR Il se peut que vous trouviez que votre nouveau four cuise Pour diminuer (-) la température différemment de l'ancien.
- Page 82 C O N S I G N E S D E F O N C T I O N N E M E N T FONCTIONS SPÉCIALES DES COMMANDES DU FOUR CHOIX DE LA LANGUE RÉGLAGE MARCHE/ARRÊT DU VOYANT DE PRÉCHAUFFAGE Les commandes du four sont définies pour être affichées en anglais, mais vous pouvez les afficher en espagnol ou en...
-
Page 83: Utilisation Du Tiroir Chauffe-Plats Électrique (Sur Certains Modèles)
C O N S I G N E S D E F O N C T I O N N E M E N T UTILISATION DU TIROIR CHAUFFE-PLATS ÉLECTRIQUE (sur certains modèles) Le tiroir chauffe-plats maintient au chaud les aliments cuits, prêts à être servis. Il faut que ces aliments soient chauds au préalable. - Page 84 C O N S I G N E S D E F O N C T I O N N E M E N T UTILISATION DU TIROIR CHAUFFE-PLATS ÉLECTRIQUE (sur certains modèles) TABLEAU DU CHOIX DES TEMPÉRATURES POUR RENDRE CROUSTILLANTS DES ALIMENTS SECS Pour maintenir au chaud plusieurs aliments différents, réglez les commandes selon les paramètres les plus élevés...
-
Page 85: Utilisation De L'auto-Nettoyage
C O N S I G N E S D E F O N C T I O N N E M E N T UTILISATION DE L'AUTO-NETTOYAGE AVANT UN CYCLE DE NETTOYAGE Lors du cycle d'auto REMARQUES : nettoyage, nous •... - Page 86 C O N S I G N E S D E F O N C T I O N N E M E N T UTILISATION DE L'AUTO-NETTOYAGE La porte du four doit être fermée et toutes les commandes bien réglées pour que le cycle s'effectue correctement. LANCEMENT DIFFÉRÉ...
-
Page 87: Entretien Et Nettoyage De La Cuisinière
E N T R E T I E N E T N E T TOYAG E D E L A C U I S I N I È R E ENTRETIEN ET NETTOYAGE Assurez-vous que le courant est coupé et que toutes ATTENTION: les surfaces sont froides avant de nettoyer toute partie de la cuisinière. -
Page 88: Couvercles Et Têtes Des Brûleurs
E N T R E T I E N E T N E T TOYAG E D E L A C U I S I N I È R E COUVERCLES ET TÊTES DES BRÛLEURS • NE NETTOYEZ PAS le produit avec de l'eau de Javel. Pour retirer les aliments brûlés, faites tremper les têtes des COUVERCLES DES BRÛLEURS brûleurs dans un mélange d'eau chaude et de détergent... -
Page 89: Grilles Des Brûleurs
E N T R E T I E N E T N E T TOYAG E D E L A C U I S I N I È R E GRILLES DES BRÛLEURS Votre cuisinière dispose de trois grilles. grille latérale grille centrale grille latérale Pour une stabilité... -
Page 90: Surfaces En Acier Inoxydable
E N T R E T I E N E T N E T TOYAG E D E L A C U I S I N I È R E SURFACES EN ACIER INOXYDABLE N'UTILISEZ PAS de tampons de l'aine d'acier; ils Pour vous renseigner sur l'achat du nettoyant ou produit de rayeront de rayer la surface. -
Page 91: Porte Du Four
E N T R E T I E N E T N E T TOYAG E D E L A C U I S I N I È R E PORTE DU FOUR REMISE EN PLACE DE LA PORTE La porte du four est amovible, mais elle est lourde. Il se peut que vous ayez besoin d'aide lors du retrait et de la Étape 1 remise en place de la porte. -
Page 92: Fond Du Four
E N T R E T I E N E T N E T TOYAG E D E L A C U I S I N I È R E FOND DU FOUR Le fond du four présente des finitions en émail vitrifié. N'UTILISEZ PAS de papier aluminium sur le fond de la Pour faciliter le nettoyage, protégez le fond du four des cuisinière. -
Page 93: Grilles Du Four Et Du Tiroir Chauffe-Plats
E N T R E T I E N E T N E T TOYAG E D E L A C U I S I N I È R E GRILLES DU FOUR ET DU TIROIR CHAUFFE-PLATS Si votre four est équipé de grilles en nickel, retirez-les avant Pour nettoyer les grilles en nickel, utilisez un nettoyant le début du cycle d'auto-nettoyage. -
Page 94: Tiroir Chauffe-Plats Amovible
E N T R E T I E N E T N E T TOYAG E D E L A C U I S I N I È R E TIROIR CHAUFFE-PLATS AMOVIBLE REMARQUE : Avant d'effectuer un réglage, un nettoyage ou une réparation, débranchez la cuisinière. -
Page 95: Dépannage
D É PA N N AG E AVANT D'APPELER UN DÉPANNEUR Avant d'appeler un dépanneur, consultez les pages suivantes. Cela peut vous faire gagner du temps et de l'argent. Vous y trouverez la liste des incidents fréquents qui ne sont pas le résultat d'un défaut de fabrication ou de matériau. Problème Causes possibles Solutions... - Page 96 D É PA N N AG E AVANT D'APPELER UN DÉPANNEUR Problème Causes possibles Solutions Les aliments ne • Les commandes du four sont mal • Assurez-vous d'appuyer sur BROIL HI/LO. grillent pas bien réglées dans le four. • La porte du four n'est pas fermée. •...
- Page 97 D É PA N N AG E AVANT D'APPELER UN DÉPANNEUR Problème Causes possibles Solutions La porte du four ne • Le four est trop chaud. • Laisser le four refroidir en dessous de la température de s'ouvre pas après un verrouillage.
- Page 98 D É PA N N AG E AVANT D'APPELER UN DÉPANNEUR Problème Causes possibles Solutions Le ventilateur à • La température de préchauffage n'est pas • Le ventilateur se met en marche automatiquement une convection ne atteinte. fois que la température de préchauffage est atteinte. fonctionne pas (modèles à...
- Page 99 LG Canada réparera ou remplacera à sa discrétion le produit sur réception de la preuve d’achat originale fournie par le détaillant. Cette garantie n’est offerte qu’à l’acheteur original du produit chez un détaillant et ne s’applique qu’à un produit distribué au Canada par LG Canada ou par un distributeur canadien autorisé.
- Page 100 M e m o...