Sign In
Upload
Manuals
Brands
Pioneer Manuals
Car Receiver
AVIC-X3 II
Pioneer AVIC-X3 II Manuals
Manuals and User Guides for Pioneer AVIC-X3 II. We have
2
Pioneer AVIC-X3 II manuals available for free PDF download: Installation Manual, Operation Manual
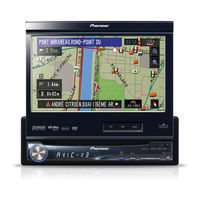
Pioneer AVIC-X3 II Operation Manual (164 pages)
DVD MULTIMEDIA AV NAVIGATION HEAD UNIT
Brand:
Pioneer
| Category:
Car Receiver
| Size: 8.9 MB
Table of Contents
Table of Contents
6
Licence Agreement
3
Pioneer Avic-X3
3
Tele Atlas End User Licensing Terms
4
About the Data for the Map Database
5
Copyright
5
Manual Overview
10
How to Use this Manual
10
About the Definition of Terminology
11
Terminology
11
Important Safety Information
12
Additional Safety Information
13
Handbrake Interlock
13
Colour Difference of the Map Display between Day and Night
14
Rear View Camera
14
To Avoid Battery Exhaustion
14
When Using a Display Connected to REAR out (VIDEO OUT)
14
Notes before Using the System and Additional Safety Information
13
About this Product
13
In Case of Trouble
13
Precaution
13
Visit Our Web Site
13
Features
14
Aac File Playback
15
Auto Reroute Function
15
DIVX Video File Playback
15
Mp3 File Playback
15
Wma File Playback
15
Playable Discs
16
DVD-Video Disc Region Numbers
17
What the Marks on Dvds Indicate
17
About AAC
18
About DIVX
18
About WMA
18
To Protect the LCD Panel and Screen
18
For Viewing LCD Comfortably
19
Resetting the Microprocessor
19
About the Data Being Deleted
19
Reset the Navigation System to the Initial (Factory) Setting
19
Reset the Navigation System Without Changing the Condition Memory
19
DVD Map Discs for Your Navigation System
20
Configuration of Data Recorded on Discs
20
Initial Use
20
Chapter 1
21
Basic Operation
21
Navigation Unit
21
Flow from Startup to Termination
22
Inserting/Ejecting a Disc
22
Ejecting a Disc
22
Inserting a Disc
22
Opening and Closing the LCD Panel
22
Setting the LCD Panel
23
Adjusting the LCD Panel Angle
23
Setting the Slide Back Function
23
Setting the Automatic Open Function
24
Protecting Your Product from Theft
24
Attaching the Front Panel
24
Removing the Front Panel
24
About NAVI MENU and AV MENU
25
Basic Navigation
26
How to Set Your Destination by Address
27
Memory Navi Mode
29
Basic AV Source
30
Adjusting the Volume
30
Selecting an AV Source
30
Turning the Source off
30
How to Listen to a CD
31
Available Buttons
32
Chapter 2
33
How to Use Menu Screens
33
Navi Menu
33
Shortcut Menu
34
Navigation Menu and Map Display
33
How to Use the Map
34
Switching the Current Position Screen Display Mode
34
How to View the Map of the Current Location
35
Display During Motorway Driving
36
Display Items
36
Changing the Scale of the Map
38
Moving the Map to the Location You Want to See
38
Chapter 3
41
Finding Your Destination by Selecting the Type of Facility
41
Searching for Points of Interest (POI)
41
Finding a POI in Your Surroundings
42
Searching the Facilities Around the Scroll Cursor
42
Setting a Route to Your Destination
41
Finding Your Destination by Specifying the Postcode
43
Setting an Entrance or Exit of a Motorway as Your Destination
43
Cancelling the Route Guidance
44
Route Calculation to Your Home Location or to Your Favourite Location
44
Selecting Destination from the Destination History and Address Book
44
Checking the Set Route
45
Checking the Set Route by Text
45
Checking the Set Route with the Map
45
Checking the Entire Route Overview
46
Checking the Set Route from the Shortcut Menu
46
Recalculating the Route to Your Destination
46
Recalculating a Specified Distance in the Route Ahead of Your Current Position
46
Recalculating the Route to the Destination Using the Route Options Menu
46
Editing Way Points to the Current Route
47
Editing a Way Point
47
Skipping a Way Point
47
Setting Areas to Avoid
48
Changing or Deleting an Area to Avoid
48
Registering an Area to Avoid
48
Displaying Certain POI on the Map
49
Registering/Deleting POI Shortcuts
49
Registering a POI Shortcut
49
Deleting a POI Shortcut
50
Modifying the Route Calculation Conditions
50
Edit Current Route
50
Items that Users Can Operate
50
Route Condition
50
Route no
50
View Current Route
50
Areas to Avoid
51
Avoid Ferry
51
Avoid Motorway
51
Avoid Toll Road
51
Perform the Route Calculation for Several Route Options, and Select One
51
Chapter 4
53
Editing Registered Locations
53
Registering Your Home and Your Favourite Location
53
Editing a Location's Information
54
Registering a Previous Location in the Address Book
54
Deleting Address Book or Destination History Information
55
Changing the Position of Locations Registered in the Address Book
56
Loading Registered Locations Data from a Disc
56
Editing the Navigation Utilities
53
Using Traffic Information
56
Viewing Traffic Information
57
Information on Avoiding Traffic Jam on Route Ahead
58
When Checking Traffic Jam Information Manually
58
Selecting Traffic Information to Display
59
Selecting the Radio Station
60
Changing Background Picture
60
Checking the Navigation Status
62
Checking Sensor Learning Status and Driving Status
62
Checking the Connections of Leads and Installation Positions
63
Chapter 5
65
Setting the Vehicle Dynamics Display
62
Customising Your Navigation System
65
Items Users Can Change
65
Volume
65
Average Speed
66
Background Picture Setting
66
Km Mile Setting
66
Language Selection
66
Read from Disc
66
System Options
66
Av Guide Mode
67
Day/Night Display
67
Map Display Options
67
Short-Cut Selection
67
Tracking Display
67
Arrow in Av
68
Close-Up of Junction
68
Defined Locations
68
Demo Mode
68
Map in Memory
68
Set "Home
68
Time
68
Connection Status
69
D Calibration Status
69
Hardware Info
69
Modify Current Location
69
Restore Factory Settings
69
Chapter 6
71
Modifying the Default Settings
65
How to Display each Menu
71
Using the AV Source (Built-In DVD Drive and Radio)
71
Operating the Built-In DVD Drive
73
Switching the Media Files Type
74
Touch Key Operation (DVD-V)
74
Operation Using the Function Menu (DVD-V)
75
Other Functions (DVD-V)
75
Slow Motion Playback
76
Touch Key Operation (CD, ROM)
77
Operation Using the Function Menu (CD, ROM)
79
Touch Key Operation (DIVX)
79
Operation Using the Function Menu (DIVX)
80
Other Functions (DIVX)
81
Radio
82
Listening to the Radio
82
Advanced Radio Operation
83
Storing and Recalling Broadcast Stations
83
Switching between the Detail Information Dis- Play and the Preset List Display
83
Storing the Strongest Broadcast Frequencies
84
Tuning in Strong Signals
84
Rds
84
RDS Operation
84
Limiting Stations to Regional Programming
85
Receiving Traffic Announcements
85
Selecting Alternative Frequencies
85
Using PTY Functions
86
Using Radio Text
86
Displaying Radio Text
87
Storing and Recalling Radio Text
87
PTY List
88
Chapter 7
89
Multi-DVD Player
89
Operations and Functions
89
Playing a Disc
89
Using the AV Source (Pioneer AV Equipment)
89
Usb
90
Displaying Text Information
90
Operating the USB Portable Audio Player/Usb Memory
90
Switching between the Detail Information Display and the List Display
90
Advanced USB Operation
91
Playing Tracks in a Random Order
91
Repeating Play
91
Scanning Folders and Tracks
91
Viewing Contents of Upper Folder
91
Hands-Free Phoning
92
About the Telephone Source Standby Mode
92
Hands-Free Phoning with Mobile Phones Featuring Bluetooth Technology
92
Setting up for Hands-Free Phoning
92
Making a Call by Entering Phone Number
93
Making a Call from the History List
93
Calling a Number in the Phone Book
94
Making a Call from the Preset Dial List
94
Making a Call Via Voice Recognition
95
Taking a Phone Call
95
Advanced Hands-Free Phoning Operation
96
Connecting a Mobile Phone
96
Deleting a Registered Phone
98
Disconnecting a Mobile Phone
98
Displaying BD (Bluetooth Device) Address
98
Registering Your Mobile Phone
98
Changing the Phone Book Display Order
99
Editing the Phone Book
99
Transferring the Phone Book
99
Clearing Memory
100
Echo Cancelling and Noise Reduction
101
Setting a Ring Tone
101
Setting the Automatic Answering
101
Setting the Automatic Connection
101
Setting the Automatic Rejecting
101
Ipod
102
Operating Ipod
102
Advanced Ipod Operation
104
Turning on or off Charging for the Ipod
104
Wide Screen
104
Bluetooth Audio
105
Listening to Songs on BT Audio (Bluetooth Audio Player)
105
Advanced BT-Audio Operation
106
Connecting a Bluetooth Audio Player
106
Disconnecting a Bluetooth Audio Player
106
Displaying BD (Bluetooth Device) Address
106
Pausing Track Playback
106
External Unit
107
Operate the External Unit by Using 1 KEY
107
Operate the External Unit by Using F1 - F4
107
Operating the External Unit
107
Switching the Automatic and Manual Function
107
AV Input (AV)
108
Selecting AV as the Source
108
Chapter 8
109
Audio Adjustments
109
Introduction to Audio Adjustments
109
Using Balance Adjustment
109
Using the Equaliser
109
Adjusting Equaliser Curves
110
Setting the Simulated Sound Stage
110
Adjusting Loudness
111
Using Non Fading Output
111
Using Subwoofer Output
111
Using the High Pass Filter
111
Adjusting Source Levels
112
Customising the AV Source Setting
109
Setting up the DVD/DIVX Player
112
DVD/DIVX Setup Adjustments
112
Setting the Language
112
Setting Angle Icon Display
113
Setting Assist Subtitles on or off
113
Setting the Aspect Ratio
113
Setting the Parental Lock
113
Displaying Your DIVX® VOD Registration Code
114
Setting the Auto Play
114
Setting the Subtitle File
114
Initial Settings
115
Adjusting Initial Settings
115
Setting the FM Tuning Step
115
Setting the Rear Output and Subwoofer Controller
115
Switching Auto PI Seek
115
Editing the PIN Code
116
Switching the Sound Muting/Attenuation
116
Other Functions
116
Selecting the Video for "Rear Display
116
Setting for Rear View Camera
117
Setting the Video Input
117
Setup Adjustments
117
Setting the Illumination Colour
118
Setting the Screen Colour
118
Switching the Auto Aerial Setting
118
Changing the Wide Screen Mode
118
Operating the Picture Adjustment
119
Switching the Backlight On/Off
120
Language Code Chart for DVD
121
Anti-Theft Function
123
Delete the Password
123
Enter the Password
123
If the Password Is Forgotten
123
Setting the Password
123
Appendix
123
Installing the Programme
124
Adjusting the Response Positions of the Touch Panels (Touch Panel Calibration)
125
Memory Navi Mode
126
Navigation in the Memory Navi Mode
126
About the Icon for the Memory Navi Mode
127
All Traffic
127
Destination History
127
Traffic Settings
127
Cautions Relating to Auto Reroute in Memory Navi Mode
128
Major Restrictions During the Memory Navi Mode
128
Operation Outside the Memorised Area
128
TMC Icon During the Memory Navi Mode
128
Positioning Technology
129
How Do GPS and Dead Reckoning Work Together
129
Positioning by Dead Reckoning
129
Positioning by GPS
129
Handling Large Errors
130
When the Positioning by GPS Is Impossible
130
Conditions Likely to Cause Noticeable Positioning Errors
131
Vehicles that Cannot Obtain Speed Pulse Data
131
About the Data Being Deleted
133
Limitation of Functions for Areas Not Stored on the Disc
133
Destination Search
133
Displaying the Map
133
Guidance
133
Other Function Limitations
134
Route Information
134
Troubleshooting
135
Problems in the Navigation Screen
135
Problems in the Audio Screen (During DVD-Video Playback)
137
Messages and How to React to Them
139
Problems in the Audio Screen (During Ipod Playback)
139
Error Messages
143
Handling and Care of the Disc
144
DVD Drive and Care
144
DVD Map Discs
144
DVD-R/-RW and CD-R/-RW
144
DVD-Video
144
About Playing Dual Disc
145
MP3, WMA and AAC Files
145
DIVX Video Files
146
Ambient Conditions for Playing a Disc
147
DIVX Subtitle Files
147
Using the Navigation System Correctly
147
Handling the LCD Screen
148
Keeping the LCD Screen in Good Condition
148
Liquid Crystal Display (LCD) Screen
148
Small Fluorescent Tube
148
Route Setting Information
149
Route Search Specifications
149
About Traffic Information
150
Tracking
150
Glossary
151
Address Book
151
Dolby Digital
152
Guidance Mode
152
Home Location
152
Route Setting
153
Set Route
153
Voice Guidance
153
Types of the Road Stored in the Disc
151
Non Routable Roads (Pink Colour Road)
151
Roads Included in the Route Guidance and Roads Not Included
151
Specifications
154
Display Information
156
Navi Menu
156
Settings
157
Menu in the Audio Screen
158
Sound Menu
158
Initial Menu
159
System Menu
159
Function Menu
160
Shortcut Menu
158
Advertisement
Pioneer AVIC-X3 II Installation Manual (182 pages)
In-Dash GPS & Entertainment System with Motorised Screen
Brand:
Pioneer
| Category:
Car Receiver
| Size: 5.06 MB
Table of Contents
English
2
Table of Contents
2
Important Information
3
About Your New Navigation System and this Manual
3
Important Safeguards
4
Please Read All of These
4
Instructions Regarding Your
4
For Future Reference
4
Connecting the System Precautions before Connecting the System
5
Before Installing this Product
6
To Prevent Damage
6
Parts Supplied
7
Connecting the System
8
Connecting the Power Cord (1)
10
Connecting the Power Cord (2)
12
When Connecting to Separately Sold Power Amp
14
When Connecting a Rear View Camera
16
When Connecting the External Video Component
17
When Using the AV-1 Input
17
When Using the AV-2 Input
17
When Connecting the External Unit Featuring Video Source
18
When Connecting the Rear Display
18
When Using a Rear Display Connected to Rear Video Output
18
Installation
19
Precautions before Installation
19
Installation Precautions before Installation
19
To Guard against Electromagnetic Interference
20
Before Installing
20
Installing this Navigation System
20
Installation Notes
20
Parts Supplied
21
Installing the Hide-Away Unit
23
DIN Front/Rear-Mount
24
DIN Front-Mount
24
DIN Rear-Mount
25
Fixing the Front Panel
25
Installing the GPS Aerial
26
Installation Notes
26
Parts Supplied
26
When Installing the Aerial Inside the Vehicle (on the Rear Shelf)
27
When Installing the Aerial Outside the Vehicle (on the Body)
28
After Installation
29
After Installing this Navigation System
29
Español
30
Acerca de Su Nuevo Sistema de Navegación Yeste Manual
31
Información Importante
31
Lea Todas Estas Instrucciones
32
Relacionadas con Su Sistema de
32
Emplearlas como Referencia en el
32
Futuro
32
Precauciones Importantes
32
Conexión del Sistema
33
Precauciones Antes de Conectar el
33
Antes de Instalar Este Producto
35
Para Impedir Daños
35
Partes Suministradas
36
Conexión del Sistema
38
Conexión del Cable de Alimentación (1)
40
Conexión del Cable de Alimentación (2)
42
Conexión al Amplificador de Potencia que Se Vende por Separado
44
Conexión de una Cámara para Visión Trasera
46
Al Conectar el Componente de Vídeo Externo
47
Cuando Utilice una Entrada
47
Cuando Utilice la Entrada
47
Al Conectar la Pantalla Posterior
48
Al Usar una Pantalla Posterior Conectada a la Salida de Vídeo Trasera
48
Al Conectar la Unidad Externa con Fuente de Vídeo
48
Instalación
49
Precauciones Antes de la Instalación
49
Antes de la Instalación
50
Instalación de Este Sistema de Navegación
50
Notas Acerca de la Instalación
50
Partes Suministradas
52
Instalación de la Unidad Oculta
53
Alejada
53
Montaje Delantero/Trasero DIN
54
Montaje Delantero DIN
54
Montaje Trasero DIN
55
Fijación del Panel Delantero
56
Para Impedir que Se Produzcan Interferencias Electromagnéticas
50
Instalación de la Antena GPS
57
Notas Acerca de la Instalación
57
Partes Suministradas
57
Cuando Instale la Antena en el Interior del Vehículo (en el Bandeja Trasero)
58
Cuando Instale la Antena en el Exterior del Vehículo (en la Carrocería)
59
Después de la Instalación
60
Deutsch
61
Wichtige Information
62
Über Ihr Neues Navigationssystem und diese Anleitung
62
Bitte Lesen Sie diese Anleitung zum
63
Navigationssystem Aufmerksam
63
Anleitung für Späteres
63
Nachschlagen auf
63
Wichtige Sicherheitshinweise
63
Anschluss des Systems
64
Vor dem Anschließen des Systems zu
64
Vor dem Einbau dieses Produkts
66
Zur Vermeidung von Schäden
66
Mitgelieferte Teile
67
Anschluss des Systems
68
Stromkabel Anschließen (1)
70
Stromkabel Anschließen (2)
72
Beim Anschluss an den Separat Erhältlichen Leistungsverstärker
74
Beim Anschluss einer Heckkamera
76
Bei Anschluss der Externen Videokomponente
77
Bei Verwendung des AV-1-Eingangs
77
Bei Verwendung des AV-2-Eingangs
77
Bei Anschluss der Heckanzeige
78
Bei Verwendung einer Heckanzeige, die an den Hinteren Videoausgang Angeschlossen ist
78
Beim Anschluss der Externen Einheit mit Videoquelle
78
Einbau
79
Vor der Installation zu Beachten
79
Einbau dieses Navigationssystems
80
Hinweise zum Einbau
80
Mitgelieferte Teile
82
Einbau der Hideaway-Einheit
83
DIN-Vorder-/Rückmontage
84
DIN-Vordermontage
85
DIN-Rückmontage
86
Frontplatte Befestigen
86
Vor dem Einbau
80
Zur Vermeidung Elektromagnetischen Rauschens
80
Einbau der GPS-Antenne
87
Hinweise zur Befestigung
87
Mitgelieferte Teile
87
Einbau der Antenne IM
88
Fahrzeuginnenraum (auf der Hutablage)
88
Einbau der Antenne Außen am Fahrzeug (an der Karosserie)
89
Nach dem Einbau dieses
90
Navigationssystems
90
Nach der Installation
90
Français
91
A Propos de Votre Nouveau Systeme de Navigation Et de Ce Manuel
92
Information Importante
92
Importantes Mesures de Securite
93
Veuillez Lire Toutes Les Explications Relatives a Votre Systeme de Navigation Et Les Conserver Pour Vous y Referer Par la Suite
93
Avant de Raccorder Ce Produit
95
Branchement du Système
95
Pour Éviter Toute Détérioration
95
Pièces Fournies
96
Branchement du Système
98
Branchement du Cordon D'alimentation (1)
100
Branchement du Cordon D'alimentation (2)
102
Branchement D'un Amplificateur de Puissance Vendu Séparément
104
Branchement D'une Caméra de Rétrovisée
106
Branchement D'un Appareil VIDéo Externe
107
Utilisation de L'entrée
107
Branchement de L'unité Externe Avec Source VIDéo
108
Connexion de L'écran Arrière
108
Utilisation D'un Écran Arrière Raccordé À la Sortie VIDéo Arrière
108
Installation
109
L'installation
109
Avant de Procéder À L'installation
110
Installation de Ce Système de Navigation
110
Remarques Sur L'installation
110
Pièces Fournies
112
Installation de L'unité Déportée
113
Montage DIN Avant/Arrière
114
Montage DIN Avant
114
Montage DIN Arrière
115
Fixation du Panneau Avant
116
Pour Protéger Le Système de Navigation Contre Les Parasites Électromagnétiques
110
Installation de L'antenne GPS
117
Remarques Sur L'installation
117
Pièces Fournies
117
Installation de L'antenne À L'intérieur du Véhicule (Sur la Tablette Arrière)
118
Installation de L'antenne À L'extérieur du Véhicule (Sur la Carrosserie)
119
Après Installation de Ce Système de
120
Navigation
120
Après L'installation
120
Italiano
121
Informazioni Importanti
122
Uso del Nuovo Sistema DI Navigazione E del Presente Manuale
122
Leggere Tutte Le Presenti Istruzioni
123
Riferimenti Futuri
123
Misure DI Sicurezza Importanti
123
Collegamento del Sistema
125
Per Evitare Danni
125
Prima DI Installare Questo Prodotto
125
Pezzi in Dotazione
126
Collegamento del Sistema
128
Collegamento del Cavo DI Alimentazione (1)
130
Collegamento del Cavo DI Alimentazione (2)
132
Quando si Collega Ad un Amplificatore in Vendita Separatamente
134
Quando si Collega con una Telecamera a Vista Posteriore
136
Quando si Collega Il Componente Video Esterno
137
Durante L'uso Dell'ingresso
137
Quando si Collega Il Display Posteriore
138
Quando si Utilizza un Display Posteriore Collegato a Un'uscita Video Posteriore
139
Quando si Collega L'unità Esterna Munita DI Sorgente Video
138
Installazione
140
Precauzioni Prima Dell'installazione
140
Installazione DI Questo Sistema DI Navigazione
141
Note Sull'installazione
141
Pezzi in Dotazione
142
Installazione Dell'unità a Scomparsa
144
Montaggio Anteriore O Posteriore DI
145
Standard DIN
145
Montaggio Anteriore a Standard DIN
145
Montaggio Posteriore a Standard DIN
146
Fissaggio del Pannello Frontale
147
Per Proteggere L'unità DI Navigazione da Disturbi Elettromagnetici
141
Prima Dell'installazione
141
Installazione Dell'antenna GPS
148
Note Sull'installazione
148
Pezzi in Dotazione
148
Quando si Installa L'antenna All'interno del Veicolo (Sul Ripiano Posteriore)
149
Quando si Installa L'antenna All'esterno del Veicolo (Sulla Carrozzeria)
150
Dopo L'installazione
151
Dutch
152
Belangrijke Informatie
153
Betreffende Uw Nieuwe Navigatiesysteem en Het Gebruik Van Deze Handleiding
153
Lees Deze Informatie Betreffende Uw
154
Navigatiesysteem Zorgvuldig Door
154
En Bewaar de Informatie Voor
154
Latere Naslag
154
Aansluitingen
155
Voorzorgen Voor Het Aansluiten Van Het Systeem
155
Alvorens U Dit Product Inbouwt
156
Voorkomen Van Beschadigingen
156
Bijgeleverde Accessoires
157
Systeemcomponenten Aansluiten
158
Het Stroomsnoer Aansluiten (1)
160
Het Stroomsnoer Aansluiten (2)
162
Voor Aansluiting Op Een Los Verkrijgbare Eindversterker
164
Bij Aansluiting Van Een Achteruitkijkcamera
166
Bij de Aansluiting Van Een Extern Videocomponent
167
Bij Gebruik Van de AV-1 Input
167
Bij Gebruik Van de AV-2 Input
167
Tijdens de Aansluiting Van de Externe Eenheid Met Videobron
168
Tijdens Het Aansluiten Van Het Achterdisplay
168
Tijdens Het Gebruik Van Een Achterdisplay Dat Op de Achtervideo-Uitgang Is Aangesloten
169
Inbouwen
170
Voorzorgen Voor Installatie
170
Dit Navigatiesysteem Inbouwen
171
Opmerkingen Betreffende Het Inbouwen
171
Bijgeleverde Accessoires
173
Inbouwen Van de Verborgen Eenheid
174
DIN Voor/Achter-Montage
175
DIN Voormontage
176
DIN Achtermontage
177
Bevestigen Van Het Voorpaneel
177
Voor de Installatie
171
Voorkomen Van Elektromagnetische Storingen
171
Bevestigen Van de GPS-Antenne
178
Opmerkingen Betreffende Het Bevestigen
178
Bijgeleverde Accessoires
178
Bevestigen Van de Antenne Binnen in de Auto (Op de Hoedenplank)
179
Bevestigen Van de Antenne Aan de Buitenzijde Van de Auto (Op de Carrosserie)
180
Na Het Inbouwen Van Dit
181
Navigatiesysteem
181
Na Installatie
181
Advertisement
Related Products
Pioneer AVIC-X930BTXNUC
Pioneer AVIC-X9310BTXNUC
Pioneer AVIC-80DVD
Pioneer AVIC-F320BT
Pioneer AVIC-HD3
PIONEER AVIC-F930BT
PIONEER AVIC-F9220BT
PIONEER AVIC-9DVD-II
PIONEER AVIC-F910BT
Pioneer AVIC-F950DAB
Pioneer Categories
Car Receiver
Receiver
Stereo Receiver
Amplifier
CD Player
More Pioneer Manuals
Login
Sign In
OR
Sign in with Facebook
Sign in with Google
Upload manual
Upload from disk
Upload from URL