Sign In
Upload
Manuals
Brands
Panasonic Manuals
Camcorder
HC-X1500
Panasonic HC-X1500 Manuals
Manuals and User Guides for Panasonic HC-X1500. We have
4
Panasonic HC-X1500 manuals available for free PDF download: Owner's Manual, Operating Instructions Manual, Basic Operating Instructions Manual
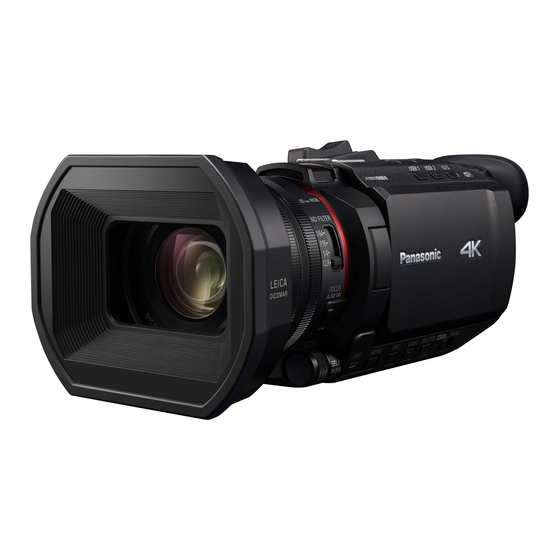
Panasonic HC-X1500 Owner's Manual (215 pages)
4K video camera
Brand:
Panasonic
| Category:
Camcorder
| Size: 8.33 MB
Table of Contents
Safety Precautions
2
Table of Contents
9
Chapter 1 Overview
11
Before Using the Unit
12
Accessories/Optional Accessories
15
Accessories
15
Optional Accessories
16
When Turning on the Power for the First Time
17
[Time Zone]
17
[Clock Setting]
17
What You Can Do with this Unit
18
Recording to the Memory Card
18
Linking to External Devices
18
Connecting to the Network
19
Chapter 2 Description of Parts
20
Main Unit
21
Handle Unit ([X2000] Supplied, [X1500] Optional: VW-HU1)
24
Basic Operation
26
Multidial Operation
26
Touch Operation of the LCD Monitor
26
Chapter 3 Preparation
27
Power Supply
28
Attaching and Removing the Battery
28
Charging the Battery
29
Attaching Accessories
31
Adjusting the Grip Belt
31
Attaching the Lens Hood
31
Attaching the Eye Cup
32
Attaching the Handle Unit ([X2000] Supplied, [X1500] Optional)
33
Attaching the External Microphone
35
Attaching a Tripod
36
Turning On/Off the Power
37
Turning the Unit on and off with the Power Button
37
Turning the Unit on and off with the LCD Monitor/Viewfinder
37
Charging the Built-In Battery
37
Setting the Date/Time of the Internal Clock
38
Preparing the Memory Card
39
Memory Cards Supported by the Unit (as of January 2020)
39
Preventing Unintentional Erasing
40
Inserting/Removing the Memory Card
41
Formatting the Memory Card
41
Recording Time of the Memory Card
42
Handling the Recording Data
44
Setting of Time Data
47
Definition of Time Data
47
User Bits Settings
47
Setting the Time Code
48
Assigning Function to the USER Buttons
50
Functions Assigned to USER Buttons
50
Checking the Function Assigned to the USER Buttons
52
Adjusting and Setting the LCD Monitor
53
Using the LCD Monitor
53
Adjusting the LCD Monitor
53
Mirror Shooting
53
Adjusting and Setting the Viewfinder
54
Using the Viewfinder
54
Adjusting the Viewfinder
54
Tally Lamp
55
Chapter 4 Operation
56
Basic Operation of the Screen
57
Major Button Operation and Screen Display
57
Major Button Operation and Switching Screen
58
Operating each Screen
59
Camera Image Screen
59
Thumbnail Screen
59
Operation Icon Screen
59
Basic Operation of the Menu
60
Configuration of the Menu
60
Displaying the Menu
61
Operating the Menu
62
Initializing the Menu
63
Menu Settings
64
[THUMBNAIL] Menu
64
[CAMERA] Menu
65
[SCENE FILE] Menu
68
[AUDIO] Menu
73
[VIDEO OUT/LCD/VF] Menu
75
[RECORDING] Menu
83
[NETWORK] Menu
85
[SYSTEM] Menu
89
[OTHERS] Menu
90
Factory Setting Value of the Scene File
93
[SCENE FILE] Menu
93
Target Items for Scene File/Setup File/Initialization
94
[THUMBNAIL] Menu
94
[CAMERA] Menu
94
[SCENE FILE] Menu
95
[AUDIO] Menu
96
[VIDEO OUT/LCD/VF] Menu
96
[RECORDING] Menu
98
[NETWORK] Menu
98
[SYSTEM] Menu
98
[OTHERS] Menu
99
Handling Setting Data
100
Scene Files
100
Setup File
102
Chapter 5 Shooting
103
Shooting
104
Selecting the Resolution, Codec, and Frame Rate for Recording Video
105
Adjustable Settings When Shooting
108
Iris
108
Gain
109
Super Gain
109
AE Level (Exposure Compensation)
110
Brightness Adjustment
111
Focusing (Manual Focus)
111
Setting the Shutter Speed
112
Area Mode Function
112
Adjusting the White and Black Balance
114
White Balance Adjustment
114
Black Balance Adjustment
117
Using the Zoom Function
118
Adjusting the Zoom Position
118
Using the Built-In LED Light
120
Adjust the Amount of Light from the Built-In LED Light
120
Image Quality Adjustment
121
Detail Function
121
Skin Tone Function
121
RB Gain Control Function
121
Chroma Setting Function
121
Matrix Function
121
Color Correction Function
122
Black Control Function
122
Gamma Function
122
Knee Function
122
White Clip Function
122
Flash Band Compensation (FBC) Function
123
Flash Band Compensation Function Settings
123
When Using the Flash Band Compensation Function
123
Super Slow Recording Function
124
Audio Input
125
Switching the Audio Input
125
Using the Built-In Microphone/External Microphone (Stereo Mini Jack)
125
Using Audio Equipment/External Microphone (XLR, 3-Pin)
126
Adjusting the Audio Recording Level
126
Monitoring the Audio
128
Confirming Audio Input Setting
128
Special Recording Function
129
Pre-Recording
129
Relay Recording
129
Simultaneous Recording
130
Background Recording
131
Interval Recording
132
IR Recording
133
Convenient Shooting Functions
134
Zebra Patterns Display
134
Displaying the Marker
134
Focus Assist Function
135
Face Detection/Tracking AE&AF Function
138
Optical Image Stabilizer Function
138
Dynamic Range Stretcher Function
139
Time Stamp Function
140
Waveform Monitor Function
140
Digital Zoom Function
141
Level Gauge
141
Operation Icon Screen Display
142
Displaying the Operation Icon Screen
142
Multi Manual Function
143
Displaying the Operation Icon Screen
144
Adjusting Headphone Volume
144
Chapter 6 Playback
145
Thumbnail Operation
146
Thumbnail Operation Overview
146
Thumbnail Screen
146
Copying Clip
149
Deleting Clips
150
Protecting Clips
150
Restoring Clips
151
Playing Back Clips
152
Useful Playback Function
154
Resume Play
154
Still Image Recording Function
155
Chapter 7 Output and Screen Display
156
Output Format
157
Format that Can be Output from the <SDI OUT> Terminal [X2000]
157
Format that Can be Output from the <HDMI> Terminal
158
Screen Status Display
159
Screen Display During Shooting
159
Screen Display During Playback
163
Checking and Displaying Shooting Status
164
Mode Check Display
165
Chapter 8 Connecting to External Devices
167
Connecting with Headphones and Tv/Monitor
168
Headphones
168
Remote Control
168
Tv/Monitor
169
Connection Function Via the USB Terminal
170
Connection with a Computer in Card Reader Mode
170
Operating Environment (Mass Storage)
171
Remote Operation by Iphone/Ipad or Android Terminal
172
Chapter 9 Network Connection
173
Network Connection
174
Available Functions
174
About the Wireless LAN Function on this Unit
174
Network Settings
175
Wireless LAN Settings
175
Confirming the Network Status
177
Connecting to the Iphone/Ipad or Android Terminal
178
Unit Settings
178
Preparing the HC ROP App
179
Connecting to the HC ROP App
179
Operation While the HC ROP App Is Connected
179
Streaming Function
180
Unit Settings
180
Starting Streaming with an Operation from the Application Software
181
Starting Streaming with an Operation on the Unit
182
Entering the Setting Using the Setting Tool
183
Chapter 10 Notes
184
Frequently Asked Questions
185
Power Supply
185
Battery
185
Memory Card
185
Indication
185
Shooting
186
Playback
186
Connections with External Devices
186
Computers
187
Others
187
Warning System
188
Cases Indicated by Error Messages
188
Recording Function that Cannot be Used Simultaneously
192
Updating the Unit's Firmware
193
Cleaning and Storing
194
Cleaning the Main Unit
194
Cautions for Storage
194
Chapter 11 Specification
195
Dimensions
196
Specifications
197
General
197
Camera
197
Memory Card Recorder
198
Digital Video
199
Digital Audio
199
Streaming
199
Wi-Fi
199
Video Output
199
Audio Input
200
Audio Output
200
Other Input/Output
200
Monitor
200
Handle Unit ([X2000] Supplied, [X1500] Optional)
200
AC Adaptor
200
Battery Pack (AG-VBR59)
200
Index
201
Useful Information (Only for Latin American Countries)
203
Functions Compatible with MP4 Added: F
206
Support for Simultaneous Output from <SDI OUT> Terminal and <HDMI> Terminal [X2000]: F
207
Configuration Menu Added for Focus Ring Operations: F
211
Menu Setting Items Added: F
212
Functional Improvements: F
213
USER Button Functionality Added: F
214
Added Menus: F
215
Advertisement
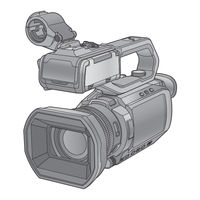
Panasonic HC-X1500 Operating Instructions Manual (213 pages)
4K Video Camera
Brand:
Panasonic
| Category:
Camcorder
| Size: 7.71 MB
Table of Contents
Information for Your Safety
2
Table of Contents
9
Chapter 1 Overview
11
Before Using the Unit
12
Accessories/Optional Accessories
15
Accessories
15
Optional Accessories
15
When Turning on the Power for the First Time
16
[Time Zone]
16
[Clock Setting]
16
What You Can Do with this Unit
17
Recording to the Memory Card
17
Linking to External Devices
17
Connecting to the Network
18
Chapter 2 Description of Parts
19
Main Unit
20
Handle Unit ([X2000]/[X2050] Supplied, [X1500] Optional: VW-HU1)
23
Basic Operation
25
Multidial Operation
25
Touch Operation of the LCD Monitor
25
Chapter 3 Preparation
26
Power Supply
27
Attaching and Removing the Battery
27
Charging the Battery
28
Attaching Accessories
30
Adjusting the Grip Belt
30
Attaching the Lens Hood
30
Attaching the Eye Cup
31
Attaching the Handle Unit ([X2000]/[X2050] Supplied, [X1500] Optional)
32
Attaching the External Microphone
34
Attaching a Tripod
35
Turning On/Off the Power
36
Turning the Unit on and off with the Power Button
36
Turning the Unit on and off with the LCD Monitor/Viewfinder
36
Charging the Built-In Battery
36
Setting the Date/Time of the Internal Clock
37
Preparing the Memory Card
38
Memory Cards Supported by the Unit (as of August 2020)
38
Preventing Unintentional Erasing
39
Inserting/Removing the Memory Card
40
Formatting the Memory Card
40
Recording Time of the Memory Card
41
Handling the Recording Data
43
Setting of Time Data
46
Definition of Time Data
46
User Bits Settings
46
Setting the Time Code
47
Assigning Function to the USER Buttons
49
Functions Assigned to USER Buttons
49
Checking the Function Assigned to the USER Buttons
51
Adjusting and Setting the LCD Monitor
52
Using the LCD Monitor
52
Adjusting the LCD Monitor
52
Mirror Shooting
52
Adjusting and Setting the Viewfinder
53
Using the Viewfinder
53
Adjusting the Viewfinder
53
Tally Lamp
54
Chapter 4 Operation
55
Basic Operation of the Screen
56
Major Button Operation and Screen Display
56
Major Button Operation and Switching Screen
57
Operating each Screen
58
Camera Image Screen
58
Thumbnail Screen
58
Operation Icon Screen
58
Basic Operation of the Menu
59
Configuration of the Menu
59
Displaying the Menu
60
Operating the Menu
61
Initializing the Menu
62
Menu Settings
63
[THUMBNAIL] Menu
63
[CAMERA] Menu
64
[SCENE FILE] Menu
67
[AUDIO] Menu
72
[VIDEO OUT/LCD/VF] Menu
74
[RECORDING] Menu
82
[NETWORK] Menu
84
[SYSTEM] Menu
88
[OTHERS] Menu
89
Factory Setting Value of the Scene File
92
[SCENE FILE] Menu
92
Target Items for Scene File/Setup File/Initialization
93
[THUMBNAIL] Menu
93
[CAMERA] Menu
93
[SCENE FILE] Menu
94
[AUDIO] Menu
95
[VIDEO OUT/LCD/VF] Menu
95
[RECORDING] Menu
97
[NETWORK] Menu
97
[SYSTEM] Menu
97
[OTHERS] Menu
98
Handling Setting Data
99
Scene Files
99
Setup File
101
Chapter 5 Shooting
102
Shooting
103
Selecting the Resolution, Codec, and Frame Rate for Recording Video
104
Adjustable Settings When Shooting
107
Iris
107
Gain
108
Super Gain
108
AE Level (Exposure Compensation)
109
Brightness Adjustment
110
Focusing (Manual Focus)
110
Setting the Shutter Speed
111
Area Mode Function
111
Adjusting the White and Black Balance
113
White Balance Adjustment
113
Black Balance Adjustment
116
Using the Zoom Function
117
Adjusting the Zoom Position
117
Using the Built-In LED Light
119
Adjust the Amount of Light from the Built-In LED Light
119
Image Quality Adjustment
120
Detail Function
120
Skin Tone Function
120
RB Gain Control Function
120
Chroma Setting Function
120
Matrix Function
120
Color Correction Function
121
Black Control Function
121
Gamma Function
121
Knee Function
121
White Clip Function
121
Flash Band Compensation (FBC) Function
122
Flash Band Compensation Function Settings
122
When Using the Flash Band Compensation Function
122
Super Slow Recording Function
123
Audio Input
124
Switching the Audio Input
124
Using the Built-In Microphone/External Microphone (Stereo Mini Jack)
124
Using Audio Equipment/External Microphone (XLR, 3-Pin)
125
Adjusting the Audio Recording Level
125
Monitoring the Audio
127
Confirming Audio Input Setting
127
Special Recording Function
128
Pre-Recording
128
Relay Recording
128
Simultaneous Recording
129
Background Recording
130
Interval Recording
131
IR Recording
132
Convenient Shooting Functions
133
Zebra Patterns Display
133
Displaying the Marker
133
Focus Assist Function
134
Face Detection/Tracking AE&AF Function
137
Optical Image Stabilizer Function
137
Dynamic Range Stretcher Function
138
Time Stamp Function
139
Waveform Monitor Function
139
Digital Zoom Function
140
Level Gauge
140
Operation Icon Screen Display
141
Displaying the Operation Icon Screen
141
Multi Manual Function
142
Displaying the Operation Icon Screen
143
Adjusting Headphone Volume
143
Chapter 6 Playback
144
Thumbnail Operation
145
Thumbnail Operation Overview
145
Thumbnail Screen
145
Copying Clip
148
Deleting Clips
149
Protecting Clips
149
Restoring Clips
150
Playing Back Clips
151
Useful Playback Function
153
Resume Play
153
Still Image Recording Function
154
Chapter 7 Output and Screen Display
155
Output Format
156
Format that Can be Output from the <SDI OUT> Terminal [X2000]/[X2050]
156
Format that Can be Output from the <HDMI> Terminal
157
Screen Status Display
158
Screen Display During Shooting
158
Screen Display During Playback
162
Checking and Displaying Shooting Status
163
Mode Check Display
164
Chapter 8 Connecting to External Devices
166
Connecting with Headphones and Tv/Monitor
167
Headphones
167
Remote Control
167
Tv/Monitor
168
Connection Function Via the USB Terminal
169
Connection with a Computer in Card Reader Mode
169
Operating Environment (Mass Storage)
170
Remote Operation by Iphone/Ipad or Android Terminal
171
Chapter 9 Network Connection
172
Network Connection
173
Available Functions
173
About the Wireless LAN Function on this Unit
173
Network Settings
174
Wireless LAN Settings
174
Confirming the Network Status
176
Connecting to the Iphone/Ipad or Android Terminal
177
Unit Settings
177
Preparing the HC ROP App
178
Connecting to the HC ROP App
178
Operation While the HC ROP App Is Connected
178
Streaming Function
179
Unit Settings
179
Starting Streaming with an Operation from the Application Software
180
Starting Streaming with an Operation on the Unit
181
Entering the Setting Using the Setting Tool
182
Chapter 10 Notes
183
Frequently Asked Questions
184
Power Supply
184
Battery
184
Memory Card
184
Indication
184
Shooting
185
Playback
185
Connections with External Devices
185
Computers
186
Others
186
Warning System
187
Cases Indicated by Error Messages
187
Recording Function that Cannot be Used Simultaneously
191
Updating the Unit's Firmware
192
Cleaning and Storing
193
Cleaning the Main Unit
193
Cautions for Storage
193
Chapter 11 Specification
194
Dimensions
195
Specifications
196
General
196
Camera
196
Memory Card Recorder
197
Digital Video
198
Digital Audio
198
Streaming
198
Wi-Fi
198
Video Output
198
Audio Input
199
Audio Output
199
Other Input/Output
199
Monitor
199
Handle Unit ([X2000]/[X2050] Supplied, [X1500] Optional)
199
AC Adaptor
199
Battery Pack (AG-VBR59)
199
Index
200
Functions Compatible with MP4 Added: F
204
Support for Simultaneous Output from <SDI OUT> Terminal and <HDMI> Terminal [X2000]/[X2050]: F
205
Configuration Menu Added for Focus Ring Operations: F
209
Menu Setting Items Added: F
210
Functional Improvements: F
211
USER Button Functionality Added: F
212
Added Menus: F
213
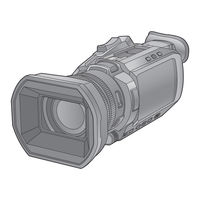
Panasonic HC-X1500 Operating Instructions Manual (200 pages)
4K
Brand:
Panasonic
| Category:
Camcorder
| Size: 9.35 MB
Table of Contents
Information for Your Safety
2
Table of Contents
7
Chapter 1 Overview
9
Before Using the Unit
10
Accessories/Optional Accessories
13
Accessories
13
Optional Accessories
13
When Turning on the Power for the First Time
14
[Time Zone]
14
[Clock Setting]
14
What You Can Do with this Unit
15
Recording to the Memory Card
15
Linking to External Devices
15
Connecting to the Network
16
Chapter 2 Description of Parts
17
Main Unit
18
Handle Unit ([X2000] Supplied, [X1500] Optional: VW-HU1)
21
Basic Operation
23
Multidial Operation
23
Touch Operation of the LCD Monitor
23
Chapter 3 Preparation
24
Power Supply
25
Attaching and Removing the Battery
25
Charging the Battery
26
Attaching Accessories
28
Adjusting the Grip Belt
28
Attaching the Lens Hood
28
Attaching the Eye Cup
29
Attaching the Handle Unit ([X2000] Supplied, [X1500] Optional)
30
Attaching the External Microphone
32
Attaching a Tripod
33
Turning On/Off the Power
34
Turning the Unit on and off with the Power Button
34
Turning the Unit on and off with the LCD Monitor/Viewfinder
34
Charging the Built-In Battery
34
Setting the Date/Time of the Internal Clock
35
Preparing the Memory Card
36
Memory Cards Supported by the Unit (as of January 2020)
36
Preventing Unintentional Erasing
37
Inserting/Removing the Memory Card
38
Formatting the Memory Card
38
Recording Time of the Memory Card
39
Handling the Recording Data
41
Setting of Time Data
44
Definition of Time Data
44
User Bits Settings
44
Setting the Time Code
45
Assigning Function to the USER Buttons
47
Functions Assigned to USER Buttons
47
Checking the Function Assigned to the USER Buttons
49
Adjusting and Setting the LCD Monitor
50
Using the LCD Monitor
50
Adjusting the LCD Monitor
50
Mirror Shooting
50
Adjusting and Setting the Viewfinder
51
Using the Viewfinder
51
Adjusting the Viewfinder
51
Tally Lamp
52
Chapter 4 Operation
53
Basic Operation of the Screen
54
Major Button Operation and Screen Display
54
Major Button Operation and Switching Screen
55
Operating each Screen
56
Camera Image Screen
56
Thumbnail Screen
56
Operation Icon Screen
56
Basic Operation of the Menu
57
Configuration of the Menu
57
Displaying the Menu
58
Operating the Menu
59
Initializing the Menu
60
Menu Settings
61
[THUMBNAIL] Menu
61
[CAMERA] Menu
62
[SCENE FILE] Menu
65
[AUDIO] Menu
70
[VIDEO OUT/LCD/VF] Menu
72
[RECORDING] Menu
80
[NETWORK] Menu
82
[SYSTEM] Menu
86
[OTHERS] Menu
87
Factory Setting Value of the Scene File
90
[SCENE FILE] Menu
90
Target Items for Scene File/Setup File/Initialization
91
[THUMBNAIL] Menu
91
[CAMERA] Menu
91
[SCENE FILE] Menu
92
[AUDIO] Menu
93
[VIDEO OUT/LCD/VF] Menu
93
[RECORDING] Menu
95
[NETWORK] Menu
95
[SYSTEM] Menu
95
[OTHERS] Menu
96
Handling Setting Data
97
Scene Files
97
Setup File
99
Chapter 5 Shooting
100
Shooting
101
Selecting the Resolution, Codec, and Frame Rate for Recording Video
102
Adjustable Settings When Shooting
105
Iris
105
Gain
106
Super Gain
106
AE Level (Exposure Compensation)
107
Brightness Adjustment
108
Focusing (Manual Focus)
108
Setting the Shutter Speed
109
Area Mode Function
109
Adjusting the White and Black Balance
111
White Balance Adjustment
111
Black Balance Adjustment
114
Using the Zoom Function
115
Adjusting the Zoom Position
115
Using the Built-In LED Light
117
Adjust the Amount of Light from the Built-In LED Light
117
Image Quality Adjustment
118
Detail Function
118
Skin Tone Function
118
RB Gain Control Function
118
Chroma Setting Function
118
Matrix Function
118
Color Correction Function
119
Black Control Function
119
Gamma Function
119
Knee Function
119
Flash Band Compensation (FBC) Function
120
Flash Band Compensation Function Settings
120
When Using the Flash Band Compensation Function
120
Super Slow Recording Function
121
Audio Input
122
Switching the Audio Input
122
Using the Built-In Microphone/External Microphone (Stereo Mini Jack)
122
Using Audio Equipment/External Microphone (XLR, 3-Pin)
123
Adjusting the Audio Recording Level
123
Monitoring the Audio
125
Confirming Audio Input Setting
125
Special Recording Function
126
Pre-Recording
126
Relay Recording
126
Simultaneous Recording
127
Background Recording
128
Interval Recording
129
IR Recording
130
Convenient Shooting Functions
131
Zebra Patterns Display
131
Displaying the Marker
131
Focus Assist Function
132
Face Detection/Tracking AE&AF Function
135
Optical Image Stabilizer Function
135
Dynamic Range Stretcher Function
136
Time Stamp Function
137
Waveform Monitor Function
137
Digital Zoom Function
138
Level Gauge
138
Operation Icon Screen Display
139
Displaying the Operation Icon Screen
139
Multi Manual Function
140
Displaying the Operation Icon Screen
141
Adjusting Headphone Volume
141
Chapter 6 Playback
142
Thumbnail Operation
143
Thumbnail Operation Overview
143
Thumbnail Screen
143
Copying Clip
146
Deleting Clips
147
Protecting Clips
147
Restoring Clips
148
Playing Back Clips
149
Useful Playback Function
151
Resume Play
151
Still Image Recording Function
152
Chapter 7 Output and Screen Display
153
Output Format
154
Format that Can be Output from the <SDI OUT> Terminal [X2000]
154
Format that Can be Output from the <HDMI> Terminal
155
Screen Status Display
156
Screen Display During Shooting
156
Screen Display During Playback
160
Checking and Displaying Shooting Status
161
Mode Check Display
162
Chapter 8 Connecting to External Devices
164
Connecting with Headphones and Tv/Monitor
165
Headphones
165
Remote Control
165
Tv/Monitor
166
Connection Function Via the USB Terminal
167
Connection with a Computer in Card Reader Mode
167
Operating Environment (Mass Storage)
168
Remote Operation by Iphone/Ipad or Android Terminal
169
Chapter 9 Network Connection
170
Network Connection
171
Available Functions
171
About the Wireless LAN Function on this Unit
171
Network Settings
172
Wireless LAN Settings
172
Confirming the Network Status
174
Connecting to the Iphone/Ipad or Android Terminal
175
Unit Settings
175
Preparing the HC ROP App
176
Connecting to the HC ROP App
176
Operation While the HC ROP App Is Connected
176
Streaming Function
177
Unit Settings
177
Starting Streaming with an Operation from the Application Software
178
Starting Streaming with an Operation on the Unit
179
Entering the Setting Using the Setting Tool
180
Chapter 10 Notes
181
Frequently Asked Questions
182
Power Supply
182
Battery
182
Memory Card
182
Indication
182
Shooting
183
Playback
183
Connections with External Devices
183
Computers
184
Others
184
Warning System
185
Cases Indicated by Error Messages
185
Recording Function that Cannot be Used Simultaneously
189
Updating the Unit's Firmware
190
Cleaning and Storing
191
Cleaning the Main Unit
191
Cautions for Storage
191
Chapter 11 Specification
192
Dimensions
193
Specifications
194
General
194
Camera
194
Memory Card Recorder
195
Digital Video
196
Digital Audio
196
Streaming
196
Wi-Fi
196
Video Output
196
Audio Input
197
Audio Output
197
Other Input/Output
197
Monitor
197
Handle Unit ([X2000] Supplied, [X1500] Optional)
197
AC Adaptor
197
Battery Pack (AG-VBR59)
197
Index
198
Advertisement
Panasonic HC-X1500 Basic Operating Instructions Manual (56 pages)
4K
Brand:
Panasonic
| Category:
Camcorder
| Size: 2.51 MB
Table of Contents
Information for Your Safety
2
Table of Contents
8
Before Using the Unit
9
Accessories/Optional Accessories
15
Accessories
15
Optional Accessories
16
When Turning on the Power for the First Time
17
[Time Zone]
17
[Clock Setting]
17
What You Can Do with this Unit
18
Recording to the Memory Card
18
Linking to External Devices
18
Connecting to the Network
19
Description of Parts
20
Main Unit
20
Handle Unit ([X2000] Supplied, [X1500] Optional: VW-HU1)
25
Power Supply
27
Attaching and Removing the Battery
27
Charging the Battery
28
Attaching Accessories
30
Adjusting the Grip Belt
30
Attaching the Eye Cup
31
Attaching the Handle Unit ([X2000] Supplied, [X1500] Optional)
31
Preparing the Memory Card
34
Memory Cards Supported by the Unit
34
Inserting/Removing the Memory Card
35
Turning On/Off the Power
36
Turning the Unit on and off with the Power Button
36
Turning the Unit on and off with the LCD Monitor/Viewfinder
36
Basic Operation of the Menu
37
Configuration of the Menu
37
Formatting the Memory Card
38
Menu List
38
Manual Recording
41
Rear Ring Function Settings
42
Focusing (Manual Focus)
43
White Balance Adjustment
43
Gain
45
Setting the Shutter Speed
45
Playing Back Clips
46
Updating the Unit's Firmware
47
Specifications
48
General
48
Camera
48
Memory Card Recorder
50
Digital Video
51
Digital Audio
51
Streaming
52
Wi-Fi
52
Video Output
52
Audio Input
53
Audio Output
53
Other Input/Output
53
Monitor
53
Handle Unit ([X2000] Supplied, [X1500] Optional)
54
AC Adaptor
54
Battery Pack (AG-VBR59)
54
Advertisement
Related Products
Panasonic HC-X1000
Panasonic HC-X1
Panasonic HC-X1000PP
Panasonic HC-X1000E
Panasonic HC-X1000EE
Panasonic HC-X1000GC
Panasonic HC-X1E
Panasonic HC-X1EE
Panasonic HC-X1PP
Panasonic HC-X1GC
Panasonic Categories
Camcorder
Air Conditioner
TV
Digital Camera
Cordless Telephone
More Panasonic Manuals
Login
Sign In
OR
Sign in with Facebook
Sign in with Google
Upload manual
Upload from disk
Upload from URL