Epson SC-T7200 Series User Manual
Hide thumbs
Also See for SC-T7200 Series:
- Setup manual (40 pages) ,
- Safety notes (1 page) ,
- Setup manual (46 pages)
Table of Contents
Advertisement
Quick Links
Download this manual
See also:
Setup Manual
Advertisement
Table of Contents

Related Manuals for Epson SC-T7200 Series


Summary of Contents for Epson SC-T7200 Series
- Page 1 User's Guide CMP0015-00 EN...
-
Page 2: Copyrights And Trademarks
(excluding the U.S.) failure to strictly comply with Seiko Epson Corporation’s operating and maintenance instructions. Seiko Epson Corporation shall not be liable for any damages or problems arising from the use of any options or any consumable products other than those designated as Original Epson Products or Epson Approved Products by Seiko Epson Corporation. -
Page 3: Table Of Contents
SC-T7200 Series/SC-T5200 Series/SC-T3200 Series/SC-T7200D Series/SC-T5200D Series User's Guide Contents Contents Loading Cut Sheets..... . 37 Copyrights and Trademarks Removing Cut Sheets....38 Loading and Removing Poster Board. - Page 4 ........96 Using Epson Printer Utility 4....127 About Roll Paper Cutting.
- Page 5 Maintenance Contacting Epson Support....215 Adjusting the Print Head....165 Before Contacting Epson.
-
Page 6: Introduction
SC-T7200 Series/SC-T5200 Series/SC-T3200 Series/SC-T7200D Series/SC-T5200D Series User's Guide Introduction ❏ Keep the entire computer system away from Introduction potential sources of electromagnetic interference, such as loudspeakers or the base units of cordless telephones. Important Safety ❏ Use only the type of power source indicated on the product’s label. -
Page 7: When Handling The Ink Cartridges
SC-T7200 Series/SC-T5200 Series/SC-T3200 Series/SC-T7200D Series/SC-T5200D Series User's Guide Introduction ❏ Always turn the product off using the Power button Note on this Guide on the control panel. When this button is pressed, the Power light flashes briefly then goes off. Do not... - Page 8 SC-T7200 Series/SC-T5200 Series/SC-T3200 Series/SC-T7200D Series/SC-T5200D Series User's Guide Introduction ❏ Windows XP refers to Windows XP Home Edition, Windows XP Professional x64 Edition, and Windows XP Professional. ❏ Windows Server 2012 refers to Windows Server 2012 Essentials Edition, Server 2012 standard Edition.
-
Page 9: Printer Parts
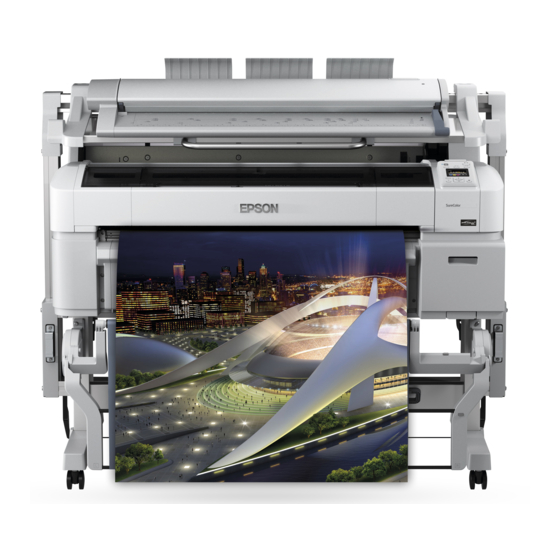
Introduction Printer Parts Front The illustration shows the SC-T7200 Series. The operation is the same even when the shape of the paper basket or other items are different. Printer cover Open this cover when cleaning the printer or clearing jams. - Page 10 Output from the printer collects in this basket, keeping the media clean and free of creases. The optional Stand (24) for the SC-T3200 Series comes with a paper basket. “Using the Paper Basket (SC-T7200 Series/SC-T5200 Series/SC-T3200 Series)” on page 45 “Using the Large-Capacity Paper Basket (SC-T7200D Series/SC-T5200D Series)” on page 49 Casters There are two casters on each leg.
- Page 11 SC-T7200 Series/SC-T5200 Series/SC-T3200 Series/SC-T7200D Series/SC-T5200D Series User's Guide Introduction Status light The color indicates the network transmission speed. : 10Base-T : 100Base-T Green : 1000Base-T Control panel “Control panel” on page 14 Alert lamp This lamp lights or flashes when an error occurs.
-
Page 12: Back
SC-T7200 Series/SC-T5200 Series/SC-T3200 Series/SC-T7200D Series/SC-T5200D Series User's Guide Introduction Back The illustration shows the SC-T7200D Series. Option slot Slot to connect the optional hard disk unit or Adobe PostScript 3 Expansion Unit. Roll 2 unit connector (SC-T7200D Series/SC-T5200D Series only) Connect the connection cable of the Roll 2 unit. -
Page 13: Roll 2 Unit (Sc-T7200D Series/Sc-T5200D Series)
SC-T7200 Series/SC-T5200 Series/SC-T3200 Series/SC-T7200D Series/SC-T5200D Series User's Guide Introduction The roll paper adapter is placed in this holder after Roll 2 unit (SC-T7200D Series/ the roll paper is attached. SC-T5200D Series) Roll lock lever The illustration shows the SC-T7200D Series. -
Page 14: Control Panel
SC-T7200 Series/SC-T5200 Series/SC-T3200 Series/SC-T7200D Series/SC-T5200D Series User's Guide Introduction Screen Control panel Displays the printer's status, menus, error messages, and so on. U “Screen View” on page 15 Menu button Displays the menu for the tab currently selected in the display. (Excluding the and + tabs.) -
Page 15: Screen View
SC-T7200 Series/SC-T5200 Series/SC-T3200 Series/SC-T7200D Series/SC-T5200D Series User's Guide Introduction Displays the Maintenance menu, which is used for nozzle checks and head cleaning. “Adjusting the Print Head” on page 165 Wbutton (pause/cancel button) ❏ The printer enters pause status if this is pressed while printing. - Page 16 SC-T7200 Series/SC-T5200 Series/SC-T3200 Series/SC-T7200D Series/SC-T5200D Series User's Guide Introduction Automatic switching of roll paperU Important: “Switching Roll Paper Automatically before A flashing , icon indicates that an optional Printing (SC-T7200D Series/SC-T5200D Ser- hard disk unit or Adobe PostScript 3 ies Only)” on page 91 Expansion Unit is transmitting data to the printer.
- Page 17 SC-T7200 Series/SC-T5200 Series/SC-T3200 Series/SC-T7200D Series/SC-T5200D Series User's Guide Introduction - : The Maintenance Tab : The Large Copy Tab Displays Maintenance Box status in the info This tab is displayed only when the optional display area. MFP Scanner is connected.
-
Page 18: Features
SC-T7200 Series/SC-T5200 Series/SC-T3200 Series/SC-T7200D Series/SC-T5200D Series User's Guide Introduction Checking current operating status even from afar Features thanks to an alert lamp Errors are immediately obvious even at a distance, thanks to the large, highly visible alert lamp. This helps The main features of this printer are described below. -
Page 19: Insistence On Ease-Of-Use
SC-T7200 Series/SC-T5200 Series/SC-T3200 Series/SC-T7200D Series/SC-T5200D Series User's Guide Introduction Pigmented inks are used for all colors for unsurpassed Choose from three sizes of cartridge according to the task water resistance, allowing print results to be safely Choose from 110, 350, and 700 ml cartridges according carried out-of-doors. -
Page 20: Notes On Usage And Storage
SC-T7200 Series/SC-T5200 Series/SC-T3200 Series/SC-T7200D Series/SC-T5200D Series User's Guide Introduction SC-T7200D Series/SC-T5200D Series Notes on Usage and Storage Installation space Make sure that you secure the following space, clear of any other objects, so that paper ejection and consumable replacement are not obstructed. -
Page 21: Notes When Using The Printer
SC-T7200 Series/SC-T5200 Series/SC-T3200 Series/SC-T7200D Series/SC-T5200D Series User's Guide Introduction ❏ If you do not print for a long time, the print head Notes when using the printer nozzles may become clogged. We recommend that you print once a week to prevent the print head Note the following points when using this printer to from clogging. -
Page 22: Notes On Handling Paper
SC-T7200 Series/SC-T5200 Series/SC-T3200 Series/SC-T7200D Series/SC-T5200D Series User's Guide Introduction ❏ To ensure good results, use all the ink in the Notes on Handling cartridge within a year of installation. ❏ Use Epson special media under normal room ❏ Ink cartridges that have been stored at low conditions (temperature: 15 to 25°C, humidity: 40... - Page 23 Typically, print outs and photos fade over time (color distortion) due to the effects of light and various constituents in the air. This also applies to Epson special media. However, with the correct storage method, the degree of color distortion can be minimized.
-
Page 24: Introducing The Supplied Software
SC-T7200 Series/SC-T5200 Series/SC-T3200 Series/SC-T7200D Series/SC-T5200D Series User's Guide Introduction Introducing the Supplied Software Contents of the Software Disc The supplied Software Disc contains the following software. Install as required. More information be found in the Network Guide (pdf) or via online help for the application in question. - Page 25 SC-T7200 Series/SC-T5200 Series/SC-T3200 Series/SC-T7200D Series/SC-T5200D Series User's Guide Introduction Software Name Summary Epson Network Utilities Select this option during installation if the printer and computer are connected via a network. Installing this utility allows a wizard to be used to simplify the process of setting the addresses needed for network connections.
-
Page 26: Summary Of The Printer Driver
SC-T7200 Series/SC-T5200 Series/SC-T3200 Series/SC-T7200D Series/SC-T5200D Series User's Guide Introduction ❏ Allows you to execute printer maintenance Summary of the Printer Driver functions to maintain print quality, check the printer's status, and so on. The main functions of the printer driver are described below. -
Page 27: Basic Operations
SC-T7200 Series/SC-T5200 Series/SC-T3200 Series/SC-T7200D Series/SC-T5200D Series User's Guide Basic Operations Attaching the Roll Paper Adapter Basic Operations Turn on the printer by pressing the P button. Loading and Removing Note: ❏ Closing the paper basket makes the work the Roll Paper easier. -
Page 28: Loading Roll Paper Or Roll 1
SC-T7200 Series/SC-T5200 Series/SC-T3200 Series/SC-T7200D Series/SC-T5200D Series User's Guide Basic Operations Move the size switch levers of the two supplied Attach an adapter to each end of the roll. roll paper adapters in accordance with the roll-core size of the roll paper to be loaded. - Page 29 SC-T7200 Series/SC-T5200 Series/SC-T3200 Series/SC-T7200D Series/SC-T5200D Series User's Guide Basic Operations Open the roll paper cover. Make sure that the roll paper is free of slack and the end is not folded, and then insert it into the paper slot. When the Auto Loading is set to On on the...
- Page 30 SC-T7200 Series/SC-T5200 Series/SC-T3200 Series/SC-T7200D Series/SC-T5200D Series User's Guide Basic Operations Lower the roll paper lock lever, and then press the Note: Z button. When the optional MFP Scanner has been raised upon loading roll paper, make sure to return the scanner back in place for use.
-
Page 31: Loading Roll 2
SC-T7200 Series/SC-T5200 Series/SC-T3200 Series/SC-T7200D Series/SC-T5200D Series User's Guide Basic Operations Confirm that the roll paper lock lever is raised. Loading Roll 2 (SC-T7200D Series/SC-T5200D Series only) Buttons that are used in the following settings Place the roll paper adapters on the adapter guides so the flat surfaces of the adapters is facing down. -
Page 32: Cutting The Roll Paper
SC-T7200 Series/SC-T5200 Series/SC-T3200 Series/SC-T7200D Series/SC-T5200D Series User's Guide Basic Operations Make sure that the roll paper is free of slack and Set the Roll 2 unit, and then press Z button. the end is not folded, and then insert it into the paper slot. - Page 33 SC-T7200 Series/SC-T5200 Series/SC-T3200 Series/SC-T7200D Series/SC-T5200D Series User's Guide Basic Operations Setting from the printer Important: Use the l/r buttons of the control panel to select the / The commercially available media types, such as those shown below, may not be cut cleanly by the tab and press the Z button or Menu button.
-
Page 34: Removing Roll Paper Or Roll 1
SC-T7200 Series/SC-T5200 Series/SC-T3200 Series/SC-T7200D Series/SC-T5200D Series User's Guide Basic Operations Press the)button. Viewing the interior of the Buttons that are used in the following settings printer without opening the printer cover, press the d button to align the cut location with the mark on the right side of the printer's interior. -
Page 35: Removing Roll 2(Sc-T7200D Series/Sc- T5200D Series Only)
SC-T7200 Series/SC-T5200 Series/SC-T3200 Series/SC-T7200D Series/SC-T5200D Series User's Guide Basic Operations Open the roll paper cover. Lift the adapter lock levers to release the roll paper adapters. Note: When removing the roll paper, you can use the optional roll paper belt to prevent the roll paper from unwinding. - Page 36 SC-T7200 Series/SC-T5200 Series/SC-T3200 Series/SC-T7200D Series/SC-T5200D Series User's Guide Basic Operations Note: Buttons that are used in the following settings When removing the roll paper, you can use the optional roll paper belt to prevent the roll paper from unwinding. Raise the roll lock lever.
-
Page 37: Loading And Removing Cut Sheets
SC-T7200 Series/SC-T5200 Series/SC-T3200 Series/SC-T7200D Series/SC-T5200D Series User's Guide Basic Operations Lift the adapter lock levers to release the roll Loading and Removing paper adapters. Cut Sheets The procedure for loading and positioning cut sheets varies with the thickness of the paper. -
Page 38: Removing Cut Sheets
SC-T7200 Series/SC-T5200 Series/SC-T3200 Series/SC-T7200D Series/SC-T5200D Series User's Guide Basic Operations Feed the paper into the paper slot with the Buttons that are used in the following settings printable surface toward you. Insert the paper into the paper slot, keeping its right edge aligned with the loading mark on the roll paper cover. -
Page 39: Loading And Removing Poster Board
SC-T7200 Series/SC-T5200 Series/SC-T3200 Series/SC-T7200D Series/SC-T5200D Series User's Guide Basic Operations Loading and Removing Note: To remove paper that was loaded but not used, press the Poster Board ( button and select Remove Paper. This section describes how to load and remove poster Buttons that are used in the following settings board from 0.8 to 1.5mm thick. - Page 40 SC-T7200 Series/SC-T5200 Series/SC-T3200 Series/SC-T7200D Series/SC-T5200D Series User's Guide Basic Operations Raise all the poster board supports. Note: The paper that can be used in the printer is detailed in the Press the supports diagonally downwards and following section. then lift them straight up.
- Page 41 SC-T7200 Series/SC-T5200 Series/SC-T3200 Series/SC-T7200D Series/SC-T5200D Series User's Guide Basic Operations Insert the board, using the edge to keep the Insert the board, checking to be sure that it passes supports pressed down. under the rollers. Open the printer cover. Close the printer cover.
-
Page 42: Removing Poster Board
SC-T7200 Series/SC-T5200 Series/SC-T3200 Series/SC-T7200D Series/SC-T5200D Series User's Guide Basic Operations After positioning the media, press the Z Pull the poster board forward as shown in the button. on-screen instructions. After removing the poster board, press the Z The paper will be fed into the printer. -
Page 43: Viewing And Changing Media Settings
SC-T7200 Series/SC-T5200 Series/SC-T3200 Series/SC-T7200D Series/SC-T5200D Series User's Guide Basic Operations Viewing and Changing Select the media name, and then press the Z button. Media Settings If On is selected for Roll Paper Remaining, you will be prompted to enter the length of the roll. -
Page 44: Replacing Paper
SC-T7200 Series/SC-T5200 Series/SC-T3200 Series/SC-T7200D Series/SC-T5200D Series User's Guide Basic Operations ❏ Printing Availability Replacing Paper The printer predicts whether the current job can be printed on the amount of paper remaining and This section describes how to replace paper. The process... -
Page 45: Using The Paper Basket (Sc-T7200 Series/Sc-T5200 Series/Sc-T3200 Series)
SC-T7200 Series/SC-T5200 Series/SC-T3200 Series/SC-T7200D Series/SC-T5200D Series User's Guide Basic Operations Cut Sheets Using the Paper Basket Cut sheets are automatically ejected to the rear, where they can be removed by hand. (SC-T7200 Series/ Poster Board SC-T5200 Series/ Poster board is partially ejected to the front. -
Page 46: Storing And Opening
SC-T7200 Series/SC-T5200 Series/SC-T3200 Series/SC-T7200D Series/SC-T5200D Series User's Guide Basic Operations Adjusting the PositionU “Adjusting the Position” on “Adjusting the Position” on page 47 page 47 Paper size and position during continual collection Paper Size Position A1 Portrait (594 × 841 mm) -
Page 47: Adjusting The Position
SC-T7200 Series/SC-T5200 Series/SC-T3200 Series/SC-T7200D Series/SC-T5200D Series User's Guide Basic Operations Use the top stack guide switching lever to lower Important: the top stack guide. The paper basket will not function correctly when opened to the position shown below at right. - Page 48 SC-T7200 Series/SC-T5200 Series/SC-T3200 Series/SC-T7200D Series/SC-T5200D Series User's Guide Basic Operations Guide positioned for other sizes of paper Lift the guide up, and then lower it lightly. Horizontal position Use the top stack guide switch lever to raise the Note: top stack guide.
-
Page 49: Using The Large-Capacity Paper Basket (Sc-T7200D Series/Sc-T5200D Series)
SC-T7200 Series/SC-T5200 Series/SC-T3200 Series/SC-T7200D Series/SC-T5200D Series User's Guide Basic Operations Using the Large-Capacity Storing and Adjusting the Position Paper Basket (SC-T7200D Series/SC-T5200D Series) Storing Close the large-capacity paper basket before loading The large-capacity paper basket collects paper from the paper or moving the printer. - Page 50 SC-T7200 Series/SC-T5200 Series/SC-T3200 Series/SC-T7200D Series/SC-T5200D Series User's Guide Basic Operations Large-capacity position Next, push it in straight. Pull the basket toward you slightly, and then lower it. Lower the basket to the position in which it is fixed by the upper protrusions of the left and right frames.
-
Page 51: Using The Auto Take-Up Reel Unit (Sc-T7200 Series Only)
SC-T7200 Series/SC-T5200 Series/SC-T3200 Series/SC-T7200D Series/SC-T5200D Series User's Guide Basic Operations Using the Auto Take-up Important: Confirm that the end of the roll is cut straight Reel Unit (SC-T7200 Series across. The unit will not function as expected if the end of the roll is wavy or curved. -
Page 52: Attaching The Paper
SC-T7200 Series/SC-T5200 Series/SC-T3200 Series/SC-T7200D Series/SC-T5200D Series User's Guide Basic Operations Backward : The roll is taken up with the printable side in. Buttons that are used in the following settings Forward : The roll is taken up with the printable side out. - Page 53 SC-T7200 Series/SC-T5200 Series/SC-T3200 Series/SC-T7200D Series/SC-T5200D Series User's Guide Basic Operations After wrapping the paper around the core, Tape the end to the roll core. ensure that paper around the core is sufficiently loose. Place tape (available from third-party suppliers) at the center and then at the left and right ends.
- Page 54 SC-T7200 Series/SC-T5200 Series/SC-T3200 Series/SC-T7200D Series/SC-T5200D Series User's Guide Basic Operations Tape the end to the roll core. Buttons that are used in the following settings Place tape (available from third-party suppliers) at the center and then at the left and right ends.
-
Page 55: Removing Paper From The Auto Take-Up Reel Unit
SC-T7200 Series/SC-T5200 Series/SC-T3200 Series/SC-T7200D Series/SC-T5200D Series User's Guide Basic Operations After wrapping the paper around the core, ensure that paper around the core is sufficiently Buttons that are used in the following settings loose. Set the Auto switch to Backward. -
Page 56: Basic Printing Methods(Windows)
SC-T7200 Series/SC-T5200 Series/SC-T3200 Series/SC-T7200D Series/SC-T5200D Series User's Guide Basic Operations Unlock the movable unit and remove it from the Basic Printing Methods roll core. (Windows) When removing the movable unit, support the roll core with one hand to prevent it falling to the floor. - Page 57 SC-T7200 Series/SC-T5200 Series/SC-T3200 Series/SC-T7200D Series/SC-T5200D Series User's Guide Basic Operations “Switching Roll Paper Automatically before After confirming that the printer is selected, click Printing (SC-T7200D Series/SC-T5200D Series Printer properties or Properties to display the Only)” on page 91 Printer Settings tab.
- Page 58 SC-T7200 Series/SC-T5200 Series/SC-T3200 Series/SC-T7200D Series/SC-T5200D Series User's Guide Basic Operations If the desired size is not available in the menu, In the Print Quality area, choose an option for click Custom Paper Size to add a custom paper Select Target.
- Page 59 SC-T7200 Series/SC-T5200 Series/SC-T3200 Series/SC-T7200D Series/SC-T5200D Series User's Guide Basic Operations An error message is displayed if an error occurs or an ink When settings are complete, click Print. cartridge needs replacing while printing. The progress bar is displayed, and printing starts.
-
Page 60: Basic Printing Methods(Mac Os X)
SC-T7200 Series/SC-T5200 Series/SC-T3200 Series/SC-T7200D Series/SC-T5200D Series User's Guide Basic Operations For Mac OS X 10.6 and 10.5, click the arrow ( Basic Printing Methods to make settings on the Page Setup screen. (Mac OS X) Turn on the printer, and load the paper. - Page 61 SC-T7200 Series/SC-T5200 Series/SC-T3200 Series/SC-T7200D Series/SC-T5200D Series User's Guide Basic Operations XXXX (cut sheet): Print with margins on cut Mac OS X 10.5 sheets. Print with top, right, and left margins of 3 Choose Page Setup and Media Type according mm and a bottom margin of 14 mm.
- Page 62 SC-T7200 Series/SC-T5200 Series/SC-T3200 Series/SC-T7200D Series/SC-T5200D Series User's Guide Basic Operations Check settings. The selected settings are reflected in the area on the right; check that settings are correct. When settings are complete, click Print. The printer icon is displayed in the Dock while printing.
-
Page 63: Printable Area
SC-T7200 Series/SC-T5200 Series/SC-T3200 Series/SC-T7200D Series/SC-T5200D Series User's Guide Basic Operations Roll Paper Margin SettingsU “Setup menu” on Printable area page 146 indicates factory default settings. This section describes the printable areas for the printer. If the margin set in an application is larger than the... -
Page 64: Cut Sheets Printable Area
SC-T7200 Series/SC-T5200 Series/SC-T3200 Series/SC-T7200D Series/SC-T5200D Series User's Guide Basic Operations Turning Off the Power Cut Sheets Printable Area Using Power Off Timer When printing borderless on the left and right, the left and right margins are 0 mm. (Borderless printing is not available with poster board.) -
Page 65: Canceling Printing
SC-T7200 Series/SC-T5200 Series/SC-T3200 Series/SC-T7200D Series/SC-T5200D Series User's Guide Basic Operations The setting is Off. Canceling Printing Power Off Timer settings can be adjusted in the Setup menu. U “Setup menu” on page 146 There are a few ways to stop printing operations depending on the situation. - Page 66 SC-T7200 Series/SC-T5200 Series/SC-T3200 Series/SC-T7200D Series/SC-T5200D Series User's Guide Basic Operations Canceling from the computer (Mac OS X) Click the printer icon in the Dock. Select the job you want to cancel, and then click Delete. If the job has been sent to the printer, print data is not displayed on the above screen.
-
Page 67: Saving To And Reprinting On The Optional Hard Disk Unit
SC-T7200 Series/SC-T5200 Series/SC-T3200 Series/SC-T7200D Series/SC-T5200D Series User's Guide Saving to and Reprinting on the Optional Hard Disk Unit • Viewing and Resuming Held Print Jobs (SC-T7200 Saving to and Series/SC-T5200 Series/SC-T3200 Series only) If the source or other settings selected with the... - Page 68 SC-T7200 Series/SC-T5200 Series/SC-T3200 Series/SC-T7200D Series/SC-T5200D Series User's Guide Saving to and Reprinting on the Optional Hard Disk Unit Note: Note: ❏ Large copy and enlarged copy print jobs If the printer’s IP address is entered in a web created with an optional MFP Scanner or a...
-
Page 69: Saving Print Jobs
SC-T7200 Series/SC-T5200 Series/SC-T3200 Series/SC-T7200D Series/SC-T5200D Series User's Guide Saving to and Reprinting on the Optional Hard Disk Unit In the Advanced tab, click the Settings button in We take no responsibility for any data loss, data the Hard Disk Unit area and select Print and corruption, or other problems due to any cause, even Save or Save only. - Page 70 SC-T7200 Series/SC-T5200 Series/SC-T3200 Series/SC-T7200D Series/SC-T5200D Series User's Guide Saving to and Reprinting on the Optional Hard Disk Unit Press the d/u buttons to highlight Stored Job and press the Z button. The print job tab info display area shows the names of stored print jobs.
-
Page 71: Copying And Scanning
SC-T7200 Series/SC-T5200 Series/SC-T3200 Series/SC-T7200D Series/SC-T5200D Series User's Guide Copying and Scanning Operation Copying and You can perform large copy/scan operations or manage Scanning scanned image files in the following locations. ❏ On the Large Copy/Large Scan screen of the control... -
Page 72: Starting Copy Center
SC-T7200 Series/SC-T5200 Series/SC-T3200 Series/SC-T7200D Series/SC-T5200D Series User's Guide Copying and Scanning The following procedure describes how to start Copy Control Copy Center. panel Center ✓ ✓ Scan To e-mail Start a web browser on a tablet terminal or computer connected to the printer via the ✓... -
Page 73: Address Settings
SC-T7200 Series/SC-T5200 Series/SC-T3200 Series/SC-T7200D Series/SC-T5200D Series User's Guide Copying and Scanning Start Copy Center. Address Settings To scan to e-mail or scan to a shared folder, you must In the upper part of the screen, click the Settings configure the mail server and register the e-mail icon. -
Page 74: How To Load Documents
SC-T7200 Series/SC-T5200 Series/SC-T3200 Series/SC-T7200D Series/SC-T5200D Series User's Guide Copying and Scanning * When loading a thin document, we recommend If the paper eject guides are left attached, the document placing it between clear holders or other similar will strike them and not be ejected. - Page 75 SC-T7200 Series/SC-T5200 Series/SC-T3200 Series/SC-T7200D Series/SC-T5200D Series User's Guide Copying and Scanning With the side of the document to be read facing Paper Size Forward (a) Backward (b) up, align the right edge of the document with the loading guide. 185mm...
-
Page 76: Large Copying
SC-T7200 Series/SC-T5200 Series/SC-T3200 Series/SC-T7200D Series/SC-T5200D Series User's Guide Copying and Scanning ❏ SC-T7200D Series/SC-T5200D Series After the document has been loaded, remove the loading guide, and then make sure the left edge of Select Roll 1/2, and then print the document and the guide line are aligned. -
Page 77: Large Scan
SC-T7200 Series/SC-T5200 Series/SC-T3200 Series/SC-T7200D Series/SC-T5200D Series User's Guide Copying and Scanning On the Large copy screen, you can press the d/u Buttons that are used in the following settings buttons to select the number of copies. Press the Z button to start copying. -
Page 78: Changing The Document Eject Direction
SC-T7200 Series/SC-T5200 Series/SC-T3200 Series/SC-T7200D Series/SC-T5200D Series User's Guide Copying and Scanning Use the d/u buttons to select the save Buttons that are used in the following settings destination folder or address, and then press the Z button. The details of the main scan settings appear. - Page 79 SC-T7200 Series/SC-T5200 Series/SC-T3200 Series/SC-T7200D Series/SC-T5200D Series User's Guide Copying and Scanning ❏ SC-T7200 Series/SC-T5200 Series/ Indicates a JPEG file with a resolution that SC-T3200 Series supports direct printing. Loaded roll paper or cut sheet When Scan File Options was selected ❏...
-
Page 80: Making Enlarged Copies With A A3 Or A4 Scanner
A3 or A4 Scanner Press the y button to exit. Connecting an Epson A3 or A4 scanner to the printer makes creating enlarged copies a snap; no computer is required. Supported scanners are listed on the Epson website. -
Page 81: Making Enlarged Copies
SC-T7200 Series/SC-T5200 Series/SC-T3200 Series/SC-T7200D Series/SC-T5200D Series User's Guide Copying and Scanning After confirming that the printer is ready, press Important: the l/r buttons to highlight the + tab and press Connect the scanner directly to the printer. the Z button. - Page 82 SC-T7200 Series/SC-T5200 Series/SC-T3200 Series/SC-T7200D Series/SC-T5200D Series User's Guide Copying and Scanning ❏ Be sure to insert the original in landscape (wide) orientation. ❏ If there are documents both on the glass and in the ADF, the document in the ADF will be scanned.
-
Page 83: More Ways To Print
SC-T7200 Series/SC-T5200 Series/SC-T3200 Series/SC-T7200D Series/SC-T5200D Series User's Guide More Ways to Print ❏ Fit to Output Size More Ways to Print Automatically enlarges or reduces the image size to fit the paper size. Enlargements and Horizontal and Vertical Banners The printer driver can enlarge or reduce documents for different paper sizes. -
Page 84: Fitting Documents To The Width Of The Roll Paper
SC-T7200 Series/SC-T5200 Series/SC-T3200 Series/SC-T7200D Series/SC-T5200D Series User's Guide More Ways to Print Choose whether to fit the short or long edge of Fitting Documents to the Width the document to the roll paper width. of the Roll Paper Making Settings in Windows... -
Page 85: Choosing A Print Size
SC-T7200 Series/SC-T5200 Series/SC-T3200 Series/SC-T7200D Series/SC-T5200D Series User's Guide More Ways to Print Select Fit to Roll Paper Width and choose In the Layout tab, select Reduce/Enlarge and whether to fit the short or long edge of the click Specify Size. -
Page 86: Fitting Documents To The Output Size
SC-T7200 Series/SC-T5200 Series/SC-T3200 Series/SC-T7200D Series/SC-T5200D Series User's Guide More Ways to Print Select Specify Size, choose a method for In the Layout tab, select Reduce/Enlarge and specifying the size, and select a size. click Fit to Output Size. Enter a value directly or click the arrows to the right of the scale box to set the value. -
Page 87: Printing At Non-Standard Sizes
SC-T7200 Series/SC-T5200 Series/SC-T3200 Series/SC-T7200D Series/SC-T5200D Series User's Guide More Ways to Print Select Fit to Output Size and choose a paper size Printing at Non-Standard that matches the paper in the printer. Sizes Before printing at non-standard sizes, including vertical or horizontal banners and documents with equal sides, save the desired paper size in the printer driver. - Page 88 SC-T7200 Series/SC-T5200 Series/SC-T3200 Series/SC-T7200D Series/SC-T5200D Series User's Guide More Ways to Print Making Settings in Windows Note: Display the printer driver's Printer Settings tab ❏ To change the paper size you saved, select the and click the Custom Paper Size.
-
Page 89: Printing Cad Drawings
SC-T7200 Series/SC-T5200 Series/SC-T3200 Series/SC-T7200D Series/SC-T5200D Series User's Guide More Ways to Print Enter the Width, Height for the Paper Size, Printing CAD Drawings enter the margins, and then click OK. The range of values available for page sizes and The printer supports the HP-GL/2 driver and HP RTL margins vary with the printer model and the (Raster Transfer Language) used in plotters. -
Page 90: Printing While Emulating Hp-Gl/2 And Hp
SC-T7200 Series/SC-T5200 Series/SC-T3200 Series/SC-T7200D Series/SC-T5200D Series User's Guide More Ways to Print Printing while Emulating HP-GL/ Note: The CAD / Line Drawing (Black), CAD / Line 2 and HP RTL Drawing (Color) , and CAD / Line Drawing (Bi-Level) options are available for Select Target... -
Page 91: Switching Roll Paper Automatically Before Printing
SC-T7200 Series/SC-T5200 Series/SC-T3200 Series/SC-T7200D Series/SC-T5200D Series User's Guide More Ways to Print Switching Roll Paper Open the Printer Settings tab of the printer driver and confirm that Source is Roll Auto - Automatically before XXXXX. Printing (SC-T7200D XXXXX indicates the width of the roll paper currently in use. -
Page 92: Switching To Roll 1/Roll 2 By Document Size
SC-T7200 Series/SC-T5200 Series/SC-T3200 Series/SC-T7200D Series/SC-T5200D Series User's Guide More Ways to Print Making Settings for Mac OS X For Media Type, select the paper type you want Using the control panel of the printer, confirm to use for printing. Type Match is set in Setup menu > Printer Setup >... - Page 93 SC-T7200 Series/SC-T5200 Series/SC-T3200 Series/SC-T7200D Series/SC-T5200D Series User's Guide More Ways to Print Settings on Windows For Paper Size, select the Paper Size set in the Using the control panel of the printer, confirm application. Best Fit is set in Setup menu > Printer Setup >...
-
Page 94: Switching To The Roll With The Most Paper Remaining (Roll 1/Roll 2) Before Printing If The Paper Runs Out
SC-T7200 Series/SC-T5200 Series/SC-T3200 Series/SC-T7200D Series/SC-T5200D Series User's Guide More Ways to Print Check that the Roll Switch is Auto. In this example, the paper is loaded as follows. If the setting is not Auto, click it and select Roll 1: Plain Paper A1 Width Auto. - Page 95 SC-T7200 Series/SC-T5200 Series/SC-T3200 Series/SC-T7200D Series/SC-T5200D Series User's Guide More Ways to Print Set Paper Size, Print Quality, and other Check that the Roll Switch is Auto. necessary settings, and then print. If the setting is not Auto, click it and select If the printer predicts that the roll paper Auto.
-
Page 96: Borderless Printing
SC-T7200 Series/SC-T5200 Series/SC-T3200 Series/SC-T7200D Series/SC-T5200D Series User's Guide More Ways to Print Borderless Printing You can print your data without margins on the paper. The types of borderless printing you can choose vary as shown below depending on the media type. - Page 97 SC-T7200 Series/SC-T5200 Series/SC-T3200 Series/SC-T7200D Series/SC-T5200D Series User's Guide More Ways to Print Supported SC-T7200 SC-T5200 SC-T3200 paper Series/ Series/ Series widths SC-T7200 SC-T5200 D Series D Series ✓ ✓ ✓ 16 inch ✓ ✓ ✓ US C/17 inch ✓ ✓...
-
Page 98: About Roll Paper Cutting
SC-T7200 Series/SC-T5200 Series/SC-T3200 Series/SC-T7200D Series/SC-T5200D Series User's Guide More Ways to Print About Roll Paper Cutting When performing borderless printing on roll paper, you can specify whether it is left and right borderless printing or all edges borderless printing, and how to cut the paper in the printer driver's Roll Paper Option. The cutting operation for each value is shown in the following chart. -
Page 99: Setting Procedures For Printing
SC-T7200 Series/SC-T5200 Series/SC-T3200 Series/SC-T7200D Series/SC-T5200D Series User's Guide More Ways to Print In the Layout tab Borderless Enlargement Setting Procedures for Printing Setting area, select either Auto Expand or Retain Size. Making Settings in Windows Display the printer driver's Printer Settings tab and adjust the following settings. - Page 100 SC-T7200 Series/SC-T5200 Series/SC-T3200 Series/SC-T7200D Series/SC-T5200D Series User's Guide More Ways to Print : 3 mm for left and 5 mm for right When roll paper is used, Auto Cut options are (the image shifts 1 mm to the available in the Advanced tab Roll Paper Option right) area.
-
Page 101: Correct Color And Print
SC-T7200 Series/SC-T5200 Series/SC-T3200 Series/SC-T7200D Series/SC-T5200D Series User's Guide More Ways to Print Making Settings in Windows Correct color and print When using applications featuring a color management function, specify how to adjust colors from these applications. The printer driver automatically and internally corrects colors to match the color space. - Page 102 SC-T7200 Series/SC-T5200 Series/SC-T3200 Series/SC-T7200D Series/SC-T5200D Series User's Guide More Ways to Print Select Color Management and then Document. Clicking the Settings button allows you to adjust Select Printer Manages Colors as the Color Gamma, Brightness, Contrast, Saturation, Handling setting, and then click Print.
- Page 103 SC-T7200 Series/SC-T5200 Series/SC-T3200 Series/SC-T7200D Series/SC-T5200D Series User's Guide More Ways to Print Note: Note: For information on supported platforms, see the EPSON Color Controls will not be available in the website for the application in question. following applications if Step 1 is omitted.
-
Page 104: Multi-Page/Poster Printing
SC-T7200 Series/SC-T5200 Series/SC-T3200 Series/SC-T7200D Series/SC-T5200D Series User's Guide More Ways to Print Make the necessary settings. Multi-Page/Poster Printing See the printer driver help for more details on each item. You can print multiple pages on a single sheet or a single page across multiple sheets. -
Page 105: Folded Double-Side (Windows Only)
SC-T7200 Series/SC-T5200 Series/SC-T3200 Series/SC-T7200D Series/SC-T5200D Series User's Guide More Ways to Print • Poster (Windows only) In the Folded Double-Side Setting dialog box, set A single page can be printed across multiple sheets. Binding Edge and Binding Margin. The sheets can then be joined together to form large posters (up to 16 times the original size). -
Page 106: Poster (Windows Only)
SC-T7200 Series/SC-T5200 Series/SC-T3200 Series/SC-T7200D Series/SC-T5200D Series User's Guide More Ways to Print In the Print Layout dialog box, select the Poster (Windows only) Number of pages per sheet and Page Order. In the printer driver's Layout tab, select Page If the Print page frames check box is selected, Layout. - Page 107 SC-T7200 Series/SC-T5200 Series/SC-T3200 Series/SC-T7200D Series/SC-T5200D Series User's Guide More Ways to Print Enable or disable borderless printing. Note: Regarding the size after joining together: When borderless is selected: If Borderless Poster Print is not selected, a Print Select Borderless Poster Print.
- Page 108 SC-T7200 Series/SC-T5200 Series/SC-T3200 Series/SC-T7200D Series/SC-T5200D Series User's Guide More Ways to Print The following section describes how to join four printed Ready the two top sheets and trim the excess pages together. from the left sheet by cutting along the line joining the two join guides (the centers of the X marks).
- Page 109 SC-T7200 Series/SC-T5200 Series/SC-T3200 Series/SC-T7200D Series/SC-T5200D Series User's Guide More Ways to Print With the two sheets overlapping, trim the excess Trim the bottom from the upper sheets by by cutting along the line joining the two cut cutting along the line joining the two guides (the guides (the lines to the left of the X marks).
- Page 110 SC-T7200 Series/SC-T5200 Series/SC-T3200 Series/SC-T7200D Series/SC-T5200D Series User's Guide More Ways to Print With the two sheets overlapping, trim the excess Join the upper and lower sheets together. by cutting along the line joining the two cut guides (the lines above the X marks).
-
Page 111: Printing Multiple Documents (The Layout Manager)(Windows Only)
SC-T7200 Series/SC-T5200 Series/SC-T3200 Series/SC-T7200D Series/SC-T5200D Series User's Guide More Ways to Print After joining all the sheets, trim off the borders by Printing Multiple cutting along the cut guides (outside the X Documents (the Layout marks). Manager) (Windows Only) Documents created in different applications can be printed together in your choice of layout. -
Page 112: Setting Procedures For Printing
SC-T7200 Series/SC-T5200 Series/SC-T3200 Series/SC-T7200D Series/SC-T5200D Series User's Guide More Ways to Print The overall size and placement of the objects can Setting Procedures for Printing be changed using the Preferences and Arrangement options in the File menu. Open the file you want to print in your application. - Page 113 SC-T7200 Series/SC-T5200 Series/SC-T3200 Series/SC-T7200D Series/SC-T5200D Series User's Guide More Ways to Print Saving On the Layout Manager screen, click File menu and then Save As. Enter the file name, select the location, and then click Save. Close the Layout Manager screen.
-
Page 114: Color Management Printing
SC-T7200 Series/SC-T5200 Series/SC-T3200 Series/SC-T7200D Series/SC-T5200D Series User's Guide Color Management Printing Color Management Print Color Management Settings Printing You can perform color management printing using this printer's printer driver in the following two ways. About Color Management Choose the best method according to the application... -
Page 115: Setting Profiles
SC-T7200 Series/SC-T5200 Series/SC-T3200 Series/SC-T7200D Series/SC-T5200D Series User's Guide Color Management Printing Setting color Setting profiles management with the Settings for the input profile, printer profile, and intent (matching method) vary between three types of color applications management printing since their color management engines are used differently. -
Page 116: Setting Color Management With The Printer Driver
SC-T7200 Series/SC-T5200 Series/SC-T3200 Series/SC-T7200D Series/SC-T5200D Series User's Guide Color Management Printing Set color management to off. Setting color management with the For Windows In the Printer Settings tab, select Advanced printer driver Settings in the Print Quality area and choose Off (No Color Management) for Color Mode. -
Page 117: Color Management Printing By Colorsync (Mac Os X)
SC-T7200 Series/SC-T5200 Series/SC-T3200 Series/SC-T7200D Series/SC-T5200D Series User's Guide Color Management Printing Select Color Management and then Document. To change the profile, select Show all profiles at the bottom. Select Printer Manages Colors as the Color Handling setting, and then click Print. -
Page 118: Color Management Printing By Driver Icm(Windows Only)
SC-T7200 Series/SC-T5200 Series/SC-T3200 Series/SC-T7200D Series/SC-T5200D Series User's Guide Color Management Printing Adobe Photoshop CS3 or later Choose Printer Settings from the list and select Adobe Photoshop Elements 6 or later Advanced Settings for Mode. Select Off (No Adobe Photoshop Lightroom 1 or later Color Management) for Color Mode. - Page 119 SC-T7200 Series/SC-T5200 Series/SC-T3200 Series/SC-T7200D Series/SC-T5200D Series User's Guide Color Management Printing In the printer driver's Printer Settings tab, select Intent Explanation Advanced Settings for Print Quality, then select ICM for Color Mode and click Settings. Absolute Assigns absolute color gamut...
-
Page 120: Tips For Using The Printer Driver(Windows)
SC-T7200 Series/SC-T5200 Series/SC-T3200 Series/SC-T7200D Series/SC-T5200D Series User's Guide Tips for Using the Printer Driver(Windows) Right-click your printer icon, and click Printing Tips for Using the preferences. Printer Driver (Windows) Displaying the Settings The printer driver dialog will be displayed. Screen You can access the printer driver in the following ways: ❏... -
Page 121: Displaying Help
SC-T7200 Series/SC-T5200 Series/SC-T3200 Series/SC-T7200D Series/SC-T5200D Series User's Guide Tips for Using the Printer Driver(Windows) Displaying Help Right-click on the item you want to check and display You can access the printer driver help in the following Right-click the item, and then click Help. -
Page 122: Customizing The Printer Driver
SC-T7200 Series/SC-T5200 Series/SC-T3200 Series/SC-T7200D Series/SC-T5200D Series User's Guide Tips for Using the Printer Driver(Windows) You can save up to 100 settings. You can choose a setting Customizing the Printer you have registered from the Select Setting list box. Driver Note: You can save the settings as a file by clicking Export. -
Page 123: Rearranging Display Items
SC-T7200 Series/SC-T5200 Series/SC-T3200 Series/SC-T7200D Series/SC-T5200D Series User's Guide Tips for Using the Printer Driver(Windows) Adjust settings for the new custom media and Rearranging display items click OK. To display frequently used items right away, you can arrange Select Setting, Media Type, and Paper Size as follows. -
Page 124: Overview Of The Utility Tab
SC-T7200 Series/SC-T5200 Series/SC-T3200 Series/SC-T7200D Series/SC-T5200D Series User's Guide Tips for Using the Printer Driver(Windows) ❏ To delete a group (folder), click Delete Overview of the Utility Group. ❏ Drag and drop unnecessary items to Not Display. The printer driver's Utility tab provides access to the following. - Page 125 Preferences screen, the Utility shortcut icon is displayed on the Windows Taskbar. By right-clicking the icon, you can display the following menu and perform maintenance functions. EPSON Status Monitor 3 starts when the printer name is clicked from the displayed menu. SC-T7200D Series/SC-T5200D Series Print Queue You can display the list of all waiting jobs.
-
Page 126: Uninstalling The Printer Driver
SC-T7200 Series/SC-T5200 Series/SC-T3200 Series/SC-T7200D Series/SC-T5200D Series User's Guide Tips for Using the Printer Driver(Windows) Uninstalling the printer Select the target printer icon, and then click OK. driver Follow the steps below to remove the printer driver and EPSON LFP Remote Panel 2. -
Page 127: Tips For Using The Printer Driver(Mac Os X)
SC-T7200 Series/SC-T5200 Series/SC-T3200 Series/SC-T7200D Series/SC-T5200D Series User's Guide Tips for Using the Printer Driver(Mac OS X) Using Epson Printer Utility Tips for Using the Printer Driver (Mac OS X) You can perform maintenance tasks such as Nozzle Check or Head Cleaning by using Epson Printer Utility 4. - Page 128 Alignment)” on page 167 SC-T7200 Series/SC-T5200 Series/SC-T3200 Series EPSON LFP Remote Panel 2 You can configure custom paper settings and other settings. See the EPSON LFP Remote Panel 2 help for details. SC-T7200D Series/SC-T5200D Series Nozzle Check This function prints a nozzle check pattern to check if the print head nozzles are clogged.
-
Page 129: Uninstalling The Printer Driver
Download the Uninstaller from the Epson website. http://www.epson.com/ Using the Uninstaller Follow the instructions on the Epson website. Removing EPSON LFP Remote Panel 2 Drag and drop the EPSON Remote Panel 2 folder from the Applications folder into the Trash. -
Page 130: Using The Control Panel Menu
SC-T7200 Series/SC-T5200 Series/SC-T3200 Series/SC-T7200D Series/SC-T5200D Series User's Guide Using the Control Panel Menu Using the Control Panel Menu Menu Operations The steps for displaying the various menus are shown below. The example below shows the steps for accessing the Paper menu. - Page 131 SC-T7200 Series/SC-T5200 Series/SC-T3200 Series/SC-T7200D Series/SC-T5200D Series User's Guide Using the Control Panel Menu When the optional MFP Scanner is connected Start copying...
-
Page 132: Menu List
SC-T7200 Series/SC-T5200 Series/SC-T3200 Series/SC-T7200D Series/SC-T5200D Series User's Guide Using the Control Panel Menu Menu List The items and options available in the menu are described below. See the reference pages for more details on each item. *1. SC-T7200D Series/SC-T5200D Series only *2. - Page 133 SC-T7200 Series/SC-T5200 Series/SC-T3200 Series/SC-T7200D Series/SC-T5200D Series User's Guide Using the Control Panel Menu Menu item Description Custom Paper XXXXXXXXXXXX Select Reference Plain Paper Lists supported Epson Setting XXXXXXXX Paper media. Photo Paper (name of custom paper type) Matte Paper Others...
- Page 134 SC-T7200 Series/SC-T5200 Series/SC-T3200 Series/SC-T7200D Series/SC-T5200D Series User's Guide Using the Control Panel Menu Menu item Description Cutter Adjust Cut Position -3 to 3 mm Maintenance Replace Cutter Press Z to start move. /Setup menu “Setup menu” on page 146 Menu item...
- Page 135 SC-T7200 Series/SC-T5200 Series/SC-T3200 Series/SC-T7200D Series/SC-T5200D Series User's Guide Using the Control Panel Menu Menu item Description HP-GL/2 Quality Speed, Fine Settings Output Size Auto, A Series, US-ANSI, US-ARCH, B Series, Photo Series, Others, User Defined Margin 3mm, 5mm Margin Options...
- Page 136 SC-T7200 Series/SC-T5200 Series/SC-T3200 Series/SC-T7200D Series/SC-T5200D Series User's Guide Using the Control Panel Menu Menu item Description Printer Status Firmware Version xxxxxxx,x.xx,xxxx Option Status Displays the options connected. Show Total Prints XXXXXX m Print Status Sheet Press Z to start printing.
- Page 137 SC-T7200 Series/SC-T5200 Series/SC-T3200 Series/SC-T7200D Series/SC-T5200D Series User's Guide Using the Control Panel Menu Menu item Description Administrator Change Password Enter a password. Menu Operational Network Setup Password Required, No Password Required Control Power Cleaning Format Hard Disk Yes, No Manage HDD...
- Page 138 SC-T7200 Series/SC-T5200 Series/SC-T3200 Series/SC-T7200D Series/SC-T5200D Series User's Guide Using the Control Panel Menu Menu item Description Copy Settings Roll Select Roll 1, Roll 2 Scaling Manual 25 to 400% Auto Color/Grayscale Color, Grayscale Document type Text/Line Drawing, Tracing Paper, Recycled Paper,...
-
Page 139: Menu Descriptions
SC-T7200 Series/SC-T5200 Series/SC-T3200 Series/SC-T7200D Series/SC-T5200D Series User's Guide Using the Control Panel Menu Menu Descriptions Print Queues menu When the printer printed without using the printer driver included with the printer or the PS driver included with the optional Adobe PostScript 3 Expansion Unit, the job names and estimated times in the following table may not be displayed correctly. - Page 140 Estimates do not account for ink used over the life of the cartridge for ink remaining in the cartridge after the replace cartridge signal. Some Epson printers have multiple tools for estimating cost or ink consumption and not all tools work the same way.
-
Page 141: Paper Menu
SC-T7200 Series/SC-T5200 Series/SC-T3200 Series/SC-T7200D Series/SC-T5200D Series User's Guide Using the Control Panel Menu Paper menu If you use the Custom Paper Setting to register print settings for commercial paper on the SC-T7200D Series/ SC-T5200D Series, observe the following precautions. If you are printing on both the Roll 1 and Roll 2, configure them individually, even when the paper is the same. If the Custom Paper Setting set by the conditions set in Roll 1 is applied to the same type of paper loaded in Roll 2, but the paper path, paper width, or other print conditions are different, printing will not be performed correctly. - Page 142 SC-T7200 Series/SC-T5200 Series/SC-T3200 Series/SC-T7200D Series/SC-T5200D Series User's Guide Using the Control Panel Menu Item Description Custom XXXXXXXXXXX Select Plain Paper You can select the media type that is the closest to Paper (name of Reference the paper you are using.
- Page 143 SC-T7200 Series/SC-T5200 Series/SC-T3200 Series/SC-T7200D Series/SC-T5200D Series User's Guide Using the Control Panel Menu Item Description Paper Feed Pattern Use this setting if you are unable to resolve Adjust banding issues (horizontal striped lines or uneven Value colors) in the standard print area (for cut sheets,...
- Page 144 SC-T7200 Series/SC-T5200 Series/SC-T3200 Series/SC-T7200D Series/SC-T5200D Series User's Guide Using the Control Panel Menu Item Description Setting Name Enter a name of up to 22 characters for custom paper settings. Choose an easy-to-remember name for quick selection. Restore Restore the selected custom paper settings to Settings default values.
-
Page 145: The Maintenance Menu
SC-T7200 Series/SC-T5200 Series/SC-T3200 Series/SC-T7200D Series/SC-T5200D Series User's Guide Using the Control Panel Menu The Maintenance Menu Item Description Nozzle Check Press the Z button to print a nozzle check pattern. Inspect the pat- tern visually and perform head cleaning if you detect faint or missing colors. -
Page 146: Setup Menu
SC-T7200 Series/SC-T5200 Series/SC-T3200 Series/SC-T7200D Series/SC-T5200D Series User's Guide Using the Control Panel Menu Setup menu Selecting Administrator Menu displays a password prompt. No password is entered at shipment; press the Z button to proceed. If the administrator password has been changed, enter the administrator password. - Page 147 SC-T7200 Series/SC-T5200 Series/SC-T3200 Series/SC-T7200D Series/SC-T5200D Series User's Guide Using the Control Panel Menu Item Description Roll End Option Continue Select the action to perform for a roll after replacement: print the remaining data (Continue) / do not print (Stop Printing) / print again from the beginning (Reprint).
- Page 148 SC-T7200 Series/SC-T5200 Series/SC-T3200 Series/SC-T7200D Series/SC-T5200D Series User's Guide Using the Control Panel Menu Item Description Roll Switch Paper Type From the following options, select the condition under which to Type Match switch to another roll for printing when the current roll has run Condition out.
- Page 149 SC-T7200 Series/SC-T5200 Series/SC-T3200 Series/SC-T7200D Series/SC-T5200D Series User's Guide Using the Control Panel Menu Advanced Settings Item Description Roll Paper Tension This setting is used if one of the following settings are configured to Extra 1 to 5 (3 High: Paper menu > Custom Paper Setting > Roll Paper Tension or Printer driver's Paper Configuration >...
- Page 150 SC-T7200 Series/SC-T5200 Series/SC-T3200 Series/SC-T7200D Series/SC-T5200D Series User's Guide Using the Control Panel Menu HP-GL/2 Settings Item Description Quality Speed Choose Print Quality in view of image quality and print speed. Fine Output Size The hard clip area of the PS command of the data becomes the base Auto output size.
- Page 151 SC-T7200 Series/SC-T5200 Series/SC-T3200 Series/SC-T7200D Series/SC-T5200D Series User's Guide Using the Control Panel Menu Item Description Margin Select the top, bottom, left, and right margin values. For a cut sheet, the bottom margin is 14 mm regardless of the settings.
- Page 152 SC-T7200 Series/SC-T5200 Series/SC-T3200 Series/SC-T7200D Series/SC-T5200D Series User's Guide Using the Control Panel Menu Item Description Margin Options The position at which the margin is added depends on the Output Size Standard setting, as shown below. ❏ When set to Auto...
- Page 153 SC-T7200 Series/SC-T5200 Series/SC-T3200 Series/SC-T7200D Series/SC-T5200D Series User's Guide Using the Control Panel Menu Item Description Add Margins The position at which the margin is added depends on the Output Size setting, as shown below. ❏ When set to Auto The result is the same as when Standard is selected.
- Page 154 SC-T7200 Series/SC-T5200 Series/SC-T3200 Series/SC-T7200D Series/SC-T5200D Series User's Guide Using the Control Panel Menu Item Description Clip By Margins Depending on the Output Size setting, adds the value selected for Margin (area of in the following illustration) inside the hard clip area of the PS command of the data or the size selected for Output Size (area of in the following illustration).
- Page 155 SC-T7200 Series/SC-T5200 Series/SC-T3200 Series/SC-T7200D Series/SC-T5200D Series User's Guide Using the Control Panel Menu Item Description Mirror Select whether to flip horizontally (mirror) using the center of the Output Size width as the basis line and then print (On) or print without flipping horizontally (Off).
- Page 156 SC-T7200 Series/SC-T5200 Series/SC-T3200 Series/SC-T7200D Series/SC-T5200D Series User's Guide Using the Control Panel Menu Item Description Reset HP-GL/2 Settings If Yes is selected, the HP-GL/2 Settings are restored to default values. Restore Settings Description If Yes is selected, the Printer Setup is restored to default values.
- Page 157 SC-T7200 Series/SC-T5200 Series/SC-T3200 Series/SC-T7200D Series/SC-T5200D Series User's Guide Using the Control Panel Menu Item Description CMYK Simulation SWOP v2/US Web Uncoated v2/US Sheetfed Coated v2/US When you simulate CMYK ink Sheetfed Uncoatedv2/Coated GRACoL 2006/SWOP Grade 3 colors of offset printers, you...
-
Page 158: Printer Status
SC-T7200 Series/SC-T5200 Series/SC-T3200 Series/SC-T7200D Series/SC-T5200D Series User's Guide Using the Control Panel Menu Printer Status Item Description Firmware Version xxxxxxx,x.xx,xxxx You can see the firmware version. When an optional auto take-up reel unit is connected, its firmware version is displayed below the firmware version of the printer. -
Page 159: Administrator Menu
Menu will only be displayed if the correct password is entered, preventing non-administrators from accidentally changing settings. Keep the password in a safe place. Should you forget the password, contact your dealer or Epson Support. Operational Network Setup Password Required... - Page 160 SC-T7200 Series/SC-T5200 Series/SC-T3200 Series/SC-T7200D Series/SC-T5200D Series User's Guide Using the Control Panel Menu Item Description Power Cleaning Inspect the printed pattern and select the check boxes for patterns with faint or missing areas. To select all nozzles, place a check in the box on the left.
-
Page 161: Enlarged Copy Menu
SC-T7200 Series/SC-T5200 Series/SC-T3200 Series/SC-T7200D Series/SC-T5200D Series User's Guide Using the Control Panel Menu Enlarged Copy menu The Enlarged Copy menu is displayed only when a A3 or A4 scanner is connected. Supported scanners are listed on the Epson website. http://www.epson.com... -
Page 162: Large Copy / Large Scan Menu
SC-T7200 Series/SC-T5200 Series/SC-T3200 Series/SC-T7200D Series/SC-T5200D Series User's Guide Using the Control Panel Menu Large Copy / Large Scan menu This menu is displayed only when the optional MFP Scanner is connected. “Large Copying and Large Scanning using the MFP Scanner (Option)” on page 71 *1. -
Page 163: Scan Setting
SC-T7200 Series/SC-T5200 Series/SC-T3200 Series/SC-T7200D Series/SC-T5200D Series User's Guide Using the Control Panel Menu Item Description Contrast Set the contrast. Negative values (-) are weaker, and Level -3 to 3 (0 positive values (+) are stronger. Background Set the adjustment value for the background. Configure... - Page 164 SC-T7200 Series/SC-T5200 Series/SC-T3200 Series/SC-T7200D Series/SC-T5200D Series User's Guide Using the Control Panel Menu Item Description Density Choose the density for scanning. Negative values (-) are Level -3 to 3 (0 lighter, and positive values (+) is darker. Contrast Set the contrast. Negative values (-) are weaker, and Level -3 to 3 (0 positive values (+) are stronger.
-
Page 165: Adjusting The Print Head
SC-T7200 Series/SC-T5200 Series/SC-T3200 Series/SC-T7200D Series/SC-T5200D Series User's Guide Maintenance From the computer Maintenance Explanations in this section use the Windows printer driver as an example. Adjusting the Print Head Use Epson Printer Utility 4 for Mac OS X. “Epson Printer Utility 4 Functions” on page 127... -
Page 166: Cleaning The Print Head
SC-T7200 Series/SC-T5200 Series/SC-T3200 Series/SC-T7200D Series/SC-T5200D Series User's Guide Maintenance ❏ From the computer From the printer All nozzles are cleaned. Buttons that are used in the following settings ❏ From the printer You can clean all nozzles or select for cleaning only those nozzles for which the printed nozzle check pattern indicates a problem. -
Page 167: Minimizing Print Misalignments (Head Alignment)
SC-T7200 Series/SC-T5200 Series/SC-T3200 Series/SC-T7200D Series/SC-T5200D Series User's Guide Maintenance “Using Epson Printer Utility 4” on page 127 Select nozzle rows for cleaning. Click Head Cleaning from the Utility tab in the Press the l/r buttons to highlight numbers printer driver's Properties (or Printing corresponding to check patterns with faint or preferences) screen. - Page 168 SC-T7200 Series/SC-T5200 Series/SC-T3200 Series/SC-T7200D Series/SC-T5200D Series User's Guide Maintenance registers the optimum adjustment value to the Note: printer. Head Alignment is adjusted according to the paper currently loaded in the printer. Load the paper for which Auto head alignment takes about 30 minutes to head alignment is required.
- Page 169 SC-T7200 Series/SC-T5200 Series/SC-T3200 Series/SC-T7200D Series/SC-T5200D Series User's Guide Maintenance Click Print Head Alignment from the Utility Press the Z button to print an adjustment pattern. tab in the printer driver's Properties (or Printing preferences) screen. If Auto is selected, the printer will automatically...
-
Page 170: Replacing Consumables
SC-T7200 Series/SC-T5200 Series/SC-T3200 Series/SC-T7200D Series/SC-T5200D Series User's Guide Maintenance Replacing Consumables Hook a finger into the indentation on the top of the cartridge and pull it straight toward you. Replacing Ink Cartridges If one of the installed ink cartridges is expended, printing cannot be performed. -
Page 171: Replacing Maintenance Boxes
SC-T7200 Series/SC-T5200 Series/SC-T3200 Series/SC-T7200D Series/SC-T5200D Series User's Guide Maintenance “Options and Consumable Products” on Holding the cartridge with the label out, slide it page 194 all the way into the slot. Match the color of the cartridge to the color of the Important: label on the printer. -
Page 172: Replacing The Cutter
SC-T7200 Series/SC-T5200 Series/SC-T3200 Series/SC-T7200D Series/SC-T5200D Series User's Guide Maintenance Place the used Maintenance Box in the clear bag Important: included with your new Maintenance Box, and Take care not to damage the cutter blade. Dropping make sure that the zipper is closed tight. - Page 173 SC-T7200 Series/SC-T5200 Series/SC-T3200 Series/SC-T7200D Series/SC-T5200D Series User's Guide Maintenance After replacing the cutter, press the Z button. The cutter will return to its original position. Ready is displayed in the control panel when the process is complete. Install the new cutter.
-
Page 174: Cleaning The Printer
SC-T7200 Series/SC-T5200 Series/SC-T3200 Series/SC-T7200D Series/SC-T5200D Series User's Guide Maintenance Cleaning the Printer Important: Failure to remove dust and particles of paper from the platen could result in clogged nozzles or damage To keep your printer in optimum operating condition, to the print head. - Page 175 SC-T7200 Series/SC-T5200 Series/SC-T3200 Series/SC-T7200D Series/SC-T5200D Series User's Guide Maintenance Open the printer cover and use a soft, clean cloth When you have finished cleaning, close the to carefully clean away any dust or dirt inside the printer cover. printer. Thoroughly clean area (a), shown in blue in the illustration below.
-
Page 176: Cleaning The Mfp Scanner (Option)
SC-T7200 Series/SC-T5200 Series/SC-T3200 Series/SC-T7200D Series/SC-T5200D Series User's Guide Maintenance (2) Use the other cloth to wipe away any remaining Cleaning the MFP Scanner glass cleaner. (option) Clean the roller directly under the glass surface. If the glass surface or rollers of the scanner are covered... -
Page 177: Problem Solver
Update the firmware again. Restart the printer. If this message appears on the LCD panel again, contact your dealer or Epson Support. Command Error Press the W button and select Job Cancel to stop printing. Confirm that the printer driver Check driver settings. - Page 178 Adobe PostScript 3 Expansion Unit. installed. If this message appears on the LCD panel again, contact your dealer or Epson Support. When you are printing via the printer driver included with a printer, you can print regardless of the hard disk status if you select the Advanced tab in the printer driver, open the Settings dialog box of Hard Disk Unit, and select Print only.
- Page 179 SC-T7200 Series/SC-T5200 Series/SC-T3200 Series/SC-T7200D Series/SC-T5200D Series User's Guide Problem Solver Messages What to do Held Jobs Limit The number of held jobs has reached 200. Held job queue full. Press the Z button and select Resume All Jobs. “Function Summary” on page 67 Paper Size Error The loaded paper width is not supported.
- Page 180 Expansion Unit and printer. Update both to the latest firmware. Refer to manual for details. The latest firmware can be downloaded from the Epson website. Information Load paper that supports large copy/large scan, and then print the copy/scan file again.
-
Page 181: When A Maintenance Call/Service Call Occurs
A part used in the printer is nearing the end of its service life. Replace Part Now/Soon XXXXXXXX Contact your dealer or Epson Support and tell them the maintenance request code. You cannot clear the maintenance request until the part is replaced. A service call occurs if you continue to use the printer. -
Page 182: Troubleshooting
SC-T7200 Series/SC-T5200 Series/SC-T3200 Series/SC-T7200D Series/SC-T5200D Series User's Guide Problem Solver Troubleshooting Does the printer port setting match the printer connection port? Check the printer port. You cannot print (because the Click the Port tab in the printer Properties dialog and... - Page 183 SC-T7200 Series/SC-T5200 Series/SC-T3200 Series/SC-T7200D Series/SC-T5200D Series User's Guide Problem Solver Is the USB hub recognized correctly? Does the current printer status show Printing Make sure the USB hub is recognized correctly on the Paused (Mac OS X)? computer. If the computer correctly detects the USB...
-
Page 184: The Printer Sounds Like It Is Printing, But Nothing Prints
SC-T7200 Series/SC-T5200 Series/SC-T3200 Series/SC-T7200D Series/SC-T5200D Series User's Guide Problem Solver The printer sounds like it is Was Head Alignment performed? With bidirectional printing, the print head prints while printing, but nothing prints moving left and right. If the print head is misaligned, ruled lines may be misaligned accordingly. - Page 185 SC-T7200 Series/SC-T5200 Series/SC-T3200 Series/SC-T7200D Series/SC-T5200D Series User's Guide Problem Solver Have you compared the printing result with Is the paper skewed? If Off is selected for Media Skew Check in the Setup the image on the display monitor? menu, printing will continue even if the paper is Since monitors and printers produce colors skewed, resulting in data being printed off the paper.
- Page 186 SC-T7200 Series/SC-T5200 Series/SC-T3200 Series/SC-T7200D Series/SC-T5200D Series User's Guide Problem Solver The paper is creased. Is the paper creased or folded? Do not use old paper or paper with folds in it. Always use new paper. Are you using the printer at normal room...
-
Page 187: Feeding Or Ejecting Problems
Min. “Borderless Printing” on page 96 Is the paper damp? Do not use paper that is damp. Also, Epson special Is the paper stored correctly? media should be left in the bag until you intend to use The paper may expand or contract if it is not stored it. - Page 188 SC-T7200 Series/SC-T5200 Series/SC-T3200 Series/SC-T7200D Series/SC-T5200D Series User's Guide Problem Solver Is the paper too thick or too thin? Caution: Check that the paper specifications are compatible If you opened the printer cover in operation, do not with this printer. For information about the media touch the area as indicated by the warning labels.
- Page 189 SC-T7200 Series/SC-T5200 Series/SC-T3200 Series/SC-T7200D Series/SC-T5200D Series User's Guide Problem Solver Remove the cut paper. When using SC-T7200 Series/SC-T5200 Series/SC-T3200 Series When roll paper loaded on Roll 1 is jammed on the SC-T7200D Series/SC-T5200D Series Remove the jammed paper via the paper feed slot or the eject slot.
-
Page 190: Others
SC-T7200 Series/SC-T5200 Series/SC-T3200 Series/SC-T7200D Series/SC-T5200D Series User's Guide Problem Solver After removing the paper, press the Z button. Caution: Reload the paper and resume printing. If you opened the printer cover in operation, do not touch the area as indicated by the warning labels. -
Page 191: Trouble When The Optional Mfp Scanner Is Connected
SC-T7200 Series/SC-T5200 Series/SC-T3200 Series/SC-T7200D Series/SC-T5200D Series User's Guide Problem Solver The following procedure shows how to remove the Head cleaning starts when the printer document. is turned on. Press the buttons on both sides of the cover to When turned on after an extended period of disuse, release the locks. - Page 192 SC-T7200 Series/SC-T5200 Series/SC-T3200 Series/SC-T7200D Series/SC-T5200D Series User's Guide Problem Solver Scanned image files cannot be Align the right edge with the loading guide so that calibration sheet is loaded from the black printed side. Was scanning performed at a resolution at...
- Page 193 SC-T7200 Series/SC-T5200 Series/SC-T3200 Series/SC-T7200D Series/SC-T5200D Series User's Guide Problem Solver After the calibration sheet has been loaded, Use the d/u buttons to select Feed Adjust and remove the loading guide. press the Z button. An adjustment setting screen will be displayed.
-
Page 194: Appendix
SC-T7200 Series/SC-T5200 Series/SC-T3200 Series/SC-T7200D Series/SC-T5200D Series User's Guide Appendix Appendix Options and Consumable Products The following options and consumable products are available for use with your printer. (As of January, 2014) For the latest information, see the Epson Web site. - Page 195 “Using the Auto Take-up Reel Unit (SC-T7200 Series Only)” on page 51 Attachment for Auto Take-up Reel C12C815411 Cannot be connected to models other than the SC-T7200 Series. This Unit item is required when installing the auto take-up reel unit. MFP Scanner C12C891071 Can scan and copy documents up to 914 ×...
-
Page 196: Supported Media
We recommend you use the following Epson special media for high-quality printing results. Note: For information about the media types and appropriate settings for printing on paper other than Epson special media or when using raster image processing (RIP) software, see the documentation supplied with the paper, or contact the dealer of the paper or the manufacturer of the RIP. - Page 197 SC-T7200 Series/SC-T5200 Series/SC-T3200 Series/SC-T7200D Series/SC-T5200D Series User's Guide Appendix Premium Semigloss Photo Paper (250) Paper thickness: 0.27 mm Roll core size: 3 inches ICC profile: EPSON SCT3000_5000_7000_Series Premium Semigloss Photo Paper 250.icc Take-up Large Copy/ Size Borderless Head Alignment Enlarged Large Scan 406mm/16"...
- Page 198 SC-T7200 Series/SC-T5200 Series/SC-T3200 Series/SC-T7200D Series/SC-T5200D Series User's Guide Appendix ICC profile: EPSON SC-T3000_5000_7000_Series Premium Semimatte Photo Paper 260.icc Take-up Large Copy/ Size Borderless Head Alignment Enlarged Large Scan 406mm/16" 610mm/24" ✓ ✓ ✓ ✓ ✓ ✓ 914mm/36" 1118mm/44" SC-T3200 Series is not supported...
- Page 199 SC-T7200 Series/SC-T5200 Series/SC-T3200 Series/SC-T7200D Series/SC-T5200D Series User's Guide Appendix Take-up Large Copy/ Size Borderless Head Alignment Enlarged Large Scan 420mm(A2) 610mm/24" ✓ ✓ ✓ ✓ ✓ ✓ 914mm/36" 1118mm/44" SC-T3200 Series is not supported SC-T7200 Series/SC-T7200D Series only are supported Premium Semigloss Photo Paper (170) Paper thickness: 0.18 mm Roll core size: 2 inches...
- Page 200 SC-T7200 Series/SC-T5200 Series/SC-T3200 Series/SC-T7200D Series/SC-T5200D Series User's Guide Appendix Take-up Large Copy/ Size Borderless Head Alignment Enlarged Large Scan 432mm/17" 610mm/24" ✓ ✓ ✓ 914mm/36" 1118mm/44" SC-T3200 Series is not supported SC-T7200 Series/SC-T7200D Series only are supported Borderless printing available, but borders may appear or print quality decline due to paper expanding or contracting.
- Page 201 SC-T7200 Series/SC-T5200 Series/SC-T3200 Series/SC-T7200D Series/SC-T5200D Series User's Guide Appendix Take-up Large Copy/ Size Borderless Head Alignment Enlarged Large Scan 432mm/17" 610mm/24" ✓ ✓ ✓ ✓ 914mm/36" 1118mm/44" SC-T3200 Series is not supported SC-T7200 Series/SC-T7200D Series only are supported Use the tensioner supplied with the optional auto take-up reel unit Enhanced Synthetic Paper Paper thickness: 0.13 mm Roll core size: 2 inches...
-
Page 202: Cut Sheet
Load the cut sheet, and then perform a copy operation. When MFP Scanner is connected to the SC-T7200 Series/SC-T5200 Series/SC-T3200 Series only When the MFP Scanner is connected to the SC-T7200D Series/SC-T5200D Series, cut sheets are not supported. Premium Semigloss Photo Paper Thickness: 0.27mm... - Page 203 SC-T7200 Series/SC-T5200 Series/SC-T3200 Series/SC-T7200D Series/SC-T5200D Series User's Guide Appendix When MFP Scanner is connected to the SC-T7200 Series/SC-T5200 Series/SC-T3200 Series only When the MFP Scanner is connected to the SC-T7200D Series/SC-T5200D Series, cut sheets are not supported. Premium Luster Photo Paper Thickness: 0.27mm...
- Page 204 SC-T7200 Series/SC-T5200 Series/SC-T3200 Series/SC-T7200D Series/SC-T5200D Series User's Guide Appendix Large Copy/ Size Borderless Head Alignment Enlarged Large Scan ✓ Super A3/B ✓ US-C Borderless printing available, but borders may appear or print quality decline due to paper expanding or contracting.
-
Page 205: Usable Commercially Available Paper Size
SC-T7200 Series/SC-T5200 Series/SC-T3200 Series/SC-T7200D Series/SC-T5200D Series User's Guide Appendix Usable Commercially Available Available 254mm/10inch width for Paper Size 300mm/11.8inch borderless Super A3/B/329 mm printing This printer supports the following paper specifications 406mm/16inch for non-Epson media. 17 inch B2/515 mm Important: A1/594mm ❏... -
Page 206: Before Printing On Non-Epson Media
SC-T7200 Series/SC-T5200 Series/SC-T3200 Series/SC-T7200D Series/SC-T5200D Series User's Guide Appendix Before printing on non-Epson Note: ❏ Be sure to check the paper characteristics such as media paper tension, ink fixating, or paper thickness before setting the custom paper. For the paper's... -
Page 207: Notes When Moving Or Transporting The Printer
SC-T7200 Series/SC-T5200 Series/SC-T3200 Series/SC-T7200D Series/SC-T5200D Series User's Guide Appendix Notes When Moving or When the optional MFP stand is attached, pull up and fix the fall prevention fixture of the stand. Transporting the Printer This section describes precaution when moving and transporting the product. -
Page 208: Notes On Transporting
SC-T7200 Series/SC-T5200 Series/SC-T3200 Series/SC-T7200D Series/SC-T5200D Series User's Guide Appendix Move the printer. Important: When removing the MFP Scanner and stand, first attach the metal fittings and scratch-prevention Important: sheet shown in the following illustration to the Use the casters on the dedicated printer stand stand. -
Page 209: Notes When Reusing The Printer
SC-T7200 Series/SC-T5200 Series/SC-T3200 Series/SC-T7200D Series/SC-T5200D Series User's Guide Appendix SC-T3200 Series Caution: ❏ The printer is heavy. When you pack or move the printer, use two or more people for the SC-T3200 Series and four or more people for the SC-T7200 Series/SC-T7200D Series/ SC-T5200 Series/SC-T5200D Series when carrying it. -
Page 210: System Requirements
SC-T7200 Series/SC-T5200 Series/SC-T3200 Series/SC-T7200D Series/SC-T5200D Series User's Guide Appendix System Requirements Available hard disk 32 GB or more space Display resolution WXGA (1280 x 800) or higher System Requirements of the resolution Printer Driver Interface Hi-Speed USB-Compatible with the USB 2.0 Specification. -
Page 211: Specifications Table
SC-T7200 Series/SC-T5200 Series/SC-T3200 Series/SC-T7200D Series/SC-T5200D Series User's Guide Appendix Specifications Table Printer Specifications Temperature Operating: 10 to 35 °C (50 to 95 Storage (before unpacking): Printer Specifications -20 to 60 °C (-4 to 140 F) (within 120 Printing method On-demand ink jet hours at 60 °C (140... - Page 212 Approximately 67 kg) SC-T7200D Series: Approximately 133 kg SC-T5200D Series: Approximately 118 kg *1 For information on HP-GL/2 and HP RTL, see the Epson website. *2 Paper basket/Large-capacity paper basket closed. *3 Excluding ink cartridges. Ink Specifications Operation temperature/humidity (when the hard disk unit...
-
Page 213: Standards And Approvals
SC-T7200 Series/SC-T5200 Series/SC-T3200 Series/SC-T7200D Series/SC-T5200D Series User's Guide Appendix MFP Scanner specifications Important: ❏ We recommend that you remove and shake Power consumption the installed ink cartridges thoroughly once every three months to ensure print quality. In use Approximately 50 W ❏... - Page 214 SC-T7200 Series/SC-T5200 Series/SC-T3200 Series/SC-T7200D Series/SC-T5200D Series User's Guide Appendix FCC part 15 subpart B Class B CAN/CSA-CEI/IEC CISPR 22 Class B AS/NZS CISPR 22 Class B EMC Directive EN 55022 Class B 2004/108/EC EN 55024 EN 61000-3-2 EN 61000-3-3...
-
Page 215: Where To Get Help
Support Technical Support Web Before Contacting Epson Site If your Epson product is not operating properly and you cannot solve the problem using the troubleshooting Epson’s Technical Support Web Site provides help with information in your product documentation, contact problems that cannot be solved using the Epson support services for assistance. -
Page 216: Help For Users In North America
SC-T7200 Series/SC-T5200 Series/SC-T3200 Series/SC-T7200D Series/SC-T5200D Series User's Guide Where To Get Help Help for Users in North America Help for Users in Taiwan Epson provides the technical support services listed Contacts for information, support, and services are: below. World Wide Web... -
Page 217: Help For Users In Australia
(R.O.C.) 04-23805000 04-23806000 No.530, Sec. 4, Henan Epson Helpdesk is provided as a final backup to make Rd., Nantun Dist., sure our clients have access to advice. Operators on the Taichung City 408, Helpdesk can aid you in installing, configuring and Taiwan operating your Epson product. -
Page 218: Help For Users In Thailand
SC-T7200 Series/SC-T5200 Series/SC-T3200 Series/SC-T7200D Series/SC-T5200D Series User's Guide Where To Get Help ❏ Sales enquiries and product information ❏ Frequently Asked Questions (FAQ), Sales Enquiries, questions through e-mail ❏ Product usage questions or problems Epson Hotline ❏ Enquiries on repair service and warranty ❏... -
Page 219: Help For Users In Hong Kong
Kong Limited. Phone: 603-56288222 Internet Home Page Epson Hong Kong has established a local home page in ❏ Enquiries on repair services & warranty, product both Chinese and English on the Internet to provide usage and technical support (Techline) users with the following information:... -
Page 220: Help For Users In The Philippines
SC-T7200 Series/SC-T5200 Series/SC-T3200 Series/SC-T7200D Series/SC-T5200D Series User's Guide Where To Get Help Location Telephone Fax number number Pune 020-30286000 / 020-30286000 30286001 /30286002 Ahmedabad 079-26407176 / 77 079-26407347 Helpline For Service, Product info or to order a cartridge - 18004250011 (9AM - 9PM) - This is a Toll-free number. -
Page 221: Software License Terms
Program (each is defined in Section 5) until five (5) years after the discontinuation of same model of this printer product. If you desire to receive the source code above, please see the “Contacting Epson Support” in the User’s Guide, and contact the customer support of your region. -
Page 222: Bonjour
SC-T7200 Series/SC-T5200 Series/SC-T3200 Series/SC-T7200D Series/SC-T5200D Series User's Guide Software License Terms Bonjour License This printer product includes the open source software program “Bonjour” which applies the terms and conditions provided by owner of the copyright to the “Bonjour”. Net-SNMP license This printer product includes the open source software program “Net-SNMP”... - Page 223 SC-T7200 Series/SC-T5200 Series/SC-T3200 Series/SC-T7200D Series/SC-T5200D Series User's Guide Software License Terms The Apple Public Source License Version1.2 is as follows. You also can see the Apple Public Source License Version1.2 at http://www.opensource.apple.com/apsl/. APPLE PUBLIC SOURCE LICENSE Version 2.0 - August 6, 2003 1.
- Page 224 SC-T7200 Series/SC-T5200 Series/SC-T3200 Series/SC-T7200D Series/SC-T5200D Series User's Guide Software License Terms 2.1 Unmodified Code. You may use, reproduce, display, perform, internally distribute within Your organization, and Externally Deploy verbatim, unmodified copies of the Original Code, for commercial or non-commercial purposes,...
- Page 225 SC-T7200 Series/SC-T5200 Series/SC-T3200 Series/SC-T7200D Series/SC-T5200D Series User's Guide Software License Terms 5. Limitations on Patent License. Except as expressly stated in Section 2, no other patent rights, express or implied, are granted by Apple herein. Modifications and/or Larger Works may require additional patent licenses from Apple which Apple may grant in its sole discretion.
- Page 226 SC-T7200 Series/SC-T5200 Series/SC-T3200 Series/SC-T7200D Series/SC-T5200D Series User's Guide Software License Terms 11. Ownership. Subject to the licenses granted under this License, each Contributor retains all rights, title and interest in and to any Modifications made by such Contributor. Apple retains all rights, title and interest in and to the Original Code and any Modifications made by or on behalf of Apple ("Apple Modifications"), and such Apple Modifications...
-
Page 227: Other Software Licenses
SC-T7200 Series/SC-T5200 Series/SC-T3200 Series/SC-T7200D Series/SC-T5200D Series User's Guide Software License Terms 13.5 Severability. (a) If for any reason a court of competent jurisdiction finds any provision of this License, or portion thereof, to be unenforceable, that provision of the License will be enforced to the maximum extent permissible so as to effect the economic benefits and intent of the parties, and the remainder of this License will continue in full force and effect. - Page 228 SC-T7200 Series/SC-T5200 Series/SC-T3200 Series/SC-T7200D Series/SC-T5200D Series User's Guide Software License Terms Permission is granted to anyone to use this software for any purpose, including commercial applications, and to alter it and redistribute it freely, subject to the above disclaimer and the following restrictions: Redistributions of source code (in whole or in part) must retain the above copyright notice, definition, disclaimer, and this list of conditions.