Advertisement
Available languages
Available languages
C114EM_BILING
100408P
MANUAL DE INSTRUCCIONES /
INSTRUCTIONS MANUAL
CAMPANA EXTRACTORA /
RANGE HOOD
appliance and keep this manual for future reference.
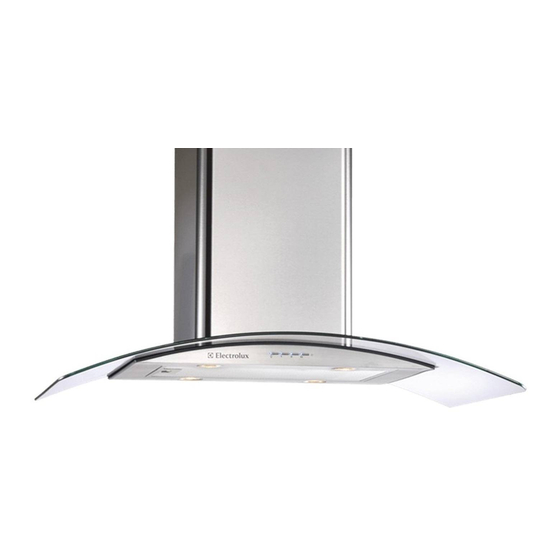
MODELO / MODEL:
EJIB369TDJS
Lea todas las instrucciones antes de utilizar
el aparato y guardelas para futuras referencias.
Read all instructions prior to using
Advertisement
Chapters

Related Manuals for Electrolux EJIB369TDJS


Summary of Contents for Electrolux EJIB369TDJS
- Page 1 MANUAL DE INSTRUCCIONES / INSTRUCTIONS MANUAL CAMPANA EXTRACTORA / RANGE HOOD MODELO / MODEL: EJIB369TDJS Lea todas las instrucciones antes de utilizar el aparato y guardelas para futuras referencias. C114EM_BILING Read all instructions prior to using 100408P appliance and keep this manual for future reference.
-
Page 2: Table Of Contents
Lea las instrucciones sobre instalación y operación antes de utilizar su Sugerencias y consejos .............. 21 campana extractora y guárdelas en un lugar seguro para futuras consultas. Electrolux una vez más fabrica lo mejor en lo que se refiere a Diagrama eléctrico............... 45 electrodomésticos. -
Page 3: Seguridad
03 electrolux seguridad seguridad electrolux 04 Seguridad d) Es necesaria una ventilación Para reducir el riesgo de fuego o metálica y apague el quemador Para los niños suficiente para la correcta descarga eléctrica, no utilice esta de gas o elemento eléctrico. -
Page 4: Descripción
05 electrolux seguridad descripción electrolux 06 Descripción difracción de onda de tierra es la 4. No emplee tubos flexibles. adecuada. 5. Las instalaciones en condiciones climáticas frías deben tener No ubique la toma a tierra en una instalado un regulador de contratiro tubería de gas. -
Page 5: Instalación
07 electrolux instalación instalación electrolux 08 Instalación Preparación de la instalación Instalar la campana usan los sistemas de ventilación de • conducto mayores que el La localización de la campana debe ser estudiada antes de comenzar la • Para una descarga del flujo de especifico CFM de movimiento instalación. - Page 6 09 electrolux instalación instalación electrolux 10 Figura 1 Figura 4 Instalar la campana A=259mm 4. Verifique la altura total de la 1. Haga 4 agujeros en el techo campana y siga las dimensiones siguiendo las dimensiones de la conforme altura deseada de las figura 1.
- Page 7 11 electrolux instalación instalación electrolux 12 Figura 7 Figura 10 a.6) Utilice la especificación de tornillos abajo para fijar la estructura interior en el techo. a.5b) Conecte el tubo flexible en el conector T y fíjelos. Figura 8 Figura 11 a.7) Monte el tubo decorativo inferior...
- Page 8 13 electrolux instalación instalación electrolux 14 Figura 13 b.6) Ponga la estructura interna en la Figura 16 parte superior del cuerpo principal de manera que los dos clips de la parte superior del cuerpo principal se puedan fijar en la parte inferior de la estructura interna y luego use los a.9) Fije el extremo inferior del tubo...
- Page 9 15 electrolux instalación instalación electrolux 16 Para instalación con evacuación Figura 23 b.9) Use cable o cinta adhesiva para fijar o asegurar el extremo b.9d) Utilice tornillos 3.5x12mm para superior del tubo flexible. fijar las extensiónes al soporte superior. Figura 19 Para instalación con recirculación...
-
Page 10: Cómo Usar
17 electrolux cómo usar cuidado y limpieza electrolux 18 Cuidado y limpieza Cómo usar Panel de control No aplique limpiadores directamente al control durante la limpieza de la campana. La campana debe ser limpiada con frecuencia tanto externamente como internamente (con la misma frecuencia con la que se realiza el ma ntenimiento de los filtros de grasa). - Page 11 19 electrolux cuidado y limpieza cuidado y limpieza electrolux 20 Reemplazar las luces Limpieza Superficies plásticas: usar una Para reemplazar los filtros de esponja jabonosa húmeda. carbón siga los pasos abajo: En caso de sustitución de las Usar siempre el limpiador más suave.
-
Page 12: Sugerencias Y Consejos
21 electrolux sugerencias y consejos sugerencias y consejos electrolux 22 Sugerencias y consejos • • El uso continuo del sistema de ventilación mientras se cocina ayuda a No freír nunca dejando los recipientes sin vigilancia ya que el aceite puede recalentarse o incendiarse. - Page 13 Lea las instrucciones sobre instalación y operación antes de utilizar su Tips and advices .............. 43 campana extractora y guárdelas en un lugar seguro para futuras consultas. Electrolux una vez más fabrica lo mejor en lo que se refiere a Electric diagram............... 45 electrodomésticos.
- Page 14 25 electrolux safety safety electrolux 26 Safety b) Always turn hood ON when OPERATION manufacturers guideline and safety For children cooking at high heat or when standards local code authorities. Always leave safety grills and filters in Avoid accidents. After unpacking the flambeing food (I.e.
-
Page 15: Description
27 electrolux safety description electrolux 28 Description The range hood must be connected 6. Make up air: local building codes with copper wire only. may require the use of make-up air systems when using ducted The range hood should be connected... -
Page 16: Installation
29 electrolux installation installation electrolux 30 Installation Installing preparation Installing the hood ventilation systems greater than • specified CFM of air movement. The vent hood should be on site before final framing and wall finisihing. • For the most efficient air flow The specified CFM varies from This will help to accurately locate the duct work and electrical service. - Page 17 31 electrolux installation installation electrolux 32 Image 1 Image 4 Installing the hood A=259mm 4. Check the total height of the hood 1. Drill 4 holes on the ceiling requested and refer to difference according to image 1 dimension. image.
- Page 18 33 electrolux installation installation electrolux 34 Image 7 Image 10 a.6) Use image 10 dimensions screw kits to install the inner structure to a.5b) Connect the Flexible tube to the the ceilling. T connector and fasten them. Image 8 Image 11 a.5c) Fit the extensions to two ends of...
- Page 19 35 electrolux installation installation electrolux 36 Image 13 Image 16 b.6) Put the inner structure on the top site of the main body so that two clips at the top side can well clip a.9) Fix the lower end of the flexible to the walls on the lower base of the the reducer.
- Page 20 37 electrolux installation installation electrolux 38 Installation with evacuation Image 23 b.9) Use cable ties or suitable tape to b.9d) Use 3.4x12mm screws to fix the fit and secure the upper end of extensions to the upper support. the flexible flue pipe.
-
Page 21: Operation
39 electrolux operation care and cleaning electrolux 40 Care and cleaning Operation Control panel Do not apply any type of cleaning product directly to the hood control during the cleaning of the cooker hood. The efficiency of the range hood system depends on the cleanliness of the intake and filters. - Page 22 41 electrolux care and cleaning care and cleaning electrolux 42 Replace lights Cleaning Plastic surfaces: Wipe with a moist To replace the charcoal filters soapy sponge. please follow the following If the halogen lamps need replacing, Always use the mildest cleaner that...
-
Page 23: Tips And Advices
44 43 electrolux tips and advices Tips and advices • • Continuous use of the fan system while cooking helps keep the kitchen Never leave frying food unattended since grease can overheat and catch fire. The risk of fire is even greater in the case of used oil. -
Page 24: Electric Diagram
45 electrolux diagrama eléctrico / electric diagram informaciones técnicas / technical informations electrolux 46 Diagrama eléctrico / Electric Diagram Informaciones técnicas / Technical informations EJIB369TDJS 120V Voltaje / Voltage Frecuencia / Frequency 60 Hz 270 W Potencia max. / Max. Input 3,08 A Corriente nominal / Nom.