Epson TM-T88V-i Technical Reference Manual
Hide thumbs
Also See for TM-T88V-i:
- User manual (258 pages) ,
- Technical reference and user's manual (164 pages) ,
- Technical reference manual (146 pages)
Table of Contents
Advertisement
Quick Links
Technical Reference Guide
(TM-i Firmware Ver.3.x or earlier)
Product Overview
Describes features for the product.
Setup
Describes setup and installation of the product and peripherals.
Application Development Information
Describes how to control the printer and necessary information
when you develop applications.
Handling
Describes how to handle the product.
Appendix
Describes general specifications and character code tables.
M00041605
Rev. E
Advertisement
Table of Contents

Related Manuals for Epson TM-T88V-i


Summary of Contents for Epson TM-T88V-i
- Page 1 (TM-i Firmware Ver.3.x or earlier) Technical Reference Guide Product Overview Describes features for the product. Setup Describes setup and installation of the product and peripherals. Application Development Information Describes how to control the printer and necessary information when you develop applications. Handling Describes how to handle the product.
- Page 2 • Neither is any liability assumed for damages resulting from the use of the information contained herein. • Neither Seiko Epson Corporation nor its affiliates shall be liable to the purchaser of this product or third parties for damages, losses, costs, or expenses incurred by the purchaser or third parties as a result of: accident, misuse, or abuse of this product or unauthorized modifications, repairs, or alterations to this product, or (excluding the U.S.) failure to strictly comply with Seiko Epson Corporation’s operating and...
-
Page 3: For Safety
For Safety Key to Symbols The symbols in this manual are identified by their level of importance, as defined below. Read the following carefully before handling the product. You must follow warnings carefully to avoid serious bodily injury. WARNING Provides information that must be observed to prevent damage to the equipment or loss of data. -
Page 4: Warnings
Shut down your equipment immediately if it produces smoke, a strange odor, or unusual noise. Continued use may lead to fire. Immediately unplug the equipment and contact your dealer or a Seiko Epson service center for advice. Never attempt to repair this product yourself. Improper repair work can be dangerous. -
Page 5: Cautions
Cautions Do not connect cables in ways other than those mentioned in this manual. Different connections may cause equipment damage or fire. Be sure to set this equipment on a firm, stable, horizontal surface. CAUTION The product may break or cause injury if it falls. ... -
Page 6: About This Manual
POS systems, order entry systems, and other receipt issuing systems that use TM- T88V-i. TM-T88V-i provides different available functions depending on the product specification and TM-i Firmware version. Refer to an appropriate Technical Reference Guide described in the following table. -
Page 7: Manual Content
Manual Content The manual is made up of the following sections: Chapter 1 Product Overview Chapter 2 Setup Chapter 3 Application Development Information Chapter 4 Handling Appendix Product Specifications Setting Items for Software Setting Mode Character Code Tables... -
Page 8: Table Of Contents
Contents ■ For Safety ..........................3 Key to Symbols ............................3 Warnings ..............................4 Cautions ..............................5 ■ Restriction of Use ........................5 ■ About this Manual ........................ 6 Aim of the Manual ..........................6 Manual Content .............................7 ■ Contents..........................8 Product Overview ................ 13 ■... - Page 9 Server Direct Print..........................66 Web Server ............................67 ■ Software and Manuals ....................... 68 How to Get Manuals and the Utility....................69 ■ EPSON TMNet WebConfig ....................70 Starting EPSON TMNet WebConfig..................... 70 General Information ..........................71 TCP/IP Information (Wired)........................73 TCP/IP Information (Wireless) ......................
- Page 10 Paper Specifications ..........................114 Electrical Characteristics ........................115 Environmental Conditions........................116 External Dimensions and Mass ......................117 TM-T88V-i Dedicated AC Adapter....................118 ■ Option Specifications ...................... 118 Wireless LAN Cable Set (OT-WL01)....................118 ■ Setting Items for Software Setting Mode ................ 119 ■ Character Code Tables ....................122...
- Page 11 Common to All Pages ........................122 Page 0 [PC437: USA, Standard Europe] ..................123 Page 1 (Katakana) ..........................124 Page 2 (PC850: Multilingual)......................125 Page 3 (PC860: Portuguese)......................126 Page 4 (PC863: Canadian-French) ....................127 Page 5 (PC865: Nordic)........................128 Page 11 (PC851: Greek)........................
-
Page 13: Product Overview
Product Overview This chapter describes features of the product. Features TM-T88V-i is a receipt printer which can be printed directly from smart device application or Web application. This product supports ePOS-Print and is capable of controlling network compatible TM printers. -
Page 14: Product Configurations
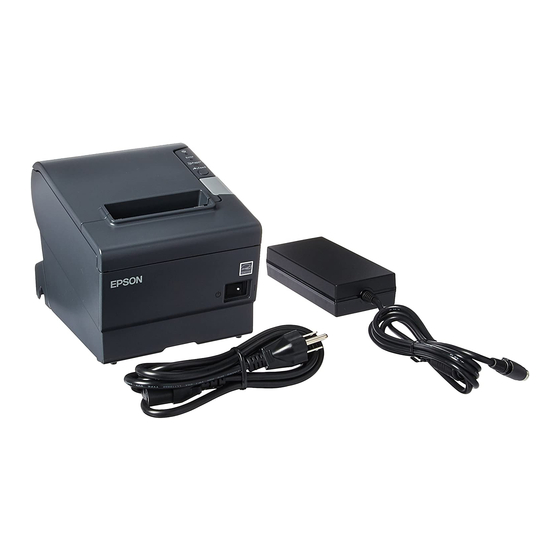
Product Configurations Bundled items • AC adapter,RA • Power code (Model: AC-170) • Roll paper (for operation check) • Connector cover • Power switch cover • Roll paper guide for 58 mm width paper • Two strips for the roll paper guide •... -
Page 15: Part Names And Functions
After the product is turned on, it requires about 30 seconds until it is ready to print. Power Switch Cover Install the power switch cover that comes with the TM-T88V-i onto the product to prevent inadvertent changing of the power switch, to prevent tampering, and to improve the appearance of the product. -
Page 16: Roll Paper Cover / Cover Open Button
Roll paper cover / Cover open button When setting or replacing the roll paper, press the cover open button to open the roll paper cover. Do not open the roll paper cover during printing or while the auto-cutter is operating. Cutter cover The auto-cutter is inside the cutter cover. -
Page 17: Interfaces
Chapter 1 Product Overview Interfaces Drawer kick connector microSD card slot Analog RGB Micro-USB connector connector Protective cover LAN connector USB connector Power supply Power supply connector for DC 24V USB connector connector for DC 5V Name Description Drawer kick connector Connects a cash drawer or the optional buzzer unit. -
Page 18: Push Button
Push Button Push button Press the push button with a thin object such as tweezers. The push button has the following functions: • Status sheet printing: Make sure the product is turned on, press the push button for approximately 3 seconds. When you release the button, a status sheet on which network parameters are printed will be ejected. -
Page 19: Status Led
Chapter 1 Product Overview Status LED With the status LED on the rear of the product, you can check the interface board status. Status LED Description On (Green) Operating normally. On (Orange) Starting up. If the status LED is on in orange even after 30 seconds have passed since the product is turned on, repair is required. -
Page 20: Wireless Lan Cable Set (Optional) Led
Wireless LAN cable set (optional) LED With the LED on the wireless LAN unit, you can check the communication status of the product. LED (Green) Description The wireless LAN unit is not connected to the product. Or the product power is OFF. This wireless LAN unit is connected to the product and is in operation. -
Page 21: Online And Offline
Chapter 1 Product Overview Online and Offline Online When no events to go offline have occurred, the product is online and ready for normal printing. Offline The product automatically goes offline under the following conditions: • During power on (including resetting with the interface) until the product is ready •... -
Page 22: Error Status
Error Status There are three possible error types: automatically recoverable errors, recoverable errors, and unrecoverable errors. Check the error LED flash code. When connection to peripherals fails, check the status LEDs at the lower rear of the product. Automatically Recoverable Errors Printing is no longer possible when automatically recoverable errors occur. -
Page 23: Unrecoverable Errors
Chapter 1 Product Overview Unrecoverable Errors If the same error occurs again even after turning the power back on, contact your dealer or a Epson service center. Turn off the power immediately when unrecoverable errors occur. CAUTION Error Error description... -
Page 24: Nv Memory
NV Memory The product's NV memory (Nonvolatile Memory) stores data even after the product power is turned off. NV memory contains the following memory areas for the user: • NV graphics memory • Memory switches (customized value) • R/E (Receipt Enhancement) •... -
Page 25: Setup
You can utilize "Easy Setup", which enables settings to the TM-i to be made in a simple manner using a USB memory that contains a file of EPSON TMNet WebConfig setting values. For detail, refer to the “TM-i series Easy Setup Guide”. - Page 26 Connecting the AC Adapter (page 45) Attaching the Connector Cover (page 46) Attaching the Power Switch Cover (page 48) Setting the Memory Switches (Customized Value) (page 49) Settings for EPSON TMNet WebConfig Network Setting (page 52) Setting for Connected Devices (page 57)
- Page 27 Attaching the Connector Cover (page 46) Attaching the Power Switch Cover (page 48) Setting the Memory Switches (Customized Value) (page 49) Settings for EPSON TMNet WebConfig Network Setting (page 52) Setting for Server Direct Print (page 56) Setting for Connected Devices (page 57)
- Page 28 Connecting the AC Adapter (page 45) Attaching the Connector Cover (page 46) Attaching the Power Switch Cover (page 48) Setting the Memory Switches (Customized Value) (page 49) Settings for EPSON TMNet WebConfig Network Setting (page 52) Enabling PHP (page 56) Registering Web Contents (page 59)
-
Page 29: Installing The Product
Chapter 2 Setup Installing the Product Important Notes • The product must be installed horizontally on a flat surface (not tilted). • Do not place the product in dusty locations. • Do not catch cables or place foreign matter under the product. -
Page 30: Setting The Dip Switches
Setting the DIP Switches Follow the steps below to change the DIP switch settings. Setting Procedure Follow the steps below to change the DIP switch settings. Before you remove the DIP switch cover, turn the product off. Otherwise, a short-circuit may cause the product to malfunction. CAUTION DIP switch settings are enabled only when the power is turned on or the product is reset via the interface. -
Page 31: Functions
Chapter 2 Setup Functions DIP Switch Bank 1 Initial Function setting Auto line feed Always enabled Always disabled Receive buffer capacity 45 bytes 4 KB Roll paper end sensor Selects paper sensors to output enabled, roll paper paper-end signals Disabled near-end sensor (initial setting) - Page 32 DIP Switch Bank 2 Initial Function Function setting Reserved Fixed to ON (Do not change setting) Reserved Fixed to OFF (Do not change setting) Standard 2-3: OFF, 2-4: OFF Selects print Darker than 2-3: ON, 2-4: OFF density standard Dark...
-
Page 33: Changing The Paper Width
Chapter 2 Setup Changing the Paper Width The product is initially set to print on 80 mm width paper and you can change the product to print on 58 mm width paper by installing the roll paper guide and changing the paper width setting with the customized value. - Page 34 Paste the enclosed 2 small strips along the roll paper guide on the bottom of the roll paper holder. Make sure the space between the top edge of the strip and the line of the groove in the roll paper guide is 0.5 mm or less.
-
Page 35: Adjusting The Paper Roll Near-End Sensor
Chapter 2 Setup Adjusting the Paper Roll Near-End Sensor Below are two situations where a roll paper Near-End sensor adjustment is required. • To adjust the detection position to suit the diameter of the roll paper core used. • To adjust the detection position of remaining amount of paper. ... -
Page 36: Installing The Microsd Card
Installing the microSD Card Install the microSD card into the microSD card slot on the rear of the product. Use a microSD card that has wear leveling functions. The microSD card can only be used if the PHP function is enabled. Installing the microSD Card Open the protective cover on this product. -
Page 37: Connecting The Product To The Network
Chapter 2 Setup Connecting the Product to the Network For Wired LAN connection Connect the product to a network by a LAN cable via a hub. Insert a 10Base-T/100Base-TX LAN cable into the LAN connector until it clicks. When LAN cables are installed outdoors, make sure devices without proper surge protection are cushioned by being connected through devices that do have surge protection. - Page 38 Connecting the unit directly with the product Install the wireless LAN unit to a USB port of the product. USB port Using the USB extension cable Attach the included rubber cover to the connector of the USB extension cable into which the wireless LAN unit will be inserted, to prevent the unit from coming off.
- Page 39 Chapter 2 Setup Connect the USB extension cable to the USB port of the product. If you want to fix the wireless LAN unit, cut the included affixing tape to fit and put on the unit, and fix the unit in a place with good communication.
-
Page 40: Connecting The Peripherals
Connecting the Peripherals Connecting the Optional External Buzzer You can use the optional external buzzer (OT-BZ20) by connecting it to the drawer kick connector. The optional external buzzer and the drawer cannot be used together at the same time. ... -
Page 41: Installation Procedures
Chapter 2 Setup Installation Procedures Turn off the product. Connect and disconnect the optional external buzzer while the product is turned off. If you connect it while the product is turned on, the buzzer does not function correctly. Clean and dry the printer case where the optional external buzzer will be installed. -
Page 42: Adjusting The Buzzer Volume
Peel off the sticker on the other side of the affixing tape, and attach and fix the optional external buzzer to the printer case. Printer case Turn on the product. When and how to beep can be set by TM-T88V Utility or the product's customized value. -
Page 43: Connecting The Cash Drawer
Chapter 2 Setup Connecting the Cash Drawer Using the optional product for TM printer is recommended. If the optional external buzzer is used, you cannot use a cash drawer. Specifications of drawers differ depending on makers or models. When you use a drawer other than specified, make sure its specification meets the following conditions.... - Page 44 Drawer Connection Circuitry Drawer kick connector With shielded Drawer kick solenoid +24V Control device Drawer open/close switch Printer side User side [Drawer kick side]...
-
Page 45: Connecting The Ac Adapter
Chapter 2 Setup Connecting the AC Adapter Use AC adapter,RA as the power supply unit for this product. Be sure to use the included AC adapter as the power supply unit. Using a nonstandard power supply can result in electric shock and fire. ... -
Page 46: Attaching The Connector Cover
Attaching the Connector Cover Follow the steps below to attach the connector cover to protect cables. The connector cover has 3 cable exits in different directions. When pulling out the cables whose connector does not lock itself (USB cable and DC 5 V cable) from the cable exits on the back, fix the cables with the cable band to prevent the cables from coming off. - Page 47 Chapter 2 Setup Pass each cable through the cable exits at the bottom of the connector cover. If the cables are too many for one cable exit, use multiple exits. Turn over the product and make sure the cables are not pinched. To remove the connector cover, turn the product over, and push the connector cover down while pushing both sides of the connector cover inward to detach the hooks form the printer case.
-
Page 48: Attaching The Power Switch Cover
Attaching the Power Switch Cover Install the power switch cover that comes with the TM-T88V-i onto the product to prevent inadvertent changing of the power switch, to prevent tampering, and to improve the appearance of the product. To operate the power switch, insert an object with a pointed tip such as a ballpoint pen into the hole on the power switch cover. -
Page 49: Setting The Memory Switches (Customized Value)
Chapter 2 Setup Setting the Memory Switches (Customized Value) With the “memory switch (customized value),” a software switch for this product, you can set the functions shown in the table below. The memory switches (customized value) are already set. Change the setting if necessary. To change the memory switch settings, use the software setting mode or the TM-T88V Utility. -
Page 50: Functions
Functions Setting the paper width • 80 mm (initial setting) • 58 mm Be sure to install the roll paper guide when you select the 58 mm paper width. (See "Changing the Paper Width" on page 33.) Once you change the paper width from 80 mm to 58 mm, you cannot change it back to 80 Setting the print density Selectable from “Depends On Dip Switch”, or levels 1 to 13 (70% ... - Page 51 Chapter 2 Setup Optional Buzzer When to sound the buzzer is selectable from the following occasions. • When an error occurs • When automatic paper cut activates • When specified pulse 1 (2 pin) occurs • When specified pulse 2 (5 pin) occurs Setting the number of head energizing parts •...
-
Page 52: Network Setting
Set from the USB memory where the configuration file is stored. (TM-i firmware Ver.3.0 or later) This section briefly explains how to set from EPSON TMNet WebConfig. Though Easy Setup requires no network connection during setup, you must specify values for all the setting items available for EPSON TMNet WebConfig. - Page 53 Chapter 2 Setup 5. Set up a wireless LAN For a wireless LAN, select the [Configuration] menu and [Wireless], and set the items such as SSID and Security Mode. After setting, click [Submit] at the bottom of the screen. Then the settings are written to the product. If [Submit] is not clicked, the settings are not applied.
-
Page 54: Confirming Network Setting
Confirming Network Setting You can confirm the network setting with a status sheet or EPSON TMNet WebConfig. Confirming with a status sheet Print a status sheet and check the following items. • Wired TCP/IP Get IP Address Set using Automatic Private IP Addressing (APIPA) ... -
Page 55: Initializing The Network Setting
When network connection fails, follow the steps below to initialize the network setting to the default. For TM-i firmware Ver.3 or later, the EPSON TMNet WebConfig password is also initialized. Other settings such as device ID, style sheet, and Server Direct Print settings are not initialized. -
Page 56: Enabling Php
Enabling PHP To use PHP on this product, enable PHP using EPSON TMNet WebConfig. This section briefly explains the setup procedure. 1. Check the microSD card Make sure that the microSD card is installed in the microSD card slot on this product. -
Page 57: Setting For Connected Devices
Setting for Connected Devices The ePOS-Print XML, ePOS-Print API, and Server Direct Print systems identify printers by the device ID. The device ID is registered in this product. Set the device ID using EPSON TMNet WebConfig. This section briefly explains the setup procedure. - Page 58 EPSON TMNet WebConfig. http://”TM-i’s IP address”/PrinterConfigurationPage/ For detail, see "Starting EPSON TMNet WebConfig" on page 2. Change the device ID From [Device] in the [Configuration] menu, change the device ID of this product. Select [local_printer] from "Model" and enter the device ID to be applied in [Device ID].
-
Page 59: Registering Web Contents
Chapter 2 Setup Registering Web Contents To use this product as a Web server, register Web contents by following the steps below. Creating Web Contents Specifications of the file to be registered • Contents such as HTML files, CSS files, PHP files, JavaScript files, and image data. •... - Page 60 • To access the Web contents registered in this product from an input terminal or other device, the reference URL is different depending on the folder configuration of the zip file as shown below. ➀ http://[the product’s IP address]/index.html ➁ http://[the product’s IP address]/webpage/index.php ➀...
-
Page 61: Registering Web Contents
To register a web content in this product, the following methods are available: • Manual Update: Web contents are registered manually by using EPSON TMNet WebConfig. • Automatic Update: Web contents are saved in the Web server and automatically updated by the product referring to the files periodically. - Page 62 EPSON TMNet WebConfig. http://TM-i’s IP address/PrinterConfigurationPage/ For detail, see "Starting EPSON TMNet WebConfig" on page 3. Set automatic update of Web contents From [Web Contents] in the [Configuration] menu, set automatic update of Web contents. Select [Enable] from “Automatic Update“.
-
Page 63: Application Development Information
Chapter 3 Application Development Information Application Development Information This chapter describes how to control the product and gives information useful for product application development. How to Control the Printer The method for controlling the printer with your print application will depend on the system structure. -
Page 64: Epos-Print Api
• You can print directly from a device with an HTML5 compatible Web browser. • No need to install drivers or plugins on the terminals. • Printable to TM printers on the network via TM-T88V-i. • You can print out images drawn on HTML5 Canvas. -
Page 65: Epos-Print Xml
Chapter 3 Application Development Information ePOS-Print XML ePOS-Print XML is a POS printer command system with the main features of the ESC/POS command system defined in XML. Application make the request message in XML format, then send with Socket communication to the product. This system has the following features: •... -
Page 66: Server Direct Print
Server Direct Print The Server Direct Print function is used to print the print data acquired by this product from the Web server. Enables a web server application to print to this product or a TM printer on the network by including print data in its responses to requests from the product. -
Page 67: Web Server
• Create dynamic Web pages. • Manage user data by saving files and operating database. The Web contents registered on this product can be automatically obtained or updated from a specified URL. Device TM-T88V-i 1. Request 2. Data http://-----/index.php Http Server... -
Page 68: Software And Manuals
Setting backup/restore Coupon and Electronic Journal are unavailable. EpsonNet Config Software for configuring IP addresses, wireless LAN, EpsonNet Config User’s etc. for Epson printers on the network. Manual Sample program ePOS-Print API ePOS-Print API JavaScript file for incorporation of ePOS-Print User's Manual ePOS-Print XML ... -
Page 69: How To Get Manuals And The Utility
Firmware Ver.3.x or earlier) TM-T88V-i Technical Describes how to handle and set up TM-T88V-i (with Reference Guide (TM-i a Serial port), and TM-T88V-i (without Serial port) Firmware Ver.4.0 or later) equipped with TM-i Firmware Ver.4.0 or later. -
Page 70: Epson Tmnet Webconfig
A user name and a password will be required on the authentication screen. Enter “epson” for both the user name and the password. You can change the password on the [Password Setting] screen (see "Password Setting"... -
Page 71: General Information
Chapter 3 Application Development Information General Information You can check the general information of the TM-T88V-i. Item Description Administrator Name Shows the administrator name set by the user. Location/Person Shows the product's installation location set by the user. Software Version Shows the TM-i firmware version of the TM-T88V-i. - Page 72 Item Description Wireless MAC Address Shows the MAC address for wireless LAN. Hardware Version Shows the hardware version for wireless LAN. Software Version Shows the software version for wireless LAN. Communication Standard Shows the communication standard. Network Mode Shows the communication mode. SSID Shows the SSID.
-
Page 73: Tcp/Ip Information (Wired)
Chapter 3 Application Development Information TCP/IP Information (Wired) You can check the TCP/IP setting for a wired LAN. Item Description Get IP Address Shows the method of getting the IP address. Set using Automatic Private IP Addressing Shows the APIPA setting. (APIPA) IP Address Shows the IP address set with the wired LAN. -
Page 74: Tcp/Ip Information (Wireless)
TCP/IP Information (Wireless) You can check the TCP/IP setting for a wireless LAN when the optional wireless LAN cable set (OT- WL01) is used. Item Description Get IP Address Shows the method of getting the IP address. Set using Automatic Private IP Addressing Shows the APIPA setting. -
Page 75: Web Contents Update Information
If never be registered web contents, when “-” is displayed. Date of Last Automatic Update Shows the latest date and time when the web contents were installed on the TM-T88V-i automatically. Status of Last Automatic Update Shows the result of the last update of web contents on the TM-T88V-i. -
Page 76: Time Information
Time Information You can check the time setting. Item Description Time Shows the date and the present time. Use Time Server Shows whether time server is used for time setting. Get Time Server Shows the method of getting time server. Time Server Shows the IP address or host name of the time server. -
Page 77: Wired Setting
Chapter 3 Application Development Information Wired Setting You can make settings for a wired LAN network. Item Description Link Speed & Duplex Sets the speed of data link layer. Submit Submits the setting to the TM-T88V-i. -
Page 78: Tcp/Ip Setting (Wired)
Sets the method of getting the address of the DNS server. Automatically DNS Server Address Sets the addresses of the DNS server in order of usage when [Acquire DNS Server Address Automatically] is set to [Disable]. Submit Submits settings to the TM-T88V-i. -
Page 79: Wireless Setting
"WPA" or "WPA2". Submit Submits settings to the TM-T88V-i. Initially, Authentication Method is set to Open System and Security Mode is set to None with the TM-i firmware Ver.2.0 or later. To ensure security, be sure to change the settings before use. -
Page 80: Tcp/Ip Setting (Wireless)
Sets the method of getting the address of the DNS server Automatically when [Get IP Address] is set to [Auto]. DNS Server Address Sets the addresses of the DNS server in order of usage when [Acquire DNS Server Address Automatically] is set to [Disable]. Submit Submits settings to the TM-T88V-i. -
Page 81: Device Settings
Sets the retry interval of a printer to register. Submit Adds a printer to the Device List. Device List Device Lists printers registered to the TM-T88V-i and their settings. When a printer is checked, [Delete] is available. Clicking [Test Print] performs a test print with the printer. Delete... -
Page 82: Web Contents Update Settings
Enter the proxy server URL and port number in the following: Update Settings Number "http://host name: port number". Example: http://10.0.0.1:8008 Submit Submits settings to the TM-T88V-i. Web Contents Web Contents Specifies the web contents to register. Manual Update Archive File (*.zip) Upload Registers the specified web contents on the TM-T88V-i. -
Page 83: Server Direct Print Setting
Sets whether to use the Server Direct Print function or not. Server Direct Print Select [Enable] or [disable]. Set ID for the server-side program to identify TM-T88V-i when [Server Direct Print] is set to [Enable]. This ID becomes the user ID used for Digest access authentication. -
Page 84: Status Notification Setting
Status Notification Select [Enable] or [disable]. Set ID for the server-side program to identify TM-T88V-i when [Status Notification] is set to [Enable]. This ID becomes the user ID used for Digest access authentication. The set value will also be passed as an ID parameter value for the form data posted to the server. -
Page 85: Administrator Setting
Chapter 3 Application Development Information Administrator Setting You can set the information for the administrator of the TM-T88V-i. Item Description Administrator Name Sets the name of the administrator of the TM-T88V-i. Location/Person Sets the location where the TM-T88V-i is installed. -
Page 86: Time Setting
Time Setting You can set the time for the TM-T88V-i. Item Description Time Sets the time. Clicking [Get Time] shows the present time. Time Zone (Hour) Sets the time zone. Time Server Use Time Server Sets whether to use the time server or not for time Setting setting. -
Page 87: Password Setting
Submits settings to the TM-T88V-i. A user name and a password will be required on the authentication screen when you start up this utility and when you change settings. Enter “epson” for the user name and the password you set for the password. -
Page 88: Reset
Reset You can reset the network functions and restore the settings for EPSON TMNet WebConfig to the factory default settings. Item Description Reset Restarts the network functions while retaining the network setting values such as IP address. The settings for EPSON TMNet WebConfig other than the network settings are retained. -
Page 89: Php Settings
PHP settings Opening PHP Setting Screen Follow the steps below to open the PHP Setting screen of EPSON TMNet WebConfig. Start up a PC connected to the network. Start up the Web browser, and input the following in the address bar. -
Page 90: Status Sheet
Shows the product’s TM-i firmware version, product’s General Information name, and time. Software Shows the product’s TM-i Firmware version. Model Shows “TM-T88V-i”. Time Shows the present time and time difference Wired Shows wired LAN settings. MAC Address Shows the MAC address. - Page 91 Chapter 3 Application Development Information Item Description Wired TCP/IP Shows TCP/IP settings for wired LAN. Get IP Address Shows the method of getting the IP address. Set using Automatic Private IP Addressing Shows the APIPA setting. (APIPA) IP Address Shows the IP address. Subnet Mask Shows the subnet mask.
- Page 92 Item Description Use Time Server Shows whether to use the time server or not. Shows the method of getting the time server’s IP Get Time Server address and host name. Shows the IP address of the time server’s IP address Time Server and host name.
-
Page 93: Setting/Checking Modes
Chapter 3 Application Development Information Setting/Checking Modes Besides the ordinary print mode, the printer has the following modes to set or check settings of the printer. • Self-test Mode • Hexadecimal Dumping Mode • NV Graphics Print Mode • Receipt Enhancement Information Print Mode •... -
Page 94: Nv Graphics Print Mode
NV Graphics Print Mode You can confirm the following information by running NV graphics print mode: • Capacity of the NV graphics • Used amount of the NV graphics • Unused capacity of the NV graphics • Number of NV graphics that are registered •... -
Page 95: Receipt Enhancement Information Print Mode
Chapter 3 Application Development Information Receipt Enhancement Information Print Mode You can confirm the following information by running the R/E information mode: • Automatic top logo setting • Automatic bottom logo setting • Extended settings for automatic top/bottom logo Follow the steps below. Close the roll paper cover. -
Page 96: Memory Switch Setting Mode
Memory Switch Setting Mode You can configure the memory switches (customized values) of the product. • Print density • Auto reduction of the amount of paper to use • Autocutting of paper while the cover is closed • Paper width •... - Page 97 Chapter 3 Application Development Information Hold down the Feed button for 1 second or more to move to mode selection. The mode selection guidance is printed and Paper LED flashes. Mode Selection Modes 0: Exit and Reboot Printer 1: NV Graphics Information 2: Receipt Enhancement Information 3: Customize Value Settings 4: or more: None...
- Page 98 Press the Feed button for less than 1 second the number of times as shown in the print result and then hold down for more than 1 second to select the item to be set. The specified value (option), currently set value, and initial value for the selected item are printed.
-
Page 99: Hexadecimal Dumping Mode
Chapter 3 Application Development Information Hexadecimal Dumping Mode In the hexadecimal dumping mode, the product prints the data transmitted from a host computer in hexadecimal numbers and their corresponding characters. Follow the steps below to run this mode. If there is no character corresponding to print data, “.” is printed. ... -
Page 100: Easy Setup
Easy Setup Easy Setup is a function that enables setting of EPSON TMNet WebConfig just by inserting a USB memory in TM-i and turning the power on. If you are using a network-connected TM printer, you can make the network settings at the same time with Easy Setup. -
Page 101: Handling
Chapter 4 Handling Handling This chapter describes basic handling of the product. Installing and Replacing Roll Paper Do not open the roll paper cover during printing. The product may be damaged. Do not touch the manual cutter with your hands when installing or replacing the roll WARNING paper.... - Page 102 Install the roll paper in the correct direction. Pull out some roll paper, and close the roll paper cover. Tear off the roll paper with the manual cutter.
-
Page 103: Removing Jammed Paper
Chapter 4 Handling Removing Jammed Paper When a paper jam occurs, never pull out the paper forcibly. Open the roll paper cover and remove the jammed paper. When the roll paper cover cannot be opened, follow the steps below to remove the jammed paper. Do not touch the thermal head (See "Cleaning the Thermal Head"... -
Page 104: Cleaning The Thermal Head
Cleaning the Thermal Head Epson recommends cleaning the thermal head periodically (generally every 3 months) to maintain receipt print quality. After printing, the thermal head can be very hot. Do not touch it and let it cool before you clean it. Do not damage the thermal head by touching it with your fingers or any hard object. -
Page 105: Preparing For Transport
Chapter 4 Handling Preparing for Transport Follow the steps below to transport the product. Turn off the product. Remove the AC adapter. Remove the roll paper. Pack the product upright. -
Page 107: Appendix
Appendix Appendix Product Specifications 80 mm width paper printing 58 mm width paper printing Printing method Thermal line printing Cutting method Partial cut (cutting with one point in left edge left uncut) Roll paper (single-ply) width 79.5 ± 0.5 mm (3.13 ± 0.02") 57.5 ±... -
Page 108: Software Specifications
Approx. 1.6 kg {3.5 lb} (roll paper excluded) *: When the optional wireless LAN cable set (OT-WL01) is used. Software Specifications Print control ePOS-Print API, ePOS-Print XML EPSON TMNet WebConfig * Utility Network setting (Ethernet/Wireless LAN) Web contents registration ePOS-Print setting ... -
Page 109: Controllable Peripherals
✔ TM-U220 The following TM printers (Wi-Fi model) ✔ TM-P60II (Including Peeler model) *1: Not available for TM-T88V-i (TM-i firmware version less than 2.1). *2: Not available for TM-T88V-i (TM-i firmware version less than 3.0). Other Device • Cash Drawer... -
Page 110: Printing Specifications
Printing Specifications 80 mm width paper printing 58 mm width paper printing Printing method Thermal line printing Dot density 180 × 180 dpi Printing direction Unidirectional with friction feed (Reverse feed is not supported.) Printing width 72.0 mm (2.83"), 512 dots 50.8 mm (2.0"), 360 dots Characters per line Font A (12 ×... -
Page 111: Printable Area
Appendix Printable Area 80 mm paper width printing The printable area of paper with a width of 79.5 ± 0.5 mm {3.13 ± 0.02"} is 72.2 ± 0.2 mm {2.84 ± 0.008"} (512 dots), and the space on the right and left sides is approximately 3.7 mm {0.15"}. 79.5 0.5 mm {3.13 0.02”} 0.141 0.05 mm {0.0056 0.002”} 72.2 0.2 mm {2.84 0.008}... - Page 112 58 mm paper width printing The printable area of paper with a width of 57.5 ± 0.5 mm {2.26 ± 0.02"} is 50.8 ± 0.2 mm {2.00 ± 0.008"} (360 dots), and the space on the left side is approximately 3.7 mm {0.15"} and the space on the right side is approximately 3.0 mm {0.12"}.
-
Page 113: Printing And Cutting Positions
Appendix Printing and Cutting Positions Last line of a previous receipt Manual-cutter position Approx. 29 mm Approx. 15 mm Auto-cutter blade position Center of the print dotline Printable area Paper feed direction The values above may vary slightly as a result of paper slack or variations in the paper. Take this into account when setting the cutting position of the auto-cutter. -
Page 114: Paper Specifications
Paper Specifications 80 mm width paper printing 58 mm width paper printing Paper types Specified thermal paper Form Roll paper Size Roll paper diameter 83 mm {3.27"} maximum Roll paper core Inside: 12 mm {0.47"}, Outside: 18 mm {0.71"} Roll width when taken up 80 + 0.5/-1.0 mm 58 + 0.5/-1.0 mm Paper width... -
Page 115: Electrical Characteristics
Appendix Electrical Characteristics Supply voltage DC 24V: DC 24V ± 5% DC 5V: DC 5V Current DC 24V Standby: Approximately 0.1A consumption Operating when print the following conditions: Approximately 1.8A Continuous printing for 50 lines (repeating 20H-7FH) (25°C, normal print ... -
Page 116: Environmental Conditions
Ambient temperature Acoustic noise (operating) Approximately 55 dB (bystander position) Note: The values above are measured in the Epson evaluation condition. Acoustic noise differs depending on the paper used, printing contents, and the setting values, such as print speed or print... -
Page 117: External Dimensions And Mass
Appendix External Dimensions and Mass • Width: Approximately 145 mm {5.71"} • Depth: Approximately 195 mm {7.68"} • Height: Approximately 148 mm {5.83"} • Mass: Approximately 1.6 kg {3.53 lb} (except for roll paper) [Units: mm]... -
Page 118: Tm-T88V-I Dedicated Ac Adapter
Output voltage (rating): DC 24V ± 5% Output current (rating): 2.1A Option Specifications Wireless LAN Cable Set (OT-WL01) Wireless module ELPAP07: 802. 11b/g/n wireless LAN Module (EPSON) Standard IEEE802.11b/g/n (Wi-Fi certificated) SSID 1 to 32 one-byte alphanumeric and numbers Connection mode... -
Page 119: Setting Items For Software Setting Mode
Appendix Setting Items for Software Setting Mode For details about how to set the software setting mode, see "Memory Switch Setting Mode" on page Setting Item Setting Values * Underlined values are the initial settings. 1st page 2nd page 3rd page 1: Print Current Settings 100%, 105%, 110%, 115%, 120%, 125%, ... - Page 120 Setting Item Setting Values * Underlined values are the initial settings. 1st page 2nd page 3rd page 8: Default 1: Western Europe, 1: Code Page Page0:PC437(USA,Standard Europe), Page3:PC860(Portuguese), Character Southern Europe Page11:PC851(Greek), Page14:PC737(Greek), Page15:ISO8859-7(Greek), Page16:WPC1252, ...
- Page 121 Appendix Setting Item Setting Values * Underlined values are the initial settings. 1st page 2nd page 3rd page 10: Interface Selection UIB, Built-in USB, Auto 11: USB Interface 1: Class Vendor Class, Printer Class Settings 12: Power Supply Output Level 1(Low), Level 2, Level 3(High) Level 1(Slow), Level 2, Level 3, Level 4, ...
-
Page 122: Character Code Tables
Character Code Tables The character code tables show only character configurations. They do not show the actual print pattern. “SP” in the table shows a space. Common to All Pages When International character set (See "International Character Sets" on page 166.) is USA:... -
Page 123: Pc437: Usa, Standard Europe]
Appendix Page 0 [PC437: USA, Standard Europe]... -
Page 124: Katakana)
Page 1 (Katakana) -
Page 125: Pc850: Multilingual)
Appendix Page 2 (PC850: Multilingual) -
Page 126: Pc860: Portuguese)
Page 3 (PC860: Portuguese) -
Page 127: Pc863: Canadian-French)
Appendix Page 4 (PC863: Canadian-French) -
Page 128: Pc865: Nordic)
Page 5 (PC865: Nordic) -
Page 129: Pc851: Greek)
Appendix Page 11 (PC851: Greek) -
Page 130: Pc853: Turkish)
Page 12 (PC853: Turkish) -
Page 131: Pc857: Turkish)
Appendix Page 13 (PC857: Turkish) -
Page 132: Pc737: Greek)
Page 14 (PC737: Greek) -
Page 133: Iso8859-7: Greek)
Appendix Page 15 (ISO8859-7: Greek) -
Page 134: Wpc1252)
Page 16 (WPC1252) -
Page 135: Pc866: Cyrillic #2)
Appendix Page 17 (PC866: Cyrillic #2) -
Page 136: Pc852: Latin 2)
Page 18 (PC852: Latin 2) -
Page 137: Pc858: Euro)
Appendix Page 19 (PC858: Euro) -
Page 138: Thai Character Code 42)
Page 20 (Thai Character Code 42) -
Page 139: Thai Character Code 11)
Appendix Page 21 (Thai Character Code 11) -
Page 140: Thai Character Code 18)
Page 26 (Thai Character Code 18) -
Page 141: Tcvn-3: Vietnamese)
Appendix Page 30 (TCVN-3: Vietnamese) -
Page 142: Tcvn-3: Vietnamese)
Page 31 (TCVN-3: Vietnamese) -
Page 143: Pc720: Arabic)
Appendix Page 32 (PC720: Arabic) -
Page 144: Wpc775: Baltic Rim)
Page 33 (WPC775: Baltic Rim) -
Page 145: Pc855: Cyrillic)
Appendix Page 34 (PC855: Cyrillic) -
Page 146: Pc861: Icelandic)
Page 35 (PC861: Icelandic) -
Page 147: Pc862: Hebrew)
Appendix Page 36 (PC862: Hebrew) -
Page 148: Pc864: Arabic)
Page 37 (PC864: Arabic) -
Page 149: Pc869: Greek)
Appendix Page 38 (PC869: Greek) -
Page 150: Iso8859-2: Latin 2)
Page 39 (ISO8859-2: Latin 2) -
Page 151: Iso8859-15: Latin 9)
Appendix Page 40 (ISO8859-15: Latin 9) -
Page 152: Pc1098: Farsi)
Page 41 (PC1098: Farsi) -
Page 153: Pc1118: Lithuanian)
Appendix Page 42 (PC1118: Lithuanian) -
Page 154: Pc1119: Lithuanian)
Page 43 (PC1119: Lithuanian) -
Page 155: Pc1125: Ukrainian)
Appendix Page 44 (PC1125: Ukrainian) -
Page 156: Wpc1250: Latin 2)
Page 45 (WPC1250: Latin 2) -
Page 157: Wpc1251: Cyrillic)
Appendix Page 46 (WPC1251: Cyrillic) -
Page 158: Wpc1253: Greek)
Page 47 (WPC1253: Greek) -
Page 159: Wpc1254: Turkish)
Appendix Page 48 (WPC1254: Turkish) -
Page 160: Wpc1255: Hebrew)
Page 49 (WPC1255: Hebrew) -
Page 161: Wpc1256: Arabic)
Appendix Page 50 (WPC1256: Arabic) -
Page 162: Wpc1257: Baltic Rim)
Page 51 (WPC1257: Baltic Rim) -
Page 163: Wpc1258: Vietnamese)
Appendix Page 52 (WPC1258: Vietnamese) -
Page 164: Kz1048: Kazakhstan)
Page 53 (KZ1048: Kazakhstan) -
Page 165: 165
Appendix Page 255... -
Page 166: International Character Sets
International Character Sets ASCII code (Hex) Country ∗ ¥ ∗ France à ° ç § é ù è ¨ ∗ Germany § Ä Ö Ü ä ö ü β ∗ U.K. £ ¥ Denmark I ∗ Æ Ø Å æ ø...