Sony HT-CT380 Service Manual
Hide thumbs
Also See for HT-CT380:
- Operating instructions manual (166 pages) ,
- Startup manual (2 pages) ,
- Operating instructions manual (134 pages)
Table of Contents
Advertisement
SERVICE MANUAL
Ver. 1.1 2015.04
• All of the units included in the HT-
CT380/CT381 (SA-CT380/CT381,
SA-WCT380/WCT381, Remote con-
trol) are required to confi rming opera-
tion of SA-CT380/CT381. Check in
advance that you have all of the units.
Note:
Be sure to keep your PC used for service and
checking of this unit always updated with the
latest version of your anti-virus software.
In case a virus affected unit was found during
service, contact your Service Headquarters.
COMPONENT MODEL NAME
Bar Speaker (Active Speaker System)
Subwoofer (Active Subwoofer)
• Please refer to service manual separately issued for Subwoofer.
Amplifier section
U.S. models:
POWER OUTPUT AND TOTAL HARMONIC
DISTORTION:
(FTC)
Front L + Front R:
With 4 ohms loads, both channels
driven, from 200 Hz - 20,000 Hz; rated
35 Watts per channel minimum RMS
power, with no more than 1% total
harmonic distortion from
250 milliwatts to rated output.
POWER OUTPUT (reference)
Front L/Front R: 100 Watts (per
channel at 4 ohms, 1 kHz)
Other models:
POWER OUTPUT (rated)
Front L + Front R:
50 W + 50 W (at 4 ohms, 1 kHz, 1%
THD)
POWER OUTPUT (reference)
Front L/Front R: 100 Watts (per
channel at 4 ohms, 1 kHz)
Inputs
HDMI IN* 1/2/3
ANALOG IN
DIGITAL IN (TV)
Outputs
HDMI OUT (ARC)
* The 1, 2, and 3 jacks are
identical. Using any of them makes no
difference.
HDMI Section
Connector
Type A (19pin)
9-896-145-02
Sony Corporation
2015D33-1
©
2015.04
Published by Sony Techno Create Corporation
HT-CT380/CT381
HT-CT380
HT-CT381
SA-CT380
SA-CT381
SA-WCT380
SA-WCT381
SPECIFICATIONS
BLUETOOTH section
Communication system
BLUETOOTH Specification version 3.0
Output
BLUETOOTH Specification Power Class
2
Maximum communication range
1)
Line of sight approx. 10 m (33 ft)
Maximum number of devices to be
registered
9 devices
Frequency band
2.4 GHz band (2.4000 GHz -
2.4835 GHz)
Modulation method
FHSS (Freq Hopping Spread Spectrum)
2)
Compatible BLUETOOTH profiles
A2DP 1.2 (Advanced Audio Distribution
Profile)
AVRCP 1.3 (Audio Video Remote
Control Profile)
3)
Supported Codecs
4)
5)
SBC
, AAC
Transmission range (A2DP)
20 Hz - 20,000 Hz (Sampling frequency
44.1 kHz)
1)
The actual range will vary depending on
factors such as obstacles between
devices, magnetic fields around a
microwave oven, static electricity,
cordless phone, reception sensitivity,
operating system, software application,
etc.
2)
BLUETOOTH standard profiles indicate
the purpose of BLUETOOTH
communication between devices.
3)
Codec: Audio signal compression and
conversion format
4)
Subband Codec
5)
Advanced Audio Coding
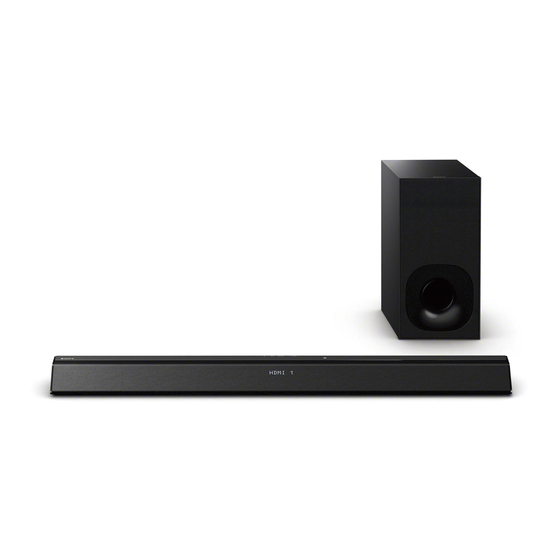
Photo: SA-CT380
Front L/Front R speaker section
Speaker system
Full range speaker system,
Acoustic suspension
Speaker
3
60 mm (2
/
in) cone type
8
General
Power requirements
120 V AC, 60 Hz (US and Canadian models)
110 V - 240 V AC, 50 Hz/60 Hz (PX model)
220 V - 240 V AC, 50 Hz/60 Hz (Other models)
Power consumption
On: 37 W
Standby: 0.3 W or less
(at the Power saving mode)
Standby: 0.5 W or less
(When [S. THRU] is [ON]: 6 W or less)
Dimensions (approx.) (w/h/d)
1
900 mm × 51 mm × 117 mm (35
/
in ×
2
1
5
2
/
in × 4
/
in) (without wall
8
8
mounting brackets)
1
900 mm × 120 mm × 72 mm (35
/
in ×
2
3
7
4
/
in × 2
/
in) (with wall mounting
4
8
brackets)
Mass (approx.)
5
2.4 kg (5 lb 4
/
oz)
8
ACTIVE SPEAKER SYSTEM
SA-CT380/CT381
US Model
Canadian Model
E Model
Australian Model
PX Model
HT-CT380/SA-CT380
AEP Model
UK Model
HT-CT380/CT381/SA-CT380/CT381
Wireless transmitter section
Speaker system
Wireless Sound Specification version
2.0
Frequency band
2.4 GHz (2.4000 GHz - 2.4835 GHz)
Modulation method
Pi / 4 DQPSK
Supplied accessories
Remote control (1)
R03 (size AAA) batteries (2)
Optical digital cable (1)
Wall mounting brackets (2) and screws (2)
Speaker pads for the subwoofer (4)
Startup Guide (1)
Operating Instructions (1)
Design and specifications are subject to
change without notice.
HT-CT380/CT381
SOUND BAR
SA-CT380/CT381
Advertisement
Table of Contents

Related Manuals for Sony HT-CT380


Summary of Contents for Sony HT-CT380
-
Page 1: Specifications
BLUETOOTH HDMI Section communication between devices. Connector SOUND BAR Codec: Audio signal compression and Type A (19pin) conversion format Subband Codec Advanced Audio Coding SA-CT380/CT381 ACTIVE SPEAKER SYSTEM 9-896-145-02 Sony Corporation 2015D33-1 © 2015.04 Published by Sony Techno Create Corporation... - Page 2 Sony Computer Entertainment Inc. TIONNEMENT. NE REMPLACER CES COMPOSANTS QUE Other trademarks and trade names are PAR DES PIÈCES SONY DONT LES NUMÉROS SONT DON- those of their respective owners. NÉS DANS CE MANUEL OU DANS LES SUPPLÉMENTS PUBLIÉS PAR SONY.
-
Page 3: Table Of Contents
HT-CT380/CT381 TABLE OF CONTENTS SERVICING NOTES 5-3. Block Diagram - AMP Section - ........33 ..........5-4. Block Diagram - PANEL/POWER SUPPLY Section - ......34 DISASSEMBLY 5-5. Printed Wiring Boards - MAIN Section (1/2) - ....36 2-1. Disassembly Flow ............ -
Page 4: Servicing Notes
HT-CT380/CT381 Ver. 1.1 SECTION 1 SERVICING NOTES The SERVICING NOTES contains important information for servicing. Be sure to read this section before repairing the unit. UNLEADED SOLDER CAPACITOR ELECTRICAL DISCHARGE PROCESSING Boards requiring use of unleaded solder are printed with the lead- When checking the board, for the electric shock prevention, con- free mark (LF) indicating the solder contains no lead. - Page 5 (Indicate that the LINK procedure is described in the operating instructions) ADVANCE PREPARATION WHEN CONFIRMING OP- ERATION Parts in which the LINK will be disconnected due to re- All of the units included in the HT-CT380/CT381 (SA-CT380/ placement: CT381, SA-WCT380/WCT381, Remote control) are required to • Complete MAIN board confi...
- Page 6 HT-CT380/CT381 Ver. 1.1 BOND FIXATION OF ELECTRIC PARTS When complete POWER board or the following parts are replaced, it is necessary to fi x the parts by using the bond (SC608Z2) (Refer to the fi gure below). • POWER board:...
-
Page 7: Disassembly
HT-CT380/CT381 SECTION 2 DISASSEMBLY • This set can be disassembled in the order shown below. 2-1. DISASSEMBLY FLOW 2-2. CABINET TOP BLOCK 2-15. SERVICE POSITION (Page 8) (Page 21) 2-3. LOUDSPEAKER (6 cm) (L-CH, R-CH) (SP1, SP2) (Page 9) 2-4. NFC MODULE (NFC1) (Page 10) 2-5. -
Page 8: Cabinet Top Block
HT-CT380/CT381 Note: Follow the disassembly procedure in the numerical order given. 2-2. CABINET TOP BLOCK 1 five screws (BVTP3 1 seven screws (BVTP3 1 seven screws Note: Please spread a sheet under a (BVTP3 unit not to injure cabinet top. -
Page 9: Loudspeaker (6 Cm) (L-Ch, R-Ch) (Sp1, Sp2)
HT-CT380/CT381 2-3. LOUDSPEAKER (6 cm) (L-CH, R-CH) (SP1, SP2) setting narrow terminal side wide terminal side “R” mark Note 1: When installing the loudspeaker (6 cm) (R-ch) (SP2), check the presence of a "R" mark. outside inside setting loudspeaker (6 cm) -
Page 10: Nfc Module (Nfc1)
HT-CT380/CT381 2-4. NFC MODULE (NFC1) How to install the NFC module (NFC1) 3 Peel off the 1 Paste the double sheet (NFC) slot slot release paper. adhesive tape (NFC). NFC module (NFC1) 4 Install the NFC 6 Insert the sheet... -
Page 11: Display Board
HT-CT380/CT381 2-5. DISPLAY BOARD ac in settin guide line DISPLAY board 8 two screws (BVTP3 fold 8 two screws (BVTP3 packing (CZ2) 7 packing (CZ2) 4 flexible flat cable 0 DISPLAY board (18 core) (FFC3) (CN803) 1 two screws (BVTP3... -
Page 12: Power Board
HT-CT380/CT381 2-6. POWER BOARD Note 1: When the complete POWER board is replaced, refer to “BOND FIXATION OF ELECTRIC PARTS” on page 6. Insert the connector straight into the interior. Insert the connector straight into the interior. There is a possibility that using this unit without There is a possibility that using this unit without the connector correctly installed will damage it. -
Page 13: Connection Cable With Speaker (L-Ch, R-Ch) (Spc1, Spc2)
HT-CT380/CT381 2-7. CONNECTION CABLE WITH SPEAKER (L-CH, R-CH) (SPC1, SPC2) Push Push Push Push Push CN3002 cushion (CZ2-A) Note: Do not block the vent hole in the connection cable with speaker (R-ch) (SPC2). Push Vent hole 1 cushion (CZ2-A) Push... -
Page 14: Key Board Block
HT-CT380/CT381 2-8. KEY BOARD BLOCK How to install the connector How to install the KEY board block Insert the connector straight into the interior. Note: Align five buttons into the holes and align bracket (BTN-CZ2) There is a possibility that using this unit without into two screw holes. -
Page 15: Button, Key Board
HT-CT380/CT381 2-9. BUTTON, KEY BOARD 1 three screws (BVTP2.6) 4 button (CZ2) button (CZ2) five ribs four ribs Note 1: Align to cover total nine ribs as shown. 2 bracket (BTN-CZ2) 7 KEY board 5 connector cushion (CZ2-A) (CN701) Note 2: Do not press this area during affixing. -
Page 16: Rf Modulator (Rf1)
HT-CT380/CT381 2-10. RF MODULATOR (RF1) Note: When the RF modulator (Ref. No. RF1) is replaced, refer to “NOTES ON THE WIRELESS CONNECTION (LINK) AFTER REPAIRS ARE COMPLETE” on page 5. 4 screw 3 flexible flat cable flexible flat cable RF modulator... -
Page 17: Main Board
HT-CT380/CT381 2-11. MAIN BOARD Note 1: When removing the MAIN board, you need the full length is Note 2: When the complete MAIN board is replaced, refer to “NOTE short screwdriver. OF REPLACING THE IC3001 ON THE MAIN BOARD AND If that has not been available a short screwdriver, remove the THE COMPLETE MAIN BOARD”... -
Page 18: Power Cord (Ac1)
HT-CT380/CT381 2-12. POWER CORD (AC1) Note: When installing the power cord (AC1), check the direction of claw of cord bushing (FBS001) and install correctly. claw claw Claw is on the lower side. cord bushing (FBS001) power cord 70 +5, -0 mm... -
Page 19: Bluetooth Module (Bt1)
HT-CT380/CT381 2-13. BLUETOOTH MODULE (BT1) ow to i tall the le i le lat a le When installing the flexible flat cable, ensure that the colored line is parallel to the connector after insertion. Insert straight into the interior. Insert at a slant. -
Page 20: Chassis (Main) Block
HT-CT380/CT381 2-14. CHASSIS (MAIN) BLOCK 2 four screws (BVTP3 5 chassis (MAIN) block 2 eleven screws (BVTP3 Terminal face is below side. 2 screw connector (BVTP3 (CN2001) 1 flexible flat cable (14 core) (FFC1) (CN2001) 3 wiring stopper 4 Remove the chassis (MAIN) block in the direction of the arrow. -
Page 21: Service Position
HT-CT380/CT381 2-15. SERVICE POSITION MAIN board POWER board... -
Page 22: Test Mode
HT-CT380/CT381 SECTION 3 TEST MODE 1. TEST MODES OTHER THAN THE TEST MODE MENU 2-1. Panel Test Mode These are executable test mode even if not entering the test mode It can check the lighting of fl uorescent indicator tube and LED, menu. - Page 23 HT-CT380/CT381 Ver. 1.1 6. In the state of step 4, press the [INPUT] button and model 7. When [INPUT] button is pressed while the each version is dis- name is displayed on the fl uorescent indicator tube. played on the fl uorescent indicator tube, year, month and day of the software creation is displayed on the fl...
- Page 24 HT-CT380/CT381 2-4. MC Version Display Mode 2-8. AMP Test Mode It can display the MC (-com) version. (It is displayed “AMP” on the fl uorescent indicator tube) Not used for the servicing. Procedure: Press the [ ] button if having entered this mode.
- Page 25 HT-CT380/CT381 5. The -com version of Subwoofer (SA-WCT380/WCT381) is 2-14. User Update Mode displayed on the fl uorescent indicator tube. (It is displayed “UPDATE” on the fl uorescent indicator tube) Not used for the servicing. Press the [ ] button if having entered this mode.
- Page 26 HT-CT380/CT381 2-21. Cold Reset It can initialize various backup information. Procedure: 1. Enter the test mode menu. (Refer to “Setting method of the test mode menu” on page 22) 2. Press the [VOLUME +]/[VOLUME –] buttons to select the “RESET”, press the [INPUT] button.
-
Page 27: Troubleshooting
HT-CT380/CT381 SECTION 4 TROUBLESHOOTING 1. “PRTECT” is displayed on the fl uorescent indicator tube after turning the power on “PRTECT” is displayed on the fluorescent indicator tube after turning the power on. IC3001 on the MAIN board is Replace the IC3001 on the MAIN board. - Page 28 HT-CT380/CT381 2. The sound is not outputted Check and repair the signal path for After entering to the tone test mode (Refer being inputted to the DSP (IC2009) on to 2-9. Tone test mode on the SECTION 3 the MAIN board.
- Page 29 HT-CT380/CT381 4. The video and audio of HDMI is not outputted The video and audio of HDMI is not outputted. The voltage of the following is 1.0 V. MAIN board: IC3105 pin 1 The voltage of the following is 3.3 V.
- Page 30 HT-CT380/CT381 MEMO...
-
Page 31: Diagrams
HT-CT380/CT381 SECTION 5 DIAGRAMS 5-1. BLOCK DIAGRAM - HDMI Section - HDMI TRANSCEIVER IC3109 HDMI_D0 – HDMI_D3, HDMI_SPDIF, HDMI_MCK, HDMI_BCK, HDMI_LRCK, RX_MUTE, ARC_SPDIF HDMI_D0 >001B (Page 32) DATA0+ 27 R2X0+ SD0_0_DL0 90 HDMI_D1 DATA0– 26 R2X0– SD0_1_DR1_GPIO1 92 HDMI_D2 SD0_2_DL1_GPIO2 93... -
Page 32: Block Diagram - Main Section
HT-CT380/CT381 Ver. 1.1 5-2. BLOCK DIAGRAM - MAIN Section - A/D CONVERTER, DIGITAL AUDIO INTERFACE RECEIVER IC2005 IC2009 AMP_D1FLFR, AMP_D3CSW, MCK, DSP_BCK, DSP_LRCK OPTICAL AMP_D1FLFR >002B RECEIVER RXIN2 DOUT 17 L/R_IN L/R OUT 48 DIGITAL IN CN2004 DIR_IN (Page 33) -
Page 33: Block Diagram - Amp Section
HT-CT380/CT381 Ver. 1.1 5-3. BLOCK DIAGRAM - AMP Section - STREAM PROCESSOR DIGITAL POWER AMP IC3002 IC3001 AMP_D1FLFR, AMP_D3CSW, L3003 MCK, DSP_BCK, DSP_LRCK AMP_D1FLFR >002B SDIN1 PWM_P_2 41 INPUT_C OUT_C 32 DSP_BCK (L-CH) SCLK (Page 32) DSP_LRCK L3004 LRCLK MCLK... -
Page 34: Block Diagram - Panel/Power Supply Section
HT-CT380/CT381 5-4. BLOCK DIAGRAM - PANEL/POWER SUPPLY Section - NFC1 NFC MODULE E12V SYSTEM CONTROLLER (RC-S730 (WW)) IC1002 (4/4) D3103, 3104 +1V REGULATOR HDMI1V NFC_SDA 22 NFC_DATA IC3105 NFC_SCL 20 NFC_SCL NFC_IRQ 83 NFC_IRQ +3.3V REGULATOR HDMI3.3V IC3106 NFC_RFDET 17 NFC_RFDET... - Page 35 HT-CT380/CT381 THIS NOTE IS COMMON FOR PRINTED WIRING BOARDS AND SCHEMATIC DIAGRAMS. • Waveforms (In addition to this, the necessary note is printed in each block.) – MAIN Board – For Printed Wiring Boards. For Schematic Diagrams. IC3109 ud (XTALOUT)
-
Page 36: Printed Wiring Boards - Main Section (1/2)
HT-CT380/CT381 Ver. 1.1 5-5. PRINTED WIRING BOARDS - MAIN Section (1/2) - • : Uses unleaded solder. MAIN BOARD (SIDE A) DISPLAY (Page 44) >01P ET3001 BOARD IC3106 CN803 (CHASSIS) FFC3 BOARD R1179 (CHASSIS) LN3001 CN3101 CL1079 C3003 L3111 C3160... -
Page 37: Printed Wiring Board - Main Section (2/2)
HT-CT380/CT381 5-6. PRINTED WIRING BOARD - MAIN Section (2/2) - • : Uses unleaded solder. MAIN BOARD (SIDE B) R1178 R3110 IC1011 R1143 R3108 R3107 R1144 C1055 D3104 JL1033 R3102 R3007 R1145 C1054 R3009 R3008 R1174 R1091 FB1012 R3418 D3103... -
Page 38: Schematic Diagram - Main Section (1/6)
HT-CT380/CT381 5-7. SCHEMATIC DIAGRAM - MAIN Section (1/6) - • See page 35 for Waveforms. • See page 48 for IC Block Diagrams. • See page 51 for IC Pin Function Description. MAIN BOARD (1/6) ET3002 C3218 C3215 R3217 (CHASSIS) -
Page 39: Schematic Diagram - Main Section (2/6)
HT-CT380/CT381 5-8. SCHEMATIC DIAGRAM - MAIN Section (2/6) - • See page 35 for Waveforms. • See page 48 for IC Block Diagrams. MAIN BOARD (2/6) JL2019 >004S >005S L2001 L2002 C2015 10uH 10uH MAIN DD6V MAIN BOARD DGND BOARD... -
Page 40: Schematic Diagram - Main Section (3/6)
HT-CT380/CT381 5-9. SCHEMATIC DIAGRAM - MAIN Section (3/6) - • See page 35 for Waveforms. • See page 48 for IC Block Diagrams. • See page 51 for IC Pin Function Description. MAIN BOARD (3/6) L2007 FB2005 10uH IC2012 DC/DC CONVERTER... -
Page 41: Schematic Diagram - Main Section (4/6)
HT-CT380/CT381 Ver. 1.1 5-10. SCHEMATIC DIAGRAM - MAIN Section (4/6) - • See page 48 for IC Block Diagrams. MAIN BOARD (4/6) R3040 DC_PRT R3041 OVF1 CL3002 R3042 >011S NS_INIT C3037 C3044 C3048 C3043 DAMP_PDN 0.01 0.0047 MAIN S_MUTE BOARD... -
Page 42: Schematic Diagram - Main Section (5/6)
HT-CT380/CT381 Ver. 1.1 5-11. SCHEMATIC DIAGRAM - MAIN Section (5/6) - • See page 35 for Waveforms. • See page 48 for IC Block Diagrams. • See page 51 for IC Pin Function Description. MAIN BOARD (5/6) DIR_ZERO DIR_ZERO DIR_XSTATE... -
Page 43: Schematic Diagram - Main Section (6/6)
HT-CT380/CT381 5-12. SCHEMATIC DIAGRAM - MAIN Section (6/6) - • See page 35 for Waveforms. • See page 48 for IC Block Diagrams. MAIN BOARD (6/6) R1174 CAM103 >010S WL_BCK WL_LRCK R1175 MAIN (CHASSIS) BOARD WL_D3CSW BT_LED (3/6) CAM104 (Page 40) -
Page 44: Printed Wiring Board - Display Board
HT-CT380/CT381 5-13. PRINTED WIRING BOARD - DISPLAY Board - • : Uses unleaded solder. DISPLAY BOARD (COMPONENT SIDE) NFC1 MAIN NFC MODULE (Page 36) >01P BOARD (RC-S730 (WW)) CN1002 FFC3 FFC4 CN804 CN803 R801 R802 R804 R811 D802 R803 R820... -
Page 45: Schematic Diagram - Display Board
HT-CT380/CT381 5-14. SCHEMATIC DIAGRAM - DISPLAY Board - • See page 35 for Waveforms. • See page 48 for IC Block Diagrams. DISPLAY BOARD ND801 FLUORESCENT INDICATOR TUBE CN804 C801 JL825 E3.3V JL820 FFC4 NFC_SCL C822 NFC1 JL821 NFC MODULE... -
Page 46: Printed Wiring Board - Power Board
HT-CT380/CT381 Ver. 1.1 5-15. PRINTED WIRING BOARD - POWER Board - • : Uses unleaded solder. POWER BOARD C904 (US, CND) C905 (Except US, CND) (CHASSIS) ET932 LF901 IC931 R945 LINE FILTER R978 R971 R977 C932 C933 C936 Q931 C971... -
Page 47: Schematic Diagram - Power Board
HT-CT380/CT381 Ver. 1.1 5-16. SCHEMATIC DIAGRAM - POWER Board - • See page 48 for IC Block Diagrams. POWER BOARD ET931 JL904 (US, CND) (Except US, CND) C902 C903 C906 C908 (CHASSIS) 0.001 0.001 0.0022 0.0022 250V 250V 250V 250V... - Page 48 HT-CT380/CT381 • IC Block Diagrams IC2005 PCM9211PTR – MAIN Board – IC1003 PST8429UL IC1008, 3105, 3106 BD00IC0WEFJ-E2 33 32 31 30 29 28 GND 1 RXIN0 37 MD1/SDA MD0/ADR0 VREF OVER CURRENT RESET & SPI/I2C PROTECT MODE SETTING INTERFACE POWER...
- Page 49 HT-CT380/CT381 IC3001 TAS5624ADDVR GVDD_AB 1 BST_A BST_B VDD 2 OC_ADJ 3 RESET 4 OUT_A ANALOG PWM & TIMING GATE- INPUT_A 5 LOOP FILTER – CONTROL DRIVE OUT_A RECEIVER PVDD_AB PVDD_AB PVDD_AB INPUT_B 6 ANALOG PWM & TIMING GATE- RECEIVER OUT_B...
- Page 50 HT-CT380/CT381 Ver. 1.1 IC3003 BD00C0AWFP-E2 IC3102 MM3411A50NRE VDD 1 GND 2 VREF – DRIVER VOUT CURRENT LIMIT VOLTAGE REFERENCE CE 3 BIAS – DISPLAY Board – – POWER Board – IC803 MM3411A33URE IC930 STR-Y6735 (US and Canadian models) IC930 STR-Y6766B (Except US and Canadian models)
- Page 51 HT-CT380/CT381 • IC Pin Function Description MAIN BOARD IC1002 R5F3650RDFB#30 (SYSTEM CONTROLLER) Pin No. Pin Name Description SIRCS_IN SIRCS signal input from the remote control receiver SIRCS2 SIRCS signal input terminal Not used DSP_MOSI Serial data output to the serial fl ash and DSP DSP_ MISO Serial data input from the serial fl...
- Page 52 HT-CT380/CT381 Ver. 1.1 Pin No. Pin Name Description HDMI_INT Interrupt signal input from the HDMI transceiver SEL_HDMI HDMI selection signal output terminal “H”: HDMI RST_FL Reset signal output to the fl uorescent indicator tube “L”: reset P_CONT3 Power on/off control signal output terminal “H”: power on...
- Page 53 HT-CT380/CT381 MAIN BOARD IC2009 ADSST-AVR-3045 (DSP) Pin No. Pin Name Description VDD_INT Power supply terminal (+1.1V) (for core) Core instruction rate to CLKIN (pin 12) ratio selection signal input terminal CLK_CFG1 Fixed at “L” in this unit BOOT_CFG0 Boot mode selection signal input terminal Fixed at “H”...
- Page 54 HT-CT380/CT381 Pin No. Pin Name Description LRCLK_OUT L/R sampling clock signal output to the stream processor and RF modulator SBL/SBR_IN Audio signal (for surround back L-ch/R-ch) input from the digital audio interface receiver L/R_IN Audio signal (for front L-ch/R-ch) input from the digital audio interface receiver VDD_INT Power supply terminal (+1.1V) (for core)
- Page 55 HT-CT380/CT381 MAIN BOARD IC3109 SII9535CTUC (HDMI TRANSCEIVER) Pin No. Pin Name Description SCLK_GPIO9 Not used SCK0_IN_GPIO5 Not used SD0_IN_SPDIF_IN Not used WS0_IN_GPIO6 Not used R0XC– TMDS clock (negative) signal input terminal Not used R0XC+ TMDS clock (positive) signal input terminal Not used R0X0–...
- Page 56 HT-CT380/CT381 Pin No. Pin Name Description DSDA2 Two-way I2C serial data bus with the HDMI IN 1 connector DSCL2 I2C serial data transfer clock signal input from the HDMI IN 1 connector CBUS_HPD2 Hot plug detection control signal output to the HDMI IN 1 connector...
-
Page 57: Exploded Views
HT-CT380/CT381 SECTION 6 EXPLODED VIEWS Note: • -XX and -X mean standardized parts, so • The mechanical parts with no reference The components identifi ed by mark 0 they may have some difference from the number in the exploded views are not sup- or dotted line with mark 0 are critical for original one. -
Page 58: Top Cabinet Section
HT-CT380/CT381 Ver. 1.1 6-2. TOP CABINET SECTION • Bottom view not supplied not supplied FFC3 NFC1 (18 pin) 54 54 not supplied FFC4 (6 pin) right side not supplied 54 54 not supplied #2 #2 54 54 (DISPLAY board) rear side... -
Page 59: Bottom Cabinet Section
HT-CT380/CT381 Ver. 1.1 6-3. BOTTOM CABINET SECTION not supplied not supplied SPC1 not supplied not supplied not supplied not supplied not supplied SPC2 FFC2 (24 pin) MAIN board section not supplied (PX) ACP1 ACP2 (SP for Hong Kong) (See Note 1) -
Page 60: Main Board Section
HT-CT380/CT381 Ver. 1.1 6-4. MAIN BOARD SECTION not supplied not supplied not supplied not supplied not supplied not supplied not supplied not supplied not supplied Note 1: When the complete MAIN board is replaced, refer to “NOTE Note 2: When the complete POWER board is replaced, refer to “BOND OF REPLACING THE IC3001 ON THE MAIN BOARD AND FIXATION OF ELECTRIC PARTS”... -
Page 61: Electrical Parts List
HT-CT380/CT381 Ver. 1.1 SECTION 7 DISPLAY MAIN ELECTRICAL PARTS LIST Note: • Due to standardization, replacements in • COILS The components identifi ed by mark 9 con- uH: μH the parts list may be different from the tain confi dential information. - Page 62 HT-CT380/CT381 MAIN Ref. No. Part No. Description Remark Ref. No. Part No. Description Remark C1002 1-118-386-11 CERAMIC CHIP 0.1uF * C2023 1-116-720-11 CERAMIC CHIP 10uF 6.3V C1003 1-118-386-11 CERAMIC CHIP 0.1uF * C2024 1-116-720-11 CERAMIC CHIP 10uF 6.3V C1005 1-118-386-11 CERAMIC CHIP 0.1uF...
- Page 63 HT-CT380/CT381 MAIN Ref. No. Part No. Description Remark Ref. No. Part No. Description Remark C2095 1-128-992-21 ELECT CHIP 47uF * C3127 1-118-035-11 CERAMIC CHIP 0.1uF C2098 1-118-412-11 CERAMIC CHIP 220PF * C3128 1-116-720-11 CERAMIC CHIP 10uF 6.3V C2099 1-118-412-11 CERAMIC CHIP 220PF...
- Page 64 6-719-198-01 IC MM3411A33URE * D1004 6-503-578-01 DIODE RB520SM-30T2R IC2003 8-759-596-39 IC SN74LV4052APWR D1005 6-502-961-01 DIODE DA2J10100L D1008 6-503-775-01 DIODE CRH02 (T5R, SONY, XM) IC2004 6-707-010-01 IC NJM2740V (TE2) IC2005 6-716-745-01 IC PCM9211PTR D1009 6-502-961-01 DIODE DA2J10100L IC2006 6-718-999-01 IC MM1839A50NRE...
- Page 65 HT-CT380/CT381 Ver. 1.1 MAIN Ref. No. Part No. Description Remark Ref. No. Part No. Description Remark L2008 1-412-977-41 INDUCTOR 0.68uH R1026 1-218-977-11 METAL CHIP 100K 1/16W R1027 1-218-941-81 METAL CHIP 1/16W L2009 1-412-977-41 INDUCTOR 0.68uH R1028 1-218-977-11 METAL CHIP 100K...
- Page 66 HT-CT380/CT381 Ver. 1.1 MAIN Ref. No. Part No. Description Remark Ref. No. Part No. Description Remark R1111 1-218-957-11 METAL CHIP 2.2K 1/16W R2014 1-218-973-11 METAL CHIP 1/16W R1114 1-218-959-11 METAL CHIP 3.3K 1/16W R1115 1-218-965-11 METAL CHIP 1/16W R2016 1-218-973-11...
- Page 67 HT-CT380/CT381 MAIN Ref. No. Part No. Description Remark Ref. No. Part No. Description Remark R2078 1-218-933-11 METAL CHIP 1/16W R2147 1-216-864-11 SHORT CHIP R2079 1-218-933-11 METAL CHIP 1/16W R2152 1-216-864-11 SHORT CHIP R2080 1-218-933-11 METAL CHIP 1/16W R2155 1-216-864-11 SHORT CHIP...
- Page 68 HT-CT380/CT381 Ver. 1.1 MAIN POWER Ref. No. Part No. Description Remark Ref. No. Part No. Description Remark R3155 1-216-864-11 SHORT CHIP R3297 1-218-965-11 METAL CHIP 1/16W R3162 1-216-864-11 SHORT CHIP R3300 1-218-937-11 METAL CHIP 1/16W R3176 1-216-864-11 SHORT CHIP R3301...
- Page 69 METAL CHIP 1/10W (Except US, CND) 0 D941 8-719-083-71 DIODE UDZSUSTE-1730B 0 R953 1-216-793-91 METAL CHIP 1/10W 0 D942 6-503-775-01 DIODE CRH02 (T5R, SONY, XM) D965 6-501-849-01 DIODE FMX-22SL 0 R954 1-216-793-91 METAL CHIP 1/10W D967 6-503-978-01 DIODE RB068L100TE25 0 R955...
- Page 70 HT-CT380/CT381 Ver. 1.1 POWER Ref. No. Part No. Description Remark Ref. No. Part No. Description Remark ACCESSORIES 0 T901 1-697-327-11 CONVERTER TRANSFORMER (01C313) ************ (US, CND) 4-565-123-12 MANUAL, INSTRUCTION < THERMISTOR > (ENGLISH, SPANISH, FRENCH) (US, CND) 0 TH901 1-811-315-31...
- Page 71 HT-CT380/CT381 MEMO...
-
Page 72: Revision History
HT-CT380/CT381 REVISION HISTORY Ver. Date Description of Revision 2015.02 2015.04 Addition of PX, African, Iranian, Saudi Arabia, UAE, Kuwait, Iraqi, Kenyan, Tanzanian, Nigerian and Singapore models Change of Part No. for INSTRUCTION MANUAL (US, Canadian, AEP, UK and Australian models)