
Related Manuals for Dell Latitude 13-7350 Series


Summary of Contents for Dell Latitude 13-7350 Series
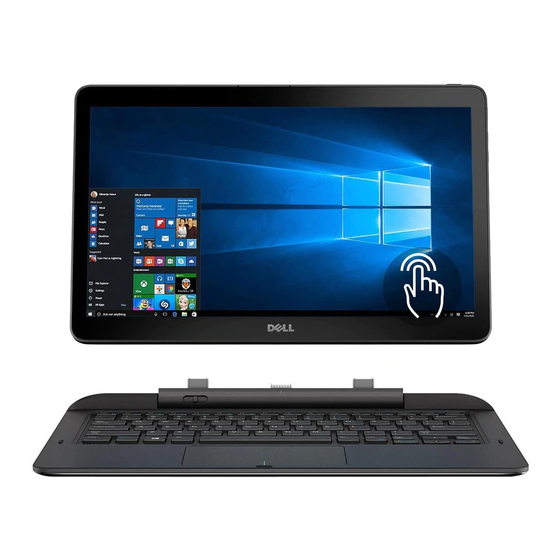
- Page 1 Latitude 13-7350 Series User’s Guide Regulatory Model: P58G Regulatory Type: P58G001...
- Page 2 WARNING: A WARNING indicates a potential for property damage, personal injury, or death. Copyright © 2015 Dell Inc. All rights reserved. This product is protected by U.S. and international copyright and intellectual property laws. Dell and the Dell logo are trademarks of Dell Inc.
-
Page 3: Table Of Contents
Contents 1 Contacting Dell......................5 2 System Overview....................6 3 Undocking/Docking your Tablet ..............8 ........................8 Using the Dell Tablet Dock 4 Inserting an SD card................... 10 5 Installing the micro-SIM Card................11 6 Setting Up Your Tablet..................12 ..........................12 Charging the Tablet ........................13... - Page 4 Turning On/Off mobile broadbandConnecting to a mobile broadband networkDisconnecting from mobile broadband networkMobile broadband ..........24 optionsService Provider hardware informationEnabling PIN lock ................26 Refreshing / Recovering / Re-setting your tablet Refresh your PC without affecting your filesRemove everything and re-install ......................27 WindowsAdvanced startup 9 Synchronizing your tablet................
-
Page 5: Contacting Dell
Dell product catalog. Dell provides several online and telephone-based support and service options. Availability varies by country and product, and some services may not be available in your area. To contact Dell for sales, technical support, or customer service issues: Go to dell.com/support. -
Page 6: System Overview
System Overview USB 3.0 connector Mini-DisplayPort connector Noble security-cable slot Microphones Ambient-light sensor Camera-status light Camera USB 3.0 connector with PowerShare Power connector 10. Near Field Communication (NFC) reader (optional) 11. Noble security-cable slot 12. Volume button 13. Full-sized SD memory card reader 14. - Page 7 Figure 3. Side view...
-
Page 8: Undocking/Docking Your Tablet
To dock the tablet to the base, Slide the button to the left to ensure that the hook is inside of the docked pin. NOTE: Applying excess pressure may cause damage to the docking connectors. Using the Dell Tablet Dock The following images show how to dock your tablet:... -
Page 10: Inserting An Sd Card
Inserting an SD card Insert the SD card into the SD card slot on the keyboard base. NOTE: The plastic filler piece needs to be removed first before inserting an SD card. -
Page 11: Installing The Micro-Sim Card
Installing the micro-SIM Card CAUTION: Removing the Micro-SIM card when the tablet is on may cause data loss or damage the card. Make sure your tablet is turned off or the network connections are disabled. Insert a paperclip or a SIM removal tool to remove the SIM card tray from the tablet. Load the SIM card on the tray. -
Page 12: Setting Up Your Tablet
Setting Up Your Tablet Charging the Tablet CAUTION: Charge the battery in an ambient temperature of 0 °C to 40 °C. CAUTION: Use only the power adapter and power cable that came with your tablet. Using unauthorized power adapters or power cables may cause severe damage to your tablet. NOTE: The battery is not fully charged when you unpack your tablet. -
Page 13: Turning On Your Tablet
Battery icon Description Battery is fully charged and AC adapter is connected. Battery is charging with AC adapter. Your tablet is running on battery power and the battery is discharging. Your tablet is plugged in, and either no battery is detected or the battery is not working correctly. -
Page 14: Turning Off The Screen
Turning off the Screen Using power button Press the Power button to turn off the screen. Using Charms Swipe from the right edge of the display to access the Charms bar. Touch Settings → Power → Sleep to turn off the screen. NOTE: If your tablet is in a sleep state, press the Power button or Windows button once to turn on the screen. - Page 15 Using charms Swipe from the right edge of the display to access the Charms menu. Touch Settings —> Power —> Shut down to turn off the tablet.
-
Page 16: Using Your Tablet
Using Your Tablet Screen Orientation For optimal viewing experience, the screen orientation changes automatically to portrait or landscape format depending on how you hold the tablet. NOTE: Some applications may not support automatic screen rotation to portrait or landscape format. How to lock / unlock the screen orientation Swipe from the right edge of the display to access the Charms bar. -
Page 17: Gestures
You can also adjust your screen automatically. To adjust the screen brightness automatically: Swipe from the right edge of the display to access the Charms bar. Touch Settings → Change PC settings → PC and devices → Power and sleep. Under Brightness, slide left or right to turn on / turn off the automatic brightness option. - Page 18 Gesture Actions Functions • Scroll through the Start screen, web pages, lists, Swipe or Slide entries, photos, contacts, and so on Move your finger in a vertical or horizontal • Close an application. (Swipe the application to direction on the display the bottom of the display) Zoom in Enlarge the view of an image or web page...
-
Page 19: Right-Click
Right-Click To perform a right-click on your tablet, Touch and Hold your finger for 2 seconds on any section of the screen or an icon and then release your finger. The options menu appears on the screen. The Windows Start Screen The Windows Start screen displays a list of default and custom Live Tiles, which act as a shortcut to Control Panel, Windows Explorer, Weather application, RSS, Windows Store, Internet Explorer, and other installed applications. -
Page 20: Get To Know Windows 8.1
Get to know Windows 8.1 You can touch the Help+Tips tile on the Start screen to get help and tips on using Windows 8.1. Swipe Right Swiping-in from the right edge of the display reveals the Charms bar. Charms provide access to the system commands, such as Start, Search, Share, Devices, and Settings options. -
Page 21: Split Screen
You can also enable the camera (front), when the screen is in lock mode. To enable the camera when the screen is in lock mode: Swipe from the right edge of the display to access the Charms bar. Click Settings →... - Page 22 NOTE: It is recommended that you turn down the volume level before plugging the headset, and then adjust to a comfortable level. Sudden exposure to loud sounds can cause hearing damage.
-
Page 23: Managing Your Tablet Settings
Managing your tablet settings Wi-Fi setting Turning On/Off Wi-Fi Swipe from the right edge of the display to access the Charms bar. Touch Settings → Change PC settings → Networks → Airplane mode. Swipe Wi-Fi icon right or left to turn Wi-Fi on or off. Connecting to a network Swipe from the right edge of the display to access the Charms bar. -
Page 24: Mobile Broadband Setting
NOTE: Hidden SSIDs and other advanced configurations may require going to the network and sharing center and selecting the option to manually configure the connection. Mobile broadband setting Turning On/Off mobile broadband Swipe from the right edge of the display to access the Charms bar. Touch Settings →Change PC settings →... -
Page 25: Connecting To A Mobile Broadband Network
Connecting to a mobile broadband network Ensure an active SIM card is inserted into the tablet. Swipe from the right edge of the display to access the Charms bar. Touch Setting → Network → Connections → Your Service Provider → Connect. The estimated data usage will be shown once the mobile broadband network is enabled. -
Page 26: Refreshing / Recovering / Re-Setting Your Tablet
• Touch View connection properties to view your connected mobile broadband properties. NOTE: If the option Set as metered connection is enabled, Windows Update will not download updates automatically unless it is a high priority, critical security update. Service Provider hardware information Swipe from the right edge of the display to access the Charms bar. -
Page 27: Refresh Your Pc Without Affecting Your Filesremove Everything And Re-Install Windowsadvanced Startup
Swipe from the right edge of the display to access the Charms bar. Touch Settings → Change PC Settings → Update and recovery → Recovery. • Refresh your PC without affecting your files • Remove everything and reinstall Windows • Advanced startup Select any recovery option to complete the task. -
Page 28: Synchronizing Your Tablet
Synchronizing your tablet Using Microsoft account If your computer has Microsoft Windows 8.1 installed, you can synchronize user settings of your tablet with your computer using a Microsoft account. When you sign in with your Microsoft account on your tablet, you can automatically synchronize your settings, including internet browser history, application settings, and personal files etc., with other Windows 8.1 PCs and Windows 8.1 tablets. -
Page 29: Cleaning Your Tablet
Cleaning Your Tablet CAUTION: Before you clean your tablet, disconnect all cables. Clean your tablet with a soft cloth dampened with water. Do not use liquid or aerosol cleaners, which may contain flammable substances. Turn off your tablet. For more information on turning off your tablet, see Turning Off Your Tablet. Disconnect any attached devices, headphones, speakers, and keyboard dock from the tablet and from their electrical outlets. -
Page 30: Troubleshooting
Troubleshooting Battery problem Problems Possible causes Possible solutions • Unplug the Dell AC power Battery does not charge adapter from the wall and verify that the outlet is functioning. • Check all cable connections and plug back into the wall, then back into the tablet. -
Page 31: System Problem
• Operating system failure tablet. • Virus/Malware Refresh the tablet. Contact Dell’s support service. Go to dell.com/ support or dell.com/ contactdell. Software or feature is not Restart your tablet. Software working as expected updates may have been downloaded in the background. -
Page 32: Touchscreen Problem
Touchscreen problem Problems Possible causes Possible solutions • Shutdown and restart your Touchscreen responds slowly or Protective cover prevents the tablet. improperly tablet from recognizing your • Gently wipe the display with a inputs. clean dry cloth. • Remove any protective covers from the touchscreen. -
Page 33: Setting Up A Wlan Using A Wireless Router And A Broadband Modem
Setting Up a WLAN using a Wireless Router and a Broadband Modem Contact your Internet service provider (ISP) to obtain specific information about the connection requirements for your broadband modem. Ensure that you have wired Internet access through your broadband modem before you attempt to set up a wireless Internet connection. - Page 34 Reset the wireless router if using a private network; open the browser to view the landing page if using a public network. Contact your internet service provider for assistance. • The mobile broadband has No mobile broadband Check if the mobile been capped.
-
Page 35: System Setup
Press and hold the Volume Up button when the Dell logo appears on the screen. When the F12 Boot Selection menu appears, press the Volume Up button to change the boot selection to the BIOS Setup option. -
Page 36: System Setup (Bios) Options
NOTE: If you cannot find your Service Tag, click Detect My Product. Proceed with the instructions on screen. If you are unable to locate or find the Service Tag, you can select your product from the products list under the General Support. Choose the Product Type from the list. - Page 37 Option Function interacting with flash memory. Processor Type Displays the processor type available on the tablet. Core Count Displays the core count of the tablet. Processor ID Displays the processor ID of the tablet. Current Clock Speed Displays the current clock speed of the tablet.
- Page 38 Option Function Native Resolution Displays the resolution of the tablet. Audio Controller Displays the audio controller used in the tablet. WiGig Device Displays the WiGig device in the tablet. Wi-Fi Device Displays the Wi-Fi device in the tablet. Cellular Device Displays the cellular device in the tablet.
- Page 39 Table 4. Advanced Boot Options Option Function Enable Legacy Option ROMs During the UEFI boot mode, the Enable Legacy Option ROMs option will allow legacy option ROMs to load. This option is not allowed if Secure Boot is enabled. Enable UEFI Network Stack Enable UEFI Network Stack function with IPV4/ IPV6 PXE protocol support.
- Page 40 Option Function Keyboard Illumination Allows you to choose the keyboard illumination features. Keyboard Backlight with AC Allows user to use keyboard illumination features with the AC power connected. Miscellaneous Devices Allows you to enable or disable various on-board devices. • Enable Microphone.
- Page 41 Option Description Click OK after entering the password details. Enable strong password - This option is disabled by default. Strong Password Password Configuration This field controls the minimum and maximum number of characters allowed for the admin and system passwords. Changes to these fields are not active until they are committed via the apply button or saving changes before exiting setup.
- Page 42 Option Description CPU XD Support This option enables or disables the Execute Disable mode of the Processor. • Enable CPU XD Support (Default Enable) Admin Setup Lockout Allows you to enable or disable the option to enter setup when an admin password is set.
- Page 43 Option Description • Intel SpeedStep Allows you to enable or disable the Intel SpeedStep mode of the processor. • Enable Intel(R) SpeedStep (Default) C States Control Allows you to enable or disable the additional processor sleep states. • C states (Default) Intel TurboBoost Allows you to enable or disable Intel TurboBoost mode of the processor.
- Page 44 Auto (Default Enable) NOTE: Enabling the Fastboot will prevent F2 BIOS access through USB or Thin / Travel keyboard. You can still access the BIOS Setup, by pressing the Volume Up button after the Dell logo screen appears. Table 13. Virtualization Support...
-
Page 45: Specifications
Option Description • • Bluetooth Wireless Switch Determines if wireless devices can be controlled by the wireless switch. Table 15. Maintenance Option Description Service Tag Displays the service tag of your tablet. Asset Tag Allows you to create a system asset tag if an asset tag is not already set. This option is not set by default. - Page 46 USB 3.0 two USB 3.0 connectors SD 4.0 one full size SD 4.0 connector on tablet base Docking port Dell 40-pin dock connector x1 Subscriber Identity Module (SIM) port micro-SIM reader (LTE/HSPA+ models only) one NFC reader (optional) Finger print reader...
- Page 47 Camera (Front) Type OV 2724 (2 MP) Resolution 1080p supported Camera (Back) Type IMX 134 (8 MP) Resolution 1080p supported Storage Storage 128 GB / 256 GB / 512 GB Solid state drive Battery Type • Tablet – 30.5 Whr (Nominal) •...
- Page 48 AC Adapter Type Input voltage 100 VAC to 240 VAC Input current (maximum) 1.3 A Input frequency 50 Hz to 60 Hz Output power 23.4 W / 30 W Output current (30 W) 2.31 A Rated output voltage 19.5 Vdc Temperature range: Operating 0 °C to 40 °C (32 °F to 104 °F)