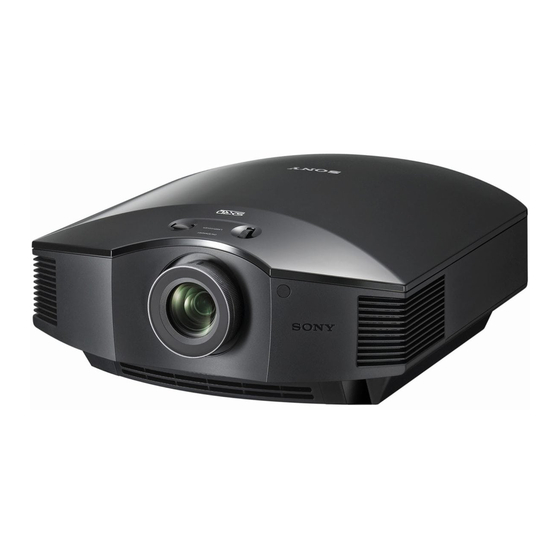
Sony VPL-HW40ES Operating Instructions Manual
Hide thumbs
Also See for VPL-HW40ES:
- Operating instructions manual (20 pages) ,
- Specifications (4 pages) ,
- Service manual (142 pages)

Related Manuals for Sony VPL-HW40ES


Summary of Contents for Sony VPL-HW40ES
-
Page 1: Operating Instructions
4-534-761-11 (1) Video Projector Operating Instructions Before operating the unit, please read this manual and supplied Quick Reference Manual thoroughly and retain them for future reference. VPL-HW40ES... -
Page 2: Table Of Contents
Table of Contents Adjusting the Picture Using Real Color Processing .........27 Location of Controls Front/Right Side ......... 4 Using the Menus Rear/Bottom ........5 Operation through the Menus ...29 Remote Control ........6 Picture Menu ........32 Connections and Advanced Picture Menu ....36 Preparations Screen Menu ........37 Setup Menu ........39... - Page 3 Input Signals and Adjustable/ Setting Items .......66 Compatible 3D Signals ....68 3D Signals and Adjustable/Setting Items ..........68 Aspect Mode .......70 Storage Conditions of Adjustable/ Setting Items .......71 Projection Distance and Lens Shift Range ..........73 Index ..........77...
-
Page 4: Location Of Controls
Location of Controls Front/Right Side You can use the buttons on the control panel with the same names as those on the remote control to operate the projector. Control panel Lens shift dials (1 page 9) M/m/</, (arrow)/ (enter) button (1 page 29) MENU button (1 page 29) LAMP/COVER indicator... -
Page 5: Rear/Bottom
Rear/Bottom Ventilation holes (intake) Ventilation holes (intake) Ventilation holes (intake) Ventilation holes (intake) Lamp cover (1 page 58) Front feet (adjustable) (1 page 12) Filter holder (1 page 59) Ventilation holes (intake) Projector suspension support attaching hole (1 page 75) 3D Sync Transmitter (1 page 23) -
Page 6: Remote Control
Remote Control Infrared transmitter LIGHT button Illuminates the buttons on (On/standby) the remote control. switch (1 page 9) INPUT button (1 page 17) CALIBRATED PRESET buttons (1 page 25) PATTERN button RESET button (1 page 31) (1 page 9) M/m/</, (arrow)/ (enter) buttons (1 page 29) MENU button (1 page 29) -
Page 7: Connections And Preparations
Connections and Preparations This section describes how to install the projector and screen, how to connect the equipment from which you want to project the picture, etc. Preparation 1: Installing the Projector The projector displays pictures output from a VCR or other device. The lens shift allows you to have broader options for placing the projector and viewing pictures easily. -
Page 8: Preparation 2: Adjusting The Picture Position
Preparation 2: Adjusting the Picture Position Project an image on the screen and then adjust the picture position. ON/STANDBY indicator Remote control Lens shift dials detector 5, 6 (On/ standby) Zoom lever, switch Focus ring PATTERN button (ON/STANDBY), INPUT, MENU, and M/m/</,/ (joystick) buttons on the side panel of the projector function the same as those on the remote control. -
Page 9: On/Standby) Switch (1
After connecting the AC cord to Move both lens shift dials to the projector, plug the AC cord adjust the picture position. into a wall outlet. The ON/STANDBY indicator lights in red and the projector goes into standby mode. Lights in red. Press the (ON/STANDBY) switch to turn on the projector. -
Page 10: To Adjust The Horizontal Position
To adjust the horizontal position Turn the lens shift dial right or left. The picture projected on the screen moves right or left by a maximum of 25% of the screen width from the center of the lens. 1 screen width Top view : Picture position when moving the picture to the left at maximum... -
Page 11: Focus Ring (1
Notes • The range to move the picture projected on the screen can be adjusted only within the octagon area illustrated below. For details, see “Projection Distance and Lens Shift Range” (1 page 73). Range of movement of the projected picture 0.71V Projected Picture 0.25H... - Page 12 To adjust the tilt of the installation surface If the projector is installed on an uneven surface, use the front feet (adjustable) to keep the projector level. Turn to adjust. Front feet (adjustable) Notes • Pointing the projector at too high or too low of a tilt will result in trapezoidal distortion in the projected image.
-
Page 13: Preparation 3: Connecting The Projector
Right side of the projector AV amplifier with HDMI input/output connectors Speakers to HDMI output HDMI cable (not supplied) When using an HDMI cable, be sure to use a Sony HDMI : Video signal flow cable or another cable that has the HDMI logo. -
Page 14: To Connect To Equipment With Component Video Output Connectors
Notes • Use a high-speed HDMI cable. With a standard HDMI cable, images of 1080p, DeepColor, and 3D video images may not be displayed properly. • When connecting an HDMI cable to the projector, make sure the mark on the upper part of the HDMI input of the projector and the mark on the connector of the cable is set at the same position. -
Page 15: Connecting To A Computer
Computer to monitor output HD-Dsub15 pin cable (not supplied) or HDMI cable (not supplied) When using an HDMI cable, be sure to use a Sony HDMI : Video signal flow cable or another cable that has the HDMI logo. Notes •... -
Page 16: Connecting To A 3D Sync Transmitter
Connecting to a 3D Sync Transmitter This unit incorporates a 3D Sync Transmitter. Depending on the installation environment of the unit, the 3D glasses may not receive 3D signals properly from the unit’s built-in 3D Sync Transmitter. In this case, connect an optional 3D Sync Transmitter and place it near your viewing position. -
Page 17: Projecting
Projecting This section describes how to operate the unit to view the picture from the equipment connected to the unit. It also describes how to adjust the quality of the picture to suit your taste. Projecting the To view the picture from Press INPUT to display Picture... -
Page 18: Turning Off The Power
Turning Off the Power Press the (ON/STANDBY) switch. A message “POWER OFF?” appears on the screen. Press the (ON/STANDBY) switch again before the message disappears. The ON/STANDBY indicator flashes in green and the fan continues to run to reduce the internal heat. First, the ON/ STANDBY indicator flashes quickly, during which you will not be able to light up the lamp with the ?/1 (ON/... -
Page 19: Selecting The Aspect Ratio According To The Video Signal
Selecting the Aspect Ratio According to the Video Signal You can select an aspect ratio best suited for the video signal received. Press ASPECT. Each time you press the button, you can select the “Aspect” setting. You can also select it using the menu. (1 page 37) ASPECT button Original image... - Page 20 Original image Recommended setting and resultant images Normal 1.78:1 (16:9) 1.33:1 (4:3) 1.33:1 (4:3) with side panels Stretch Squeezed V Stretch 2.35:1 When using an anamorphic lens...
- Page 21 Original image Recommended setting and resultant images Squeeze 16:9 When using an anamorphic lens Normal (When a computer signal is input) Full (When a computer signal is input) Notes • Selectable aspect modes vary depending on the input signal. • You can adjust the vertical position of the picture with “V Center” and “Vertical Size” in the Screen menu only when “Aspect”...
-
Page 22: Watching 3D Video Images
Watching 3D Video Images You can enjoy powerful 3D video images, such as from 3D games and 3D Blu-ray Discs, using the optional 3D glasses. Turn on the HDMI equipment for 3D compatibility connected to the unit, then play the 3D content. For details on how to play 3D content, refer to the operating instructions for the connected equipment. -
Page 23: Using The Simulated 3D Function
Using the Simulated 3D Function You can convert normal 2D video images to 3D video images. For details on how to operate the on-screen menu, see “Operation through the Menus” (1 page 29). Display the Function menu and select “3D Settings.” Set “2D-3D Display Sel.”... - Page 24 Figure B:3D sync signal communication distance between the projector and screen Approx. 5 m (Maximum) Projector Side view Screen Note A 3D sync signal is projected towards the screen from 3D Sync Transmitter at the front of this unit. (Figure C) Installation conditions may prevent 3D sync signals from reaching the screen;...
-
Page 25: Selecting The Picture Viewing Mode
Selecting the Picture Viewing Mode You can select the picture viewing mode that best suits the type of video source or room conditions. You can save and use different preset modes for 2D/3D respectively. Press one of the CALIBRATED PRESET buttons. CALIBRATED PRESET buttons Setting items... -
Page 26: Adjusting The Picture Quality
Adjusting the Picture Quality You can easily adjust the picture quality that suits your taste by selecting the adjustment items with the remote control. The adjusted data can be stored in each calibrated preset mode. Selecting to Directly Adjust the Desired Menu Item The following menu items can be adjusted by using the buttons on MOTION... -
Page 27: Adjusting The Picture Using Real Color Processing
Adjusting the Picture Using Real Color Processing The Real Color Processing (RCP) feature allows you to adjust the color, hue, and brightness of each target of the projected picture you specify independently. You can thus obtain a picture more suitable to your taste. Freeze the scene of the video source when you are adjusting the picture using Real Color Processing. - Page 28 After the adjustment is completed, press The RCP window disappears and the picture of step 2 returns. There are some limitations on selection of position and range. Press RCP.
-
Page 29: Using The Menus
Using the Menus This section describes how to make various adjustments and settings using the menus. Note The menu displays used for the explanation may be different from the actual menu display. Press M/m to select a menu item, Operation through and press , or the Menus The projector is equipped with an on-screen... - Page 30 Make the setting or adjustment of Pop-up menu an item. Setting items When changing the adjustment level To increase the value, press M/,. To decrease the value, press m/<. Press to store the setting and restore the original menu screen. When changing the setting Press M/m to change the setting.
- Page 31 To reset the items that have been adjusted Select an item in the Menu screen, and display the pop-up menu, the setting menu, and the adjustment menu. Press RESET on the remote control to reset only the selected settings to its factory preset value.
-
Page 32: Picture Menu
Picture Menu The Picture menu is used for adjusting the picture. Note These items may not be available, depending on the type of input signal. For details, see “Input Signals and Adjustable/Setting Items” (1 page 66). Item names in brackets represent those printed on the remote control. Calib. - Page 33 Reality Creation Adjusts the detail and noise processing of images. (Super-resolution [REALITY CREATION] function) On: Applies detail and noise processing effects. Resolution: When you increase the setting value, the texture and detail of the picture become sharper. Noise Filtering: When you increase the setting value, the noise (picture roughness) becomes less prominent.
- Page 34 Adjusts the color tone. The higher the setting, the more greenish the picture becomes. The lower the setting, the more reddish the picture becomes. Color Temp. Adjusts the color temperature. [COLOR TEMP] D93: Equivalent to 9,300 K color temperature normally used in TVs. Gives white colors a blue tint.
- Page 35 Expert Setting Gamma Correction [GAMMA CORRECTION] Adjusts the response characteristics of the tone of the picture. Select a favorite tone from 6 options. 2.0: Bright Produces a brighter picture overall. 2.4: Dark Produces a darker picture overall. Gamma 8: Increases the sharpness in images. Select this when you watch in a bright environment, such as a living room.
-
Page 36: Advanced Picture Menu
Advanced Picture Menu The Advanced Picture is used for adjusting the picture more. RCP (Real Color You can adjust the color, hue, and brightness of each selected Processing) portion of the picture independently. User 1: You can adjust the picture using Real Color Processing and store the settings. -
Page 37: Screen Menu
Screen Menu The Screen menu is used to adjust the input signal. You can adjust the size of the picture, and select aspect mode, etc. Note These items may not be available, depending on the type of input signal. For details, see “Input Signals and Adjustable/Setting Items”... - Page 38 Over Scan Hides the edges of the picture. On: The edges of the input picture are not displayed. Select this setting when noise appears along the edge of the picture. Off: Projects the whole of the input picture. To display the displayable region within the four directions of the screen, refer to “Blanking”...
-
Page 39: Setup Menu
Setup Menu The Setup menu is used to change the factory preset settings, etc. Status Sets whether or not the on-screen display is displayed. Set to “Off” to turn off the on-screen displays except for certain menus, message when turning off the power, and warning messages. Language Selects the language used in the menu and on-screen displays. - Page 40 Power Saving Sets the power saving mode. Lamp Cutoff: The lamp turns off automatically and power consumption is reduced if no signal is input for 10 minutes. If signal is resumed, or any button on the control panel or remote control is pressed, the lamp will light again.
-
Page 41: Function Menu
Function Menu The Function menu is used for changing the settings of the various functions of the projector. The 3D Settings menu can be displayed by pressing the 3D button on the remote control. 3D Settings You can change the settings of the 3D function. 2D-3D Display Sel.: For Switching the video images to “2D”... - Page 42 • The operation of the projector and the connected Control for HDMI compatible equipment will synchronize with each other. • The Control for HDMI setting of Sony equipment (AV amplifier, video, etc.), which is compatible with “Control for HDMI - Easy Setting”*, will also be effective.
- Page 43 Device List: Lists all the Control for HDMI compatible equipment connected to the projector. When “Enable” is selected, the Control for HDMI setting of Sony equipment (AV amplifier, video, etc.), which is compatible with “Control for HDMI - Easy Setting”, will also be effective.
-
Page 44: Items Locked By Settings Lock
Items Locked by Settings Lock Level A, B Level B Picture menu Setup menu • Reset • Status • Reality Creation • Language • Lamp Control • Menu Position • Film Projection • Cooling Setting • Motion Enhancer • Standby Mode •... -
Page 45: Installation Menu
Installation Menu The Installation menu is used for changing the installation settings. V Keystone Corrects the vertical trapezoidal distortion of the picture. When the bottom of the trapezoid is longer than the top ( Sets a lower value (– direction). When the top of the trapezoid is longer than the bottom ( Sets a higher value (+ direction). - Page 46 Panel Alignment This feature allows you to adjust the gaps in the color of characters or the picture. When set to “On”, the “Adjust Color” and the “Pattern Color” can be assigned and adjusted. Adjust Item: Selects how to make adjustments from below. Shift: Shifts the whole picture and makes adjustments.
-
Page 47: Information Menu
Model name: VPL-HW40ES Serial No. Memory No. Signal type Model name Displays the model name (VPL-HW40ES). Serial No. Displays the serial number. fH (horizontal frequency) Displays the horizontal frequency of the input signal. fV (vertical frequency) Displays the vertical frequency of the input signal. -
Page 48: About The Preset Memory No
About the Preset Memory No. This unit has default image data to adjust preset data for input signals appropriately according to the signals shown in “Preset Signals” (1 page 64) (the preset memory). When the preset signal is input, the projector automatically detects the signal type and recalls the data for the signal from the preset memory to adjust it to an optimum picture. -
Page 49: Others
Others This section describes about the other functions, how to solve the problems, how to replace the lamp and air filter, etc. connected to the projector. For settings of About the Control for the projector, see page 42. For settings of the Control for HDMI compatible equipment HDMI connected to the projector, refer to its... -
Page 50: About The X.v.color
Sony Corporation. • xvYCC is an international standard of the technical specifications of the extended- gamut color space for video signals. The... -
Page 51: Troubleshooting
Troubleshooting If the projector appears to be operating erratically, try to diagnose and correct the problem using the following instructions. If the problem persists, consult with qualified Sony personnel. Power Symptom Cause and Remedy c The power may not turn on if you turn the power off with I/1 The power is not turned on. - Page 52 The display mode of the projector may be set at the time of The model name does not disappear from the screen. purchase. Consult with your local dealer or qualified Sony Or else, the demo mode is personnel. displayed continuously.
- Page 53 3D video images Symptom Cause and Remedy c Check if the 3D glasses are turned on. The video image does not c Make sure that the battery in the 3D glasses is charged. seem like 3D video images. c Check if the input source is HDMI. c Set “2D-3D Display Sel.”...
-
Page 54: Warning Indicators
The lamp has reached a high temperature. Wait until the lamp flashes) cools, and then turn on the power again. c The fan is broken. Consult with qualified Sony personnel. ON/STANDBY flashes in red. (A repetition rate of 4 flashes) c The internal temperature is unusually high. -
Page 55: Message Lists
Message Lists Warning messages Message Cause and Remedy c Turn off the power. High temp.! Lamp off in 1 min. c Check to ensure that nothing is blocking the ventilation holes. c Frequency is out of range. Input a signal that is within the Frequency is out of range! acceptable frequency range of the projector. -
Page 56: Caution Messages
Caution messages Message Cause and Remedy c No signal is input in the selected input. Check connections. (1 page 13) c Press the appropriate button. Not applicable! c The operation to be activated by the button is currently prohibited. c “Settings Lock” is set to “Level A” or “Level B.” (1 page 43) Settings Lock enabled. -
Page 57: Replacing The Lamp And The Air Filter And Cleaning The Ventilation Holes (Intake)
message for replacing the air filter appears, Replacing the Lamp replace the air filter immediately. and the Air Filter and Turn off the projector and unplug the AC power cord. Cleaning the When setting the projector on a Ventilation Holes flat surface such as a desk etc., put a cloth to prevent the surface (intake) - Page 58 Loosen the screw on the lamp Hold the handle of the new lamp cover with a Philips screwdriver, and push it in securely until it and then open the lamp cover. reaches the end, and then tighten the 3 screws. Loosen the 3 screws on the lamp with the Phillips screwdriver.
- Page 59 Remove the filter holder. Wipe dust off the ventilation holes (intake) with a soft cloth. Ventilation holes (intake) Remove the air filter. Place the project back on its original position. Turn on the projector, then select the desired setting item on the Setup menu.
-
Page 60: Cleaning The Air Filter
Notes Cleaning the Air • Be sure to use an LMP-H202 Projector Lamp for replacement. If you use lamps other than Filter the LMP-H202, the projector may malfunction. • Be sure to turn off the projector and unplug When “Please clean the filter.” appears on the power cord before replacing the lamp, the screen, you should clean the air filter. -
Page 61: Cleaning
Cleaning Cleaning the lens The lens surface is especially treated to reduce reflection of light. As incorrect maintenance may impair the performance of the projector, take care with respect to the following: • Wipe the lens gently with a soft cloth such as a cleaning cloth or glass cleaning cloth. -
Page 62: Specifications
Specifications Item Description Display system SXRD panel, 1 lens, projection system Display device Size of effective 0.61-inch (15.4 mm) SXRD panel display area 6,220,800 pixels (2,073,600 pixels × 3) Number of pixels Projection lens 1.6 times zoom lens (manual) f=18.7 mm to 29.7 mm F2.52 to F3.02 Light source Ultra High Pressure Lamp 200 W type... - Page 63 • The values for mass and dimensions are approximate. • Not all optional accessories are available in all countries and area. Please check with your local Sony Authorized Dealer. • Information on accessories in this manual is current as of February 2014.
-
Page 64: Preset Signals
Preset Signals The following table shows the signals and video formats which you can project using this unit. When a signal other than the preset signal shown below is input, the picture may not be displayed properly. Preset Preset signal Sync Pitch memory no. - Page 65 Preset Preset signal Sync Pitch memory no. (resolution) (kHz) (Hz) Size) 640 × 480 VESA 60 31.469 59.940 H-neg, V-neg VESA 72 37.861 72.809 H-neg, V-neg VESA 75 37.500 75.000 H-neg, V-neg (IBM M3) VESA 85 43.269 85.008 H-neg, V-neg (IBM M4) 800 ×...
-
Page 66: Input Signals And Adjustable/Setting Items
Input Signals and Adjustable/Setting Items The items in the menus available to adjust differ depending on the input signal. The following tables indicate them. The items that cannot be adjusted are not displayed in the menu. Picture menu Item Input signal Component signal Video GBR signal Computer signal... - Page 67 Screen menu Item Input signal Component signal Video GBR signal Computer signal Aspect Over Scan – Screen Area * – (preset memory (preset memory numbers 7, 8, 12, 13, numbers 7, 8, 12, 13, 14 only) 14 only) V Center * –...
-
Page 68: Compatible 3D Signals
Compatible 3D Signals The projector accepts the following types of 3D signals. Resolution 3D signal format 720/60, 50P Side-by-Side format 1080/24P Over-Under format* Frame packing* 1080/60, 50i Side-by-Side format* 1080/60, 50P Side-by-Side format Over-Under format *: Mandatory 3D format of the HDMI standards. 3D Signals and Adjustable/Setting Items Some items on the menus may not be available to adjust/set, depending on the 3D signals. - Page 69 Item 3D format Over-Under Side-by-Side Simulated 3D Lamp Control – – – Film Projection – – – Motion Enhancer (preset memory (preset memory number 14 only) number 14 only) – – MPEG NR Film Mode – – – x.v.Color (preset memory (preset memory number 14 only) number 14 only)
-
Page 70: Aspect Mode
Aspect Mode Selectable items vary depending on the type of input signal or 3D format. For details, see the tables below. Items that cannot be selected are not displayed in the menu. Acceptable signals 1920 × 1080 720 × 480 1280 ×... -
Page 71: Storage Conditions Of Adjustable/Setting Items
Storage Conditions of Adjustable/Setting Items Each adjustable/setting item is individually stored for each input connector, image display (2D/3D), or preset signal. For further details, see the tables below. Preset memory numbers for each input signal Input Preset memory numbers Input-A 26, 28 to 35, 37 to 39, 55, 56 Component 3 to 8, 10, 11... - Page 72 Item Storage conditions Sharpness For each input connector, image display (2D/3D) and Calib. Preset MPEG NR Film Mode Contrast Enhancer Gamma Correction x.v.Color Color Space Advanced Picture menu Item Storage conditions RCP: Position For RCP User 1. RCP: Range RCP Color RCP Hue RCP Brightness Screen menu...
-
Page 73: Projection Distance And Lens Shift Range
Projection Distance and Lens Shift Range The projection distance refers to the distance between the front of the lens and the projected surface. Projection distance L Front of the lens Projected image The lens shift range represents the distance in percent (%) by which the lens can be shifted from the center of the projected image. - Page 74 When projecting in 1.78:1 (16:9) format 1.78 Video display area Projection area Projection distance Unit: m (inches) Projection image size Projection distance L Diagonal Width × Height 80" (2.03 m) 1.77 × 1.00 (70 × 39) 2.40 – 3.83 (95 – 150) 100"...
- Page 75 For details on installation on a ceiling, refer to the Installation manual for Dealers of the PSS-H10. Make sure to consult with a qualified Sony personnel for installation. The installation measurements are shown below when installing the projector on a ceiling using the PSS-H10.
-
Page 76: Front View
Front view 150 (6) 75 (3) Ceiling 175 (7) Center of the The bottom supporting pole surface of the mount bracket 93.5 (3 Center of the lens 203.7 (8 203.7 (8 407.4 (16 Side view 182.8 (7 130 (5 Center of the lens Front of the cabinet 227.8 (9) 236.1 (9... -
Page 77: Index
User ............. 32 Index Cinema Black Pro ........33 Color ............33 Color Space ..........35 Numerics Color Temp..........34 Connecting 3D Glasses 3D Sync Transmitter ......16 3D glasses communication range ..23 Computer ..........15 3D Settings Video equipment ......... 13 2D-3D Display Sel. - Page 78 Trademark Information Projection distance and lens shift • “PlayStation” is a registered trademark range ..........73 of Sony Computer Entertainment Inc. • The terms HDMI and HDMI High- Definition Multimedia Interface, and the RCP ............36 HDMI Logo are trademarks or registered Reality Creation ........
- Page 79 © 2014 Sony Corporation...