Miele S 558 Operating Instructions Manual
Hide thumbs
Also See for S 558:
- Operating instructions manual (48 pages) ,
- Technical information (65 pages) ,
- Operating instructions manual (48 pages)

Related Manuals for Miele S 558


Summary of Contents for Miele S 558
-
Page 1: Operating Instructions
Operating instructions Vacuum cleaner S 558 S 658 To prevent accidents and machine damage, read these instructions before installation and use. M.-Nr. 05 638 551... -
Page 3: Table Of Contents
Contents IMPORTANT SAFETY INSTRUCTIONS ....... . . 4 INSTRUCTIONS IMPORTANTES SUR LA SÉCURITÉ ..... 9 Guide to the vacuum cleaner . -
Page 4: Important Safety Instructions
IMPORTANT SAFETY INSTRUCTIONS When using an electrical appliance, basic precautions should always be followed, including the following: READ ALL INSTRUCTIONS BEFORE USING THIS APPLIANCE The manufacturer cannot be held responsible for any damage caused through non-observance of these Important Safety Instructions. WARNING- To reduce the the risk of electric To reduce the risk of fire, electric... -
Page 5: Child Safety
Keep hair, loose clothing, fingers chemical or biological particles. While and all parts of the body away from Miele’s HEPA filter is certified to retain openings and moving parts. micro-particles, once any biohazardous Turn off all controls before material is introduced into the vacuum, unplugging. - Page 6 Do not turn on or attempt to operate the vacuum cleaner unless a dustbag, dust compartment filter and exhaust filter are in place. Use only genuine Miele double-layer dustbags and filters (see "Maintenance" for instructions on how to insert the dustbag and filters.) If a dustbag has not been inserted, the dust compartment cover will not close.
- Page 7 To ensure efficient suction, driven accessory for use only with clean or replace them when necessary Miele vacuum cleaners. It must not be according to the operating instructions. used with vacuum cleaners produced To guarantee safety, only use genuine by other manufacturers.
- Page 8 Maintenance and care Disposal A damaged power cord must only When disposing of an old be replaced with a genuine Miele appliance, the power cord should cord by an authorized service agent. be removed. Unplug the vacuum. Cut the power cord off the appliance as...
-
Page 9: Instructions Importantes Sur La Sécurité
INSTRUCTIONS IMPORTANTES SUR LA SÉCURITÉ Lorsque vous utilisez un appareil électrique, vous devez toujours prendre des précautions essentielles, y compris ce qui suit. LISEZ TOUTES LES INSTRUCTIONS AVANT D’UTILISER CET APPAREIL. Le fabricant n’est pas responsable des dommages causés par le non-respect des présentes instructions. - Page 10 Danger de choc substance chimique ou biologique électrique! dangereuse. Le filtre HEPA de Miele Ne tirez pas sur le cordon retient les particules microscopiques, d’alimentation pour débrancher mais lorsqu’une substance nocive pour l’appareil.
- Page 11 N’utilisez que des sacs à N’utilisez pas les brosses à poussière doublés et des filtres Miele parquet, les accessoires et les (consultez la section « Entretien » pour tubes à hauteur de la tête pour éviter les instructions d’insertion du sac à...
-
Page 12: Utilisation Des Accessoires
INSTRUCTIONS IMPORTANTES SUR LA SÉCURITÉ Utilisation des accessoires Les sacs à poussière Miele sont jetables et sont conçus pour usage L’électrobrosse Miele est un unique. Ne les réutilisez pas. accessoire électrique utilisable uniquement avec les aspirateurs Miele. N’utilisez pas l’aspirateur sans Elle ne doit pas être utilisée avec des... - Page 13 INSTRUCTIONS IMPORTANTES SUR LA SÉCURITÉ Mise au rebut Nettoyez l’aspirateur seulement avec un tissu sec ou légèrement Avant de jeter un vieil aspirateur, humide lorsqu’il est débranché. Ne vous devez couper le cordon l’immergez jamais dans l’eau. d’alimentation. Débranchez l’aspirateur, Le tuyau d’aspiration et le tube coupez le cordon le plus près possible télescopique renferment des fils...
-
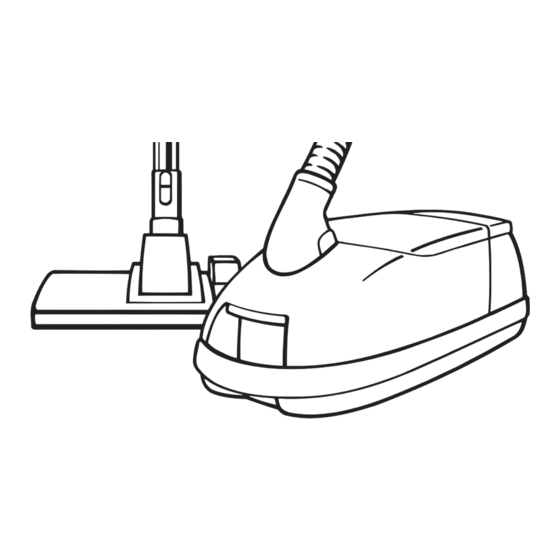
Page 14: Guide To The Vacuum Cleaner
Guide to the vacuum cleaner... - Page 15 Guide to the vacuum cleaner a Handpiece b Suction power selector c Electrobrush switch d Locking button e Telescopic wand release button f Telescopic wand g Dust compartment lid release h Dust compartment filter (motor protection) i Dust bag j Electrobrush k Carrying handle l Suction wand holder m Exhaust filter...
-
Page 16: Before Using For The First Time
Before using for the first time Attaching the suction hose ^ Open the dust compartment shutter. The dust compartment shutter is designed for clean handling and prevents dust and odors from escaping. If you remove the suction hose from the vacuum cleaner for storage purposes close the dust compartment shutter before putting it away. -
Page 17: Connecting The Suction Hose
Before using for the first time Connecting the suction hose and the suction wand ^ Fit the handpiece of the suction hose firmly into the suction wand. (Ensure that the plug connectors line up.) They must lock together with a click. ^ To release the handpiece from the suction wand press the locking button and pull apart (see arrow). -
Page 18: Using The Electrobrush
The Electrobrush can also be used on smooth flooring surfaces. The standard floor brush (optional accessory) or the Miele parquet floorbrush should be used to clean delicate hard flooring and floor surfaces susceptible to scratching. - Page 19 Before using for the first time Using the parquet floor brush Special brush with natural bristles for cleaning parquet and laminate floors, floorboards and flooring susceptible to scratching (e.g. with a high shine). Regard primarily the Cleaning and Care instructions of the floor covering manufacturer.
-
Page 20: Included Accessories
Included accessories Other tools, in addition to the floor brush(es), are supplied with the vacuum cleaner to help with various types of cleaning. a Crevice nozzle b Crevice nozzle extension * c Dusting brush with natural bristles d Upholstery brush e Filter grill (supplied seperately in the box) f Blower connection socket,... - Page 21 Included accessories Taking the accessories out ^ Press the release button to open the accessory compartment lid. ^ Take out the accessory needed. ^ Close the lid securely. Crevice nozzle extension (only for the S 658) The crevice nozzle extension is located in the compartment underneath the crevice nozzle.
-
Page 22: Using The Included Accessories
Using the included accessories The different tools can either be fitted to the handpiece or to the suction wand. Crevice nozzle For cleaning in folds, crevices and corners. Crevice nozzle extension (only with model S 658) This accessory can be used to extend the length of the crevice nozzle. -
Page 23: Dusting Brush
Using the included accessories Dusting brush For cleaning moldings, ornate or carved articles, etc. The head of the dusting brush can be swivelled to attain the best cleaning position. Upholstery nozzle For cleaning upholstery, mattresses, cushions, curtains, covers etc. -
Page 24: Operation
Unwinding ^ Hold the plug and pull out the power cord to the required length: S 558: maximum 24 ft. (7.5 m) S 658: maximum 31 ft. (9.5 m) If the vacuum cleaner is operated more than 30 minutes the power cord must be unwind at least two thirds of the way. -
Page 25: Turning The Vacuum On And Off
Operation Turning the vacuum on and off To turn the vacuum cleaner on: ^ Press the On-Off switch. The Stand-by indicator light comes on to show that the vacuum cleaner is ready for use. While vacuuming The vacuum cleaner can also stand on its end for vacuuming stairs, drapes etc. -
Page 26: Adjusting The Suction
Operation Adjusting the suction ^ Turn the vacuum cleaner on. Use the p and m on the handpiece to adjust the suction to suit the type of flooring. Setting 9 = no suction Low setting = weak suction High setting = strong suction The floor brush will require less effort to maneuver when the suction power is reduced. -
Page 27: Turning The Electrobrush On And Off
Operation Turning the Electrobrush on and off The Electrobrush is turned on and off seperately from the vacuum cleaner by pressing the j switch on the handpiece. This means that you can turn the Electrobrush off during vacuuming and the vacuum cleaner will continue to operate using suction only. -
Page 28: Blower Connection Socket
Operation Blower connection socket The blower connection socket can be used to connect the suction hose to the "blower" outlet of the vacuum cleaner, e.g. for dusting multi-layered radiators. It can also be used to "blow out" the suction hose if it should ever become blocked. -
Page 29: Setting Down, Transport And Storage
Setting down, transport and storage Park-System A Park-System has been designed for conveniently parking the vacuum cleaner during pauses and for carrying as well as for storage. A special parking attachment is fitted to all floor brushes, except the Electrobrush SEB 236 which can stand by itself. -
Page 30: Maintenance And Care
Replacement dustbags and filters can any maintenance work. be obtained from your local Miele Dealer. The Miele filter system consists of three filters which must be replaced from time Order original Miele dustbags with the to time to ensure efficient suction. -
Page 31: When To Change The Dustbag
When to change the dustbag Change the dustbag when the colored marker in the dustbag change indicator fills the display. Miele dust bags are disposable and intended to be used only once. Do not attempt to reuse. Checking the dustbag change... -
Page 32: Replacing The Dustbag
Maintenance and care Replacing the dustbag ^ Open the dust compartment lid. The dustbag has a flap which closes automatically when the dustbag is removed to prevent any dust from escaping. ^ Grasp the collar by the two finger holes and pull it out from the dustbag holder. -
Page 33: Replacing The Exhaust Filter
Maintenance and care Replacing the exhaust filter Always change the ACTIVE HEPA filter when the filter change indicator (Reset button 7) lights up. It is designed to light up after approximately 50 hours of operation which is about a year of average use. -
Page 34: Replacing The "Active Hepa" Filter
Maintenance and care Replacing the "ACTIVE HEPA" filter ^ Open the dust compartment lid. ^ Release the catch and remove the filter. ^ To insert the new filter, fit it so that it engages at the back, then close the catch. -
Page 35: Replacing One Type Of Filter With Another
The SUPER air clean filter should be replaced every time you start a new box of dustbags. (A SUPER air clean filter is supplied with every box of Miele dustbags). Pressing on the filter change indicator light will reset it. -
Page 36: When To Change The Dust Compartment Filter (Motor Protection)
Replace the dust compartment filter every time you start a new box of dustbags. A dust compartment filter is supplied with each box of Miele dustbags. Replacing the dust compartment filter ^ Open the dust compartment lid. ^ Open the filter frame, remove the old filter and replace with a new one. -
Page 37: Cleaning And Care
Cleaning and care Turn off the vacuum and unplug it from the outlet when not in use and before service. Vacuum cleaner and accessories The suction hose, the telescopic wand and the electrobrush contain electrical wires and pomponents. The plug connectors must not come in contact with water. -
Page 38: Problem Solving Guide
Problem solving guide If the vacuum cleaner switches itself off automatically and the overheating indicator , lights up: A temperature limiter switches the the vacuum cleaner off automatically if it gets too hot. The warning light , will then come on to indicate "Warning - Overheating". -
Page 39: Technical Service
Technical Service In the event of a fault which you cannot correct, please contact the Miele Technical Service Department. 1-800-999-1360 techserv@mieleusa.com 1-800-565-6435 service@miele.ca... -
Page 40: Optional Accessories
Optional accessories Turbobrush STB 205 Recommended for cleaning and restoring crushed pile on low nap rugs or carpeting. The turbobrush is mechanically driven by the suction power of the vacuum. No electrical connection or electric hose is necessary. Observe the cleaning instructions of the floor manufacturer. - Page 41 Optional accessories Hard floor brush For cleaning smooth floors (e.g. stone, ceramic, vinyl). Standard floor brush The standard floor brush can be used for normal cleaning of carpets, rugs, and hard surfaces.
- Page 42 Optional accessories Radiator brush For cleaning radiators, narrow shelves or crevices. ^ Fit the radiator brush to the crevice nozzle. Universal brush For dusting books, shelves, etc.
- Page 43 Optional accessories Mattress tool For vacuuming mattresses and upholstery. Even deep crevices between mattresses can be vacuumed easily. Crevice tool 12" (300 mm) For cleaning in folds, crevices and corners.
- Page 44 Accessory carrying case consists of: – the Miele hand turbobrush – micro hose with Combi nozzle – crevice nozzle 12" (300 mm) – a 10 foot (3 m) long suction hose...
-
Page 45: Electrical Connection
Electrical connection ^ Connect the vacuum cleaner only to a 120 V, 60 Hz, 15 A outlet. -
Page 46: Caring For The Environment
Disposing of the dustbag and materials filters The cardboard box and packing Genuine Miele dustbags and filters are materials protect the appliance during made of environmentally friendly shipping. They have been designed to materials. They can be thrown out with be biodegradable and recyclable. - Page 48 Alteration rights reserved / 5003 M.-Nr. 05 638 551 / 01 This paper was bleached without the use of chlorine.