Table of Contents
Advertisement
Advertisement
Table of Contents

Related Manuals for HP DreamColor Z24X


Summary of Contents for HP DreamColor Z24X
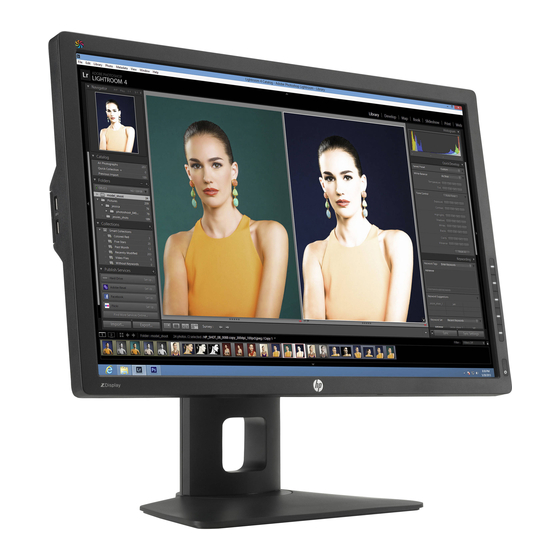
- Page 1 HP DreamColor Z24x Display User Guide...
- Page 2 © 2014 Hewlett-Packard Development Company, L.P. Microsoft and Windows are U.S. registered trademarks of Microsoft Corporation. The only warranties for HP products and services are set forth in the express warranty statements accompanying such products and services. Nothing herein should be construed as constituting an additional warranty.
-
Page 3: About This Guide
About This Guide This guide provides information on monitor features, setting up the monitor, and technical specifications. WARNING! Text set off in this manner indicates that failure to follow directions could result in bodily harm or loss of life. CAUTION: Text set off in this manner indicates that failure to follow directions could result in damage to equipment or loss of information. - Page 4 About This Guide...
-
Page 5: Table Of Contents
Front Panel Controls .......................... 13 Adjusting the Monitor .......................... 14 Turning on the Monitor ........................17 HP Watermark and Image Retention Policy ..................18 Connecting USB Devices ........................18 Removing the Monitor Stand ......................19 Mounting the Monitor .......................... 20 Mounting the Monitor Using the Quick Release 2 Mounting Bracket ........ - Page 6 Installing the .INF and .ICM Files ....................... 27 Installing from the Disc ...................... 27 Downloading from the Internet ................... 27 Using Picture-in-Picture (PIP) and Picture-beside-Picture (PBP) ............27 DisplayPort Multistreaming ......................... 28 Changing the Bezel Button Functions ....................29 Adjusting the Bezel Button LEDs ....................... 29 Using Auto-Sleep Mode ........................
- Page 7 Disposal of Waste Equipment by Users in Private Household in the European Union ..47 HP Recycling Program ...................... 47 Chemical Substances ......................47 Restriction of Hazardous Substances (RoHS) ..............47 Turkey EEE Regulation ..................... 48 Ukraine Restriction of Hazardous Substances ..............48...
- Page 8 viii...
-
Page 9: Product Features
● Removable stand for flexible monitor panel mounting solutions ● HP Quick Release 2 to quickly install the monitor on the stand with a simple click and remove it with the convenient sliding tab release ● Optional thin client mounting bracket that attaches to the rear of the stand (purchased... - Page 10 ● Easy access pull-out information card with the information needed when contacting HP support ● Video signal inputs to support DisplayPort digital (cable provided), DVI digital (cable provided), and HDMI digital (cable not provided) ● DisplayPort output connector for DisplayPort multistreaming ●...
-
Page 11: Safety And Maintenance Guidelines
Damage Replacement Policy so you can replace the equipment, if surge protection fails. Use the appropriate and correctly sized furniture designed to properly support your HP LCD monitor. WARNING! LCD monitors that are inappropriately situated on dressers, bookcases, shelves, desks, speakers, chests, or carts may fall over and cause personal injury. -
Page 12: Maintenance Guidelines
Do not open the monitor cabinet or attempt to service this product yourself. Adjust only those controls that are covered in the operating instructions. If the monitor is not operating properly or has been dropped or damaged, contact an authorized HP dealer, reseller, or service provider. ●... -
Page 13: Setting Up The Monitor
Setting Up the Monitor To set up the monitor, ensure that the power is turned off to the monitor, computer system, and other attached devices, then follow the instructions below. NOTE: Be sure the master power switch, located on the rear panel of the monitor, is in the off position. -
Page 14: Installing The Stand
If this occurs the screen will not recover to its normal condition. The display uses the HP Quick Release 2 for easy moving of the monitor. To mount the panel onto the stand: Lay the monitor panel face down on a flat surface covered by a clean, dry cloth. -
Page 15: Rear Components
HDMI Connects an HDMI cable to the monitor. DisplayPort OUT Connects a second monitor. Audio Out Connects headphones or optional HP Speaker Bar to the monitor. USB 3.0 Upstream Connects the USB hub cable to the monitor's USB hub Connector connector and to a host USB port/hub. -
Page 16: Connecting The Cables
Connecting the Cables Place the monitor in a convenient, well-ventilated location near the computer. Before connecting the cables, route the cables through the cable routing hole in the center of the stand. Chapter 3 Setting Up the Monitor... - Page 17 Depending on your configuration, connect either the DisplayPort, DVI, or HDMI video cable between the PC and the monitor. NOTE: The video mode is determined by the video cable used. The monitor will automatically determine which inputs have valid video signals. The inputs can be selected through the On- Screen Display (OSD) feature by pressing one of the five front bezel buttons to activate the buttons, and then press the bottom Open Menu button to open the OSD.
- Page 18 ● For DVI digital operation, connect the DVI-D signal cable to the DVI connector on the rear of the monitor and the other end to the DVI connector on the computer (cable provided). ● For HDMI digital operation, connect the HDMI signal cable to the HDMI connector on the rear of the monitor and the other end to the HDMI connector on the computer (cable not provided).
- Page 19 Connect one end of the provided USB cable to the USB hub connector on the rear panel of the computer, and the other end to the upstream USB connector on the monitor. NOTE: The monitor supports USB 3.0. For optimal performance, connect the USB cable to a USB 3.0 port on the computer, if available.
- Page 20 Connect one end of the power cord to the AC power connector on the back of the monitor, and the other end to an electrical wall outlet. NOTE: The master power switch on the rear of the monitor must be in the On position before pressing the power button on the front of the monitor.
-
Page 21: Front Panel Controls
Be sure the master power switch on the rear of the monitor is in the ON position to turn on the monitor. NOTE: To view an OSD menu simulator, visit the HP Customer Self Repair Services Media Library at http://www.hp.com/go/sml. NOTE: You can adjust the bezel button brightness and change the function of the buttons in the OSD. -
Page 22: Adjusting The Monitor
Adjusting the Monitor Tilt the monitor's panel forward or backward to set it to a comfortable eye level. Swivel the monitor to the left or right for the best viewing angle. Chapter 3 Setting Up the Monitor... - Page 23 Adjust the monitor’s height to a comfortable position for your individual workstation. The monitor’s top bezel edge should not exceed a height that is parallel to your eye height. A monitor that is positioned low and reclined may be more comfortable for users with corrective lenses. The monitor should be repositioned as you adjust your working posture throughout the work day.
- Page 24 NOTE: The monitor includes an auto-rotation sensor that automatically changes the displayed OSD from landscape to portrait when rotated. Use the operating system's display settings to rotate the image on the screen from portrait to landscape. Chapter 3 Setting Up the Monitor...
-
Page 25: Turning On The Monitor
Image retention is a condition that may occur on all LCD screens. Monitors with a “burned-in image” are not covered under the HP warranty. * A prolonged period of time is 12 consecutive hours of a static image. -
Page 26: Hp Watermark And Image Retention Policy
Monitors in use for 24 hours per day that result in image retention damage are not covered under the HP warranty. To avoid image retention damage, always turn off the monitor when it is not in use or use the power management setting, if supported on your system, to turn off the display when the system is idle. -
Page 27: Removing The Monitor Stand
Disconnect and remove the signal, power, and USB cables from the monitor. Lay the monitor face down on a flat surface covered by a clean, dry cloth. Press down on the latch near the bottom center of the monitor to unlock the HP Quick Release 2 (1). -
Page 28: Mounting The Monitor
The monitor panel can be attached to a wall, swing arm, or other mounting fixture. You can attach the monitor panel to a mounting fixture using the HP Quick Release 2 mounting bracket or you can attach the monitor panel to a mounting fixture without the HP Quick Release 2 mounting bracket. - Page 29 Remove the four screws from the mounting plate to separate the mounting plate from its cover. Remove the four screws from the VESA holes located on the rear of the monitor panel. Mounting the Monitor...
- Page 30 Install the mounting plate to the wall or swing arm of your choice using the four screws that were removed from the VESA holes on the rear of the monitor panel. Place the monitor panel on the mounting bracket you've installed by aligning its recess with the mounting bracket, then sliding it down over the top of the bracket and pressing it back into place against the bracket.
-
Page 31: Mounting The Monitor Without Using The Quick Release 2 Mounting Bracket
Mounting the Monitor Without Using the Quick Release 2 Mounting Bracket To mount the monitor panel directly to a mounting fixture without using the HP Quick Release 2 mounting bracket, use the four screws removed from the VESA holes on the rear of the monitor panel and install them to attach the mounting device to the rear of the monitor panel. -
Page 32: Locating The Serial Number And Product Number
Locating the Serial Number and Product Number The serial number and product number are located on a label on the rear panel of the display head. You may need these numbers when contacting HP about the monitor model. NOTE: You may need to partially pivot the display head to read the label. -
Page 33: Installing A Cable Lock
Installing a Cable Lock You can secure the monitor to a fixed object with an optional cable lock available from HP. Installing a Cable Lock... -
Page 34: Operating The Monitor
NOTE: If the monitor does not include a disc, the .INF and .ICM files can be downloaded from the HP monitors support Web site. See Downloading from the Internet on page 27 in this chapter. The Information File The .INF file defines monitor resources used by Microsoft Windows operating systems to ensure... -
Page 35: Installing The .Inf And .Icm Files
NOTE: You may need to install the digitally signed monitor .INF and .ICM files manually from the disc in the event of an installation error. Refer to the HP Monitor Software Information file on the disc. Downloading from the Internet To download the latest version of .INF and .ICM files from the HP monitors support Web site:... -
Page 36: Displayport Multistreaming
If you want to change the size of the PIP, select PIP Size in the OSD then select either Large or Small. If you want to adjust the position of the PIP, select PIP Position in the OSD, then select either Top Left, Top Right, Bottom Left, or Bottom Right. -
Page 37: Changing The Bezel Button Functions
Connect from the DisplayPort OUT of one monitor to the DisplayPort IN of the next, until you have the desired number of displays. If you want different information on each screen be sure that all upstream monitors are configured to DisplayPort 1.2 mode, as described above. -
Page 38: Using The On-Screen Display Menu
Upon entering this reduced power state sleep mode, the monitor screen is blanked, the backlight is turned off and the power LED indicator turns amber. The monitor draws less than 0.5W of power when in this reduced power mode. The monitor will wake from the sleep mode when the host PC sends an active signal to the monitor (for example, if you activate the mouse or keyboard). - Page 39 Level 1 Level 2 Level 3 Color Space sRGB AdobeRGB BT.709 User Native RGB Adjust Warm Neutral Cool Custom (RGB) Adjust Luminance Set Luminance Value Back Color Space Information Current Color Primaries (u'v' / xy) ● Red: x.xxx x.xxx ● Blue: x.xxx x.xxx ●...
- Page 40 Level 1 Level 2 Level 3 Video Input DisplayPort HDMI Auto-Switch Source Enable Disable Back Back Image Adjustment Aspect Ratio Display Fill to Source Aspect Ratio (Proportional) Fill to Entire Screen (Non-Proportional) Pixel-for-Pixel Back Sharpness Soft Level 2 Level 3 Level 4 Sharp Back...
- Page 41 Level 1 Level 2 Level 3 PIP Control PIP On/Off Picture-in-Picture Picture-beside-Picture Back PIP Size Large Small Back PIP Position Top Left Top Right Bottom Left Bottom Right Back PIP Input DisplayPort HDMI Back Primary / PIP Source Information Back Language Deutsch Traditional Chinese...
- Page 42 Level 1 Level 2 Level 3 Management Auto-Sleep Mode Enable Disable Back Power On Recall Enable Disable Back DDC/CI Communications Enable Disable Back Auto EDID Update Enable Disable Back Hot Plug Initiate Enable Disable Back DisplayPort Compatibility DisplayPort 1.1 Compatibility Mode DisplayPort 1.2 Back Back...
- Page 43 Level 1 Level 2 Level 3 Menu and Message Control Position Use the buttons to adjust the position of the Menu. Press "Back" when you are finished. Opacity Set Opacity Value Back Timeout Set Timeout Value Back Configure Function Buttons Configure Function Button 1 Configure Function Button 2 Configure Function Button 3...
-
Page 44: Color Management
Most color spaces are pre-calibrated at the factory and can be recalibrated by the end user when the HP DreamColor Calibration Solution kit is used (sold separately). Calibration includes control of the monitor’s color gamut, RGB primaries, gamma, and luminance. The RGB Adjust color selections are not calibrated and cannot be calibrated. -
Page 45: Auto Edid Update
calibration software is a Windows-based application that requires use of the Windows 7 or later operating system. The calibration process uses the following steps: Insert the monitor documentation disc into the host computer’s CD/DVD player. Install the user calibration program on the host computer. Place the colorimeter from the DreamColor Calibration Solutions kit in front of the monitor panel as directed. -
Page 46: Appendix A Technical Specifications
Technical Specifications NOTE: All specifications represent the typical specifications provided by HP's component manufacturers; actual performance may vary either higher or lower. Z24x Model Display 61.0 cm wide screen 24 inches wide screen Type IPS LCD Viewable Image Size 61.0 cm diagonal 24–inch diagonal... -
Page 47: Recognizing Preset Display Resolutions
Recognizing Preset Display Resolutions The display resolutions listed below are the most commonly used modes and are set as factory defaults. This monitor automatically recognizes these preset modes and they will appear properly sized and centered on the screen. Preset Pixel Format Aspect Ratio Vert Freq (Hz) -
Page 48: Appendix B Support And Troubleshooting
Support and Troubleshooting Solving Common Problems The following table lists possible problems, the possible cause of each problem, and the recommended solutions. Problem Possible Cause Solution Screen is blank or video is Power cord is disconnected. Connect the power cord. flashing. -
Page 49: Product Support
Incorrect setup or equipment Redo calibration. failure. Product Support For additional information on using your all-in-one, go to http://www.hp.com/support. Select your country or region, select Troubleshooting, and then enter your model in the search window and click the Go button. NOTE: The monitor user guide, reference material, and drivers are available at http://www.hp.com/... - Page 50 ● Purchase date on invoice ● Conditions under which the problem occurred ● Error messages received ● Hardware configuration ● Name and version of the hardware and software you are using Appendix B Support and Troubleshooting...
-
Page 51: Appendix C Agency Regulatory Notices
Agency Regulatory Notices Federal Communications Commission Notice This equipment has been tested and found to comply with the limits for a Class B digital device, pursuant to Part 15 of the FCC Rules. These limits are designed to provide reasonable protection against harmful interference in a residential installation. -
Page 52: Canadian Notice
Hewlett Packard Company P. O. Box 692000, Mail Stop 530113 Houston, Texas 77269-2000 Or, call 1-800-HP-INVENT (1-800 474-6836) For questions regarding this FCC declaration, contact: Hewlett Packard Company P. O. Box 692000, Mail Stop 510101 Houston, Texas 77269-2000 Or, call (281) 514-3333 To identify this product, refer to the Part, Series, or Model number found on the product. -
Page 53: German Ergonomics Notice
0.75 mm² or 18 AWG, and the length of the cord must be between 6 feet (1.8 m) and 12 feet (3.6 m). If you have questions about the type of power cord to use, contact an authorized HP service provider. -
Page 54: Product Environmental Notices
STAR® Power Management Web site at http://www.energystar.gov/powermanagement. Materials Disposal Some HP LCD monitors contain mercury in the fluorescent lamps that might require special handling at end-of-life. Disposal of this material can be regulated because of environmental considerations. For disposal or recycling information, contact the local authorities or the Electronic Industries Alliance (EIA) http://www.eiae.org. -
Page 55: Disposal Of Waste Equipment By Users In Private Household In The European Union
Chemical Substances HP is committed to providing our customers with information about the chemical substances in our products as needed to comply with legal requirements such as REACH (Regulation EC No 1907/2006 of the European Parliament and Council). A chemical information report for this product can be found at http://www.hp.com/go/reach. -
Page 56: Turkey Eee Regulation
11363-2006 11363-2006 Turkey EEE Regulation In Conformity with the EEE Regulation EEE Yönetmeliğine Uygundur Ukraine Restriction of Hazardous Substances The equipment complies with requirements of the Technical Regulation, approved by the Resolution of Cabinet of Ministry of Ukraine as of December 3, 2008 No. 1057, in terms of restrictions for the use of certain dangerous substances in electrical and electronic equipment. -
Page 57: Appendix D Lcd Monitor Quality And Pixel Policy
This is common to all LCD displays used in products supplied by all vendors and is not specific to the HP LCD. These imperfections are caused by one or more defective pixels or sub-pixels.