Table of Contents
Advertisement
SLV-SE85/SF90/SF99
RMT-V259D/V259E/V259F/V259G/V259H/V259J/V260/V260A/V260B
SERVICE MANUAL
j
G
MICROFILM
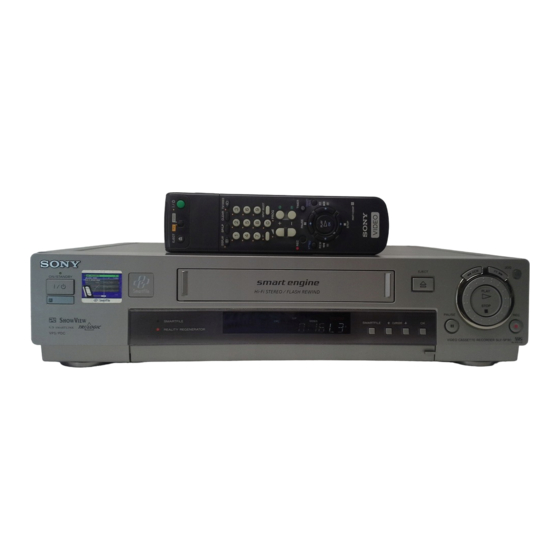
Photo: SLV-SF90
RMT-V259F
Refer to the SERVICE MANUAL of VHS MECHANICAL
ADJUSTMENT
(9-921-647-13).
SPECIFICATIONS
VIDEO CASSETTE RECORDER
UK Model
SLV-SE85UX/SF90UX(SF)/
SF90UX(WF)/SF99UX
French Model
SLV-SE85B/SF90B(SF)/
SF90B(WF)/SF99B
German Model
SLV-SE85VC/SF90VC(SF)/
SF90VC(WF)/SF99VC
Spanish Model
SLV-SE85NP/SF90NP(SF)/
SF90NP(WF)/SF99NP
E Model
SLV-SF99EN
Irish Model
SLV-SF90EX
SR MECHANISM
for MECHANICAL ADJUSTMENTS
Advertisement
Table of Contents

Related Manuals for Sony SLV-SE85


Summary of Contents for Sony SLV-SE85
- Page 1 SLV-SE85/SF90/SF99 RMT-V259D/V259E/V259F/V259G/V259H/V259J/V260/V260A/V260B UK Model SERVICE MANUAL SLV-SE85UX/SF90UX(SF)/ SF90UX(WF)/SF99UX French Model SLV-SE85B/SF90B(SF)/ SF90B(WF)/SF99B German Model SLV-SE85VC/SF90VC(SF)/ SF90VC(WF)/SF99VC Spanish Model SLV-SE85NP/SF90NP(SF)/ SF90NP(WF)/SF99NP E Model SLV-SF99EN Irish Model Photo: SLV-SF90 RMT-V259F SLV-SF90EX SR MECHANISM Refer to the SERVICE MANUAL of VHS MECHANICAL ADJUSTMENT for MECHANICAL ADJUSTMENTS (9-921-647-13).
- Page 2 CRITIQUES POUR LA SÉCURITÉ DE FONCTIONNEMENT. NE COMPONENTS WITH SONY PARTS WHOSE PART NUMBERS REMPLACER CES COMPOSANTS QUE PAR DES PIÈSES SONY APPEAR AS SHOWN IN THIS MANUAL OR IN SUPPLEMENTS DONT LES NUMÉROS SONT DONNÉS DANS CE MANUEL OU PUBLISHED BY SONY.
-
Page 3: Table Of Contents
TABLE OF CONTENTS SERVICE MODE PRINTED WIRING BOARDS AND SCHEMATIC DIAGRAMS ERROR CODE INDICATION ··········································· 5 4-1. FRAME SCHEMATIC DIAGRAM ································ 4-3 GENERAL 4-2. PRINTED WIRING BOARDS AND SCHEMATIC Getting Started DIAGRAMS ···································································· 4-5 Step 1 Unpacking ··································································· 1-1 • MA-359 (Y/C PROCESS)(1/7) Step 2 Setting Up the remote commander ·····························... -
Page 4: Repair Parts List
5-3. SYSTEM CONTROL — MECHANISM INTERFACE (MA-359 BOARD IC160) ··············································· 5-2 5-4. SYSTEM CONTROL — SYSTEM CONTROL PERIPHERAL CIRCUIT INTERFACE (MA-359 BOARD IC160) ························ 5-2 5-5. SYSTEM CONTROL — AUDIO BLOCK INTERFACE (MA-359 BOARD IC160) ··············································· 5-2 5-6. SERVO/SYSTEM CONTROL MICROPROCESSOR PIN FUNCTIONS (MA-359 BOARD IC160) ················... -
Page 5: Service Mode
SERVICE NOTE 1. ERROR CODE INDICATION • EMERGENCY CODE and ENCODER DATA and FUNCTION MODE will display to the fluorescent display tube in MECHA emergency mode. FUNCTION MODE (Hexadecimal) MECHA ENCODER (Decimal) EMERGENCY CODE (Decimal) EMERGENCY CODE Code Emergency contents No emergency Loading direction cam encoder emergency Unloading direction cam encoder emergency... - Page 6 FUNCTION MODE Code Code Code Code Function mode Function mode (*1) (*2) (*1) (*2) Initial REW HIGH PB Emergency Emergency power off REC PAUSE EJECT TIMER REC EJECT DEW TIMER REC PAUSE EJECT power off ULDEND VA INSERT STOP DEW VA INSERT PAUSE ULDEND power off V INSERT...
-
Page 7: General
SLV-SE85/SF90/SF99 SECTION 1 This section is extracted from instruction GENERAL manual. (SLV-SF99 model) - Page 16 1-10...
- Page 17 1-11...
- Page 18 1-12...
- Page 19 1-13...
- Page 20 1-14...
- Page 21 1-15...
- Page 22 1-16...
- Page 23 1-17...
- Page 24 1-18...
- Page 25 1-19...
- Page 26 1-20...
- Page 27 1-21...
- Page 28 1-22...
- Page 29 1-23...
- Page 30 1-24...
- Page 31 1-25...
- Page 32 1-26...
- Page 33 1-27...
- Page 34 1-28...
- Page 35 1-29E...
-
Page 36: Disassembly
SLV-SE85/SF90/SF99 SECTION 2 DISASSEMBLY NOTE: Follow the disassembly procedure in the numerical order given. 2-1. CASE, FRONT PANEL BLOCK ASSEMBLY 1 Two screws (case) ML-17 board Case 4 Screw (B2.6 × 8) 1 Two screws (case) 3 Connector (From CN901 on ML-17 board) -
Page 37: Rear Panel
2-3. REAR PANEL 2 Release cable stopper from rear panel 3 Hooks 1 Connector (From CN101 on POWER BLOCK) 3 Hooks 4 Rear panel 2-4. NR-27, RP-235 BOARDS 5 Two screws (B3) 4 Connector 6 RP-235 board (From CN301 on RP-235 board) 4 Flat cable 4 Connector (From CN260 on RP-235 board) -
Page 38: Sr Mechanism Deck
2-5. SR MECHANISM DECK 2 Screw (B3) 1 Two screws (BVTP 3 × 12) ML holder 4 SR mechanism deck 2-6. POWER BLOCK, MA-359 BOARDS 4 Three screws (B3) 1 Two connector From CN201, CN202 on Power block 5 MA-359 board 2 Two screws (B3) 3 Power block... -
Page 39: Internal Views
2-7. INTERNAL VIEWS — Top View — M901 Drum Assembly DZH-86A-R: 1-759-373-22 (SE85:NP,VC,UX/SF90:NP,VC,UX,EX/SF99:UX,EN,NP,VC) DZH-98A-R: 1-759-557-22 (SE85:B/SF90:B/SF99:B) ACE head block assembly A-6775-052-A Pinch press block assembly FE head A-6759-615-A 1-500-144-11 FL complete assembly A-6759-619-B Reel (S) table Reel (T) table 3-977-508-01 3-977-507-01 —... -
Page 40: Circuit Boards Location
2-8. CIRCUIT BOARDS LOCATION MA-359 Y/C PROCESS, ARC, AFC, VPS/PDC, SERVO/SYSTEM CONTROL, IN/OUT SELECT, TUNER, AUDIO PROCESS, RP-235 DC/DC CONVERTER (REC/PB HEAD AMP) ML-17 (SF90/SF99) (SMART FILE) NR-27 (SF99:UX,EN,NP,VC) (DNR, Y/C SELECT) SE-90 (SE85:B/SF90:B/SF99:B) AT-26 (SF90/SF99) (SECAM PROCESS) FRONT SMART FILE SENSOR JK-171 (LINE 2 IN) -
Page 41: Block Diagrams
SLV-SE85/SF90/SF99 XX-XXX SECTION 3 BLOCK DIAGRAMS... -
Page 42: Overall Block Diagram (1)
SLV-SE85/SF90/SF99 3-1. OVERALL BLOCK DIAGRAM (1) -
Page 43: Overall Block Diagram (2)
SLV-SE85/SF90/SF99 OVERALL BLOCK DIAGRAM (2) -
Page 44: Video Block Diagram (1)
SLV-SE85/SF90/SF99 SLV-SE85/SF90/SF99 3-2. VIDEO BLOCK DIAGRAM (1) IC260 5 REC/PB 3.6Vp-p IC260 7 PB 0.5Vp-p CN260 4 REC 3.6Vp-p 40msec IC260 9 REC 0.1µsec/div 470mVp-p IC260 !º REC 280mVp-p... -
Page 45: Video Block Diagram (2)
SLV-SE85/SF90/SF99 VIDEO BLOCK DIAGRAM (2) IC200 @¶ REC IC200 @¶ PB IC660 8 REC/PB IC661 2 REC/PB 1.3Vp-p 5.0Vp-p 2.4Vp-p 2.0Vp-p 17.73MHz IC200 #™,#§ REC IC001 4 REC IC001 @º PB 1.0Vp-p 2.3Vp-p 400mVp-p IC200 ^¡ REC IC200 ^£ REC... -
Page 46: Servo Block Diagram (1)
SLV-SE85/SF90/SF99 3-3. SERVO BLOCK DIAGRAM (1) IC420 8 4.5Vp-p 25µsec IC180 $™ 5.2Vp-p 20MHz IC180 %∞ 5.2Vp-p 32.768kHz 3-11 3-12... -
Page 47: Servo Block Diagram (2)
SLV-SE85/SF90/SF99 SERVO BLOCK DIAGRAM (2) IC160 $∞ REC/PB 5.0Vp-p 40msec IC160 1 REC/PB IC160 $§ REC/PB IC160 $™ REC/PB 5.0Vp-p 5.0Vp-p 40msec 4.0Vp-p 3.3msec 16MHz IC160 $¶ REC/PB 5.0Vp-p 1.3msec T REEL IC160 &¶ TAPE TOP PLAY SP MODE 4.6Vp-p 450msec IC160 @∞... -
Page 48: Memory Block Diagram
SLV-SE85/SF90/SF99 3-4. MEMORY BLOCK DIAGRAM CN900 3 260mVp-p 13.56MHz IC902 $• 4.5Vp-p 25µsec IC902 #™ CN901 3 IC901 !¢ 3.4Vp-p 16MHz 14Vp-p 5.4Vp-p 13.56MHz 13.56MHz IC950 !¢ 3.4Vp-p (18MHz) 3-15 3-16... -
Page 49: Audio Block Diagram
SLV-SE85/SF90/SF99 3-5. AUDIO BLOCK DIAGRAM IC360 #§ REC IC360 #¶ PB 650mVp-p 1µsec/div 80mVp-p 1µsec/div 3-17 3-18... - Page 50 SLV-SE85/SF90/SF99 3-6. POWER BLOCK DIAGRAM (1) 3-19 3-20...
-
Page 51: Power Block Diagram (1)
SLV-SE85/SF90/SF99 POWER BLOCK DIAGRAM (2) 3-21E... -
Page 52: Printed Wiring Boards And Schematic Diagrams
SLV-SE85/SF90/SF99 SECTION 4 PRINTED WIRING BOARDS AND SCHEMATIC DIAGRAMS THIS NOTE IS COMMON FOR PRINTED WIRING BOARDS AND SCHEMATIC DIAGRAMS. (In addition to this, the necessary note is printed in each block.) (For printed wiring boards) • b: Pattern from the side which enables seeing. -
Page 53: Frame Schematic Diagram
SLV-SE85/SF90/SF99 4-1. FRAME SCHEMATIC DIAGRAM FRAME SCHEMATIC DIAGRAM... - Page 54 SLV-SE85/SF90/SF99 For schematic diagram 4-2. PRINTED WIRING BOARDS AND SCHEMATIC DIAGRAMS • Refer to page 4-19 for printed wiring board. • Refer to page 4-21 for waveforms. Y/C PROCESS MA-359 (1/7)
-
Page 55: Arc, Afc, Vps/Pdc
SLV-SE85/SF90/SF99 For schematic diagram • Refer to page 4-19 for printed wiring board. • Refer to page 4-21 for waveforms. ARC, AFC, VPS/PDC MA-359 (2/7) -
Page 56: Servo/System Control
SLV-SE85/SF90/SF99 For schematic diagram • Refer to page 4-19 for printed wiring board. • Refer to page 4-22 for waveforms. SERVO/SYSTEM CONTROL 4-10 MA-359 (3/7) -
Page 57: In/Out Select
SLV-SE85/SF90/SF99 For schematic diagram • Refer to page 4-19 for printed wiring board. • Refer to page 4-22 for waveforms. IN/OUT SELECT 4-11 4-12 MA-359 (4/7) -
Page 58: Tuner
SLV-SE85/SF90/SF99 For schematic diagram • Refer to page 4-19 for printed wiring board. TUNER 4-13 4-14 MA-359 (5/7) -
Page 59: Audio Process
SLV-SE85/SF90/SF99 For schematic diagram • Refer to page 4-19 for printed wiring board. • Refer to page 4-22 for waveforms. AUDIO PROCESS 4-15 4-16 MA-359 (6/7) -
Page 60: Dc/Dc Converter
SLV-SE85/SF90/SF99 MA-359 Y/C PROCESS, ARC, AFC, VPS/PDC, SERVO/SYSTEM CONTROL, IN/OUT SELECT, TUNER, AUDIO PROCESS, RP-235 DC/DC CONVERTER (REC/PB HEAD AMP) ML-17 (SF90/SF99) (SMART FILE) NR-27 (SF99:UX,EN,NP,VC) (DNR, Y/C SELECT) SE-90 (SE85:B/SF90:B/SF99:B) AT-26 (SF90/SF99) (SECAM PROCESS) FRONT SMART FILE SENSOR JK-171... - Page 61 SLV-SE85/SF90/SF99 MA-359 (Y/C PROCESS, ARC, AFC, VPS/PDC, SERVO/SYSTEM CONTROL, IN/OUT SELECT, TUNER, AUDIO PROCESS, DC/DC CONVERTER) PRINTED WIRING BOARD — Ref. No. MA-359 Board; 1,000 Series — MA-359 BOARD CN101 G-7 Q100 D-10 CN102 E-2 Q101 CN104 A-4 Q102 CN164 A-12...
- Page 62 SLV-SE85/SF90/SF99 MA-359 BOARD (1/7) (2/7) (3/7) (4/7) (6/7) S REEL !¡ !£ !ª @§ @• @ª IC200 1 PB IC200 @∞ REC IC200 ^£ PB IC001 4 REC IC160 1 REC/PB IC500 7 REC LINE IN IC360 #§ REC IC160 &§...
- Page 63 SLV-SE85/SF90/SF99 SLV-SE85/SF90/SF99 RP-235 BOARD CN260 4 REC 3.6Vp-p 40msec IC260 5 REC/PB 3.6Vp-p IC260 7 PB 0.5Vp-p IC260 9 REC 0.1µsec/div 470mVp-p IC260 !º REC 280mVp-p IC340 1 5Vp-p 40msec T321 6, REC 46Vp-p 16µsec T331 6, REC 50Vp-p 15µsec...
-
Page 64: Servo/System Control, In/Out Select
SLV-SE85/SF90/SF99 RP-235 (REC/PB HEAD AMP) PRINTED WIRING BOARD — Ref. No. RP-235 Board; 3,000 Series — RP-235 BOARD CN260 B-5 CN261 C-4 CN301 C-1 CN302 B-1 CN341 C-6 CN342 A-2 CN343 A-5 CN970 A-1 IC260 IC301 IC340 IC970 Q270 Q271... - Page 65 SLV-SE85/SF90/SF99 For schematic diagram • Refer to page 4-23 for waveforms. REC/PB HEAD AMP 4-27 4-28 RP-235...
-
Page 66: Line 2 In
SLV-SE85/SF90/SF99 JK-171 (LINE 2 IN) PRINTED WIRING BOARD — Ref. No. JK-171 Board; 3,000 Series — For printed wiring boards There are few cases that the part printed on this diagram isn’t mounted in this model. MA-359 Y/C PROCESS, ARC, AFC, VPS/PDC,... -
Page 67: User Control
SLV-SE85/SF90/SF99 DM-86 (USER CONTROL) PRINTED WIRING BOARD — Ref. No. DM-86 Board; 3,000 Series — For printed wiring boards There are few cases that the part printed on this diagram isn’t mounted in this model. MA-359 Y/C PROCESS, ARC, AFC, VPS/PDC,... -
Page 68: Mode Control, Fl Drive) Printed Wiring Board
SLV-SE85/SF90/SF99 FR-161 (MODE CONTROL, FL DRIVE) PRINTED WIRING BOARD — Ref. No. FR-161 Board; 3,000 Series — FR-161 BOARD For printed wiring boards FR-161 BOARD CN400 B-13 REC/PB There are few cases that the part printed on this CN401 C-12 diagram isn’t mounted in this model. - Page 69 SLV-SE85/SF90/SF99 TIMER/TUNER CONTROL 4-35 4-36 FR-161...
-
Page 70: Secam Chroma Process) Printed Wiring Board
SLV-SE85/SF90/SF99 SLV-SE85/SF90/SF99 SE-90 (SECAM CHROMA PROCESS) PRINTED WIRING BOARD — Ref. No. SE-90 Board; 3,000 Series — For printed wiring boards There are few cases that the part printed on this diagram isn’t mounted in this model. MA-359 Y/C PROCESS, ARC, AFC, VPS/PDC,... - Page 71 SLV-SE85/SF90/SF99 SECAM CHROMA PROCESS 4-39 4-40 SE-90...
-
Page 72: Dnr, Y/C Select) Printed Wiring Board
SLV-SE85/SF90/SF99 NR-27 (DNR, Y/C SELECT) PRINTED WIRING BOARD — Ref. No. NR-27 Board; 2,000 Series — NR-27 BOARD NR-27 BOARD IC002 1 REC IC003 3 REC CN001 B-1 IC001 IC002 IC003 IC004 1.2Vp-p 2.0Vp-p Q001 Q002 Q003 IC002 1 PB... - Page 73 SLV-SE85/SF90/SF99 DNR, Y/C SELECT 4-43 4-44 NR-27...
-
Page 74: Srv879Ek (Power Supply) Printed Wiring Board
SLV-SE85/SF90/SF99 SRV879EK (POWER SUPPLY) PRINTED WIRING BOARD — Ref. No. SRV879EK Board; 4,000 Series — SRV879EK-A (SIDE B) For printed wiring boards SRV879EK-B (SIDE B) SRV879 SUB (SIDE B) There are few cases that the part printed on this diagram isn’t mounted in this model. -
Page 75: Power Block Srv879Ek
SLV-SE85/SF90/SF99 POWER BLOCK 4-47 4-48 SRV879EK... -
Page 76: Inner Smart File Sensor)
SLV-SE85/SF90/SF99 ML-17 (SMART FILE), AT-25 (INNER SMART FILE SENSOR), AT-26 (FRONT SMART FILE SENSOR) PRINTED WIRING BOARDS — Ref. No. ML-17, AT-25 and AT-26 Boards; 2,000 Series — ML-17 BOARD CN900 B-8 CN901 C-8 CN950 B-3 D900 D902 D903 D904... - Page 77 SLV-SE85/SF90/SF99 For schematic diagram • Refer to page 4-55 for waveforms. SMART FILE, INNER/FRONT SMART FILE SENSOR 4-51 ML-17 (1/2), AT-25, 26...
- Page 78 SLV-SE85/SF90/SF99 For schematic diagram • Refer to page 4-49 for printed wiring board. SMART FILE 4-53 4-54 ML-17 (2/2)
- Page 79 SLV-SE85/SF90/SF99 ML-17 BOARD (1/2) REC/PB (2/2) REC/PB IC901 !¢ IC902 #™ 5.4Vp-p 13.56MHz 3.4Vp-p 16MHz CN900 3 IC902 $• 4.5Vp-p 260mVp-p 13.56MHz 25µsec CN901 3 IC950 !¢ 14Vp-p 13.56MHz 3.4Vp-p (18MHz) 4-55E...
-
Page 80: System Control - Video Block Interface
5-1. SYSTEM CONTROL — VIDEO BLOCK INTERFACE (MA-359 BOARD IC160) STOP TAPE TAPE Signal Pin No. PB PAUSE SLOW REVIEW REC PAUSE FF/REW THREADING UNTHREADING RF SWP *™ V SYNC (™ HA SWP *1 Synchronized with drum rotation. 30Hz 50% duty cycle. *2 Normally “L“. -
Page 81: System Control - Mechanism Interface
5-3. SYSTEM CONTROL — MECHANISM INTERFACE (MA-359 BOARD IC160) CASSETTE CASSETTE TAPE TAPE Signal Pin No. EJECTED STOP PB PAUSE SLOW REVIEW LOADING UNLOADING THREADING UNTHREADING PAUSE CAM2 HI-Z @¡ MODE 1 (*8) @º MODE 2 (*8) !ª MODE 3 (*8) !•... -
Page 82: (Ma-359 Board Ic160)
5-6. SERVO/SYSTEM CONTROL MICROPROCESSOR PIN FUNCTIONS (MA-359 BOARD IC160) Pin No. Pin Name Function Pin No. Pin Name Function RF SWP RF switching pulse output. Not used. AF REC P “H” when HiFi audio REC. AVSS — Ground. Not used. AVref Quasi VD pulse output. -
Page 83: Tuner/Timer Mode Control Pin Function
5-7. TUNER/TIMER MODE CONTROL PIN FUNCTION (FR-161 BOARD IC180) Pin No. Pin Name Function Pin No. Pin Name Function Teletext IC (ML Board IC950) Reset — TXT RST signal — Together with 45 & 46 — — LANC IN — Lanc Input (SENSER) —... -
Page 84: Adjustments
SLV-SE85/SF90/SF99 SECTION 6 ADJUSTMENTS 6-1. MECHANICAL ADJUSTMENT 2-1-3. Setup for adjustment Because the video signal obtained from the pattern generator is used as the adjustment signal for adjustments, the video output signal For the mechanical adjustments, please refer to the must satisfy the given specification. -
Page 85: Input/Output Levels And Impedance
Specified value 5.9 ± 0.15Vdc Output impedance: less than 10 kilohms SW5V check CN601 pin 2 or 3 Measurement point *1 : SLV-SE85/SF90 model only Specified value 5.15 ± 0.15 Vdc *2 : SLV-SF99 model only –30V check 2-1-6. Adjustment Sequence... -
Page 86: System Control System Adjustment
2-3. SYSTEM CONTROL SYSTEM ADJUSTMENT 2-4. SERVO SYSTEM ADJUSTMENT 2-3-1. Clock Adjustment (FR-161 board) 2-4-1. RF Switching Position Adjustment (MA-359 board) [Adjustment Purpose] [Adjustment Purpose] To adjust the precision of the clock. If this specification is not To adjust the link of the A-ch and B-ch of the tape playback outputs. satisfied, the clock will lose or will gain time. -
Page 87: Video System Check
(Note2) Note 1: For SLV-SF99 model. (Except B model) Measuring Instrument Oscilloscope Note 2: For SLV-SE85/SF90 or B model. Note 3: This check should be carried out upon completion of “Playback Specified Value A=2.00 ± 0.18V Level Check” and “Sync AGC Check”. -
Page 88: Dnr Y Level Adjustment (Nr-15 Board)
2-5-4. DNR Y Level Adjustment (NR-27 board) 2-6. AUDIO SYSTEM ADJUSTMENT (SLV-SF99 model only. (Except B model) ) [Connecting Instruments] [Adjustment purpose] Audio oscillator Adjust the Y level during DNR ON. 600 Ω Mode Playback Attenuator Signal Alignment tape: SP mode color bar portion CN001 9 pin (DNR Y) Measurement Point... -
Page 89: Normal Audio System Adjustment
2-6-2. Normal Audio System Adjustment • Make adjustment in the SP mode unless otherwise specified. • Use a normal VHS cassette tape for adjustment. 2-6-2-1. ACE Head Adjustment Refer to the VHS mechanical adjustment manual MECHANISM) (9-921-647-11). 2-6-2-2. Frequency Response Check [Adjustment purpose] Confirm that the frequency characteristics are within the specification. -
Page 94: Mechanism Deck Section-2
7-1-4. MECHANISM DECK SECTION-2 #701 #701 #702 Ref. No. Part No. Description Remarks Ref. No. Part No. Description Remarks X-3949-363-1 BRAKE ASSY, MAIN (T) 3-965-178-01 SPRING 3-053-882-01 SPRING, TENS (MAIN BRAKE) 3-969-632-04 BASE, DRUM X-3947-573-1 ARM ASSY, PENDULUM A-6759-630-A SHUTTLE (T) BLOCK ASSY X-3949-362-1 BRAKE ASSY, MAIN (S) 3-977-501-01 PLATE, LUMINOUS 3-977-513-02 LEVER, REC. -
Page 95: Mechanism Deck Section-3
7-1-5. MECHANISM DECK SECTION-3 M902 #701 M903 #703 Ref. No. Part No. Description Remarks Ref. No. Part No. Description Remarks 3-977-437-01 RETAINER,CAM MOTOR X-3947-579-1 LEVER ASSY, LOADING(T) X-3949-364-1 ASSY, REEL DIRECT SELECT (B) 3-977-451-01 GEAR, LOADING(S) 3-977-443-01 WASHER, STOPPER 3-977-452-01 SPRING, TORSION (LOAD S) 3-977-438-01 WORM - WHEEL X-3947-578-1 LEVER ASSY, LOADING(S) 3-053-888-01 BASE, DIRECT SELECT (B) -
Page 96: Electrical Parts List
AT-25 AT-26 DM-86 7-2. ELECTRICAL PARTS LIST NOTE: • Due to standardization, replacements in the • RESISTORS When indicating parts by reference number, parts list may be different from the parts All resistors are in ohms. please include the board name. specified in the diagrams or the components METAL: metal-film resistor The components identified by mark ! or... - Page 97 FR-161 Ref. No. Part No. Description Remarks Ref. No. Part No. Description Remarks A-6791-909-A FR-161 COMPLETE BOARD, COMPLETE < CAPACITOR > (SF90:VC(WF),VC(SF)) C180 1-163-038-91 CERAMIC CHIP 0.1uF ************************************** (EXCEPT SF99:UX) A-6791-921-A FR-161 COMPLETE BOARD, COMPLETE C188 1-163-104-00 CERAMIC CHIP 30PF (SF90:B(WF),B(SF)) (EXCEPT SF99:UX) C190...
- Page 98 FR-161 Ref. No. Part No. Description Remarks Ref. No. Part No. Description Remarks D422 8-719-056-06 DIODE SLR-342DCT31 (EXCEPT SF99:UX) R185 1-216-073-00 METAL CHIP 1/10W D423 8-719-056-06 DIODE SLR-342DCT31 (SF90/SF99) R188 1-216-049-91 RES,CHIP 1/10W R189 1-216-041-00 METAL CHIP 1/10W < FERRITE BEAD > R191 1-216-073-00 METAL CHIP 1/10W...
- Page 99 FR-161 JK-171 MA-359 Ref. No. Part No. Description Remarks Ref. No. Part No. Description Remarks R430 1-216-073-00 METAL CHIP 1/10W A-6791-913-A MA-359 COMPLETE BOARD, COMPLETE R492 1-216-037-00 METAL CHIP 1/10W (SF90:VC(WF),VC(SF)) ************************************** < SWITCH > A-6791-917-A MA-359 COMPLETE BOARD, COMPLETE S400 1-771-410-21 SWITCH, TACT (SF90:UX(WF),UX(SF))
- Page 100 MA-359 Ref. No. Part No. Description Remarks Ref. No. Part No. Description Remarks C007 1-126-964-11 ELECT 10uF C221 1-164-004-11 CERAMIC CHIP 0.1uF C008 1-163-031-11 CERAMIC CHIP 0.01uF C222 1-109-982-11 CERAMIC CHIP C009 1-163-021-91 CERAMIC CHIP 0.01uF C223 1-163-038-91 CERAMIC CHIP 0.1uF C010 1-163-021-91 CERAMIC CHIP...
- Page 101 MA-359 Ref. No. Part No. Description Remarks Ref. No. Part No. Description Remarks C365 1-126-960-11 ELECT C668 1-163-239-11 CERAMIC CHIP 33PF C366 1-126-960-11 ELECT C669 1-163-239-11 CERAMIC CHIP 33PF C367 1-163-016-00 CERAMIC CHIP 0.0039uF 10% C670 1-164-505-11 CERAMIC CHIP 2.2uF C368 1-126-960-11 ELECT C671...
- Page 102 MA-359 Ref. No. Part No. Description Remarks Ref. No. Part No. Description Remarks CN500 1-784-415-11 CONNECTOR, SQUARE TYPE 21P < IC > CN500 1-785-636-11 CONNECTOR, SQUARE TYPE 21P * CN501 1-568-954-11 PIN, CONNECTOR 5P IC001 8-759-566-07 IC LA7277M-TLM CN570 1-784-415-11 CONNECTOR, SQUARE TYPE 21P IC100 8-759-702-02 IC NJM062M-TE2 CN570...
- Page 103 MA-359 Ref. No. Part No. Description Remarks Ref. No. Part No. Description Remarks JR203 1-216-296-91 SHORT (EXCEPT JR233 1-216-296-91 SHORT (EXCEPT SF90:VC(SF)/SF99:NP) SF90:VC(SF)/SF99:NP) JR204 1-216-296-91 SHORT (EXCEPT JR234 1-216-296-91 SHORT (EXCEPT SF90:VC(SF)/SF99:NP) SF90:VC(SF)/SF99:NP) JR205 1-216-296-91 SHORT (EXCEPT JR235 1-216-296-91 SHORT (EXCEPT SF90:VC(SF)/SF99:NP) SF90:VC(SF)/SF99:NP)
- Page 104 MA-359 Ref. No. Part No. Description Remarks Ref. No. Part No. Description Remarks JS705 1-216-295-91 SHORT Q204 8-729-043-29 TRANSISTOR PDTC144EK-115 JS805 1-216-295-91 SHORT (SF99:B/SF90:B(WF),B(SF)/SE85:B) Q205 8-729-043-32 TRANSISTOR PDTA114EK-115 < COIL > (SF99:B/SF90:B(WF),B(SF)/SE85:B) Q501 8-729-043-32 TRANSISTOR PDTA114EK-115 L001 1-414-934-21 INDUCTOR 10uH (SF99:UX,EN,NP,VC) (EXCEPT SF99:EN) L161 1-414-934-21 INDUCTOR...
- Page 105 MA-359 Ref. No. Part No. Description Remarks Ref. No. Part No. Description Remarks Q803 8-729-422-33 TRANSISTOR 2PD601AR-115 R134 1-216-089-91 RES,CHIP 1/10W (EXCEPT SF90:B(WF),UX(SF)/SF99:EN) (EXCEPT SF90:B(WF),UX(SF)) Q804 8-729-043-29 TRANSISTOR PDTC144EK-115 R135 1-216-073-00 METAL CHIP 1/10W (EXCEPT SF90:B(WF),UX(SF)/SF99:EN) (EXCEPT SF90:B(WF),UX(SF)) Q850 8-729-216-22 TRANSISTOR 2PB709AR-115 R136 1-216-073-00 METAL CHIP...
- Page 106 MA-359 Ref. No. Part No. Description Remarks Ref. No. Part No. Description Remarks R210 1-216-051-00 METAL CHIP 1.2K 1/10W R318 1-216-075-00 METAL CHIP 1/10W (EXCEPT SF90:B(WF)) (EXCEPT SF90:B(WF)) R211 1-216-071-00 METAL CHIP 8.2K 1/10W R319 1-216-085-00 METAL CHIP 1/10W (EXCEPT SF90:B(WF)) (EXCEPT SF90:B(WF)) R212 1-216-051-00 METAL CHIP...
- Page 107 MA-359 Ref. No. Part No. Description Remarks Ref. No. Part No. Description Remarks R500 1-216-041-00 METAL CHIP 1/10W R591 1-216-049-91 RES,CHIP 1/10W (EXCEPT SF90:B(WF)) R592 1-216-049-91 RES,CHIP 1/10W R501 1-216-041-00 METAL CHIP 1/10W R597 1-216-025-91 RES,CHIP 1/10W (EXCEPT SF90:B(WF)) R598 1-216-025-91 RES,CHIP 1/10W R502...
- Page 108 MA-359 ML-17 Ref. No. Part No. Description Remarks Ref. No. Part No. Description Remarks R853 1-216-049-91 RES,CHIP 1/10W < CAPACITOR > R856 1-216-097-91 RES,CHIP 100K 1/10W R857 1-216-069-00 METAL CHIP 6.8K 1/10W C902 1-163-251-11 CERAMIC CHIP 100PF R858 1-216-069-00 METAL CHIP 6.8K 1/10W (SF90/SF99)
- Page 109 ML-17 Ref. No. Part No. Description Remarks Ref. No. Part No. Description Remarks C941 1-128-131-11 ELECT 22uF < FERRITE BEAD > (SF90/SF99) C942 1-128-131-11 ELECT 22uF FB900 1-414-233-22 INDUCTOR CHIP 0UH (SF90/SF99) (SF90/SF99) FB901 1-414-233-22 INDUCTOR CHIP 0UH (SF90/SF99) C943 1-164-004-11 CERAMIC CHIP 0.1uF FB902...
- Page 110 ML-17 Ref. No. Part No. Description Remarks Ref. No. Part No. Description Remarks L905 1-414-936-21 INDUCTOR 22uH (SF90/SF99) R909 1-216-049-91 RES,CHIP 1/10W L907 1-414-936-21 INDUCTOR 22uH (SF90/SF99) (SF90/SF99) L912 1-414-936-21 INDUCTOR 22uH (SF90/SF99) R910 1-249-398-11 CARBON 1/4W F L950 1-414-934-21 INDUCTOR 10uH (SF90/SF99) (SF90/SF99) L961...
- Page 111 ML-17 NR-27 Ref. No. Part No. Description Remarks Ref. No. Part No. Description Remarks R946 1-216-295-91 SHORT 0 (SF90/SF99) R998 1-216-295-91 SHORT 0 (SF90/SF99) R947 1-216-063-91 RES,CHIP 3.9K 1/10W R999 1-216-073-00 METAL CHIP 1/10W (SF90/SF99) (SF90/SF99) R948 1-216-065-91 RES,CHIP 4.7K 1/10W (SF90/SF99) <...
- Page 112 NR-27 RP-235 Ref. No. Part No. Description Remarks Ref. No. Part No. Description Remarks < CONNECTOR > R023 1-216-097-91 RES,CHIP 100K 1/10W R024 1-216-025-91 RES,CHIP 1/10W CN001 1-573-825-11 CONNECTOR, BOARD TO BOARD 11P R025 1-216-049-91 RES,CHIP 1/10W R027 1-216-295-91 SHORT <...
- Page 113 RP-235 Ref. No. Part No. Description Remarks Ref. No. Part No. Description Remarks C290 1-163-021-91 CERAMIC CHIP 0.01uF < JUMPER RESISTOR > (SF90/SF99) C291 1-163-021-91 CERAMIC CHIP 0.01uF JR251 1-216-296-91 SHORT (EXCEPT (SF90/SF99) SF90:VC(SF)/SF90:NP) C292 1-163-021-91 CERAMIC CHIP 0.01uF JR252 1-216-296-91 SHORT 0 (EXCEPT SF90:VC(SF)) (SF90/SF99)
- Page 114 RP-235 SE-90 Ref. No. Part No. Description Remarks Ref. No. Part No. Description Remarks R283 1-216-059-00 METAL CHIP 2.7K 1/10W R346 1-216-065-91 RES,CHIP 4.7K 1/10W R285 1-216-049-91 RES,CHIP 1/10W (SF99:EN,NP,B,VC/SF90/SE85) R286 1-216-053-00 METAL CHIP 1.5K 1/10W R347 1-216-065-91 RES,CHIP 4.7K 1/10W (SF90/SF99) (SF99:EN,NP,B,VC/SF90/SE85)
- Page 115 SE-90 Ref. No. Part No. Description Remarks Ref. No. Part No. Description Remarks C992 1-163-021-91 CERAMIC CHIP 0.01uF < RESISTOR > (SF99:B/SF90:B(WF),B(SF)/SE85:B) C993 1-163-021-91 CERAMIC CHIP 0.01uF R968 1-216-101-00 METAL CHIP 150K 1/10W (SF99:B/SF90:B(WF),B(SF)/SE85:B) (SF99:B/SF90:B(WF),B(SF)/SE85:B) C994 1-163-021-91 CERAMIC CHIP 0.01uF R969 1-216-069-00 METAL CHIP 6.8K...
- Page 116 POWER BLOCK Ref. No. Part No. Description Remarks Ref. No. Part No. Description Remarks 1-468-398-11 POWER BLOCK (SRV879EK) < IC > ********************** (Ref.No:4000 Series) ! IC151 9-980-235-01 IC AN8028 IC201 8-759-438-18 IC PQ12RD08 < CAPACITOR > IC251 8-759-420-19 IC AN1431T ! C151 9-980-236-01 ELECT 47uF...
- Page 117 Ref. No. Part No. Description Remarks Ref. No. Part No. Description Remarks ! 60 1-468-398-11 POWER BLOCK ************** 1-500-144-11 HEAD, FE HARDWARE LIST 1-759-373-22 DRUM ASSY (DZH-86A-R) ************** (SE85:NP,VC,UX/SF90:NP,VC,UX,EX/SF99:EN,NP,UX,VC) 1-759-557-22 DRUM ASSY (DZH-98A-R) 7-685-648-79 SCREW +BVTP 3X12 TYPE2 (SE85:B/SF90:B/SF99:B) #701 7-685-646-79 SCREW +BVTP 3X8 TYPE2 1-766-723-21 CONNECTOR, BOARD TO BOARD 3P #702...
- Page 118 SLV-SE85/SF90/SF99 Sony Corporation 99G167566-1 Home Video Company 9-921-729-11 Printed in Hungary ©1999.7 — 160 — Published by Quality Assurance Dept.