Sony Trinitron GDM-200PS Service Manual
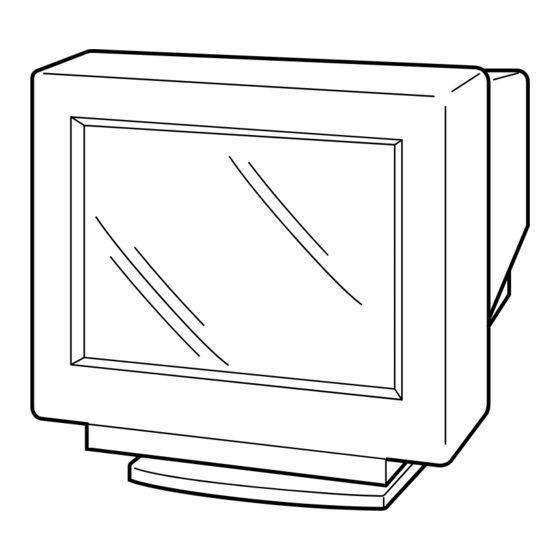
Color graphic display
Hide thumbs
Also See for Trinitron GDM-200PS:
- Operating instructions manual (63 pages) ,
- Specification (2 pages) ,
- Service bulletin (9 pages)
Table of Contents
Advertisement
Quick Links
GDM-200PS/200PST/200PST9
SERVICE MANUAL
REVISED
MICROFILM
SPECIFICATIONS
Picture tube
0.25 mm aperture grille pitch
17 inches measured diagonally
90-degree deflection
Approx. 327 × 243 mm (w/h)
Viewable image size
7
(12
16.0" viewing image
Resolution
Horizontal: Max. 1280 dots
Vertical: Max. 1024 lines
Approx. 312 × 234 mm (w/h)
Standard image area
3
(12
or
Approx. 293 × 234 mm (w/h)
5
(11
Deflection frequency
Horizontal: 30 to 92 kHz
Vertical: 48 to 160 Hz
AC input voltage/current
100 to 240 V, 50 – 60 Hz, 1.7 – 1.0 A
Power consumption
Max. 120 W
406 × 432 × 420 mm (w/h/d)
Dimensions
(16 × 17
Mass
Approx. 18.8 kg (41 lb 7 oz)
Supplied accessories
See page 6
Design and specifications are subject to change without notice.
TRINITRON
®
Canadian Model
× 9
5
/
/
inches)
8
8
× 9
1
/
/
inches)
8
4
× 9
1
/
/
inches)
8
4
× 16
1
/
5
/
inches)
8
8
COLOR GRAPHIC DISPLAY
GDM-200PS
US Model
SH Model
Chassis No. SCC-L11B-A
GDM-200PST
AEP Model
UK Model
GDM-200PST9
AEP Model
Chassis No. SCC-L11C-A
N3
CHASSIS
Advertisement
Table of Contents

Related Manuals for Sony Trinitron GDM-200PS


Summary of Contents for Sony Trinitron GDM-200PS
-
Page 1: Service Manual
GDM-200PS/200PST/200PST9 SERVICE MANUAL GDM-200PS US Model Canadian Model REVISED SH Model Chassis No. SCC-L11B-A GDM-200PST AEP Model UK Model GDM-200PST9 AEP Model Chassis No. SCC-L11C-A CHASSIS SPECIFICATIONS Picture tube 0.25 mm aperture grille pitch 17 inches measured diagonally 90-degree deflection Approx. - Page 2 AND IN THE PARTS LIST ARE CRITICAL FOR SAFE recommend their replacement. OPERATION. REPLACE THESE COMPONENTS WITH SONY PARTS WHOSE PART NUMBERS APPEAR AS Check the line cords for cracks and abrasion. Recommend SHOWN IN THIS MANUAL OR IN SUPPLEMENTS the replacement of any such line cord to the customer.
-
Page 3: Power Saving Function
GDM-200PS/200PST/200PST9 POWER SAVING FUNCTION This monitor is capable of three states of reduced power consumption. By sensing the absence of video signals and one or both sync signals coming from the host computer, it will reduce power consumption as follows. Power consumption state Power consumption Recovery time... -
Page 4: Table Of Contents
GDM-200PS/200PST/200PST9 TABLE OF CONTENTS Section Title Page 1. GENERAL ..............1-1 2. DISASSEMBLY 2-1. Cabinet Removal ..........2-1 2-2. A Board Removal ..........2-1 2-3. AC Inlet and I/O Terminal Board Removal ..2-2 2-4. D Board Removal ..........2-2 2-5. -
Page 5: General
SECTION 1 The operating instructions mentioned here are partial abstracts from the Operating Instruction Manual. The page numbers of GENERAL the Operating Instruction Manual remain as in the manual. Customizing Your Monitor Getting Started Customizing Your Monitor Getting Started Getting Started Before adjusting Adjusting the Picture Contrast Identifying Parts and Controls... - Page 6 Customizing Your Monitor Getting Started Customizing Your Monitor Navigating the MENU on-screen display Introducing the On-screen Using the CENTER On-screen Using the SIZE On-screen Display Display System Display Select a link using the ¨./> and >?// buttons in the The SIZE settings allow you to adjust the size of the picture. MENU OSD.
- Page 7 Getting Started Customizing Your Monitor Customizing Your Monitor Press the >?// buttons to adjust the settings. Using the ZOOM On-screen Using the COLOR On-screen Using the GEOM (Geometry) On- Display Display screen Display You can change the monitor’s color temperature. For The ZOOM settings allow you to enlarge or reduce the The GEOM (geometry) settings allow you to adjust the example, you can change the colors of a picture on the...
- Page 8 Customizing Your Monitor Getting Started Customizing Your Monitor Press the >?// buttons to adjust the settings. Changing the on-screen display position Using the SCREEN On-screen Using the OPTION On-screen Display Display You can change the OSD position (for example, when you want to adjust the picture behind the OSD).
-
Page 9: Resetting The Adjustments
Getting Started Customizing Your Monitor Customizing Your Monitor Setting the power saving delay time Locking the controls Using the LANG (Language) On- Resetting the Adjustments screen Display You can set the delay time before the monitor enters the The control lock function disables all of the buttons on the Resetting an adjustment item power saving mode. -
Page 10: Troubleshooting
The moire may be modified depending on the connected computer. ® • If you cannot find “GDM-200PS” among the Sony monitors in the Windows 95 If using Windows • Due to the relationship between resolution, monitor dot pitch and the pitch of some monitor selection screen, select the DDC standard monitor or install the Windows 95 image patterns, certain screen backgrounds sometimes show moire. -
Page 11: Disassembly
GDM-200PS/200PST/200PST9 SECTION 2 DISASSEMBLY 2-1. CABINET REMOVAL Two claws Eight screws (+BVTT 3 x 8) Two screws (+BVTP 4 x 16) Cabinet Four screws (+BVTT 3 x 8) Video shield EMI shield 2-2. A BOARD REMOVAL CN406 CN405 CN404 CN403 CN401 CN402 A board... -
Page 12: Ac Inlet And I/O Terminal Board Removal
GDM-200PS/200PST/200PST9 2-3. AC INLET AND I/O TERMINAL BOARD REMOVAL Two screws (Ext tooth washer screw M4) I/O terminal board CN601 Rear shield A board Connector (9pin) CN404 Two screws (+BVTT 3 x 8) CN403 AC inlet (3P) Screw Two screws (Ext tooth washer screw M4) (+KTP 3 x 8) 2-4. -
Page 13: Picture Tube Removal
GDM-200PS/200PST/200PST9 2-6. PICTURE TUBE REMOVAL Two screws (+BVTP 3 x 10) A board Screw (+BVTT 4 x 8) Two claws Four screws (Tapping screw 5 : U/C, SH model) (Self tapping screw 5 : AEP, UK model) Stand assy Chassis assy Screw (+P 4 x 12) Neck assy... -
Page 14: Safety Related Adjustment
GDM-200PS/200PST/200PST9 SECTION 3 SAFETY RELATED ADJUSTMENT • Beam Current Protector Circuite Check When replacing or repairing the shown below table, the following operational checks must be performed as a (1) Hardware logic circuit safety precaution against X-rays emissions from the unit. •... -
Page 15: Adjustments
GDM-200PS/200PST/200PST9 SECTION 4 ADJUSTMENTS • Landing Rough Adjustment (µm) <Specifications> Adjust so that the green is within 0 ± 5 0 ± 7.5 0 ± 5 1. Enter the full white signal. (or the full black dots signal). the specification given right. 2. - Page 16 GDM-200PS/200PST/200PST9 Connect the communication cable of the computer to the connector located on the D board on the monitor. Run the service software and then follow the instruction. 1-690-391-21 A-1500-819-A 3-702-691-01 Interface Unit Connector Attachment IBM AT Computer To BUS CONNECTOR as a Jig D-sub mini Din...
-
Page 17: Diagrams
SECTION 5 DIAGRAMS 5-1. BLOCK DIAGRAMS (with FRAME SCHEMATIC DIAGRAM) TO FBT FV1 FV2 HV IC408 IC403 IC407 RGB INPUT SELECT RGB DRIVE RGB OUT V901 PICTURE TUBE CN403 CN407 CN408 R IN 2 R_IN2 R_OUT R_IN R_OUT R_IN R_OUT G IN 2 G_IN2 G_OUT... -
Page 18: Schematic Diagram Of D Board
• D BOARD WAVEFORMS (1) Schematic Diagram of D Board • D BOARD VOLTAGE LIST 5.0 Vp-p (4MHz) 4.5 Vp-p (H) 2.0 Vp-p (H) 600 Vp-p (H) 45.0 Vp-p (H) 45.0 Vp-p (V) 1.0 Vp-p (V) Ref. Pin No. Voltage [V] Ref. - Page 19 POWER SUPPLY, U-COM, DEFLECTION — D BOARD (Conductor Side) — — D BOARD (Component Side) — 5-10...
- Page 20 VIDEO AMP RGB OUT — A BOARD (Conductor Side) — — A BOARD (Component Side) — • A BOARD SEMICONDUCTOR LOCATION Conductor Component Side Side IC401 D–1 IC402 D–2 IC403 C–1 C–2 IC404 C–1 IC405 A–2 IC406 A–2 A–1 IC407 B–1 B–2 IC408...
-
Page 21: Schematic Diagram Of A Board
(2) Schematic Diagrams of A Board • A BOARD WAVEFORMS D311 CN409 C109 R108 1PS226-115 TO D BOARD T901(FBT) FV2 0.47 CONNECTOR PANEL PROT B.GND2 C352 IC408 250V FB101 1/2W +12V BK2125LL560 TO D BOARD T901(FBT) FV1 47 25V :MPS M52348FP BLUE2 IC403... -
Page 22: Semiconductors
5-4. SEMICONDUCTORS MCR5102 BA10393F LA6500-FA TDA8172 IRLI540GLF33 NJM4558M µPC4558G2 24LC16BT/SN MARKING SIDE VIEW 24LC21A/SN 19 pin ZIP LA6510 MM1170BFB BU2527AX-ON5020 IRFPE50LF21 TOP VIEW PQ6RD83B 8 pin SOP TOP223PF1 BA9756F-E2 M62352GP-75E M62352GP-75ED TOP VIEW 8 pin DIP LM1283N DTA114GKAT146 2SA1049-GR DTA124EKA-T146 M52755FP DTC114GKA TOP VIEW... - Page 23 2SC3209LK DTZ-10B D2L40-TA PC123F2 SEL1922D-C DTZ-13B D4SBS4 PC123FY2 SEL1922D-C, D DTZ-5.1B D4SBS4-F MA111-TX D4SB60L RD12SB2 UDZ-TE-17-10B UDZ-TE-17-12B UDZ-TE-17-13B UDZ-TE-17-22B – UDZ-TE-17-5.1B ANODE CATHODE 2SC3941A-Q(TA) – P6KE170AG23 SPB-26MVWF SB340L-6489 D2S4MF ANODE D2S4MTA1 CATHODE CATHODE CATHODE D1NS4 ANODE (GRN) D1NL20-TR ANODE EGP10GPKG23 (RED) CATHODE 2SC4015TV2...
-
Page 24: Exploded Views
SECTION 6 EXPLODED VIEWS • Items with no part number and no • Items marked " * " are not stocked since The components identified by shading ¡ description are not stocked because they they are seldom required for routine and mark are critical for safety. -
Page 25: Picture Tube
GDM-200PS/200PST/200PST9 6-2. PICTURE TUBE Les composants identifiés par un tramé The components identified by shading ¡ ¡ and mark are critical for safety. et une marque sont critiques pour la 7-685-647-79 +BVTP 3X10 Replace only with part number specified. sécurité. Ne les remplacer que par une 7-685-663-71 +BVTP 4X16 pièce portant le numéro spécifié. -
Page 26: Packing Materials
GDM-200PS/200PST/200PST9 The components identified by shading Les composants identifiés par un tramé ¡ ¡ and mark are critical for safety. et une marque sont critiques pour la Replace only with part number specified. sécurité. Ne les remplacer que par une pièce portant le numéro spécifié. -
Page 27: Electrical Parts List
GDM-200PS/200PST/200PST9 SECTION 7 The components identified by shading Les composants identifiés par un tramé ¡ ¡ and mark are critical for safety. et une marque sont critiques pour la Replace only with part number specified. sécurité. Ne les remplacer que par une ELECTRICAL PARTS LIST pièce portant le numéro spécifié. - Page 28 GDM-200PS/200PST/200PST9 Les composants identifiés par un tramé The components identified by shading ¡ ¡ et une marque sont critiques pour la and mark are critical for safety. sécurité. Ne les remplacer que par une Replace only with part number specified. pièce portant le numéro spécifié.
- Page 29 GDM-200PS/200PST/200PST9 The components identified by shading Les composants identifiés par un tramé ¡ ¡ and mark are critical for safety. et une marque sont critiques pour la Replace only with part number specified. sécurité. Ne les remplacer que par une pièce portant le numéro spécifié.
- Page 30 GDM-200PS/200PST/200PST9 Les composants identifiés par un tramé The components identified by shading ¡ ¡ et une marque sont critiques pour la and mark are critical for safety. A(d) sécurité. Ne les remplacer que par une Replace only with part number specified. pièce portant le numéro spécifié.
- Page 31 GDM-200PS/200PST/200PST9 The components identified by shading Les composants identifiés par un tramé ¡ ¡ and mark are critical for safety. et une marque sont critiques pour la Replace only with part number specified. sécurité. Ne les remplacer que par une pièce portant le numéro spécifié.
- Page 32 GDM-200PS/200PST/200PST9 Les composants identifiés par un tramé The components identified by shading ¡ ¡ et une marque sont critiques pour la and mark are critical for safety. sécurité. Ne les remplacer que par une Replace only with part number specified. pièce portant le numéro spécifié.
- Page 33 GDM-200PS/200PST/200PST9 The components identified by shading Les composants identifiés par un tramé ¡ ¡ and mark are critical for safety. et une marque sont critiques pour la Replace only with part number specified. sécurité. Ne les remplacer que par une pièce portant le numéro spécifié.
- Page 34 GDM-200PS/200PST/200PST9 Les composants identifiés par un tramé The components identified by shading ¡ ¡ et une marque sont critiques pour la and mark are critical for safety. sécurité. Ne les remplacer que par une Replace only with part number specified. pièce portant le numéro spécifié.
- Page 35 GDM-200PS/200PST/200PST9 The components identified by shading Les composants identifiés par un tramé ¡ ¡ and mark are critical for safety. et une marque sont critiques pour la Replace only with part number specified. sécurité. Ne les remplacer que par une pièce portant le numéro spécifié.
- Page 36 GDM-200PS/200PST/200PST9 Les composants identifiés par un tramé The components identified by shading ¡ ¡ et une marque sont critiques pour la and mark are critical for safety. sécurité. Ne les remplacer que par une Replace only with part number specified. pièce portant le numéro spécifié.
- Page 37 GDM-200PS/200PST/200PST9 The components identified by shading Les composants identifiés par un tramé ¡ ¡ The components identified by [ in this manual and mark are critical for safety. et une marque sont critiques pour la have been carefully factory-selected for each set Replace only with part number specified.
- Page 38 GDM-200PS/200PST/200PST9 Sony Corporation English Display Company 99DL05245-1 9-978-587-02 Computer Display Dept. Printed in Japan © 1999. 4 – 48 –...