Pioneer PLX-1000 Operating Instructions Manual
Hide thumbs
Also See for PLX-1000:
- Operating instructions manual (116 pages) ,
- Service manual (44 pages)
Table of Contents

Related Manuals for Pioneer PLX-1000


Summary of Contents for Pioneer PLX-1000
-
Page 1: Operating Instructions
TURNTABLE PLX-1000 http://pioneerdj.com/support/ The Pioneer DJ support site shown above offers FAQs, information on software and various other types of information and services to allow you to use your product in greater comfort. Operating Instructions... - Page 2 Thank you for buying this Pioneer product. Please read through these operating instructions so you will know how to operate your model properly. After you have finished reading the instructions, put them away in a safe place for future reference.
- Page 3 Check D3-4-2-1-7a_A1_En the power cord once in a while. When you find it damaged, ask your nearest PIONEER authorized service center or your dealer for a replacement. S002*_A1_En For U.S.A. and Canada...
- Page 4 Only use attachments/accessories specified by Read these instructions. the manufacturer. Keep these instructions. Use only with the cart, stand, tripod, bracket, or Heed all warnings. table specified by the manufacturer, or sold with Follow all instructions. the apparatus. When a cart is used, use caution Do not use this apparatus near water.
- Page 5 être posés de façon à ne pas être écrasés. Un câble abîmé peut provoquer un risque d’incendie ou un choc électrique. Vérifier le câble d’alimentation de temps en temps. Contacter le service après-vente PIONEER le plus proche ou le revendeur pour un remplacement. S002*_A1_Fr...
-
Page 6: Table Of Contents
Contents Before start How to read this manual In this booklet, the names of the buttons and terminals of the main unit Features appear in square brackets ([ ]). Examples: This unit is a professional turntable that provides functions, durability, —... -
Page 7: Before You Start
Assembly Before you start 1 Attach the turntable and turntable sheet. Set the turntable on the center spindle and place the turntable sheet on top of the turntable. About the cartridge ! Be careful not to hit the turntable on the main unit or drop it. ! Make sure that iron powder or other dust is not adhering to the ! The cartridge is not provided. - Page 8 4 Attach the balance weight. Attach the balance weight to the rear shaft of the tone arm. Balance weight ! When using a cartridge between 9.5 g and 13 g, attach the sub weight on the rear shaft of the tone arm. Sub weight...
-
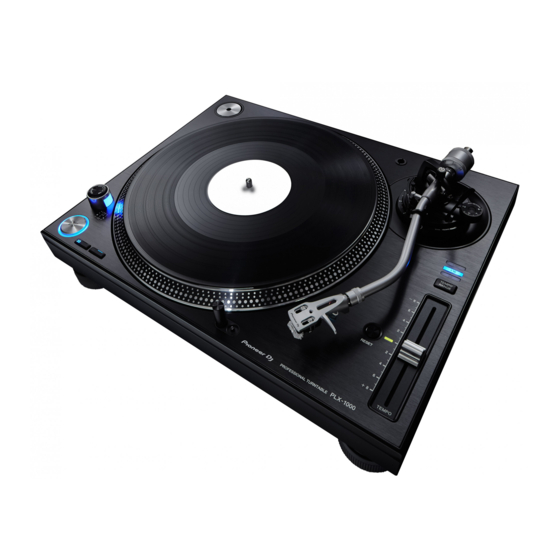
Page 9: Part Names And Functions
Part names and functions Top panel 1 POWER switch 9 TEMPO slider When turning the switch to the [ON] side, the power is turned on and You can slide back and forth to perform fine adjustment of the rota- the strobe illuminator on the side lights. tion speed. -
Page 10: Rear Panel
i HEIGHT ADJUST lock l Stylus pressure adjustment ring Locks the adjusted height of the arm. Used to match to the appropriate stylus pressure of the cartridge. = Adjusting the arm height (p. 12 ) = Adjusting the stylus pressure (p. 11 ) j HEIGHT ADJUST dial m Headshell stand Used to adjust the height of the tone arm. -
Page 11: Adjustment
2 Adjust the stylus pressure. Turn the balance weight to adjust to the appropriate stylus pressure Adjustment value for your cartridge. ! When turning the balance weight, the stylus pressure adjust- ment ring turns together. While observing the adjustment ring, adjust the stylus pressure to the appropriate value. -
Page 12: Adjusting The Arm Lifter Height
Adjusting the arm lifter height Adjusting the arm height If necessary, perform adjustment to match the cartridge being used. 1 Turn the [HEIGHT ADJUST] lock to unlock the lock. Prepare as follows. ! Place a record on the turntable sheet. Unlock ! Remove the stylus cover and arm clamper while paying attention not to touch the stylus tip. -
Page 13: Connections
Connections ! Be sure to turn off the power and unplug the power cord from the power outlet whenever making or changing connections. ! Refer to the operating instructions for the component to be connected. ! Connect the power cord after all the connections between devices have been completed. Descriptions of terminals 1 PHONO OUT terminals 3 AC IN... -
Page 14: Place Of Installation
Connecting to a DJ mixer Ground wire Ground wire Audio Audio cable cable Rear panel Analog player DJ mixer Power cord To power outlet 1 Connect the audio cable and ground wire to the [PHONO] input terminal of the DJ mixer. ! If this product is connected to a DJ mixer that does not have a [PHONO] input terminal, sufficient volume and sound quality cannot be obtained. -
Page 15: Operation
About the slip mat and slip sheet Operation Slip mat If you use the mat instead of the turntable sheet, you can stop the record by hand during playing, or turn the turntable in reverse. Turning the power on Slip sheet When the slip sheet is used under the slip mat, sliding of scratch 1 Make all the connections, then plug the power cord becomes smooth. -
Page 16: Adjusting The Pitch
Adjusting the pitch 1 Press the [RESET] button to turn off the [RESET] indicator. 2 Move the [TEMPO] slider forward or backward. Moving the slider forward increases the rotation speed and moving it backward decreases the rotation speed. ! The scale of the [TEMPO] slider is a rough value. Please use it as a guide. -
Page 17: Additional Information
Sometimes the problem may lie in another component. Inspect the other components and electrical appliances being used. If the problem cannot be rectified, ask your nearest Pioneer authorized service center or your dealer to carry out repair work. ! This unit may not operate properly due to static electricity or other external influences. In this case, proper operation may be restored by turning the power off, waiting 1 minute, then turning the power back on. -
Page 18: About Trademarks And Registered Trademarks
About trademarks and registered trademarks ! Pioneer is a registered trademark of PIONEER CORPORATION. The names of companies and products mentioned herein are the trade- marks of their respective owners. Specifications Power requirements ..AC 110 V to 120 V or 220 V to 240 V, 50 Hz/60 Hz Power consumption ................. - Page 19 Within 40 days of receiving your complaint, Pioneer will investigate the dispute and will either: (1) respond to your complaint in writing informing you what action Pioneer will take, and in what time period, to resolve the dispute; or (2) respond to your complaint in writing informing you why it will not take any action.
- Page 20 URL suivantes : In the USA & Canada/Aux Etats-Unis & Canada http://www.pioneerelectronics.com S018_B1_EnFr_PSV © 2014 PIONEER CORPORATION. All rights reserved. PIONEER CORPORATION 1-1, Shin-ogura, Saiwai-ku, Kawasaki-shi, Kanagawa 212-0031, Japan PIONEER ELECTRONICS (USA) INC.