Table of Contents
Advertisement
Quick Links
Advertisement
Table of Contents

Related Manuals for Pioneer AVH-269BT


Summary of Contents for Pioneer AVH-269BT
- Page 1 DVD RDS AV RECEIVER AVH-269BT AVH-169DVD Owner’s Manual...
-
Page 2: Table Of Contents
Contents Contents Receiving alarm broadcasts interrupting Bluetooth telephone System settings Precautions regular broadcasts Bluetooth telephone operations Switching the auxiliary setting IMPORTANT SAFEGUARDS Using PTY functions Calling a number in the phone book Changing the picture adjustment To ensure safe driving Setting the FM tuning step Selecting a number by alphabet search (Brightness, Contrast, Color, Hue, Dimmer... -
Page 3: Important Safeguards
Section Contents Precautions Thank you for purchasing this PIONEER When connecting to separately sold power WARNING product. ! Do not attempt to install or service this When connecting the display To ensure proper use, please read through this product by yourself. Installation or serv- When connecting with a rear view manual before using this product. -
Page 4: To Avoid Battery Exhaustion
Section Precautions Before you start ! Please note that the edges of the rear view When you attempt to watch a video image while About this unit About this manual driving, the warning “Viewing of front seat camera images may differ slightly according ! This unit features a number of sophisticated video source while driving is strictly prohib- to whether full screen images are displayed... -
Page 5: Demo Mode
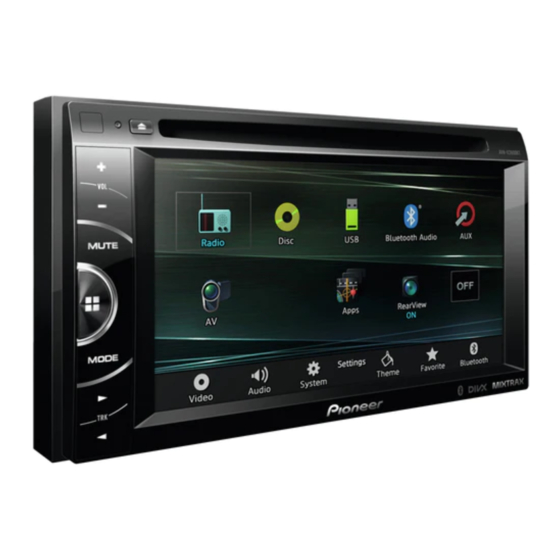
Section Before you start What’s what Important Head unit Home display CAUTION The red lead (ACC) of this unit should be con- ! Remove the battery if the remote control is Home display nected to the ignition on/off function. Failure to not used for a month or longer. -
Page 6: Selecting A Source
AUDIO ! Bluetooth Audio – Built-in Bluetooth audio Press to change the audio language during 4 Thumb pad (Function of AVH-269BT) DVD playback. Use to select a menu on the DVD menu. ! AUX – AUX Press to switch audio output for DivX/ MPEG-4. -
Page 7: Common Operations
Press to select the tuner band when tuner is menu settings/lists selected as a source. Also used to cancel the control mode of functions. (Function of AVH-269BT) Press to switch between modes when play- Starting the Bluetooth telephone ing the following types of data: ! Disc menu. -
Page 8: Activating The Touch Panel Keys
Section Common operations Common operations ! Remember that using the wide mode feature Activating the touch panel keys Using the rear view key to Note of this system for commercial or public view- This function is enabled for playback on the display the rear view Touch panel keys ing purposes may constitute an infringement... -
Page 9: Basic Operations
Section Basic operations Tuner Ejecting a disc Tuner operations Storing and recalling radio text. % Press h to eject a disc. Touch panel keys 8 List key Displaying the preset channel list. Setting the clock 9 Preset channel key Radio 8 AUG 12:05 Selecting a preset channel. -
Page 10: Storing And Recalling Radio Text
Section Tuner Tuner # If no station is broadcasting the type of program Radio text data transmitted by RDS stations, Tuning in to strong signals Turn off the announcement while a traf- fic announcement is being received. you searched for, Not Found is displayed for about such as station information, can be displayed Local seek tuning allows you to tune in to only on this tuner. -
Page 11: Switching Auto Pi Seek
Section Tuner Disc (CD/DVD) Touch the system key to open the system Touch the system key to open the system Introducing movie operations Touch to change the fast forward and reverse menu. menu. speed. You can use this unit to view DVD/DVD-R/DVD- RW/CD/CD-R/CD-RW movie files. -
Page 12: Sound Playback Operations
Section Disc (CD/DVD) Disc (CD/DVD) ! You can also switch between subtitle lan- 9 Screen mode key g Audio output key Selecting a chapter using the buttons guages using Video Setup menu. For de- Changing the screen mode. Switching the audio output, when playing 1 Press c or d (TRK). -
Page 13: Switching The Media File Type
Section Disc (CD/DVD) Disc (CD/DVD) # Ways to display the menu will differ depending ! If you perform title/chapter search or fast for- 2 Search key Operating the DVD menu ward/reverse during Chapter, the repeat play Displaying a list of track titles/file names to on the disc. -
Page 14: Selecting Audio Output
Section Disc (CD/DVD) Disc (CD/DVD) % If a message is displayed after loading a Refer to Introducing movie operations on page Start playback from the selected part. Touch your favorite file (or folder) name. # When you have selected a folder, a list of the disc containing DivX VOD content, touch Play. -
Page 15: Usb
Section ! You can also switch between languages/ This unit is compliant with USB MSC (Mass Touch panel keys Refer to Repeating playback on page 17. audio systems using Video Setup menu. For Storage Class) and USB MTP (Media Transfer 7 Slow-motion playback key Protocol). -
Page 16: Music Browse Mode
Section ! When you select Speana on Selecting the 7 DB key 2 Search key Touch DB to create a database in Music browse mode. background display on page 31, the artwork is Creating a database that enables searches Displaying the file name list to select the not displayed. -
Page 17: Switching The Media File Type
Section ! All – Repeat all files ! Only one image can be stored on this unit. Basic operations ! When Folder is selected, it is not possible to Old image is overwritten with the new one. play back a subfolder of that folder. Playing still images ! If you select USB source, the repeat play Touch f to pause the slide show when... -
Page 18: Bluetooth Audio
Touch panel keys Notes ! When playing back files recorded as VBR (Function of AVH-269BT) (variable bit rate) files, the play time will not You can use this unit to listen to Bluetooth audio be correctly displayed if fast forward or re- files. -
Page 19: Bluetooth Telephone
Adjusting the other party’s listening volume. operations 13 APR 12:25 1 Connection b Private mode key (Function of AVH-269BT) First, you need to connect a Bluetooth tele- Turning private mode on or off. You can use Bluetooth telephone. Abcdefghi XXXXXXXXXXXXXXXX phone to this unit. -
Page 20: Selecting A Number By Alphabet Search Mode
Section Bluetooth telephone Bluetooth telephone # If you want to change the character to Russian, “Would you like to invert all names?” ap- Touch the phone book key to switch to Touch the on-hook key to end the call. the phone book mode. pears. -
Page 21: Making A Call By Entering Phone Number
Section Bluetooth telephone Bluetooth telephone Touch the preset dial key to display the Setting the private mode Notes preset screen. ! In order for your voice commands to be rec- During a conversation, you can switch to private ognized and interpreted correctly, ensure mode (talk directly on your cellular phone). -
Page 22: Settings
Section Settings Audio adjustments Menu operations Press the home button to switch to the Using fader/balance adjustment Touch Balance on the audio function home display. menu. Fader/Balance displays when Rear Speaker is Touch panel keys set to Full on the System Menu. Touch any of the following touch panel Touch or to adjust the left/right You can change the fader/balance setting to pro-... -
Page 23: Adjusting Loudness
Section Audio adjustments Audio adjustments Press the home button to switch to the Touch the table to adjust the level of the Touch c or d next to Level to adjust the Adjusting source levels home display. equalizer band. output level of the subwoofer. With SLA (source level adjustment), the volume Range: +12dB to –12dB Range: +6 to –24... -
Page 24: Setting Up The Video Player
Section Setting up the video player Setting up the video player Setting the subtitle language Touch the video setup key to open the Press the home button to switch to the video setup menu. home display. Registering the code. You can set a desired subtitle language. When available, the subtitles will be displayed in the Touch Menu Language on the Touch the video setup key to open the... -
Page 25: Setting Parental Lock
Section Setting up the video player Setting up the video player Touch Time Per Photo Slide on the Touch 0 to 9 to input the registered code Notes Video Setup menu to select the slideshow in- number. ! Up to 42 characters can be displayed on one Registering the code. -
Page 26: Automatic Playback Of Dvds
Section Setting up the video player System settings Touch the video setup key to open the Switching the auxiliary setting Touch any of the following touch panel video setup menu. keys to select the function to be adjusted. Activate this setting when using an auxiliary de- Picture Adjustment items are displayed. -
Page 27: Setting Demo Mode
Setting the Bluetooth audio — Language for cautions menu. output are switched simultaneously in this (Function of AVH-269BT) Some operations on this unit are prohib- setting. You need to activate the Bluetooth Audio Touch Demo Mode on the system menu ited from use while driving or require source in order to use a Bluetooth audio player. -
Page 28: Updating Bluetooth Software
! Ground – When the polarity of the connected CAUTION Touch Video Signal Setting on the system lead is negative while the shift lever is in RE- Pioneer recommends the use of a camera Turn the source off. menu. VERSE (R) position which outputs mirror-reversed images. - Page 29 Receiver from your steering wheel control. MUTE If you have a connected steering wheel control adapter PLAY/PAUSE STOP for Pioneer, please choose "With Adapter". If you are Press to mute. Press again to unmute. connected to your steering wheel control directly, MUTE MODE Off Hook please choose "Without Adapter".
-
Page 30: Favorite Menu
Bluetooth Display menu columns to register. device addresses. Refer to Menu operations on page 22. (Function of AVH-269BT) # You can customize menus except Video Setup # To cancel searching, touch Stop. Note menu. # If three devices are already paired, Memory Full If you are using a cellular phone that can be is displayed and pairing cannot be performed. -
Page 31: Theme Menu
Section Bluetooth connection menu Theme menu Connecting to a Bluetooth Entering PIN code for Bluetooth Selecting the OSD (on-screen device automatically wireless connection display) color If this function is set to on, a connection be- To connect your Bluetooth device to this unit via The OSD color can be changed. -
Page 32: Other Functions
! If the touch panel cannot be adjusted prop- rately can be connected to this unit. to ACC ON before pressing RESET in the follow- erly, consult your local Pioneer dealer. ing situations: About AUX connection methods ! After completing connections Turn the source off. -
Page 33: Connection
Section Connection Connection ! The black cable is ground. When installing — Secure the wiring with cable clamps or adhe- WARNING this unit or power amp (sold separately), sive tape. Wrap adhesive tape around wiring In some countries or states the viewing of im- make sure to connect the ground wire first. -
Page 34: Connecting The Power Cord
AUX jack (3.5 ø) Use a mini plug cable to connect with auxiliary device. Antenna input USB cable (Supplied with this unit) Connect to separately sold USB device. Microphone input (Function of AVH-269BT) Fuse (10 A) Microphone (Function of AVH-269BT) Violet/white Of the two lead wires connected to the back lamp, connect the one in which the voltage changes when the gear shift is in the REVERSE (R) position. -
Page 35: When Connecting The Display
Section Connection Connection When connecting to separately sold power amp When connecting the display Rear output/Subwoofer output This product This product Power amp (sold separately) To front output Power amp (sold separately) To rear output To video Power amp Rear monitor output input (sold separately) (V OUT) -
Page 36: When Connecting With A Rear View Camera
Section Connection Installation When connecting with a rear Rear view camera input (R.C IN) Notes Installation using the screw ! Check all connections and systems before view camera holes on the side of the unit final installation. ! Do not use unauthorized parts as this may If you switch the shift lever to REVERSE (R), the % Fastening the unit to the factory radio- display on this unit will automatically switch to... -
Page 37: Installing The Microphone
5 Dashboard or console Install the microphone on the steering column. Installing the microphone (Function of AVH-269BT) CAUTION It is extremely dangerous to allow the micro- phone lead to become wound around the steer- ing column or shift lever. Be sure to install the... -
Page 38: Additional Information
Appendix Additional information Additional information Troubleshooting There is no sound. File size and transmission rate are above recom- The volume level will not rise. mended rates. Playback is not possible. Symptoms are written in bold and causes in reg- Create a DivX file that is within the Cables are not connected correctly. -
Page 39: Error Messages
The inserted disc contains a high definition DivX/ MPEG-1/MPEG-2/MPEG-4 file. When you contact your dealer or your nearest Error-02-XX/FF-FF Select a file that can be played. Pioneer Service Center, be sure to note the error The disc is dirty. message. Clean the disc. - Page 40 Select a file that can be played. memory that is USB Mass Storage Class This unit’s flash memory used as the temporary stor- dealer or an authorized Pioneer Service Station. compliant. age area is full. Select a file that can be played.
-
Page 41: Understanding Messages
DTS. Messages Translation Shows the album title of the Area 1 Area 2 song currently being played for Pioneer rec- MP3/WMA/AAC/WAV files. ommends the use of a Shows the song title when re- camera ceiving the tag information. -
Page 42: Handling Guidelines
Appendix Additional information Additional information Handling guidelines Condensation may temporarily impair the player’s Shows the file name of the Indicates that TA (traffic an- performance. Let it rest for about one hour to ad- MP3/WMA/AAC file currently nouncement standby) is on. Discs and player just to a warmer temperature. -
Page 43: Audio Compatibility (Usb)
Appendix Additional information Additional information CD-R/RW discs DivX video files Audio compatibility (USB) Do not connect anything other than a USB stor- age device. When CD-R/RW discs are used, playback is possi- Depending on the composition of the file informa- ble only for discs which have been finalized. -
Page 44: Sequence Of Audio Files
AAC file bought from the iTunes Store (.m4p file CAUTION application used to encode WMA files. method is recommended. ! Pioneer accepts no responsibility for data extension): Not compatible 1 Create a file name that includes numbers There may be a slight delay at the start of playback lost on the USB memory/USB portable audio that specify the playback sequence (e.g.,... -
Page 45: Bluetooth Profiles
YOUR SPECIFIC RIGHTS MAY VARY FROM JU- easily. more than 10 000 hours. However, it may de- TIES MADE BY PIONEER OR ANY OF ITS LICEN- RISDICTION TO JURISDICTION. ! When the display is subjected to direct sun- crease if used in high temperatures. -
Page 46: Language Code Chart For Dvd
Appendix Additional information Additional information ABOUT DIVX VIDEO-ON-DEMAND: This Language code chart for DVD â DivX Certified device must be registered in Supply of this product only conveys a license for order to play purchased DivX Video-on-Demand private, non-commercial use and does not con- Language (code), input code (VOD) movies. -
Page 47: Specifications
Appendix Additional information Additional information Specifications Subwoofer (mono): Language (code), input code Frequency ......50 Hz/63 Hz/80 Hz/100 Hz/ Navajo, Navaho (nv), 125 Hz Bengali (bn), 0214 Inupiaq (ik), 0911 Tahitian (ty), 2025 General 1422 Slope ....... –18 dB/oct Power source ....14.4 V DC (12.0 V to 14.4 V al- Gain ........ - Page 48 Frequency range ....530 kHz to 1 640 kHz (10 kHz) 531 kHz to 1 602 kHz (9 kHz) Usable sensitivity ..... 25 µV (S/N: 20 dB) Signal-to-noise ratio ..62 dB (IEC-A network) Bluetooth (AVH-269BT) Version ......Bluetooth 3.0 certified...
- Page 52 Visit our website We offer the latest information about PIONEER CORPORATION on our website. PIONEER CORPORATION 1-1, Shin-ogura, Saiwai-ku, Kawasaki-shi, Kanagawa 212-0031, JAPAN PIONEER ELECTRONICS (USA) INC. P.O. Box 1540, Long Beach, California 90801-1540, U.S.A. TEL: (800) 421-1404 PIONEER EUROPE NV Haven 1087, Keetberglaan 1, B-9120 Melsele, Belgium/Belgique TEL: (0) 3/570.05.11...