Bosch C 950 Installation Manual
Hide thumbs
Also See for C 950:
- Installation manual (72 pages) ,
- Technical service bulletin (2 pages) ,
- Applications manual (107 pages)
Table of Contents
Advertisement
INDOOR MODEL
C 950 / 1050 ES
C 950 / 1050 ES - Natural Gas / C 950 / 1050 ES - Liquefied Petroleum (LP) Gas
Temperature Modulated with Electronic Ignition Suitable for heating potable water and space heating
(Intended for variable flow applications)
Danger: If the information in this manual is not followed exactly, a fire or
explosion may result causing property damage, personal injury or
death.
Do not store or use gasoline or other flammable vapors and liquids in the
vicinity of this or any other appliance.
Installation and service must be performed by a trained and certified
installer, service agency or the gas supplier.
Improper installation, adjustment, alteration, service or maintenance
can cause injury or property damage. Refer to this manual. For assis-
tance or additional information consult a qualified installer, service
agency or the gas supplier.
In the Commonwealth of Massachusetts this product must be installed
by a licensed plumber or gas fitter.
Upon completion of the installation, these instructions should be
handed to the user of the appliance for future reference.
What to do if you smell gas
• Turn off the gas shut-off valve. Open windows and doors.
• Do not try to light any appliance.
• Do not touch any electrical switch, telephone, and do not use outlets.
• Extinguish all open flames. Do not smoke! Do not use lighters!
• Warn all occupants of the building. Do not ring doorbells!
• If you can hear gas leaking, leave the building immediately. Prevent
others from entering the building and notify the police and fire
department from outside the building.
•
From outside the building, call the gas utility company and a trained
and certified installer.
Advertisement
Table of Contents

Related Manuals for Bosch C 950


Summary of Contents for Bosch C 950
- Page 1 INDOOR MODEL C 950 / 1050 ES C 950 / 1050 ES - Natural Gas / C 950 / 1050 ES - Liquefied Petroleum (LP) Gas Temperature Modulated with Electronic Ignition Suitable for heating potable water and space heating (Intended for variable flow applications)
-
Page 2: Table Of Contents
2 | Table of contents Table of contents Key to symbols and safety instructions ....3 Troubleshooting ........47 Key to symbols . -
Page 3: Key To Symbols And Safety Instructions
▶ Immediately correct all faults to prevent system damage. ▶ In the Commonwealth of Massachusetts, the water heater must be ▶ Use only Bosch spare parts! Damage caused by the use of parts not installed by a licensed plumber. supplied by Bosch may void the warranty. - Page 4 4 | Key to symbols and safety instructions Risk of scalding at the hot water fixture ▶ When the water heater is in operation, temperatures in excess of 122 °F (50 °C) can occur. To limit the temperature at the tap, install a thermostatic DHW mixing valve.
- Page 5 Key to symbols and safety instructions | 5 For your safety WARNING: ▶ Do not store or use gasoline or other flammable, combustible or ▶ The maximum inlet gas pressure must not exceed the corrosive vapors and liquids in the vicinity of this or any other value specified by the manufacturer and the appliance.
-
Page 6: Fcc Rules
• Pressure relief valve (7 738 001 152) Temperature Time to severe scalding BOSCH is constantly improving its products, therefore 120 °F (48 °C) longer than 5 minutes specifications are subject to change without prior notice. -
Page 7: Specifications (Technical Data)
Appliance details | 7 Specifications (Technical data) Approved in US/Canada Technical characteristics Units C950 ES C1050 ES Capacity Maximum flow rate at a 25 °F (13.9 °C) rise GPM (l/min) 13.1 (49.7) 14.9 (56.5) Maximum flow rate at a 35 °F (19.4 °C) rise GPM (l/min) 9.4 (35.5) 10.7 (40.4) -
Page 8: Unpacking The Heater
▶ Lift front cover panel upward and remove. • Exhaust vent adaptor (with 4 screws and gasket provided) • Combustion air inlet adaptor (with 3 screws and gasket provided) • Installation manual (manual can be downloaded at www.bosch- climate.us) • Product registration card •... -
Page 9: General Rules To Follow For Safe Operation
Appliance details | 9 3.3.3 Remove combustion cover (service only) • 8. Should overheating occur or the gas supply fail to shut off, turn off the gas supply at the manual gas shut off valve, on the gas line. Note: ▶... -
Page 10: Dimensions And Minimum Installation Clearances
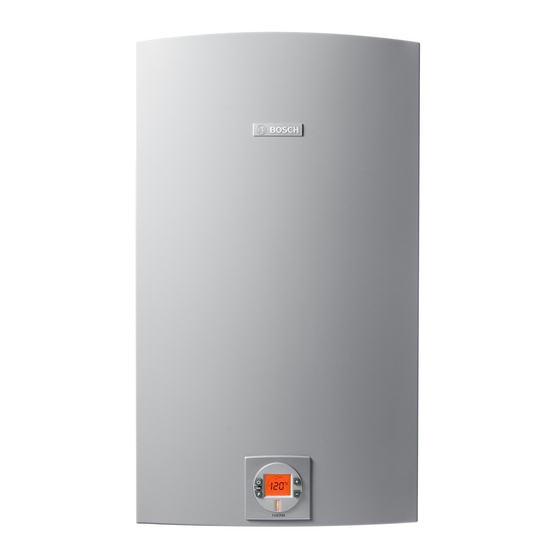
10 | Appliance details Dimensions and minimum installation clearances Fig. 6 Dimensions On/Off button Reset button Program key Power ON or stand-by LED LCD display Up button Down button 6 720 805 440 (2014/11) Greentherm... -
Page 11: Installation Instructions
If improperly installed, a hazardous condition such as explosion or carbon monoxide poisoning could result. Bosch Thermotechnology Corp. is not responsible for improperly installed appliances. Common installation practice is to first determine the venting/combustion air point of termination, then design the piping layout back to the heater. - Page 12 12 | Installation instructions 4.3.1 Vent options with 90° elbow or T terminals. Maximum vent lengths and equivalent lengths per tables 9 and 10 apply. The Greentherm are approved with the following venting options: All combustion air and vent pipe materials and fittings must comply with Kit part no.
- Page 13 Installation instructions | 13 4.3.2 Vent specifications Maximum Elbow Establish vent clearances that comply with the vent manufacturer's 3" Venting allowable Equivalency specifications and all applicable national/local codes. Exhaust pipe Combustion air length pipe length 90° 45° Venting specifications Twin pipe with two 31ft 31ft 5 ft...
- Page 14 14 | Installation instructions Calculation of example For this example, the maximum allowable exhaust pipe Max. length 63’ length is 12 feet. 90° elbow reduction - 5’ sub-total = 58’ Combustion air 45° elbow reduction - 3’ Total = 55’ System used Concentric Table 19...
- Page 15 Installation instructions | 15 Required direct vent terminal clearances (twin pipe / concentric penetration) for PVC, CPVC, ABS, and PP. Fig. 10 Canadian installations U.S. installations Clearance above grade, veranda, porch, deck or balcony 12 in. 12 in. Clearance to window or door that may be opened 36 in.
- Page 16 16 | Installation instructions Required other than direct vent terminal clearances (single pipe penetration) for PVC, CPVC and ABS systems. Fig. 11 Canadian installations U.S. installations Clearance above grade, veranda, porch, deck or balcony 12 in. 12 in. Clearance to window or door that may be opened 36 in.
- Page 17 Installation instructions | 17 4.3.3 Vent configuration examples for PP, PVC, CPVC, or ABS systems Below are approved examples of vertical and horizontal venting installations. Fig. 13 Vertical venting system (single pipe penetration) Fig. 12 PP concentric kit venting Drain tee (when required) Intake Exhaust NOTICE: Using a single pipe vent in cold climates puts...
- Page 18 18 | Installation instructions WARNING: ▶ Single pipe penetration should be used in non- freezing climates only and steps must be taken to ensure that adequate combustion air is available to the water heater at all times! Fig. 17 Horizontal venting system (single pipe penetration) Exhaust pipe Intake pipe [LA] Minimum 4"...
- Page 19 Installation instructions | 19 ▶ Attach the combustion air inlet accessory to the top of the unit fig. 19 (position 2) using the 3 screws and gasket provided, and install 3" air intake pipe over the accessory. Fig. 20 Appliance drain installation Fig.
- Page 20 20 | Installation instructions 4.3.6 Freeze prevention for PVC, CPVC, and ABS systems In cold climates, components of a tankless water heater can freeze and burst from negative draft. A leading cause of negative draft is combustion appliances in the building not being supplied with sufficient combustion air.
- Page 21 Fig. 27 Back to back configuration Fig. 28 Side by side configuration For available parts and configurations see the Greentherm Common Vent Bulletin available on www.bosch-climate.us. Fig. 26 Common venting for 2 to 4 water heaters available with vertical or horizontal termination NOTICE: Drawings 26 to 28 depict the conceptual configurations available.
- Page 22 22 | Installation instructions 4.3.8 Fan speed adjustment necessary adjustments to fan speed values may result in improper operation of the appliance. NOTICE: IMPORTANT INFORMATION! First calculate the total equivalent vent length. This is the straight pipe ▶ Natural gas heaters with installation altitudes below length of both exhaust and combustion air plus the number of elbows 2,000 ft above sea level disregard this section.
- Page 23 Installation instructions | 23 Liquid Liquid Natural Gas propane Natural Gas propane Minimum Minimum Maximum Maximum Altitude (above Vent Total equivalent vent power fan power fan power fan power fan sea level) terminal length speed (P2) speed (P2) speed (P1) speed (P1) 0 - 2000 ft Concentric...
- Page 24 24 | Installation instructions Liquid Liquid Natural Gas propane Natural Gas propane Minimum Minimum Maximum Maximum Altitude (above sea Vent Total equivalent vent power fan power fan power fan power fan level) terminal length speed (P2) speed (P2) speed (P1) speed (P1) 0 - 2000 ft Concentric...
- Page 25 Installation instructions | 25 PP Concentric up and out venting - Only C1050 ▶ Press and hold simultaneously buttons for 3 seconds, until display reads P2. Altitude NG P2 LP P2 NG P1 LP P1 0 - 2000 no change no change no change 2000 - 4500...
-
Page 26: Combustion Air Requirements
26 | Installation instructions Attention residents of the Commonwealth of Massachusetts: In the Commonwealth of Massachusetts the following regulation went systems," the following requirements shall be satisfied by the into effect on 12/30/2005: manufacturer: (a)For all side wall horizontally vented gas fueled equipment installed in 1. -
Page 27: Proper Location For Installing Your Heater
Installation instructions | 27 – a) An unconfined space is one whose volume is greater than 50 For installations in an alcove or closet, maintain the minimum clearances cubic feet (1.42 cubic meter) per 1000 BTU/hr (292.81 Watts) to combustible and non-combustible materials. See fig. 6, page 10. of the combined rating of all appliances installed in the space. - Page 28 28 | Installation instructions 6720608158-05. 1 AL 6720608158-05. 1 AL Fig. 31 Distance between support boards Fig. 33 Mounting the heater Studs 16" (406mm) on center CAUTION: Personal injury and property damage. ▶ Appliance must be installed vertically. 6720608158-64.1AL Fig. 32 Leveling wall mounting bracket 6 720 805 440 (2014/11) Greentherm...
-
Page 29: Gas Piping & Connections
Installation instructions | 29 Gas piping & connections GAS LINE SIZING The gas supply piping for a single heater should be sized for a maximum Before connecting the gas supply, check the rating plate on the right side draw of 175000 BTU/hr for the C950 and 199000 BTU/hr for the of the heater to be sure that the heater is rated for the same gas to which C1050. - Page 30 30 | Installation instructions 4.8.1 Gas Line Sizing Tables for NATURAL GAS For your convenience see below for an excerpt from gas line sizing tables for a single NG appliance. For details see the current NFPA 54. Required input for C950 is 175000 BTU/hr and 199000 BTU/hr for the C1050. The gas supply system must be sized for the combined total maximum BTU/hr load requirements of all gas appliances running simultaneously.
- Page 31 Installation instructions | 31 4.8.2 Gas Line Sizing Tables for LP GAS For your convenience see below for an excerpt from gas line sizing tables for a single LP appliance. Their intended use is for pipe sizing between the the 2nd stage (low pressure) regulator and the appliance.
-
Page 32: Water Connections
For water analysis data call your local water department, or if on a well, have well water analyzed periodically. If water quality exceeds one or more of the values specified below, Bosch recommends consulting a local water treatment professional for water softening/conditioning options. -
Page 33: Filling The Condensate Trap
Installation instructions | 33 ▶ Remove the clip and disconnect the drain tube, see fig. 39. Fig. 39 Disconnect drain tube ▶ Fill the condensate trap by pouring approx.14 oz. (400ml) of water into the top of the drain tube. To avoid damage to the appliance use a funnel in this operation, see fig. -
Page 34: Domestic Hot Water Recirculation
Thermotechnology for further installation requirements. The following drawing is provided to outline one possible recirculation design using the water heater in conjunction with a Bosch electric mini tank water heater. This schematic is for illustration only and must not be used for... -
Page 35: Space Heating Applications
44. Use of when the Bosch tankless water heater is used with an a Bosch tankless water heater in a combination DHW and space heating air-handling system. The flow switch should be used application will result in the product warranty being reduced to 3 years. -
Page 36: Measuring Gas Pressure
36 | Installation instructions Fig. 45 Pressure drop curve 4.14 Measuring gas pressure Confirm gas pressure upon installation. Gas type 3.5” WC 8” WC Connecting manometer ▶ Shut off gas supply at installer supplied shutoff valve for this water Table 44 Minimum inlet gas pressure under full operation heater. -
Page 37: Electrical Connections
Electrical connections | 37 Static Gas Pressure Reading (see chapter 4.14) enter here: ___________________ Date: ___________ Operating Gas Pressure Reading (see chapter 4.14) enter here: ___________________ Date: ___________ Table 45 Fig. 47 Gas pressure test port (left tapping) Electrical connections Electrical power supply ▶... -
Page 38: Operation Instructions
38 | Operation instructions Operation instructions Fig. 51 On/Off button Reset button Program Key LCD display Up button Down button Power On or stand-by LED Description LCD Display Fig. 55 Locked condition indicator (only with remote control) NOTICE: ▶ Do not use any aggressive or corrosive cleaning agents to clean the window. -
Page 39: For Your Safety Read Before Operating Your Water Heater
Operation instructions | 39 ▶ Press buttons in order to reach desired temperature. Fig. 59 Activation water flow (see chapter 12) For your safety read before operating your water Fig. 61 heater Setting the water temperature WARNING: Explosion hazard! The desired temperature of the hot water can be adjusted on the front ▶... -
Page 40: Use Of Optional Remote Control Accessory (Part No. 7709003213)
40 | Operation instructions Operation ▶ When a hot water tap is opened, main burner ignites and LCD displays indication Fig. 64 ▶ LCD flashes until selected temperature is reached. ▶ Power bar indicates power percentage in use. Reset button If the LCD shows the error symbol do not shut off power or unplug the heater. -
Page 41: Locked Condition
• Inspect heat exchanger fin coils for soot build-up or blockage. To DANGER: access fincoil, consult service bulletin at www.bosch-climate.us. If ▶ Always shut off the electrical power supply, shut off there is evidence of soot build-up or blockage, the heat exchanger the manual gas valve and shut off the water valves should be removed by a professional and cleaned thoroughly. -
Page 42: Condensing Heat Exchanger Unit
If repairs are needed, the repairs ▶ Make sure all connections are "water tight.". should be done by a certified Bosch technician. Commercial or ▶ Fill tank with descaling solution so both lines inside are submersed. -
Page 43: Adjusting Co2
Maintenance and service | 43 ▶ Insert CO analyzer probe into the measuring port. The tip of the probe should be in the center of the flue pipe (approx 1.5" inserted). Avoid air gaps between probe and measuring port as they can alter readings. -
Page 44: Program Values
44 | Maintenance and service Max. CO level range (%) (measured) C950ES C1050ES Nat. Gas Nat. Gas max. input 7.2 % - 7.8 % 7.8 % - 8.4 % < 250 ppm min. input 1.5 % - 1.8 % 1.5 % - 1.8 % <... -
Page 45: Control Board Diagnostics
“P” - button Cascading type This menu is only available when cascade mode is selected CC. Contact Bosch Water Heating for details. Primary/Secondary mode Table 49 Program values, factory default settings and ranges. Control board diagnostics 1. - Page 46 46 | Maintenance and service After checking the sub-modes C0, C1 and C2, introduce the values in a table as the example; Diagnostic menu 10th most recent error Example: Calculation of number of cycles (1 cycle = 1 ignition), Appliance type - Cd (Condensing) Appliance type - nC (Non condensing) Number of cycles Appliance power - 175 / 199 (kBTU/hr)
-
Page 47: Troubleshooting
See chapter7.3, page 42 for directions. Visit our web site at www.bosch-climate.us for more detailed Water is not hot enough troubleshooting. For best results, perform each step before proceeding to the next. -
Page 48: Hot Water Temperature Fluctuates At Tap
If this slows the flow through the tankless water heater below its activation point, it will shut off the burners. The end result is nothing but cold water coming out of the outlet. Consult www.bosch- climate.us for a detailed service bulletin on overcoming temperature fluctuations. -
Page 49: Noisy Burner/Heater During Operation
Troubleshooting | 49 Noisy burner/heater during operation 1. Sealed combustion leak. Make sure combustion cover is securely fastened. Ensure the exhaust vent adaptor is properly sealed with supplied gasket. Leaky seals create improper combustion resulting in noise. 2. Improper venting. Venting that is unsealed, the wrong material, too big in diameter or too long in run will result in unstable burner flames and noise. -
Page 50: Problem Solving
3. Check supply voltage. It must be 120VAC and properly grounded. 4. Possible defective control unit call Bosch Water Heating for further instructions. Bypass valve solenoid damaged or 1. Check wire connection at the bypass valve, fig. 86, page 64. - Page 51 87, page 65. 2. Check supply voltage. It must be 120VAC and properly grounded. 3. Possible defective component in fan or defective control unit call Bosch Water Heating for further instructions. (Flashing) Water flow signal over specified 1.
- Page 52 52 | Problem solving Display Cause Solution Overheat sensor (ECO) open circuit 1. Disconnect power supply cord and check wire connections on the overheat sensor (fig. (resets when cooler temperatures are 80, page 57) and the two connectors on the control board. detected 220°F/104 °C).
- Page 53 2. Flame ionization rod or control unit may be damaged. Contact Bosch Water Heating for further instruction. Gas leakage error, gas valve circuit not 1.
-
Page 54: Electrical Diagram
54 | Electrical diagram Electrical diagram Fig. 76 Electrical scheme Inlet water temperature sensor Outlet water temperature sensor Backflow temperature sensor By-pass water valve Cascading output connection Cascading input connection Ionization sensor Water flow sensor Flue gas limiter [10] Heat exchanger overheat sensor (ECO) [11] Gas valve [12] Temperature Heat Exchanger [13] Exhaust temperature sensor... -
Page 55: Sensor Resistance Charts
Sensor resistance charts | 55 Sensor resistance charts Fig. 77 Outlet / Inlet and HE immersion sensor characteristics Fig. 78 Greentherm 6 720 805 440 (2014/11) -
Page 56: Functional Scheme
56 | Functional scheme Functional scheme Fig. 79 Functional scheme 6 720 805 440 (2014/11) Greentherm... -
Page 57: Interior Components Diagram And Parts List
Interior components diagram and parts list | 57 Interior components diagram and parts list 13.1 Interior components Fig. 80 Components Exhaust temperature sensor [13] Ignition electrodes Flue gas collector [14] Observation window Heat exchanger [15] Backflow temperature sensor Ionization sensor [16] Secondary air fan Primary fan (Mixer) [17] Gas valve... - Page 58 58 | Interior components diagram and parts list Fig. 81 Appliance overview 6 720 805 440 (2014/11) Greentherm...
-
Page 59: Components Diagram
Interior components diagram and parts list | 59 13.2 Components diagram 13.2.1 Group 1 Fig. 82 Components Diagram Item Description Reference Item Description Reference Combustion cover clip 8 701 201 032 0 Front cover 8 738 708 387 Grommet set 8 710 203 039 0 Cover shield 8 738 708 388... - Page 60 60 | Interior components diagram and parts list 13.2.2 Group 2 Fig. 83 Components Diagram 6 720 805 440 (2014/11) Greentherm...
- Page 61 Interior components diagram and parts list | 61 Item Description Reference Heat exchanger (LP Gas) 8 738 704 026 0 Heat exchanger (Natural Gas) 8 738 704 117 0 Heat exchanger top gasket 8 704 701 052 0 Condensing exchanger inlet 8 705 700 159 0 Overheat sensor (ECO) 8 707 206 204 0...
- Page 62 62 | Interior components diagram and parts list 13.2.3 Group 3 Fig. 84 Components Diagram Item Description Reference Item Description Reference Gas / Air Mixer 8 705 700 170 0 Main burner (Natural Gas) 8 708 120 642 0 Venturi 8 700 306 226 0 Main burner (LP Gas) 8 708 120 699 0...
- Page 63 Interior components diagram and parts list | 63 13.2.4 Group 4 Fig. 85 Components Diagram Item Description Reference Item Description Reference Washer 8 704 701 062 0 Gas valve 8 707 021 019 0 Regulation screw 8 703 404 220 0 Pressure tapping 8 703 404 219 0 O-ring...
- Page 64 64 | Interior components diagram and parts list 13.2.5 Group 5 Fig. 86 Components Diagram Item Description Reference Item Description Reference Filter 8 700 507 059 0 Water valve with engine and 8 708 505 023 0 temperature sensor Filter cover 8 738 702 550 0 O-ring 8 700 205 147 0...
- Page 65 Interior components diagram and parts list | 65 13.2.6 Group 6 Fig. 87 Components Diagram Item Description Reference Item Description Reference Shaped seal (optional) 8 700 201 012 0 Control unit 8 738 708 389 Screw (optional) 8 703 401 109 0 Fuse T2.5A 1 904 521 342 0 Printed circuit transceiver (optional) 8 708 300 123 0...
-
Page 66: Protecting The Environment
66 | Protecting the environment Protecting the environment Packing The packing box may be fully recycled as confirmed by the recycling symbol Components Many parts in the heater can be fully recycled in the end of the product life. Contact your city authorities for information about the disposal of recyclable products. -
Page 67: Installer Checklist To Be Completed By Installer Upon Installation
Installer Checklist to be completed by installer upon installation | 67 Installer Checklist to be completed by installer upon installation Serial Number ___ ___ ___ ___ ___ ___ ___ ___ (8 digit serial number is located on rating plate on right side panel) Gas Pressure Reading Static...