Table of Contents
Advertisement
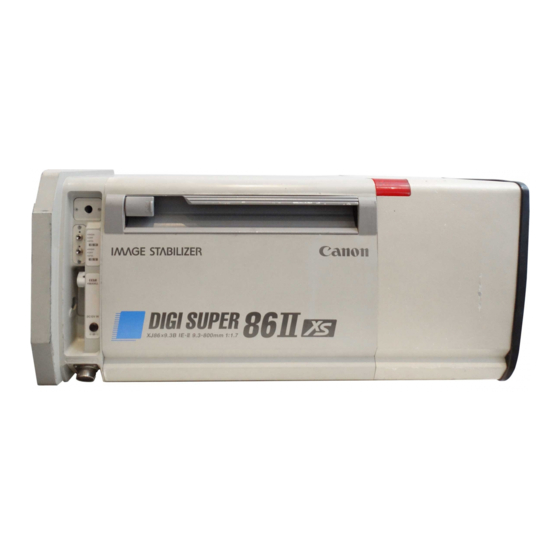
BCTV Zoom Lens
广播电视变焦镜头
取
扱
OPERATION MANUAL
使 用 说 明 书
ご使用の前に必ずこの取扱説明書をお読みください。
なお、取扱説明書は必要に応じてご覧になれるよう大切に保管してください。
Read this operation manual before using the product.
Keep the manual in place for future reference.
在使用本产品之前 , 请务必先仔细阅读本使用说明书。
请务必妥善保管好本书 , 以便日后能随时查阅。( 保留备用 )
请在充分理解内容的基础上 , 正确使用。
説
明
書
XJ100x9.3B AF
XJ100x9.3B
XJ95x8.6B
XJ86x13.5B
XJ86x9.3B AF
XJ86x9.3B
XJ80x8.8B
XJ76x9B
XJ75x9.3B
XJ72x9.3B
XJ60x9B
XJ27x6.5B AF
XJ27x6.5B
XJ23x7B
J/E/C
Advertisement
Table of Contents

Related Manuals for Canon XJ100x9.3B AF


Summary of Contents for Canon XJ100x9.3B AF
- Page 1 BCTV Zoom Lens 广播电视变焦镜头 XJ100x9.3B AF XJ100x9.3B XJ95x8.6B XJ86x13.5B XJ86x9.3B AF XJ86x9.3B XJ80x8.8B XJ76x9B XJ75x9.3B 取 扱 説 明 書 XJ72x9.3B OPERATION MANUAL XJ60x9B 使 用 说 明 书 XJ27x6.5B AF XJ27x6.5B XJ23x7B ご使用の前に必ずこの取扱説明書をお読みください。 なお、取扱説明書は必要に応じてご覧になれるよう大切に保管してください。 Read this operation manual before using the product. Keep the manual in place for future reference.
- Page 3 ENGLISH VERSION The English version is the operation manual for counties other than Japan.
- Page 4 Canadian Radio Interference Regulations CAN ICES-3(A)/NMB-3(A) We, Canon Inc., in Japan and CANON EUROPE LTD., in U.K., confirm that the BCTV zoom lens is conformity with the essential requirements of EC Directive(s) by applying the following standards: EN55103-1 and EN55103-2...
- Page 5 Your cooperation in the correct disposal of this product will contribute to the effective usage of natural resources and will avoid incurring administrative sanctions according to art. 50 and following of Italian legislative decree 22/97. For more information regarding return and recycling of WEEE products, please visit www.canon-europe.com/environment. (EEA: Norway, Iceland and Liechtenstein)
-
Page 6: Product Configuration
Thank you for purchasing the Canon BCTV zoom lens. This operation manual explains the functions and operating instructions for the Canon BCTV zoom lens. It also describes precautions for handling the lens. Read this operation manual carefully before using the product. Also, keep this manual in a safe place where it can easily be referenced whenever necessary. -
Page 7: General Safety Information
5. If the lens is to be used in adverse environments, such damage. as in a chemical laden atmosphere, consult with Canon’s representative beforehand. Emphasizes essential information which, if not heeded, may make the... - Page 8 Canon dealer or your Canon sales representative. 6. Note that Canon may be unable to undertake servicing or repair of a product if it is modified without consulting Canon or your Canon sales representative.
-
Page 9: Table Of Contents
HOW TO MOUNT 1-1 Mounting the Lens onto the Camera .................E2 1-2 Mounting the Accessories for Full Servo Operation ..........E3 1-3 Mounting the Accessories for Semi-servo Operation ..........E5 1-4 Mounting the Accessories for Manual Control System ..........E6 PREPARATION 2-1 Initialize Operation (Only Models with a Display) ............E7 2-2 Back Focus Adjustment .....................E7 2-3 Removing and Installing the Lens Shroud ..............E8 2-4 Iris Gain Adjustment ....................E8 2-5 Iris Mode Setting (Option) ..................E10 2-6 Setting on the Information Display ................E11 2-7 Incorporable Focus Servo Demand (Option) ............E12 OPERATION 3-1 Zoom and Focus Operation ..................E13 3-2 Iris Operation ......................E14 3-3 Extender Operation ....................E15 3-4 Operating the AF (Auto Focus) Function (Only Models with AF Function) .....E15 3-5 Operating the IS Function (Only Models with IS Function) ........E15... -
Page 10: How To Mount
Camera When using the portable camera, the supporter to mount the lens is required. Depending on the camera models, the supporters which can be used with a camera differ. For details, contact your Canon dealer or your Canon sales representative. -
Page 11: Mounting The Accessories For Full Servo Operation
1 HOW TO MOUNT 1-2 Mounting the Bottom compartment of the lens Accessories for Full Servo Operation Coupling B Lock Axis The servo demand is mounted and connected as shown in the figure below. When mounting the various demands, refer Groove to the operation manual for the respective demand. - Page 12 1 HOW TO MOUNT Lens Mounting the Accessories for IS Operation (Only Models with IS Function) “SW. BOX” Connector Mounting the IS operation unit Switch Box Cable Plug the connector of the IS operation unit into the receptacle labeled “AUX” on the left side of the lens (as viewed from the camera).
-
Page 13: Mounting The Accessories For Semi-Servo Operation
1 HOW TO MOUNT Connecting Wiper Switch Box (Option) “VIRTUAL” Connector When using separately purchased switch box for the wiper equipped lens, connect it to the lens using the dedicated cable. (Connection method varies by switch box specifications.) “SW. BOX” Connector Wiper Switch Box Cable To Virtual System Lens 1-3 Mounting the Accessories for Semi- servo Operation The zoom servo demand and the flexible focus control unit are mounted and connected as shown in the figure below. When mounting the various demands, refer to the operation Wiper Switch Box (Shapes and connections manual for the respective demand. vary by specifications.) Connecting the “VIRTUAL” Cable (Only Models with "VIRTUAL" Connector) The lens is equipped with the connector labeled “VIRTUAL” ... -
Page 14: Mounting The Accessories For Manual Control System
1 HOW TO MOUNT 1-4 Mounting the Next, as the same procedure, install the flexible module on the other joint. It does not matter which is installed first, Accessories for Manual either the zoom or the focus. Control System Bottom compartment of the lens Mount and connect the flexible zoom and focus control units as shown in the figure. -
Page 15: Preparation E7
2 PREPARATION 2-1 Initialize Operation • During initialization, lens operation is disabled. After initialization is completed, the lens returns to the position (Only Models with a Display) where it used to be before initialization. However, if the lens is operated in the position servo mode, the lens This lens has a built-in encoder for a position sensor of moves to the currently controlled position. -
Page 16: Removing And Installing The Lens Shroud
* (NOTE) For other iris adjustment such as iris ends adjustment or video level Lens Shroud adjustment when the extender is used, contact Canon dealer or your Canon sales representative. * (NOTE) Make sure that the fasteners of the lens shroud are always locked... - Page 17 2 PREPARATION Trimmer Adjustment Remove the lens shroud from the lens body. Check that DIP switch (iris control select switch) is set b. When the screen starts flushing by pushing the to the “OFF” position (refer to the table below). cursor button, move the (left) or (right) Depending on the command signals from the camera, cursor button until the value to be set appears on the iris would not be set to auto iris mode although the screen. the switch was set to the “OFF” position. For details, Selection item 01 – refer to the “Iris mode” table in 2-5 “Iris Mode Setting (Option)”. Function Minimum gain Maximum gain Default value: 50 Turn the iris gain adjusting trimmer for the gain I G : 50 I G : 51 adjustment. To increase the gain, turn the trimmer clockwise. To decrease the gain, turn the trimmer ...
-
Page 18: Iris Mode Setting (Option)
2 PREPARATION 2-5 Iris Mode Setting (Option) DIP switch (iris control select switch) was set to the “OFF” position at the factory. See the table below to find the relationship between the position of the switch and signals. Iris mode Iris control and operation depend on the following three signals Enforced auto iris command signal from the camera system (IRIS ENF) (Some camera models are not capable to provide this signal.) -
Page 19: Setting On The Information Display
2 PREPARATION 2-6 Setting on the Information Display The table below shows the functions that can be set from the information display. For the detailed setting method, refer to the “Display Operation Manual” at the end of this Operation Manual. Reference Functions that can be set from the information display page in... -
Page 20: Incorporable Focus Servo Demand (Option)
2 PREPARATION 2-7 Incorporable Focus STD (Standard mode): The Standard mode has the characteristics where the relationship between the rotation Servo Demand (Option) amount of the control knob and the moving amount of the focus lens group is almost in linear. The optional incorporable focus servo demands are offered FAR (Far mode): The Far mode facilitates focusing on an object in the far end, by making the far end for some types of camera. curve characteristics gentle to increase the far end resolution. This mode is useful when shooting an Remove the lens shroud from the lens. object in comparatively far distance in sports events, for example. NEAR (Near mode): Contrary to the Far mode, the Near mode facilitates focusing on an object in the Set the focus demand selection switch to the “CAM” near end, by making the near end curve position. characteristics gentle to increase the near end resolution. This mode is useful when shooting an object in a limited space such as a studio. * (NOTE) This switch is usually set to the “LENS” position by default. Focus Demand Selection Switch Focus Damand Characteristics Curve Selection Switch (Only models without information display) -
Page 21: Operation
3 OPERATION 3-1 Zoom and Focus Flexible module Flexible zoom control unit Operation Flexible focus control unit Flexible cable Switch box unit Full-servo System Operation Semi-servo System Operation Zoom and Focus operations are performed based on a configuration as shown in the figure below. For the operating procedure, refer to the operation manual Zoom and Focus operations are performed based on a for the respective unit. -
Page 22: Iris Operation
3 OPERATION 3-2 Iris Operation Remove the lens shroud. Normally, lens iris operation is performed by the position servo control method using commands from the camera Check that DIP switch is set to the “OFF” position. If CCU. Control can be switched between auto iris control and the switch is set to “ON” position, change the setting to remote iris control. the “OFF” position. The camera operator can also perform remote iris control using a switch box (special version) as a special specification. Control from the Switch Box Control from the Camera When a switch box which is capable to control the iris function of the lens is mounted, the iris function of the lens is Both automatic and remote iris control are usually operated controlled by it. from the CCU. (Refer to the camera operation manual on how to operate.) Setting the iris control select switch During the shooting, an approximate F number (iris value) can be checked with the indicator panel on the left side of Settings must be performed at the lens side in order for the the lens, as viewed from the camera. iris to be controlled from the switch box. Follow the setting steps below. F Number Indicator Remove the lens shroud. Change the DIP switch setting to the “ON” position (I.LOCAL). Controlling Control the iris by turning the iris control knob as set forth below. -
Page 23: Extender Operation
3 OPERATION 3-4 Operating the AF (Auto * (NOTE) Focus) Function • See the section “Mounting the Switch Box” (p. E3) for details of how to mount and connect the switch box. • Refer to the table “Iris mode” in the section 2-5 “Iris Mode Setting (Only Models with AF Function) (Option)” to understand the relationship among the command signals from camera, iris control device, and the position of the iris control select switch. An AF demand is necessary to operate the AF function. For more information about AF operation and AF function settings, please refer to the AF demand operation manual. 3-3 Extender Operation AF function notes • Focusing using the AF may not be possible when shooting Remote Operation the following types of subjects. Examples of objects difficult to focus using the AF Remote controlling from the zoom servo • Subjects with low contrast: Blue sky or a single- demand and switch box colored, flat surface • Subjects having particularly fast movement Remote extender control can be performed from the zoom • Subjects at night or dark locations servo demand, switch box, and other accessories. • The back focus of the lens may change slightly due to Remote controlling from the camera variations in the ambient temperature. To obtain the best ... - Page 24 3 OPERATION * (NOTE) DIP switch 1 No. 8 is the IS main power switch. Normally, the switch is kept at the OFF position. (For models with a display) Change the setting on the information display. IS Operation Switch For details on the information display, refer to the “Display Operation Manual” at the end of this Operation Manual. Using the accessories with IS operation switch function When using an accessory with IS operation function, refer to the operating instructions of the accessory. * (NOTE) Information Display The IS function activated by pressing, releasing or holding down the button varies according to the lens setting. Setting the IS operation switch mode (For models without a display) <Selecting ALT/MON> The IS function state alternates between “IS SW-ON” Setting the Image Stabilizing and “IS SW-OFF” each time the IS operation switch is pressed. Direction and Characteristics The IS function state is momentarily set to “IS SW- ON” while the IS operation switch is held down. “ALT” is set by default. IS Horizontal ALT/MON selection.. ALT : Set No.7 to OFF. Direction Selector MON : Set No.7 to ON. Switch (At the factory, No.7 was set to the OFF position.) <Selecting SW*/ OFF> Select the IS operation mode (OFF: IS STD.) when IS operation switch is OFF. IS Vertical Direction Selector When SW* is selected: Switch When the IS operation switch is ON, the IS function operates at the ...
- Page 25 3 OPERATION Advanced settings of IS function Shaded sections indicate that the IS indicator unit LED is lighted. IS SW-ON IS SW-OFF (Switch is pressed when set to MON) IS mode setting (Switch is not pressed when → Selector switch status is applied set to MON) * When the power is turned on, the IS function is in IS SW-ON state if the IS operation switch mode is set to “ALT”, and in IS SW-OFF state if set to “MON”.
-
Page 26: Other Functions And Options
4 Other Functions and Options 4-1 Checking for Low 4-3 Heater System (Option) Power The heater system for warming up the lens to prevent clouding inside the lens can be mounted on the lens. The The power low LED, used to indicate low power supply heater system is operated as follows. -
Page 27: Nitrogen Gas Filling (Option)
Nitrogen gas should be refilled at the periodic overhaul, and before the critical event. * (NOTE) To refill nitrogen gas, gas canister and filling tool are required. Contact your Canon dealer or your Canon sales representative. 4-6 Zoom Control Selecting Switch (Only XJ27x AF and XJ27x) Either the speed servo or position servo can be set as the servo system from the analog zoom demand. -
Page 28: Specifications
5 SPECIFICATIONS ■ IESD/IESDA ■ XJ100x9.3B■AF XJ100x9.3B 4:3■mode 16:9■mode 4:3■mode 16:9■mode 1.0x 9.3–930 mm Focal Length 2.0x 18.6–1860 mm Zoom Ratio 100× 1:1.7 (at 9.3–296 mm) 1.0x 1:4.7 (at 930 mm) Maximum Relative Aperture 1:3.4 (at 18.6–592 mm) 2.0x 1:9.4 (at 1860 mm) 6.6 mm 5.4 mm 6.6 mm... - Page 29 5 SPECIFICATIONS XJ95x8.6B XJ86x13.5B 4:3■mode 16:9■mode 4:3■mode 16:9■mode 1.0x 8.6–820 mm 13.5–1161 mm Focal Length 2.0x 17.2–1640 mm 27–2322 mm Zoom Ratio 95× 86× 1:1.7 (at 8.6–340 mm) 1:2.4 (at 13.5–480 mm) 1.0x 1:4.1 (at 820 mm) 1:5.8 (at 1161 mm) Maximum Relative Aperture 1:3.4 (at 17.2–680 mm)
- Page 30 5 SPECIFICATIONS XJ86x9.3B■AF XJ86x9.3B 4:3■mode 16:9■mode 4:3■mode 16:9■mode 1.0x 9.3–800 mm Focal Length 2.0x 18.6–1600 mm Zoom Ratio 86× 1:1.7 (at 9.3–340 mm) 1.0x 1:4.0 (at 800 mm) Maximum Relative Aperture 1:3.4 (at 18.6–680 mm) 2.0x 1:8.0 (at 1600 mm) 6.6 mm 5.4 mm 6.6 mm...
- Page 31 5 SPECIFICATIONS XJ80x8.8B XJ76x9B 4:3 mode 16:9 mode 4:3 mode 16:9 mode 1.0x 8.8–710 mm 9–690 mm Focal Length 2.0x 17.6–1420 mm 18–1380 mm Zoom Ratio 80× 76× 1:1.7 (at 8.8–340 mm) 1:1.7 (at 9–340 mm) 1.0x 1:3.55 (at 710 mm) 1:3.45 (at 690 mm) Maximum Relative Aperture 1:3.4 (at 17.6–680 mm) 1:3.4 (at 18–680 mm) 2.0x 1:7.1 (at 1420 mm) 1:6.9 (at 1380 mm) 8.8 6.6 mm 9.6 5.4 mm 8.8 6.6 mm 9.6 ...
- Page 32 5 SPECIFICATIONS XJ75x9.3B XJ72x9.3B 4:3■mode 16:9■mode 4:3■mode 16:9■mode 1.0x 9.3–700 mm 9.3–675 mm Focal Length 2.0x 18.6–1400 mm 18.6–1350 mm Zoom Ratio 75× 72× 1:1.7 (at 9.3–331 mm) 1:1.7 (at 9.3–333 mm) 1.0x 1:3.6 (at 700 mm) 1:3.45 (at 675 mm) Maximum Relative Aperture 1:3.4 (at 18.6–662 mm)
- Page 33 5 SPECIFICATIONS XJ60x9B XJ27x6.5B■AF 4:3■mode 16:9■mode 4:3■mode 16:9■mode 1.0x 9–540 mm 6.5–180 mm Focal Length 2.0x 18–1080 mm 13–360 mm Zoom Ratio 60× 27× 1:1.7 (at 9–306 mm) 1:1.5 (at 6.5–123 mm) 1.0x 1:3.0 (at 540 mm) 1:2.2 (at 180 mm) Maximum Relative Aperture 1:3.4 (at 18–612 mm)
- Page 34 5 SPECIFICATIONS XJ27x6.5B XJ23x7B 4:3■mode 16:9■mode 4:3■mode 16:9■mode 1.0x 6.5–180 mm 7–161 mm Focal Length 2.0x 13–360 mm 14–322 mm Zoom Ratio 27× 23× 1:1.5 (at 6.5–123 mm) 1:1.6 (at 7–132.1 mm) 1.0x 1:2.2 (at 180 mm) 1:1.95 (at 161 mm) Maximum Relative Aperture 1:3.0 (at 13–246 mm)
- Page 35 5 SPECIFICATIONS ■ ■ IDSD XJ95x8.6B XJ27x6.5B 4:3■mode 16:9■mode 4:3■mode 16:9■mode 1.0x 8.6–820 mm 6.5–180 mm Focal Length 2.0x 17.2–1640 mm 13–360 mm Zoom Ratio 95× 27× 1:1.7 (at 8.6–340 mm) 1:1.5 (at 6.5–123 mm) 1.0x 1:4.1 (at 820 mm) 1:2.2 (at 180 mm) Maximum Relative Aperture...
- Page 64 DISPLAY OPERATION MANUAL OPERATION MANUAL 索 引 索 引 ................16 ..............8 ..............10 ..............11 ..............11 ..............17 ...................4 .................15 ................15 ..................6 ..............9 INDEX INDEX CAMERA SERIAL .............E11 BACK FOCUS ..............E7 EXTENDER ..............E15 ENCORDER ..............E11 FOCUS ................E13 INDICATOR ............... E8 IRIS..................
- Page 65 memo...
- Page 66 memo...
- Page 67 memo...
- Page 68 1P7, Canada 电话:+86(0)10-8513-9999 Tel:+1(905)795-2012 传真:+86(0)10-8513-9915 Fax:+1(905)795-2087 Singapore Europe/Africa/Middle East Canon Singapore Pte. Ltd. Canon Europe Ltd. REG ICP Sales & Marketing Div. Broadcast Products Div. 1 HarbourFront Avenue 3 The Square, Stockley Park, Uxbridge, #04-01 Keppel Bay Tower Middlesex, UB11 1ET, UK...
- Page 69 CANON INC. 30-2, Shimomaruko 3-chome, Ohta-ku, Tokyo, 146-8501, Japan Subject to change without notice. 进口商 : 佳能(中国)有限公司 地址 : 100005 北京市东城区金宝街 89 号 金宝大厦 15 层 规格・外观・商品构成等进行变更,恕不事先一一通知。 修订 :2012.12.1 原产地 : 日本 Pub No. B-IM-10060C 1212S ©2012.12 CANON INC. PRINTED IN JAPAN...