Nokia E90 Service Manual
Hide thumbs
Also See for E90:
- User manual (125 pages) ,
- Service manual (51 pages) ,
- Software manual (24 pages)
Table of Contents
Advertisement
Quick Links
See also:
User Manual
Page
1
(51)
SERVICE MANUAL
Level 1&2
CONFIDENTIAL
Copyright © 2007 NOKIA. All rights reserved.
RA-6
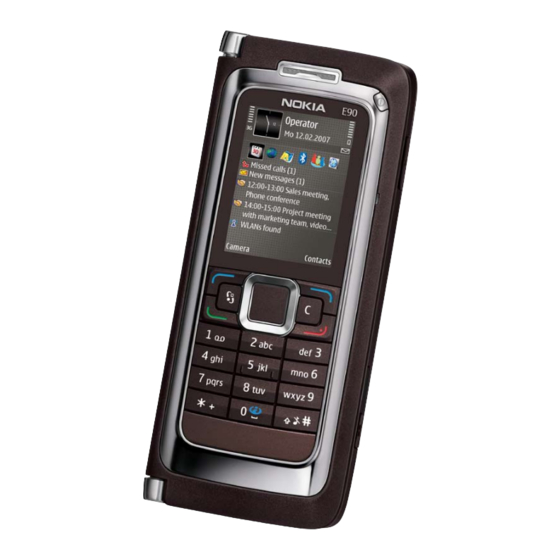
Transceiver characteristics:
Band:
EGSM: Quad-band 850/900/1800/1900MHz
WCDMA: 2100MHz
Display:
Inner - LCD: Active matrix color display (800x352 pixels); 16M colors
Outer - LCD: Active matrix color display (240x320 pixels); 16M colors
Camera:
Main Camera: 3.2 Megapixel with flash and autofocus
Sub Camera: QCIF camera for video calling
Operating System:
Series 60
Connections:
Wireless: WLAN, Bluetooth, IRDA, GPS
Connector: Mini USB Connector; AV Connector
Memory:
MicroSD™ (max 2GB)
Transceiver with BP-4L Li-Ion battery pack
Talk time
up to 5h
Service Manual Level 1&2
Standby
Note
Depends on network
up to 14days
parameters
E90 RA-6
ISSUE 2
Advertisement
Table of Contents

Related Manuals for Nokia E90


Summary of Contents for Nokia E90
- Page 1 Connector: Mini USB Connector; AV Connector Memory: MicroSD™ (max 2GB) Transceiver with BP-4L Li-Ion battery pack Talk time Standby Note Depends on network up to 5h up to 14days parameters Page (51) ISSUE 2 CONFIDENTIAL Copyright © 2007 NOKIA. All rights reserved.
-
Page 2: Table Of Contents
QUICK TROUBLE SHOOTER - PUSH TO TALK KEY QUICK TROUBLE SHOOTER - CAMERA KEY QUICK TROUBLE SHOOTER - FLASH LIGHT QUICK TROUBLE SHOOTER - SUB CAMERA QUICK TROUBLE SHOOTER - CAMERA Page (51) ISSUE 2 CONFIDENTIAL Copyright © 2007 NOKIA. All rights reserved. -
Page 3: Change History
Exploded view & Spare Parts overview updated The purpose of this document is to help NOKIA service levels 1 and 2 workshop technicians to carry out service to NOKIA products. This Service Manual is to be used only by authorized NOKIA service suppliers, and the content of it is confidential. -
Page 4: Warnings And Cautions
5. Ensure all cables and wires are repositioned correctly. ESD PROTECTION Nokia requires that service points have sufficient ESD protection (against static electricity) when servicing the phone. Any product of which the covers are removed must be handled with ESD protection. The SIM card can be replaced without ESD protection if the product is otherwise ready for use. -
Page 5: Care And Maintenance
Batteries’ performance is particularly limited in temperatures well below freezing. Do not dispose batteries in a fire! Dispose of batteries according to local regulations (e.g. recycling). Do not dispose as household waste. Page (51) ISSUE 2 CONFIDENTIAL Copyright © 2007 NOKIA. All rights reserved. -
Page 6: Exploded View
FLASH WINDOW (A8) after removal. TYPE LABEL I0227 (LEVEL 3&4 ONLY) CAMERA WINDOW (A8) I0209 = only available as BATTERY COVER ANTENNA COVER (A8) I0226 Ver. 2.0 assembly I0225 I0229 Page (51) ISSUE 2 CONFIDENTIAL Copyright © 2007 NOKIA. All rights reserved. -
Page 7: Spare Parts Overview
I0224 after removal. SCREW M1.4x3.4 SCREW M1.4x3.4 TORX PLUS 4IP = only available as TORX PLUS 4IP I0212 BATTERY COVER Ver. 2.0 assembly I0205 I0229 Page (51) ISSUE 2 CONFIDENTIAL Copyright © 2007 NOKIA. All rights reserved. -
Page 8: General Recycling Recommendation
E90 RA-6 Service Manual Level 1&2 GENERAL RECYCLING RECOMMENDATION Page (51) ISSUE 2 CONFIDENTIAL Copyright © 2007 NOKIA. All rights reserved. -
Page 9: Level 2 Solder Components
E90 RA-6 Service Manual Level 1&2 LEVEL 2 SOLDER COMPONENTS No solder able components for Level 2 Page (51) ISSUE 2 CONFIDENTIAL Copyright © 2007 NOKIA. All rights reserved. -
Page 10: Service Tools
Service Bulletin (SB-011) on NOKIA On- line. Supplier or manufacturer contacts for tool re-order can be found in “Recom- mended service equipment” docu- ment on NOKIA Online. Page (51) ISSUE 2 CONFIDENTIAL Copyright © 2007 NOKIA. All rights reserved. -
Page 11: Sw-Update
To use FLS-5 Flash Dongle you have to follow the user guide inside the sales package. Please check always for the latest version of flash software, which is available on NOKIA Online. Page (51) ISSUE 2 CONFIDENTIAL Copyright © 2007 NOKIA. All rights reserved. -
Page 12: Upper Block Disassembly
E90 RA-6 Service Manual Level 1&2 UPPER BLOCK DISASSEMBLY 1. You will need the Nokia Standard Toolkit version 2. Also 2. Open the assembly. Peel up the LOGO PLATE with the dental refer the General Mechanical Guideline video for additional pick. - Page 13 10. Ease out the glued in EARPIECE with the SS-93. SS-93. 11. Discard it, do not use this part again when reassemble. 12. Unscrew these 2 Torx Plus size 4 screws. Page (51) ISSUE 2 CONFIDENTIAL Copyright © 2007 NOKIA. All rights reserved.
- Page 14 QWERTY KEYMAT side. before continuing. Flip over both parts of the hinge. 17. Now turn the CHASSIS ASSEMBLY. 18. Be double carefully while opening these 2 MICROCOAX HARNESS connectors. Page (51) ISSUE 2 CONFIDENTIAL Copyright © 2007 NOKIA. All rights reserved.
- Page 15 19. It is very important not to bend these connectors while 20. Now the CHASSIS ASSEMBLY can be removed. opening. Otherwise the connectors become unusable. 21. The disassembly procedure is now complete. Page (51) ISSUE 2 CONFIDENTIAL Copyright © 2007 NOKIA. All rights reserved.
-
Page 16: Upper Block Assembly
5. Now place the CHASSIS ASSEMBLY. 6. Close both MICROCOAX HARNESS connector. Check for correct fitting of the connectors before going on. Page (51) ISSUE 2 CONFIDENTIAL Copyright © 2007 NOKIA. All rights reserved. - Page 17 9. Insert the two screws. 10. Set the correct torque. 11. Apply the torque to the screws in the shown order. 12. Place the LCD AM 240x320. Close the flex foil connector. Page (51) ISSUE 2 CONFIDENTIAL Copyright © 2007 NOKIA. All rights reserved.
- Page 18 IHF SPEAKER becomes unusable. 17. Place the A-COVER ASSEMBLY, beginning at the opposite 18. Do not mismatch these screws. Place this short screw… side of the hinge. Page (51) ISSUE 2 CONFIDENTIAL Copyright © 2007 NOKIA. All rights reserved.
- Page 19 21. …at both edges of the A-COVER ASSEMBLY. 22. Set the correct torque. 23. Apply the correct torque in the order shown. 24. Align the new LOGO PLATE first. Then smooth it down evenly. Page (51) ISSUE 2 CONFIDENTIAL Copyright © 2007 NOKIA. All rights reserved.
-
Page 20: Lower Block Disassembly
E90 RA-6 Service Manual Level 1&2 LOWER BLOCK DISASSEMBLY 1. You will need the Nokia Standard Toolkit version 2 and 2. Remove the BATTERY COVER. the SS-81 camera removal tool. Also refer to the General Mechanical Guideline video for additional hints about the tools and component handling. - Page 21 10. Lift out the CAMERA MODULE now. now. 12. Discard the screws. Do not use them again when 11. Unscrew these 5 TORX PLUS size 4 screws in the order shown. reassembling. Page (51) ISSUE 2 CONFIDENTIAL Copyright © 2007 NOKIA. All rights reserved.
- Page 22 16. It is possible to remove the QWERTY KEYMAT without unlocking the QWERTY COVER. 17. Carefully release the hidden clips of the QWERTY COVER, 18. …on the middle near the LOGO PLATE… located on the right side… Page (51) ISSUE 2 CONFIDENTIAL Copyright © 2007 NOKIA. All rights reserved.
- Page 23 22. Mind the hidden components underneath when opening the flex foil connector. 23. The MICROCOAX HARNESS connectors are very delicate. Be 24. The ENGINE MODULE can be removed now. double careful when releasing these 2 connectors. Page (51) ISSUE 2 CONFIDENTIAL Copyright © 2007 NOKIA. All rights reserved.
- Page 24 28. The WLAN ANTENNA MODULE can be removed. 30. Discard them, do not use them again. 29. Unscrew these 3 Torx Plus size 4 screws in the shown order. Page (51) ISSUE 2 CONFIDENTIAL Copyright © 2007 NOKIA. All rights reserved.
- Page 25 E90 RA-6 Service Manual Level 1&2 31. Remove the ANTENNA/IHF MODULE. 32. The disassembly of the lower block is now complete. Page (51) ISSUE 2 CONFIDENTIAL Copyright © 2007 NOKIA. All rights reserved.
-
Page 26: Lower Block Assembly
Antenna M1.4 x 3.4 3. Replace the ANTENNA/IHF MODULE. 4. First take the 3 new screws 1.4M x 3.4 ... 5. …and place them. 6. Set the correct torque. Page (51) ISSUE 2 CONFIDENTIAL Copyright © 2007 NOKIA. All rights reserved. - Page 27 10. Note: False placement will destroy the delicate MICROCOAX the cables. cables. 12. Set the correct torque. 11. Insert the 2 hinge screws. Note! Use the correct length - M1.4 x 4.5 Page (51) ISSUE 2 CONFIDENTIAL Copyright © 2007 NOKIA. All rights reserved.
- Page 28 16. Be double accurate while closing this 2 MICROCOAX HARNESS connectors. 17. Flip over the ENGINE MODULE. 18. Check the correct placement of the cables before going on. Page (51) ISSUE 2 CONFIDENTIAL Copyright © 2007 NOKIA. All rights reserved.
- Page 29 23. Replace the QWERTY COVER, beginning on the left side, 24. Close the clips, check that no cables will be squeezed, where the connectors are located. otherwise the DUAL AXIS HINGE MODULE becomes unusable. Page (51) ISSUE 2 CONFIDENTIAL Copyright © 2007 NOKIA. All rights reserved.
- Page 30 20. Mind the correct positioning of the key mat before going on. 21. Click the snaps into their places. 22. Replace the CAMERA BUTTON… 23. …and the PUSH TO TALK BUTTON. 24. Take these 5 new screws. Page (51) ISSUE 2 CONFIDENTIAL Copyright © 2007 NOKIA. All rights reserved.
- Page 31 27. Apply the torque to the screws in the shown order. 28. Replace the FLASH GASKET. 30. Push it into its housing evenly. 29. Mind the alignment tab while replacing the CAMERA MODULE. Page (51) ISSUE 2 CONFIDENTIAL Copyright © 2007 NOKIA. All rights reserved.
- Page 32 34..followed by the 2 snaps at this side. 36. Replace the BATTERY COVER. 35. The last clip is located close to the CAMERA BUTTON. Click it into its place slightly. Page (51) ISSUE 2 CONFIDENTIAL Copyright © 2007 NOKIA. All rights reserved.
-
Page 33: Legend For Quick Trouble Shooter
E90 RA-6 Service Manual Level 1&2 LEGEND FOR QUICK TROUBLE SHOOTER Page (51) ISSUE 2 CONFIDENTIAL Copyright © 2007 NOKIA. All rights reserved. -
Page 34: Quick Trouble Shooter - Power On
E90 RA-6 Service Manual Level 1&2 QUICK TROUBLE SHOOTER - POWER ON Page (51) ISSUE 2 CONFIDENTIAL Copyright © 2007 NOKIA. All rights reserved. -
Page 35: Quick Trouble Shooter - Charging
E90 RA-6 Service Manual Level 1&2 QUICK TROUBLE SHOOTER - CHARGING Page (51) ISSUE 2 CONFIDENTIAL Copyright © 2007 NOKIA. All rights reserved. -
Page 36: Quick Trouble Shooter - No Service
E90 RA-6 Service Manual Level 1&2 QUICK TROUBLE SHOOTER - NO SERVICE Page (51) ISSUE 2 CONFIDENTIAL Copyright © 2007 NOKIA. All rights reserved. -
Page 37: Quick Trouble Shooter - Wlan/Bluetooth
E90 RA-6 Service Manual Level 1&2 QUICK TROUBLE SHOOTER - WLAN/BLUETOOTH Page (51) ISSUE 2 CONFIDENTIAL Copyright © 2007 NOKIA. All rights reserved. -
Page 38: Quick Trouble Shooter - Gps
E90 RA-6 Service Manual Level 1&2 QUICK TROUBLE SHOOTER - GPS Page (51) ISSUE 2 CONFIDENTIAL Copyright © 2007 NOKIA. All rights reserved. -
Page 39: Quick Trouble Shooter - Earpiece
E90 RA-6 Service Manual Level 1&2 QUICK TROUBLE SHOOTER - EARPIECE Page (51) ISSUE 2 CONFIDENTIAL Copyright © 2007 NOKIA. All rights reserved. -
Page 40: Quick Trouble Shooter - Ihf Speaker
E90 RA-6 Service Manual Level 1&2 QUICK TROUBLE SHOOTER - IHF SPEAKER Page (51) ISSUE 2 CONFIDENTIAL Copyright © 2007 NOKIA. All rights reserved. -
Page 41: Quick Trouble Shooter - Display
E90 RA-6 Service Manual Level 1&2 QUICK TROUBLE SHOOTER - DISPLAY Page (51) ISSUE 2 CONFIDENTIAL Copyright © 2007 NOKIA. All rights reserved. -
Page 42: Quick Trouble Shooter - Sub Display
E90 RA-6 Service Manual Level 1&2 QUICK TROUBLE SHOOTER - SUB DISPLAY Page (51) ISSUE 2 CONFIDENTIAL Copyright © 2007 NOKIA. All rights reserved. -
Page 43: Quick Trouble Shooter - Microphone
E90 RA-6 Service Manual Level 1&2 QUICK TROUBLE SHOOTER - MICROPHONE Page (51) ISSUE 2 CONFIDENTIAL Copyright © 2007 NOKIA. All rights reserved. -
Page 44: Quick Trouble Shooter - Cmt Keymat
E90 RA-6 Service Manual Level 1&2 QUICK TROUBLE SHOOTER - CMT KEYMAT Page (51) ISSUE 2 CONFIDENTIAL Copyright © 2007 NOKIA. All rights reserved. -
Page 45: Quick Trouble Shooter - Qwerty Keymat
E90 RA-6 Service Manual Level 1&2 QUICK TROUBLE SHOOTER - QWERTY KEYMAT Page (51) ISSUE 2 CONFIDENTIAL Copyright © 2007 NOKIA. All rights reserved. -
Page 46: Quick Trouble Shooter - Send/End/Soft Keys
E90 RA-6 Service Manual Level 1&2 QUICK TROUBLE SHOOTER - SEND/END/SOFT KEYS Page (51) ISSUE 2 CONFIDENTIAL Copyright © 2007 NOKIA. All rights reserved. -
Page 47: Quick Trouble Shooter - Push To Talk Key
E90 RA-6 Service Manual Level 1&2 QUICK TROUBLE SHOOTER - PUSH TO TALK KEY Page (51) ISSUE 2 CONFIDENTIAL Copyright © 2007 NOKIA. All rights reserved. -
Page 48: Quick Trouble Shooter - Camera Key
E90 RA-6 Service Manual Level 1&2 QUICK TROUBLE SHOOTER - CAMERA KEY Page (51) ISSUE 2 CONFIDENTIAL Copyright © 2007 NOKIA. All rights reserved. -
Page 49: Quick Trouble Shooter - Flash Light
E90 RA-6 Service Manual Level 1&2 QUICK TROUBLE SHOOTER - FLASH LIGHT Page (51) ISSUE 2 CONFIDENTIAL Copyright © 2007 NOKIA. All rights reserved. -
Page 50: Quick Trouble Shooter - Sub Camera
E90 RA-6 Service Manual Level 1&2 QUICK TROUBLE SHOOTER - SUB CAMERA Page (51) ISSUE 2 CONFIDENTIAL Copyright © 2007 NOKIA. All rights reserved. - Page 51 E90 RA-6 Service Manual Level 1&2 QUICK TROUBLE SHOOTER - CAMERA Page (51) ISSUE 2 CONFIDENTIAL Copyright © 2007 NOKIA. All rights reserved.