Toshiba e-studio 165 Operator's Manual For Copying Functions
Multifunctional digital system
Hide thumbs
Also See for e-studio 165:
- Printing manual (256 pages) ,
- Operator's manual (224 pages) ,
- Fax manual (118 pages)
Table of Contents
Advertisement
Quick Links
Advertisement
Table of Contents

Related Manuals for Toshiba e-studio 165


Summary of Contents for Toshiba e-studio 165
- Page 1 MULTIFUNCTIONAL DIGITAL SYSTEMS Operator's Manual for Copying Functions...
- Page 2 In accordance with EPA NERGY TAR program guidelines, TOSHIBA recommends the following recycled paper. Great White MultiUse 20 paper If you have any questions regarding the use of recycled paper or some recommended types of recycled paper, please contact your authorized TOSHIBA dealer.
-
Page 3: Notice To Users
WARNING Changes or modification made to this equipment, not expressly approved by TOSHIBA TEC or parties authorized by TOSHIBA TEC, could void the user’s authority to operate the equipment. This Class A digital apparatus complies with Canadian ICES-003. -
Page 4: Lineup Of Our Manuals
Lineup of Our Manuals Thank you for purchasing the TOSHIBA multifunctional digital systems e-STUDIO165/205. We have provided you with these manuals for the operation of this equipment. Select and read the manual best suited to your needs. Operator’s Manual for Copying Functions This manual describes the basic operations, mainly copying functions, of this equipment. -
Page 5: Before Reading This Manual
Before Reading This Manual This operator’s manual describes the following: How to use this equipment How to inspect and carry out maintenance on this equipment How to remedy mechanical and copying problems Precautions in this manual To ensure correct and safe use of this equipment, this operator’s manual describes safety pre- cautions according to the three levels shown below. - Page 6 ©2006 TOSHIBA TEC CORPORATION All rights reserved Under the copyright laws, this manual cannot be reproduced in any form without prior written permission of TOSHIBA TEC CORPORATION. No patent liability is assumed, however, with respect to the use of the information contained herein.
-
Page 7: Table Of Contents
CONTENTS Notice to Users .....................1 Lineup of Our Manuals.................2 Before Reading This Manual ...............3 TOSHIBA Quality is Second to None............11 Features of e-STUDIO165/205 ..............14 General Precautions...................15 How to Use Antiskid Devices ..............20 Disclaimer Notice ..................21 Chapter 1 PREPARATION Description of Each Component...............24 Front / Right side ..................24... - Page 8 Interrupting copying and making another copy - Interrupt copy - ....58 Using Bypass Tray ..................59 Preparation - Registering paper size placed on bypass tray ....60 Bypass copying on standard size paper..........64 Chapter 3 COPYING FUNCTIONS Before Making Copies................68 Default settings..................68 Confirming set functions ................
- Page 9 Copying Both Sides of Card into 1 Page - ID CARD - ......109 Changing Sizes in Horizontal and Vertical Directions - XY ZOOM - ...112 Registering Functions Frequently Used - JOB MEMORY - ....114 Registering combination of functions.............114 Recalling combination of functions ............115 Chapter 5 CHANGING EQUIPMENT’S SETTINGS Before Changing the Settings ..............119...
- Page 10 ROM Version Display ................170 Chapter 6 TROUBLESHOOTING When This Message Appears..............172 Paper Jams ....................174 Checking position of paper jams ............174 When paper jams occur frequently............175 When releasing jammed paper..............175 Paper jams within Reversing Automatic Document Feeder (optional) / Automatic Document Feeder (optional)..........176 Paper jams on bypass tray ..............179 Paper jams within Automatic Duplexing Unit (optional)......180 Paper jam behind transfer unit ..............181...
- Page 11 Supply notice list..................215 Mailbox list.....................216 Configuration page list................217 NIC status page list ................218 Menu list ....................219 INDEX ............................221 CONTENTS...
- Page 12 CONTENTS...
-
Page 13: Toshiba Quality Is Second To None
TOSHIBA Quality is Second to None Co-packed toner cartridge The toner cartridge illustrated below is co-packed with the equipment. TOSHIBA Quality is Second to None... -
Page 14: Recommended Toner Cartridges
Recommended toner cartridges To assure optimal printing performance, we recommend that you use TOSHIBA toner cartridges. If you use a TOSHIBA-recommended toner cartridge, you can utilize the following two check functions of this equipment: Cartridge detecting function: This function checks if the toner cartridge is correctly installed and notifies you if it is not. -
Page 15: High Productivity
Genuine TOSHIBA supplies are designed to provide consistently stable image output. Copier Friendly Supplies Genuine TOSHIBA supplies are designed to help to keep the equipment and all its parts in trou- ble-free working order. Reduction of machine wear is due to TOSHIBA’s intimate knowledge of the equipment’s characteristics ensuring the highest standard of care. -
Page 16: Features Of E-Studio165/205
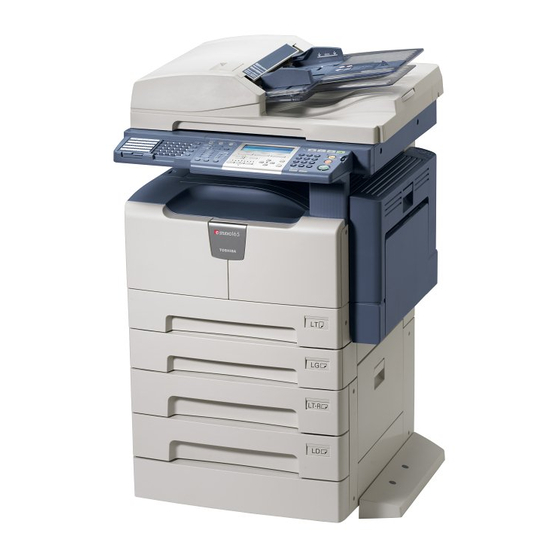
Features of e-STUDIO165/205 A black-and-white copier the e-STUDIO165/205 has realized the copying speed of 16 copies per minute (the e-STUDIO165) and also the copying speed of 20 copies per minute (the e-STUDIO205). Both of them can be a printer and a scanner when they are connected to your *2, *3 PC with a USB cable The e-STUDIO165/205 also has functions as a Fax, a network scanner and a network printer,... -
Page 17: General Precautions
General Precautions When installing or moving Warning This equipment requires 115 V, 12 A, 50/60 Hz electric power. Do not use a power supply with a voltage other than that specified. Avoid multiple connections in the same outlet. This could cause a fire or give you an electric shock. - Page 18 Caution Avoid placing the equipment in a place unsuitable for its weight and also make sure the sur- face is level. Remember that if the equipment falls over, serious injuries could result. Weight of the equipment: approx. 71.7 lb. Be sure to use the adjusters (safety stopper) to fix the equipment firmly to the floor after mov- ing/installing it.
- Page 19 When using the equipment Warning Do not take off the cover of the equipment; otherwise you could be injured or get an electric shock. Do not remove or connect the plug with wet hands, as this could give you an electric shock. Do not place any container with liquid (flower vases, coffee cups, etc.) on or near the equip- ment.
- Page 20 Position of Certification label, etc. Certification label Explanatory label Identification label Warning label Warning for high-temperature areas (ventilation holes) Warning for high-temperature areas (fuser unit) General Precautions...
-
Page 21: During Maintenance Or Inspection
Other points Do not turn the power OFF with jammed paper left inside the equipment. This could cause malfunctions when the main switch is turned ON next time. Be sure to turn the power OFF when leaving the office or if there is a power failure. Be careful because the paper exit area and paper just after exiting are hot. -
Page 22: How To Use Antiskid Devices
How to Use Antiskid Devices The Paper Feed Pedestal (optional) has 4 antiskid devices and 2 fall-preventing stoppers under its bottom. When moving this equipment, turn them in the direction of arrows (see figures below) and raise them to unfix the equipment. After it has been moved, be sure to turn them in the opposite direction and lower them to fix it. -
Page 23: Disclaimer Notice
Prod- ucts. 3. TOSHIBA TEC CORPORATION shall not be liable for any loss, cost, expense, claim or dam- age whatsoever caused by any of the following: (a) use or handling of the Product otherwise than in accordance with the manuals, including but not limited to Operator’s Manual, User’s Guide, and/or incorrect or careless handling or... - Page 24 Disclaimer Notice...
- Page 25 PREPARATION This chapter describes what you need to know before using this equipment, such as how to turn the power ON or how to set copy paper. Description of Each Component ................24 Front / Right side..........................24 Left side / Inner side..........................26 Configuration of options ........................28 Control panel.............................29 “Copy mode”...
-
Page 26: Chapter 1 Preparation
1 PREPARATION Description of Each Component Front / Right side 1. Platen Cover (optional, KA-1640PC) Place an original on the original glass and start copying with this cover closed. 2. Reversing Automatic Document Feeder (optional, MR-3019) / Automatic Document Feeder (optional, MR-2017) A stack of originals placed on this are scanned one sheet after another. - Page 27 7. Paper size indicator 8. Drawer Module (optional, MY-1028) Use this to add one more drawer to the Paper Feed Pedestal (optional, KD-1013). The max- imum 550 sheets of plain paper can be placed at once. 9. Paper Feed Pedestal (optional, KD-1013) Use this to add one more drawer to the equipment.
-
Page 28: Left Side / Inner Side
1 PREPARATION Left side / Inner side 1. Original glass Use this to copy three-dimensional originals, book-type originals and special paper such as overhead transparencies or tracing paper, as well as plain paper. P.50 “Placing Originals” 2. Control panel Use this to perform copying, key in the copy quantity, or set other functions. P.29 “Control panel”... - Page 29 8. USB terminal (4-pin) With this terminal, the equipment can be connected to your PC using a commercially avail- able USB cable. Use a USB2.0 Hi-Speed certified cable: USB cable supporting the USB2.0 Hi-Speed mode (480 Mbps of transfer speed) certified by the USB Implementers Forum. Connect the equipment with a PC directly by the USB cable.
-
Page 30: Configuration Of Options
1 PREPARATION Configuration of options The options listed below are available. Contact your service technician or service representative for the details. Reversing Automatic Document Feeder (MR-3019) Platen Cover (KA-1640PC) Automatic Document Feeder (MR-2017) External Keyboard (GJ-1040) Network Printer Kit (GA-1190) Scanner Upgrade Kit (GA-1200) Expansion Memory... -
Page 31: Control Panel
Control panel 1. APS/AMS selecting button/lamps Automatic paper selection (APS): The equipment detects the size of original and automat- ically selects the same size of copy paper. P.69 “Paper Selection” Automatic magnification selection (AMS): Set the size of copy paper to be used in advance. - Page 32 1 PREPARATION 6. [SETTINGS] button Use this to confirm the copying functions currently set. P.68 “Confirming set functions” 7. Selecting button A / B / C Use them to select items or operation in each menu. Items or operation corresponding to each button appears at the lower section of the LCD screen.
- Page 33 16. Alarm lamp This lamp blinks when an error such as paper jams or running out of toner has occurred. P.172 “When This Message Appears” 17. [DATA] lamp This lamp blinks when print data are being received. 18. [CANCEL] button Use this to cancel the current setting and return to the previous menu.
-
Page 34: Copy Mode" Main Screen
1 PREPARATION “Copy mode” main screen After the power of the equipment is turned ON and the warm-up is finished, the display below is shown on the LCD screen. This display is called the “copy mode” main screen. READY 100% NONSORT ZOOM FINISHING... -
Page 35: Preparation 1 - Turning Power On
Preparation 1 - Turning Power ON Turning power ON Open the power switch cover, and then press the power switch to “ ” (ON) side. The equipment starts warming itself up. The warm-up time takes approx. 25 seconds. When the warm-up has finished, the equipment is ready for copying. “READY” appears on the LCD screen. -
Page 36: Saving Energy When Not In Use - Energy Saving Mode
1 PREPARATION Saving energy when not in use - Energy saving mode - To reduce power consumption, the equipment automatically enters into the energy saving mode when a specified period of time has passed since its last use. You can also turn the equipment into this mode manually. -
Page 37: Preparation 2 - Placing Copy Paper
*2 The paper of 13 to 16 lb. Bond can be used if it is set on the bypass tray one by one. *3 Automatic duplex copying is not available. *4 Be sure to use the overhead transparencies that TOSHIBA recommends. When transparencies other than the TOSHIBA-recommended ones are used, this could cause an equipment malfunction. -
Page 38: Recommended Paper
1 PREPARATION Recommended paper To ensure the best copy performance, TOSHIBA recommends the paper types listed below. If you want to use paper other than that we recommend, contact your service technician. Media type Product name Plain paper TIDAL/Hammermill (20 lb. Bond) -
Page 39: Placing Paper In Drawers
Placing paper in drawers Follow the procedure below to place copy paper in the drawer. For the acceptable paper, see the following page: P.35 “Acceptable media types” Turn the power of the equipment ON. Pull out the drawer carefully. Pull out the drawer until it comes to a stop. Press down the paper plate. - Page 40 1 PREPARATION Pull out the trailing guide (A), and then reinstall the guide at the position of the desired paper size. The paper size is indicated on the bottom inner surface of the drawer. While pushing the green knob of the side guides fully, widen the gap between them.
- Page 41 Place paper in the drawer. The maximum number of sheets can be placed in one go is 250 (17 lb. Bond). Be sure that the stack height of paper is not higher than the line indicated at the inner side of the guide. P.35 “Acceptable media types”...
- Page 42 1 PREPARATION Be sure that the stack of paper fits completely under the latches of the side guides. Change the paper size indicator to match the size of paper placed. Push the drawer straight into the equipment slowly until it comes to a stop.
-
Page 43: Placing Paper In The Drawers Of Paper Feed Pedestal (Optional)
Placing paper in the drawers of Paper Feed Pedestal (optional) Follow the procedure below to place copy paper in the drawers of the Paper Feed Pedestal (optional). For the acceptable paper, see the following page: P.35 “Acceptable media types” Pull out the drawer carefully. Pull out the drawer until it comes to a stop. - Page 44 1 PREPARATION Push the right side of the side guide lock to unlock it. While pushing the green knob of the side guides, adjust the side guides at the position of the desired paper size. Adjust the side guides with both hands. Place paper in the drawer.
- Page 45 Adjust the side guides. Be sure that a gap of approx. 0.02" (less than 0.04" in total) is left between the paper and each side guide (shown as “A” in the picture). If the gap is inappropriate, this could cause a paper misfeed.
- Page 46 1 PREPARATION Push the drawer straight until it comes to a stop. Do not let your fingers be caught when closing the drawer. This could cause injury. Register the paper size into the equipment. When you place paper, register the size of the paper into the equipment. Be sure that the size is registered correctly, or it could cause a paper jam.
-
Page 47: Preparation 3 - Registering Size Of Paper Placed
Preparation 3 - Registering Size of Paper Placed When you place paper in a drawer for the first time or when you place paper whose size is differ- ent from that of the paper which has been placed in the drawer, the new paper size needs to be registered into the equipment. - Page 48 1 PREPARATION Press the [COPY] button several times until the lamp of the paper size you placed in the drawer is lit. If the [CANCEL] button is pressed at this step, the size is not registered and the equipment will return to its normal status. Press the [ENTER] button.
-
Page 49: Registering Other Standard Sizes
Registering other standard sizes When standard size paper other than LD, LT, LT-R, LG or ST-R is placed, register this size as “OTHER” size. In this section, A4 size is registered in the drawer of the equipment as an example. Press and hold the [COPY] and [DRAWER] buttons simultaneously for more than two seconds. - Page 50 1 PREPARATION Press the [COPY] button several times until the [OTHER] lamp is lit. Press the selecting button B or C to select the size of the paper placed in the drawer. This can also be done with the button. e.g.) Setting A4 size Select paper size A4-R...
- Page 51 HOW TO MAKE COPIES This chapter describes basic copy operations. Placing Originals.....................50 Acceptable originals ..........................50 Placing originals on the original glass ....................51 Placing booklet-type originals such as books or catalogs..............52 Using Reversing Automatic Document Feeder (optional) / Automatic Document Feeder (optional) 53 Placing originals on Reversing Automatic Document Feeder (optional) / Automatic Document Feeder (optional) ............................54 Making Copies......................55...
-
Page 52: Chapter 2 How To Make Copies
2 HOW TO MAKE COPIES Placing Originals Acceptable originals Booklets, three-dimensional objects and some types of special media can be placed on the orig- inal glass, as well as plain paper. When the Reversing Automatic Document Feeder (optional) / Automatic Document Feeder (optional) is used, a stack of plain paper originals can be automat- ically scanned one by one. -
Page 53: Placing Originals On The Original Glass
When the built-in memory has become full during scanning When the built-in memory in the equipment has become full during the scanning of the copy job, scanning stops even if the number of sheets scanned so far has not exceeded the maximum value. -
Page 54: Placing Booklet-Type Originals Such As Books Or Catalogs
2 HOW TO MAKE COPIES When copying highly transparent originals When copying highly transparent originals such as overhead transparencies or tracing paper, place a blank sheet of paper (A), the same size as the original or larger, over the original (B). Lower the Platen Cover (optional) or the Reversing Automatic Doc- ument Feeder (optional) / Automatic Document Feeder (optional) carefully. -
Page 55: Using Reversing Automatic Document Feeder (Optional) / Automatic Document Feeder (Optional)
Lower the Platen Cover (optional) or the Reversing Automatic Doc- ument Feeder (optional) / Automatic Document Feeder (optional) carefully. Do not try to lower the Platen Cover (optional) or the Reversing Automatic Document Feeder (optional) / Automatic Document Feeder (optional) forcibly when the original is very thick. -
Page 56: Placing Originals On Reversing Automatic Document Feeder (Optional) / Automatic Document Feeder (Optional)
2 HOW TO MAKE COPIES The following types of originals are usable but need extra care: Ones which cannot be slid with fingers or whose surface is specially treated (they may not be separated from each other at feeding) Folded or curled ones (should be smoothed out before being used) When black streaks appear on the copied image If the scanning area or the guide area is dirty, image problems such as black streaks on the cop- ied image may occur. -
Page 57: Making Copies
Making Copies Follow the procedure below to make copies. Various copying functions are available. See the following page for the details: P.67 “COPYING FUNCTIONS” P.81 “ADVANCED COPYING FUNCTIONS” Check if paper is placed in the drawer. For the acceptable types and sizes of paper, see the following pages: P.35 “Acceptable media types”... - Page 58 2 HOW TO MAKE COPIES Press the [START] button. Copying starts. The paper will exit with its copied side down. The paper exit area and exiting paper are hot immediately after the exit. Handle them with care. When “Next original?” appears Next original? This message appears when “SORT”...
-
Page 59: Stopping/Resuming Copying
Stopping/Resuming copying Press the [CLEAR/STOP] button to stop scanning or copying. Press the [CLEAR/STOP] button during scanning or copying. Scanning or copying stops, and the LCD screen shows as follows: Memory clear? Cancel job? Press the selecting button C or buttons and select “YES”... -
Page 60: Interrupting Copying And Making Another Copy - Interrupt Copy
2 HOW TO MAKE COPIES Interrupting copying and making another copy - Interrupt copy - You can interrupt scanning or copying of one job and make another copy job (= interrupt copy- ing). The copy quantity or functions applied to the interrupted job are stored in the memory of this equipment, so that you will not need to set them again when the interrupted job resumes. -
Page 61: Using Bypass Tray
*2 The paper of 13 to 16 lb. Bond can be used if it is set on the bypass tray one by one. *3 Automatic duplex copying is not available. *4 Be sure to use the overhead transparencies that TOSHIBA recommends. When transparencies other than the TOSHIBA-recommended ones are used, this could cause an equipment malfunction. -
Page 62: Preparation - Registering Paper Size Placed On Bypass Tray
2 HOW TO MAKE COPIES Preparation - Registering paper size placed on bypass tray Register the size of the paper into the equipment in advance. The registration procedure for other paper sizes is different from the standard sizes (LD, LT, LT- R, LG and ST-R). - Page 63 Press the [DRAWER] button several times until the lamp of the bypass tray is lit. Press the [COPY] button several times until the lamp of the paper size you placed on the bypass tray is lit. If the [CANCEL] button is pressed at this step, the size is not registered and the equipment will return to its normal status.
- Page 64 2 HOW TO MAKE COPIES Registering other standard sizes When standard size paper other than LD, LT, LT-R, LG or ST-R is placed, register this size as “OTHER” size. In this section, the registration procedure is described with A4 size paper placed on the bypass tray as an example.
- Page 65 Press the [COPY] button several times until the [OTHER] lamp is lit. Press the selecting button B or C to select the size of the paper placed in the drawer. This can also be done with the button. e.g.) Setting A4 size Select paper size A4-R If the [CANCEL] button is pressed at this step, the size is not registered and the...
-
Page 66: Bypass Copying On Standard Size Paper
2 HOW TO MAKE COPIES Bypass copying on standard size paper Standard size paper can be used for bypass copying. In this section, the procedure is described with LT size thick paper (24 lb. Bond) placed on the bypass tray as an example. Register the size of the paper into the equipment in advance. - Page 67 Check if the lamp of the paper size placed on bypass tray is lit. If not, press the [COPY] button several times until the lamp of the desired paper size is lit. The LCD screen shows as follows: Ready for bypass 100% SORT ZOOM...
- Page 68 2 HOW TO MAKE COPIES Place the original. Select the other copy modes as required, and then press the [START] button. Copying starts. When you make copies on overhead transparencies using the bypass tray, pick up the transparencies which have exited onto the receiving tray one by one. If the transparen- cies pile up, they may become curled and not be good for projection.
-
Page 69: Copying Functions
COPYING FUNCTIONS This chapter describes various functions related to copy operations, such as how to make enlargement or reduction copies, or how to adjust the quality of copy images. Before Making Copies ....................68 Default settings ..........................68 Confirming set functions........................68 Paper Selection .......................69 Automatic paper selection (APS) ......................69 Manual paper selection ........................70 Copying Different Sizes in One Go - MIXED-SIZE COPYING -......72... -
Page 70: Before Making Copies
3 COPYING FUNCTIONS Before Making Copies Default settings Initial settings established when the equipment is powered on before any of the user functions are changed are called default settings. Each setting returns to its default when the power is turned ON, when the energy saving mode is canceled, and when the [FUNCTION CLEAR] but- ton is pressed. -
Page 71: Paper Selection
Paper Selection You can select the size of copy paper in two ways; one is automatic paper selection in which the equipment automatically selects copy paper of the same size as the original, and the other is manual paper selection in which you can select the desired paper size manually. Automatic paper selection (APS): The equipment detects the size of the original placed and automatically selects copy paper of the same size as the original. -
Page 72: Manual Paper Selection
3 COPYING FUNCTIONS Press the APS/AMS selecting button and select APS. (The APS lamp is lit.) The default setting at the installation is APS. If the direction of paper in the drawer differs from that of originals, the image of the original can be copied being rotated by 90 degrees, as long as their sizes are the same (LT only). - Page 73 Press the [DRAWER] button several times until the lamp of the desired drawer is lit. e.g.) Selecting the drawer of the equipment Select the other copy modes as required, and then press the [START] button. Paper Selection...
-
Page 74: Copying Different Sizes In One Go - Mixed-Size Copying
3 COPYING FUNCTIONS Copying Different Sizes in One Go - MIXED-SIZE COPYING - When different sizes of originals are mixed and placed on the Reversing Automatic Document Feeder (optional), some combinations of sizes can be copied in one go. The combination of LD and LT, or LG and LT-R is available. - Page 75 If you want to copy all the originals on the same size paper, press the [DRAWER] button to select the drawer. e.g.) Selecting the drawer of the equipment When the mixed-size copying function is used, copy paper larger than the set original cannot be used for copying.
-
Page 76: Zooming In/Out Copy Image
3 COPYING FUNCTIONS Zooming In/Out Copy Image You can set the reproduction ratio of the copy image in the following three ways: Automatic magnification selection (AMS): Specify the size of the copy paper in advance. As the original is placed, the equipment then detects the size of the original and sets the reproduction ratio most suited to the size of copy paper automatically. - Page 77 Place paper in the drawer. Press the [COPY] button several times until the lamp of the desired paper size is lit. e.g.) Selecting LT size You can select the desired paper size with the [DRAWER] button in the same procedure. Press the APS/AMS selecting button until the AMS lamp is lit.
-
Page 78: Specifying Both The Sizes Of The Original And The Copy Paper
3 COPYING FUNCTIONS Specifying both the sizes of the original and the copy paper Place paper in the drawer. Place the original. Press the [ORIGINAL] button several times until the lamp of the desired original size is lit. e.g.) Selecting LG for the original Press the [COPY] button several times until the lamp of the desired paper size is lit. -
Page 79: Specifying Reproduction Ratio Manually
Specifying reproduction ratio manually Place paper in the drawer. Place the original. Press the selecting button A. The LCD screen shows as follows: ZOOM 100% 25% ---- 200% 100% Press the selecting button B (–) or C (+) to set the desired reproduc- tion ratio. - Page 80 3 COPYING FUNCTIONS Select the other copy modes as required, and then press the [START] button. Zooming In/Out Copy Image...
-
Page 81: Selecting Image Mode
Selecting Image Mode You can select the most suitable quality of the copied image in the following three modes depending on the originals: TEXT/PHOTO: Originals with text and photographs mixed PHOTO: Originals with photographs TEXT: Originals with text only or with text and fine illustrations only “TEXT/PHOTO”... -
Page 82: Adjusting Density Level
3 COPYING FUNCTIONS Adjusting Density Level The automatic copy density mode, which automatically selects the most suitable density level for the copied image by detecting that of the original, is set by default at the installation of the equip- ment. You can also adjust the density level as desired manually (=manual copy density mode) in the following procedure: Place paper in the drawer. - Page 83 ADVANCED COPYING FUNCTIONS This chapter describes some useful copying functions, such as how to copy more than one page into a single sheet of paper or how to print date and time on copy paper. Copy Menu.......................82 Copying in Same Page Order as Originals - Sort Copying -.......84 Sorting Alternately One Set by One - ALTERNATION - ........86 Sorting in Magazine Type Arrangement - MAGAZINE SORT - ......87 Shifting Paper to Make Margin - IMAGE SHIFT - ..........89...
-
Page 84: Chapter 4 Advanced Copying Functions
4 ADVANCED COPYING FUNCTIONS Copy Menu This equipment provides you of many convenient copying functions. When you press the select- ing button C on the “copy mode” main screen, the copy menu appears. Select the desired func- tion in this menu. FINISHING DUPLEX 2IN1/4IN1... -
Page 85: Copy Function List
Copy function list The copying functions displayed on the copy menu are shown below. Function Description FINISHING Selects finishing modes for paper copied and exited to the receiving tray. P.84, P.86, SORT: Exited in the same order as originals in each set. P.87) NONSORT: Exited without being sorted. -
Page 86: Copying In Same Page Order As Originals - Sort Copying
4 ADVANCED COPYING FUNCTIONS Copying in Same Page Order as Originals - Sort Copying - When you make several sets of copies, the copies can be made to exit in the same order as the originals in each set. This is called sort copying. Copied and sorted in 2 sets Copied in 2 sets without being sorted Place paper in the drawer. - Page 87 Select the other copy modes as required, and then press the [START] button. Copying in Same Page Order as Originals - Sort Copying -...
-
Page 88: Sorting Alternately One Set By One - Alternation
4 ADVANCED COPYING FUNCTIONS Sorting Alternately One Set by One - ALTERNATION - When you make several sets of copies, the copies can be sorted and made to exit alternately one set by one. This is called alternation. You need to place copy paper in one drawer in a land- scape direction and place that of the same size in another drawer in a portrait direction in advance. -
Page 89: Sorting In Magazine Type Arrangement - Magazine Sort
Sorting in Magazine Type Arrangement - MAGAZINE SORT - The copies can be made to exit in a booklet-type page arrangement. This is called magazine sort. You can make a booklet by folding and binding the stack of copied paper at its center. LD, LG and LT-R sizes are available for this function. - Page 90 4 ADVANCED COPYING FUNCTIONS Select the duplex copying mode most suited to the original, and then press the [ENTER] button. 1>2: When originals are 1-sided 2>2: When originals are 2-sided MAGAZINE SORT 1>2 2>2 The magazine sort is set. Select the other copy modes as required, and then press the [START] button.
-
Page 91: Shifting Paper To Make Margin - Image Shift
Shifting Paper to Make Margin - IMAGE SHIFT - You can make a margin on copy paper by shifting the whole paper to the right or left. The margin can be used for punching holes or stapling. When you place paper on the bypass tray, register the size of the paper into the equipment in advance. - Page 92 4 ADVANCED COPYING FUNCTIONS Specify the margin width, and then press the [ENTER] button. The margin width can be set between 4 mm and 15 mm. RIGHT MARGIN 4mm ---- 15mm The image shift is set. Select the other copy modes as required, and then press the [START] button.
-
Page 93: Erasing Shadow On Edge - Edge Erase
Erasing Shadow on Edge - EDGE ERASE - When you make copies of thick objects such as books, the edge of copied image may be dark- ened by shadow. When you use this copied image as an original, you can erase this shadow and make a margin only on the edge of paper with this function. - Page 94 4 ADVANCED COPYING FUNCTIONS Specify the margin width, and then press the [ENTER] button. The margin width can be set between 4 mm and 15 mm. EDGE ERASE 4mm ---- 15mm The edge erase is set. Select the other copy modes as required, and then press the [START] button.
-
Page 95: Copying On Both Sides - Duplex
Copying on Both Sides - DUPLEX - You can select whether originals and paper are 1-sided or 2-sided individually. You can make copies of 1-sided originals into the both sides of paper so that you can save paper. Also you can copy a book into the both sides of paper so that you can make another book. -
Page 96: Copying On One Side
4 ADVANCED COPYING FUNCTIONS BOOK > 2 ( P.97) -13- -12- -13- -13- -15- -12- -15- To scan 2-sided originals automatically, the Reversing Automatic Document Feeder (optional) is required. To copy on the both sides of paper, the Automatic Duplexing Unit (optional) is required. Copying on one side You can copy 1-sided or 2-sided originals on the one side of paper. -
Page 97: Copying On Both Sides
Select the other copy modes as required, and then press the [START] button. Copying starts. Place the next original if you are using the original glass, and then select “YES”. Repeat this procedure until all the originals are scanned. You can press the [START] button instead of selecting “YES”. Next original? When all the originals have been scanned Select “NO”. - Page 98 4 ADVANCED COPYING FUNCTIONS Select the duplex copying mode, and then press the [ENTER] but- ton or button. 1>2 DUPLEX: 1-sided original to 2-sided copy 2>2 DUPLEX: 2-sided original to 2-sided copy DUPLEX 1>1 SIMPLEX 1>2 DUPLEX 2>2 DUPLEX Select the finishing mode, and then press the [ENTER] button. BOOK TYPE: Open to left TABLET TYPE: Open to top DUPLEX...
-
Page 99: Copying Booklet On Both Sides
Copying booklet on both sides You can copy booklet-type originals such as books or catalogs on the both sides of paper, as in the same manner as the original. Place paper in the drawer. Use plain paper (17 to 20 lb. Bond). LT size is available. - Page 100 4 ADVANCED COPYING FUNCTIONS Select whether the beginning page of the copy is the right or left page, and also select whether the ending page is the right or left page. Then press the [ENTER] button or button. Select among “RIGHT > RIGHT”, “RIGHT > LEFT”, “LEFT > LEFT” and “LEFT > RIGHT”. BOOK >...
- Page 101 Place the original, and then select other copy modes as required. Then press the [START] button. Do not place heavy objects (9 lb. or more) and do not press on it with force. Breaking the glass could injure you. Scanning starts. Open the next page and place the original, and then select “YES”.
-
Page 102: Copying Right And Left Pages Separately - Dual Page
4 ADVANCED COPYING FUNCTIONS Copying Right and Left Pages Separately - DUAL PAGE - When you place a booklet-type original on the original glass while it is being opened, the right and left pages of the opened section can be copied separately on different paper. Also, when the Automatic Duplexing Unit (optional) is installed, they can be copied on both sides of paper. - Page 103 Select “ON”, and then press the [ENTER] button or button. DUAL PAGE Specify the margin width, and then press the [ENTER] button. The margin width can be set between 8 mm and 30 mm. BOOK MARGIN 15mm 8mm ---- 30mm The dual page is set.
-
Page 104: Printing Page Number, Date And Time - Annotation
4 ADVANCED COPYING FUNCTIONS Printing Page Number, Date and Time - ANNOTATION - You can print page numbers, date and time on copied paper. As shown below, the printing posi- tion of page number, time, date, etc. when an original is placed on the Automatic Document Feeder / Reversing Automatic Document Feeder (both optional) is different from that when the original glass is used. - Page 105 Select the item to print, and then press the [ENTER] button. PAGE NUMBER: Page numbers Page, Date&Time: Page numbers, date and time ANNOTATION PAGE NUMBER Page,Date&Time The annotation is set. Select the other copy modes as required, and then press the [START] button.
-
Page 106: Changing Copy Setting On Each Job - Job Build
4 ADVANCED COPYING FUNCTIONS Changing Copy Setting on Each Job - JOB BUILD - This function is useful for originals consisting of several jobs (= stacks). You can change settings and scanning methods for each job, and when all the originals have been scanned under the dif- ferent settings, they are copied in one go. - Page 107 Select “ON”, press the [ENTER] button, and then the [CANCEL] but- ton. JOB BUILD The job build function is set and the LCD screen shows as follows: READY (JOB BUILD) SORT ZOOM FINISHING EDIT Place the first job of the originals. Select other copy modes as required, and then press the [START] button.
-
Page 108: Copying 2 Or 4 Pages Into 1 Page - 2In1/4In1
4 ADVANCED COPYING FUNCTIONS Copying 2 or 4 Pages into 1 Page - 2IN1/4IN1 - 2 or 4 pages of originals can be copied into 1 page by reducing their reproduction ratio. When the Automatic Duplexing Unit (optional) is used, maximum 8 pages can be copied in 1 sheet, using its both sides. - Page 109 Place paper in the drawer. When you place paper on the bypass tray, register the size of the paper into the equip- ment in advance. Select “2IN1/4IN1” in the copy menu, and then press the [ENTER] button. FINISHING DUPLEX 2IN1/4IN1 IMAGE SHIFT DUAL PAGE ID CARD EDGE ERASE ANNOTATION...
- Page 110 4 ADVANCED COPYING FUNCTIONS Select the finishing mode, and then press the [ENTER] button. BOOK TYPE: Open to left TABLET TYPE: Open to top DUPLEX BOOK TYPE TABLET TYPE When “1>1 SIMPLEX” is selected in step 4, this procedure is not necessary. The 2IN1 / 4IN1 is set.
-
Page 111: Copying Both Sides Of Card Into 1 Page - Id Card
Copying Both Sides of Card into 1 Page - ID CARD - The both sides of a card-sized original can be copied into one side of LT paper. This function is useful when you need to copy massive amounts of 2-sided cards. Front side Back side Place paper in the drawer. - Page 112 4 ADVANCED COPYING FUNCTIONS Place a card original on the original glass. Place the card face down, aligning and pushing it to the left rear corner of the original glass. The portion of an original which is on the upper and left edges (width of approx. 0.08") of the original glass may not be copied.
- Page 113 Lower the Platen Cover (optional) or the Reversing Automatic Doc- ument Feeder (optional) / Automatic Document Feeder (optional) carefully. Press the [START] button. Copying Both Sides of Card into 1 Page - ID CARD -...
-
Page 114: Changing Sizes In Horizontal And Vertical Directions - Xy Zoom
4 ADVANCED COPYING FUNCTIONS Changing Sizes in Horizontal and Vertical Directions - XY ZOOM - You can select each reproduction ratio of the horizontal and vertical directions separately. Place paper in the drawer. Place the original. Select “XY ZOOM” in the copy menu, and then press the [ENTER] button. - Page 115 Press the [COPY] button several times until the lamp of the desired paper size is lit. e.g.) Selecting LT for copy paper You can select the desired paper size with the [DRAWER] button in the same proce- dure. When standard size paper other than LD, LT, LT-R, LG or ST-R is placed, register this size as “OTHER”...
-
Page 116: Registering Functions Frequently Used - Job Memory
4 ADVANCED COPYING FUNCTIONS Registering Functions Frequently Used - JOB MEMORY - You can register the combination of functions frequently used, and recall it as required. The combinations once registered will not be deleted by turning the power of the equipment OFF. Up to 4 combinations of functions can be registered. -
Page 117: Recalling Combination Of Functions
Select among “MEMORY1”, “MEMORY2”, “MEMORY3” and “MEMORY4”. Then press the [ENTER] button. e.g.) Selecting “MEMORY4” MEMORY MEMORY2 MEMORY3 MEMORY4 A mark on the left end of the memory name indicates that the combination of functions has already been registered to the memory. When you select a memory number already registered, the memory content will be overwritten. - Page 118 4 ADVANCED COPYING FUNCTIONS Select among “MEMORY1”, “MEMORY2”, “MEMORY3” and “MEMORY4”. Then press the [ENTER] button. e.g.) Selecting “MEMORY4” RECALL MEMORY2 MEMORY3 MEMORY4 A memory to which the combination of functions has already been registered has a mark on the left end of the memory name. The combination of the functions is recalled.
-
Page 119: Changing Equipment's Settings
CHANGING EQUIPMENT’S SETTINGS This chapter describes how to change each setting of this equipment. Before Changing the Settings ................119 Displaying the “user functions mode” main screen ................. 119 Operating buttons for changing the settings ...................120 Date and Time .......................122 Clock setting............................122 Date and time display........................124 Display Language Setting ..................125 Paper Size Setting....................126... - Page 120 Image Mode ......................161 Density Adjustment ....................163 Finishing Mode......................165 Various List Printing .....................167 Menu List Printing....................169 ROM Version Display....................170...
-
Page 121: Before Changing The Settings
Before Changing the Settings The settings of this equipment can be changed depending on your usage. The screen and the basic button operation are explained in this section. Displaying the “user functions mode” main screen To change the settings, operate the buttons on the control panel viewing the menu. Press the [USER FUNCTIONS] button on the control panel. -
Page 122: Operating Buttons For Changing The Settings
5 CHANGING EQUIPMENT’S SETTINGS Operating buttons for changing the settings Use the following buttons when changing the settings. [FUNCTION CLEAR] button [CANCEL] button buttons buttons [ENTER] button Digital keys [CLEAR/STOP] button [FUNCTION CLEAR] button: Use this to return the display to the “user functions mode” main screen. - Page 123 Returning to the “copy mode” main screen Press the [USER FUNCTIONS] button or (copy mode) button. The screen returns to the “copy mode” main screen. Before Changing the Settings...
-
Page 124: Date And Time
5 CHANGING EQUIPMENT’S SETTINGS Date and Time This section describes how to set a clock and the time stamp display. Clock setting Press the [USER FUNCTIONS] button. The “user functions mode” main screen is displayed. Select “INITIAL SETUP” with buttons, and then press the [ENTER] button. - Page 125 Key in the date. e.g.) April 10, 2006: [2] [0] [0] [6] [0] [4] [1] [0] SETTING YYYY-MM-DD DAY HH:MM 2006-04-10 09:45 AM Select the date of the week with the buttons, and then press the button. SETTING YYYY-MM-DD DAY HH:MM 2006-04-10 09:45 AM...
-
Page 126: Date And Time Display
5 CHANGING EQUIPMENT’S SETTINGS Date and time display You can set the display format of the date and time by selecting each item from the “DATE & TIME” menu. DATE & TIME 01.SETTING 02.TIME FORMAT 03.DATE FORMAT Time display format Select the time display format. -
Page 127: Display Language Setting
Display Language Setting This section describes how to switch the display language on the screen. Press the [USER FUNCTIONS] button. The “user functions mode” main screen is displayed. Select “INITIAL SETUP” with buttons, and then press the [ENTER] button. USER FUNCTIONS 1216 01.DEFAULT SETTINGS 02.LISTS... -
Page 128: Paper Size Setting
5 CHANGING EQUIPMENT’S SETTINGS Paper Size Setting This section describes how to set the paper size placed in the drawer or on the bypass tray. Press the [USER FUNCTIONS] button. The “user functions mode” main screen is displayed. Select “DEFAULT SETTINGS” with buttons, and then press the [ENTER] button. - Page 129 Select the desired drawer with buttons, and then press the [ENTER] button. DRAWER SIZE 01.DRAWER 1 02.DRAWER 2 03.DRAWER 3 Select the desired paper size with buttons, and then press the [ENTER] button. Paper sizes that can be set are as follows: LD, LG, LT, LT-R, ST-R, A3, A4, A4-R, B4, B5, B5-R, A5-R, FOLIO, COMP, 13"LG (The ST-R and A5-R size paper can be set only when the bypass tray is used.) Select paper size...
-
Page 130: Walkup Screen Setting
5 CHANGING EQUIPMENT’S SETTINGS Walkup Screen Setting This section describes how to set the screen when the power of the equipment is turned ON. In the initial screen set at the time of shipping, the "copy mode” main screen is displayed. Press the [USER FUNCTIONS] button. - Page 131 Select the desired walkup screen with buttons, and then press the [ENTER] button. Choose one among COPY, FAX or SCAN. WALKUP SCREEN 1.COPY 2.FAX 3.SCAN “FAX” is displayed only when the Fax Kit (optional) is installed. “SCAN” is displayed only when the Scanner Upgrade Kit (optional) is installed. The walkup screen is set and the screen returns to the menu in step 4.
-
Page 132: Timer Setting
5 CHANGING EQUIPMENT’S SETTINGS Timer Setting This section describes how to set the following timers. AUTO CLEAR: Time until the selected setting is cleared automatically AUTO LOW POWER: Time until the low power mode is entered AUTO SLEEP: Time until the sleep mode is entered after the low power mode has been entered For the low power mode and sleep mode, see “EPA ENERGY STAR”... - Page 133 Select “TIMERS” with buttons, and then press the [ENTER] button. GENERAL SETTING 01.DRAWER SIZE 02.WALKUP SCREEN 03.TIMERS Select “AUTO CLEAR” with buttons, and then press the [ENTER] button. TIMERS 1.AUTO CLEAR 2.AUTO POWER SAVE 3.AUTO SLEEP Select the time of “AUTO CLEAR” with buttons, and then press the [ENTER] button.
-
Page 134: Time Of Automatic Low Power Mode
5 CHANGING EQUIPMENT’S SETTINGS Time of automatic low power mode Press the [USER FUNCTIONS] button. The “user functions mode” main screen is displayed. Select “DEFAULT SETTINGS” with buttons, and then press the [ENTER] button. USER FUNCTIONS 1216 01.DEFAULT SETTINGS 02.LISTS 03.INITIAL SETUP Select “GENERAL SETTING”... - Page 135 Select “AUTO LOW POWER” with buttons, and then press the [ENTER] button. TIMERS 1.AUTO CLEAR 2.AUTO POWER SAVE 3.AUTO SLEEP Select the time of “AUTO LOW POWER” with buttons, and then press the [ENTER] button. Selectable times are as follows. (Unit: minute) 1, 2, 3, 4, 5, 10, 15, 20, 25, 30, 35, 40, 45, 50, 55, 60, 70, 80, 90, 100, 110, 120, 150, 180, 210, 240 TIMERS...
-
Page 136: Time Of Automatic Sleep Mode
5 CHANGING EQUIPMENT’S SETTINGS Time of automatic sleep mode Press the [USER FUNCTIONS] button. The “user functions mode” main screen is displayed. Select “DEFAULT SETTINGS” with buttons, and then press the [ENTER] button. USER FUNCTIONS 1216 01.DEFAULT SETTINGS 02.LISTS 03.INITIAL SETUP Select “GENERAL SETTING”... - Page 137 Select “AUTO SLEEP” with buttons, and then press the [ENTER] button. TIMERS 1.AUTO CLEAR 2.AUTO POWER SAVE 3.AUTO SLEEP Select the time of “AUTO SLEEP” with buttons, and then press the [ENTER] button. Selectable times are as follows. (Unit: minute) 3, 5, 10, 15, 20, 25, 30, 35, 40, 45, 50, 55, 60, 70, 80, 90, 100, 110, 120, 150, 180, 210, TIMERS AUTO...
-
Page 138: Weekly Timer Setting
5 CHANGING EQUIPMENT’S SETTINGS Weekly Timer Setting This section describes how to set the weekly timer. Use the weekly timer to set the equipment to enter the sleep mode automatically at the specified time. You can set the equipment to enter the stand-by status when the office hour starts, and to enter the sleep mode when the office hour ends. - Page 139 Select “GENERAL SETTING” with buttons, and then press the [ENTER] button. DEFAULT SETTINGS 01.GENERAL SETTING 02.COPY SETUP 03.FAX SETUP Select “WEEKLY TIMER” with buttons, and then press the [ENTER] button. GENERAL SETTING 02.WALKUP SCREEN 03.TIMERS 04.WEEKLY TIMER Select “ON” with buttons, and then press the [ENTER] button.
- Page 140 5 CHANGING EQUIPMENT’S SETTINGS Key in the time to turn the power OFF, and then press the [ENTER] button. SUNDAY OFF TIME: HH:MM 07:30 The time to turn the power ON/OFF is set and the screen returns to the menu in step 6. Set the time to turn the power ON/OFF for each day of the week by following steps 6 to 8.
-
Page 141: Volume Adjustment
Volume Adjustment This section describes how to set the alarm volume, key touch volume, ringer volume and moni- tor volume. The menu of this setting is displayed only when the Fax Kit (optional) is installed. When it is not installed, the touch key tone can be switched ON/OFF. P.141 “Touch Key Tone Setting”... - Page 142 5 CHANGING EQUIPMENT’S SETTINGS Select the desired volume with the buttons, and then press the [ENTER] button. The volume of the following items can be set: Alarm volume, Key touch volume, Ringer volume and Monitor volume e.g.) When “ALARM VOLUME” is selected SPEAKER VOLUME 1.ALARM VOLUME 2.KEY TOUCH VOLUME...
-
Page 143: Touch Key Tone Setting
Touch Key Tone Setting This section describes how to switch ON/OFF the touch tone when the buttons on the control panel are pressed. The menu of this setting is displayed only when the Fax Kit (optional) is not installed. When it is installed, all of the volume can be adjusted. - Page 144 5 CHANGING EQUIPMENT’S SETTINGS Select “ON” or “OFF” with buttons, and then press the [ENTER] button. TOUCH KEY TONE 1.OFF 2.ON The screen returns to the menu in step 4. Press the [USER FUNCTIONS] button or (copy mode) button. The screen returns to the “copy mode” main screen. Touch Key Tone Setting...
-
Page 145: Department Code
Department Code This section describes how to manage and understand the records of copying, Fax transmis- sion/reception and printing of each group (department) in your office with the department code management. When the department code management is enabled, a screen prompting you to enter your department code is displayed before you use this equipment. - Page 146 5 CHANGING EQUIPMENT’S SETTINGS Select “DEPARTMENT CODE” with buttons, and then press the [ENTER] button. GENERAL SETTING 04.WEEKLY TIMER 05.SPEAKER VOLUME 06.DEPARTMENT CODE Select “YES” with buttons, and then press the [ENTER] button. DEPARTMENT CODE 1.YES 2.NO Select “NEW” with buttons, and then press the [ENTER] button.
- Page 147 Enter the master code name, and then press the [ENTER] button. MASTER CODE MASTER CODE NUMBER: ENTER MASTER CODE NAME(MAX20): Enter the master code name only when the External Keyboard (optional) is installed. A maximum of 20 desired letters can be set for the master code name. The master code name entry can be omitted.
- Page 148 5 CHANGING EQUIPMENT’S SETTINGS Enter the department name, and then press the [ENTER] button. DEPARTMENT CODE DEPARTMENT NUMBER: ENTER DEPARTMENT NAME(MAX20): Enter the department name only when the External Keyboard (optional) is installed. A maximum of 20 desired letters can be set for the department name. The department name entry can be omitted.
-
Page 149: Changing Department Names Or Codes
Changing department names or codes This section describes how to change the department names or codes already registered. Key in the master code in the department code entry screen, and then proceed to the following steps: Press the [USER FUNCTIONS] button. The “user functions mode”... - Page 150 5 CHANGING EQUIPMENT’S SETTINGS Select “YES” with buttons, and then press the [ENTER] button. DEPARTMENT CODE 1.YES 2.NO Key in the department number you want to change its setting, and then press the [ENTER] button. DEPARTMENT CODE ENTER DEPARTMENT NUMBER(1-99): The screen below is displayed for approx.
- Page 151 Enter a new department name, and then press the [ENTER] button. DEPARTMENT CODE DEPARTMENT NUMBER: ENTER DEPARTMENT NAME(MAX20): Enter the department name only when the External Keyboard (optional) is installed. A maximum of 20 desired letters can be set for the department name. The department name entry can be omitted.
-
Page 152: Deleting Department Codes
5 CHANGING EQUIPMENT’S SETTINGS Deleting department codes This section describes how to delete the department codes already registered. Key in the mas- ter code in the department code entry screen, and then proceed to the following steps: Press the [USER FUNCTIONS] button. The “user functions mode”... - Page 153 Select “YES” with buttons, and then press the [ENTER] button. DEPARTMENT CODE 1.YES 2.NO Key in the department number you want to delete, and then press the [ENTER] button. DEPARTMENT CODE ENTER DEPARTMENT NUMBER(1-99): The screen below is displayed for approx. 2 seconds. DEPARTMENT CODE DEPARTMENT NUMBER: Already assigned...
-
Page 154: Clearing Counter Values
5 CHANGING EQUIPMENT’S SETTINGS Clearing counter values This section describes how to clear counter values indicating the total number of pages copied in each department. Key in the master code in the department code entry screen, and then pro- ceed to the following steps: Press the [USER FUNCTIONS] button. - Page 155 Select “YES” with buttons, and then press the [ENTER] button. DEPARTMENT CODE 1.YES 2.NO Key in the department number you want to clear its counter, and then press the [ENTER] button. Keying in the department number of the master code (“01”) will clear all the department number counter values.
-
Page 156: Printing Out Counter Values
5 CHANGING EQUIPMENT’S SETTINGS Printing out counter values This section describes how to print out the value of the total number of pages copied in each department. Counter values to be printed belong to the department which you entered on the department code entry screen. -
Page 157: Canceling Department Management
Canceling department management Press the [USER FUNCTIONS] button. The “user functions mode” main screen is displayed. Select “DEFAULT SETTINGS” with buttons, and then press the [ENTER] button. USER FUNCTIONS 1216 01.DEFAULT SETTINGS 02.LISTS 03.INITIAL SETUP Select “GENERAL SETTING” with buttons, and then press the [ENTER] button. - Page 158 5 CHANGING EQUIPMENT’S SETTINGS Select “NO” with buttons, and then press the [ENTER] button. DEPARTMENT CODE 1.YES 2.NO Press the [USER FUNCTIONS] button or (copy mode) button. The screen returns to the “copy mode” main screen. Department Code...
-
Page 159: Menu Customize
Menu Customize This section describes how to change the setting of the custom function. The copy function which has been registered as custom function can be quickly recalled. Press the [USER FUNCTIONS] button. The “user functions mode” main screen is displayed. Select “DEFAULT SETTINGS”... - Page 160 5 CHANGING EQUIPMENT’S SETTINGS Select the setting you want to register to the menu customize with buttons, and then press the [ENTER] button. The following copy functions can be registered: Finishing modes, Duplex, 2IN1/4IN1, Image shift, Dual-page and ID card MENU CUSTOMIZE 4.IMAGE SHIFT 5.DUAL PAGE...
-
Page 161: Aps / Ams
APS / AMS This section describes how to set the initial selection between “Automatic Paper Selection” and “Automatic Magnification Selection”. Press the [USER FUNCTIONS] button. The “user functions mode” main screen is displayed. Select “DEFAULT SETTINGS” with buttons, and then press the [ENTER] button. - Page 162 5 CHANGING EQUIPMENT’S SETTINGS Select the initial selection with the buttons, and then press the [ENTER] button. APS: Automatic Paper Selection is initially selected. AMS: Automatic Magnification Selection is initially selected. No initial selection APS/AMS 1.APS 2.AMS 3.NO The initial selection is set and the screen returns to the menu in step 4. Press the [USER FUNCTIONS] button or (copy mode) button.
-
Page 163: Image Mode
Image Mode This section describes how to change the image mode. Press the [USER FUNCTIONS] button. The “user functions mode” main screen is displayed. Select “DEFAULT SETTINGS” with buttons, and then press the [ENTER] button. USER FUNCTIONS 1216 01.DEFAULT SETTINGS 02.LISTS 03.INITIAL SETUP Select “COPY SETUP”... - Page 164 5 CHANGING EQUIPMENT’S SETTINGS Select the image mode with the buttons, and then press the [ENTER] button. TEXT/PHOTO: Originals with text and photographs mixed PHOTO: Originals with photogravure TEXT: Originals with text (or text and line art) only IMAGE MODE 1.TEXT/PHOTO 2.PHOTO 3.TEXT...
-
Page 165: Density Adjustment
Density Adjustment This section describes how to switch the mode of the density adjustment. Press the [USER FUNCTIONS] button. The “user functions mode” main screen is displayed. Select “DEFAULT SETTINGS” with buttons, and then press the [ENTER] button. USER FUNCTIONS 1216 01.DEFAULT SETTINGS 02.LISTS... - Page 166 5 CHANGING EQUIPMENT’S SETTINGS Select the mode of the density adjustment with the but- tons, and then press the [ENTER] button. AUTO: The equipment detects the density of an original and sets the appropriate copy density automatically. MANUAL: You can set the copy density manually. LIGHT/DARK 1.AUTO 2.MANUAL...
-
Page 167: Finishing Mode
Finishing Mode This section describes how to set the initial finishing mode. Press the [USER FUNCTIONS] button. The “user functions mode” main screen is displayed. Select “DEFAULT SETTINGS” with buttons, and then press the [ENTER] button. USER FUNCTIONS 1216 01.DEFAULT SETTINGS 02.LISTS 03.INITIAL SETUP Select “COPY SETUP”... - Page 168 5 CHANGING EQUIPMENT’S SETTINGS Select the initial finishing mode with the buttons, and then press the [ENTER] button. The following finishing modes can be selected: SORT, NON SORT, ALTERNATION and MAGAZINE SORT FINISHING 2.NON SORT 3.ALTERNATION 4.MAGAZINE SORT The initial finishing mode is set and the screen returns to the menu in step 4. Press the [USER FUNCTIONS] button or (copy mode) button.
-
Page 169: Various List Printing
Various List Printing This section describes how to print the list in order to check the following information. DEPARTMENT CODE: The department codes which have been registered and the counter values of each department code FUNCTION: The contents of the settings in this equipment SUPPLY NOTICE: Supply information of the equipment ITU MAILBOX:... - Page 170 5 CHANGING EQUIPMENT’S SETTINGS Select the list you want to print with the buttons, and then press the [ENTER] button. LISTS 1.DEPARTMENT CODE 2.FUNCTION 3.SUPPLY NOTICE “SUPPLY NOTICE” is displayed only when the Fax Kit or Scanner Upgrade Kit (both optional) is installed.
-
Page 171: Menu List Printing
Menu List Printing This section describes how to print the menu list of the equipment. Press the [USER FUNCTIONS] button. The “user functions mode” main screen is displayed. Select “MENU LIST” with buttons, and then press the [ENTER] button. USER FUNCTIONS 1216 02.LISTS 03.INITIAL SETUP... -
Page 172: Rom Version Display
5 CHANGING EQUIPMENT’S SETTINGS ROM Version Display This section describes how to display the product version. Press the [USER FUNCTIONS] button. The “user functions mode” main screen is displayed. Select “MACHINE REVISIONS” with buttons, and then press the [ENTER] button. USER FUNCTIONS 1216 04.MENU LIST... - Page 173 TROUBLESHOOTING This chapter describes how to deal with error messages, how to release a paper jam, how to replace a toner cartridge and how to resolve other troubles. When This Message Appears ................172 Paper Jams......................174 Checking position of paper jams .....................174 When paper jams occur frequently ....................175 When releasing jammed paper .......................175 Paper jams within Reversing Automatic Document Feeder (optional) / Automatic Document Feeder...
-
Page 174: When This Message Appears
The message may not appear because the toner remaining in the cartridge does not lie evenly. When the message appears, it is advisable to purchase a new TOSHIBA-recommended cartridge to prepare for its replacement. When This Message Appears... - Page 175 Toner not recognized The toner cartridge is not Install the toner cartridge correctly. installed correctly. A toner cartridge not recom- Use a TOSHIBA-recommended toner car- mended by TOSHIBA is tridge. being used. If you want to use a toner cartridge other...
-
Page 176: Paper Jams
6 TROUBLESHOOTING Paper Jams Checking position of paper jams When a jam of copying paper or original occurs in the equipment, the copying operation stops and the following message appears on the display to indicate the positions where the paper is jammed. -
Page 177: When Paper Jams Occur Frequently
When paper jams occur frequently When paper jams occur frequently, they may be due to one of the causes listed below. Check the following items when they occur frequently: Originals which are not acceptable for the Reversing Automatic Document Feeder (optional) / Automatic Document Feeder (optional) are placed. -
Page 178: Paper Jams Within Reversing Automatic Document Feeder (Optional) / Automatic Document Feeder (Optional)
6 TROUBLESHOOTING Paper jams within Reversing Automatic Document Feeder (optional) / Automatic Document Feeder (optional) Raise the lever, and then open the upper cover. Release the jammed original. Turn the dial to release the jammed original. Paper Jams... - Page 179 Open the transport guide. Raise the guide plate under the transport guide, and then release the original jammed under the guide plate. Close the transport guide, and then close the upper cover. When the Automatic Document Feeder is used, the releasing procedure ends here. When the Reversing Automatic Document Feeder is used, go on to the following procedure.
- Page 180 6 TROUBLESHOOTING Open the reverse cover, and then remove the original. Close the Reversing Automatic Document Feeder slowly. Raise the lever, and then open the upper cover. Paper Jams...
-
Page 181: Paper Jams On Bypass Tray
Raise the original feeding tray, and then remove the original under the tray. Lower the original feeding tray. Close the upper cover. Paper jams on bypass tray Pull out the paper jammed on the bypass tray. Paper Jams... -
Page 182: Paper Jams Within Automatic Duplexing Unit (Optional)
6 TROUBLESHOOTING Paper jams within Automatic Duplexing Unit (optional) Be careful not to let your fingers be caught between the equipment and the side cover. This could injure you. Open the side cover. Release the jammed paper. Close the side cover. Paper Jams... -
Page 183: Paper Jam Behind Transfer Unit
Paper jam behind transfer unit Be careful not to let your fingers be caught between the equipment and the side cover. This could injure you. Open the side cover. Pull the transfer unit toward you carefully to lay it down while hold- ing up the green lever. - Page 184 6 TROUBLESHOOTING Release the jammed paper. Be sure not to touch the photoconductive drum when releasing the jammed paper. Open the transport guide of the paper feeding area and check if any paper is jammed under this guide. Clear the paper if there is any. Close the transfer unit and the side cover.
-
Page 185: Paper Jams Within Fuser Unit
Paper jams within fuser unit Be careful not to let your fingers be caught between the equipment and the side cover. This could injure you. Do not touch the fuser unit or the metal part around the unit. This could cause burns, or injury to your hands if you touch the inside of the equipment. Open the side cover, and then lay down the transfer unit. - Page 186 6 TROUBLESHOOTING Release the jammed paper. Pull the jammed paper up or down as shown below depending on the position of the paper. Be sure not to touch the photoconductive drum when releasing the jammed paper. Pulling it up Pulling it down Return the transport guide to its original position, and then close the transfer unit and the side cover.
-
Page 187: Paper Jams Within Paper Feed Unit (Optional)
Paper jams within Paper Feed Unit (optional) Open the paper feed cover of the unit. Release the jammed paper. Close the paper feed cover of the unit. Paper Jams... -
Page 188: Paper Jams Within Paper Feed Pedestal (Optional)
6 TROUBLESHOOTING Paper jams within Paper Feed Pedestal (optional) Open the paper feed cover of the Paper Feed Pedestal. Remove the jammed paper. Close the paper feed cover of the Paper Feed Pedestal. Paper Jams... -
Page 189: Replacing Toner Cartridge
Replacing Toner Cartridge When the toner cartridge runs out of toner, the following message appears on the display. Toner empty Open front cover. 1/ 3 Then, replace the cartridge with a new one. When the toner cartridge runs out of toner, the procedure to replace the toner cartridge appears on the display. - Page 190 Recommended toner cartridges To assure an optimal printing performance, we recommend that you use TOSHIBA toner cartridges. If you use a TOSHIBA-recommended toner cartridge, you can utilize the following two check functions of this equipment: Cartridge detecting function: This function checks if the toner cartridge is correctly installed and notifies you if it is not.
- Page 191 Open the front cover. Hold down the green lever. Pull out the toner cartridge. Never attempt to incinerate toner cartridges. Dispose of used toner cartridges in accordance with local regulations. Replacing Toner Cartridge...
- Page 192 6 TROUBLESHOOTING Shake the new toner cartridge well to loosen the toner inside. Pull out the seal in the direction of the arrow. Insert the toner cartridge along the rail. Before inserting the toner cartridge, check if the green lever is raised and raise it if not.
- Page 193 Clean the charger. Hold the cleaning knob of the charger and pull it out toward you carefully until it comes to a stop. Then reinsert it in its original position carefully. Repeat this procedure two or three times. Check if the cleaning knob is fully inserted after cleaning. Open the side cover.
-
Page 194: Transfer Unit
6 TROUBLESHOOTING Remove the transfer charger cleaner from the front pocket of the transfer unit. Wipe the transfer charger wire with the transfer charger cleaner. (1) Insert the transfer charger cleaner into the front end of the transfer charger. (2) Push the cleaner onto the front wall, and then check if the cleaner pad has contacted with the transfer charger wire. - Page 195 Close the front cover. The equipment starts supplying toner. Replacing Toner Cartridge...
-
Page 196: Before Calling Service Technician
6 TROUBLESHOOTING Before Calling Service Technician When you encounter trouble using this equipment, check the items listed below. General operation Phenomenon Usual cause Countermeasure The equipment does not The power cable is not Plug in the power cable securely. operate at all. plugged in securely. -
Page 197: Toner-Related Items
Or it is not installed correctly. A toner cartridge not recom- Use a TOSHIBA-recommended toner car- mended by TOSHIBA is tridge. If you use a toner cartridge other being used. than the one we recommend and you feel annoyed by this message, contact your service representative. -
Page 198: Original/Copy Paper-Related Items
6 TROUBLESHOOTING Original/Copy paper-related items Phenomenon Usual cause Countermeasure An original jams. An original not acceptable for Check if the original is acceptable for the the equipment is being used. equipment. P.53 “Precautions for Reversing Auto- matic Document Feeder (optional) / Auto- matic Document Feeder (optional)”... -
Page 199: Image Trouble
Image trouble Phenomenon Usual cause Countermeasure The density of the copy Toner has run out. “Toner empty” appears on the display image is light. when toner has run out. Replace the toner cartridge if the message appears. P.187 “Replacing Toner Cartridge” The copy density is set Make the density darker if you use the lighter. - Page 200 6 TROUBLESHOOTING Phenomenon Usual cause Countermeasure The copy image is partially The size or direction of the Use copy paper of the same size as the missing. copy paper and the original, original or set the reproduction ratio suit- or the reproduction ratio is able to the copy paper size.
-
Page 201: Maintenance And Inspection
MAINTENANCE AND INSPECTION This chapter describes how to clean this equipment to ensure you get the best possible copy performance. Daily Inspection ....................200 Cleaning charger..........................201 Cleaning transfer charger........................202... -
Page 202: Daily Inspection
7 MAINTENANCE AND INSPECTION Daily Inspection We recommend a weekly cleaning of the following items to assure you the best scanning perfor- mance: Be sure not to scratch the parts to be cleaned. Do not use solvent such as thinner or benzene to clean machinery. This could cause defor- mation or tarnishing. -
Page 203: Cleaning Charger
Cleaning charger If the inside of the charger is dirty, staining may appear on the copied image. Clean the charger following the procedure below. Open the front cover. Clean the charger. Hold the cleaning knob of the charger and pull it out toward you carefully until it comes to a stop. -
Page 204: Cleaning Transfer Charger
7 MAINTENANCE AND INSPECTION Cleaning transfer charger When the transfer charger wire is dirty, white steaks or unevenness of the density may appear on copied images, or the density of the whole image may be lowered. Clean the transfer charger wire following the procedure below. -
Page 205: Then Close The Transfer Unit
Remove the transfer charger cleaner from the front pocket of the transfer unit. Wipe the transfer charger wire with the transfer charger cleaner. (1) Insert the transfer charger cleaner into the front end of the transfer charger. (2) Push the cleaner onto the front wall, and then check if the cleaner pad has contacted with the transfer charger wire. - Page 206 7 MAINTENANCE AND INSPECTION Daily Inspection...
- Page 207 SPECIFICATIONS AND OPTIONS e-STUDIO165/205 Specifications.................206 Continuous copying speed......................207 Specifications of Options..................208 Packing List......................210 Copying Function Combination Matrix...............211 Combination Matrix 1/2 ........................211 Combination Matrix 2/2 ........................212 List Print Format ....................213 Department code list ........................213 Mailbox list ............................216 Menu list............................219 Function list .............................214 Supply notice list ..........................215...
-
Page 208: Chapter 8 Specifications And Options
Reproduction ratio Actual size 100±0.5% Zoom 25 - 200% (in 1% increments) Storage capacity Max. 250 sheets or until the memory is full (TOSHIBA’s own chart) Paper supply Drawer 250 sheets (20 lb. Bond) Bypass 100 sheets (20 lb. Bond) Loading capacity for the receiving Approx. -
Page 209: Continuous Copying Speed
The values above are measured when originals are set on the original glass, 100% and non- sort multiple copies are made. TOSHIBA-recommended paper is used for the values of the specifications above. The bypass copying speed is as listed above when specifying the paper size. -
Page 210: Specifications Of Options
8 SPECIFICATIONS AND OPTIONS Specifications of Options Reversing Automatic Document Feeder Model name MR-3019 Copy sides 1-side, Duplex Number of originals (LT) 100 originals (13.3 - 20 lb. Bond) or 0.63" or less in height (more than 20 lb. Bond) Feeding speed 1.79"... -
Page 211: Paper Feed Pedestal
17 - 20 lb. Bond Maximum capacity 550 sheets (20 lb.) Weight Approx. 8.8 lb. TOSHIBA-recommended paper is used for the values above. Specifications and appearance are subject to change without notice in the interest of product improvement. Specifications of Options... -
Page 212: Packing List
8 SPECIFICATIONS AND OPTIONS Packing List Operator’s Manual Packing list Power cable Photoconductive drum Operator’s Manual pocket Set-up report Warranty sheet CD-ROM (2 pcs.) Packing List... -
Page 213: Copying Function Combination Matrix
Copying Function Combination Matrix Combination Matrix 1/2 Copying Function Combination Matrix... -
Page 214: Combination Matrix 2/2
8 SPECIFICATIONS AND OPTIONS Combination Matrix 2/2 Copying Function Combination Matrix... -
Page 215: List Print Format
List Print Format Department code list D E PA R T M E N T C O D E L I S T PAGE : 001 TIME : APR-10-2006 09:30AM TEL NUMBER : XXX-XXX-XXXX NAME : XXXXXXXXXX DEPT NBR NAME DEPT CODE COPY PGS TX PGS... -
Page 216: Function List
8 SPECIFICATIONS AND OPTIONS Function list XXXXX XXXXXX XXXXXXXXXXX XXXXX XXXXXX XXXXX F U N C T I O N L I S T PAGE : 001 TIME : APR-10-2006 09:30AM TEL NUMBER : XXX-XXX-XXXX NAME : XXXXXXXXXX : 112MB RECOVERY TX : OFF AVAILABLE MEMORY... -
Page 217: Supply Notice List
CO NTA CT NA ME : X XX XX XX X XX CO NTA CT TE L NUM BE R : XX X- X X X- X XX X e-STUDIO 165/205 Series MACHINE NAME : XXXXXXXXXX FAX NUMBER : XXX-XXX-XXXX... -
Page 218: Mailbox List
8 SPECIFICATIONS AND OPTIONS Mailbox list MAILBOX/RELAY BOX REPORT : 001 PAGE : APR-10-2006 09:30AM TIME : XXX-XXX-XXXX TEL NUMBER : XXXXXXXXXX NAME MAILBOX BOX NBR TYPE PGS FILE NBR DATE TIME FROM XXXXXXXXXXXXXXXXXXXX CONFIDENTIAL BOX XX:XX XXXX XXXXXXXXXXXXXXXXXXXX CONFIDENTIAL BOX XX:XX XXXX XXXXXXXXXXXXXXXXXXXX... -
Page 219: Configuration Page List
Configuration page list C O N F I G U R AT I O N PA G E : XXXXXXXXXX TIME : '06-04-10 09:30 F/W Ver. : XXXXXXXXXXX GENERAL : 256MB MEMORY SIZE : NOT INSTALLED OPTIONAL FUNCTIONAL KIT NETWORK SETTING GENERAL PRODUCT GENERAL : 10BASE FULL... -
Page 220: Nic Status Page List
8 SPECIFICATIONS AND OPTIONS NIC status page list U n i t S e r i a l : X X X X X X X X N e t w o r k A d d r e s s : X X ;... -
Page 221: Menu List
Menu list M E N U L I S T ( P R O G R A M ) PAGE : 001 TIME : APR-10-2006 09:30AM TEL NUMBER : XXX-XXX-XXXX NAME : XXXXXXXXXX 01.DEFAULT SETTINGS 04.REPORT & LIST 01.GENERAL SETTING 01.JOURNAL 01.DRAWER SIZE 01.MANUAL OUTPUT... - Page 222 8 SPECIFICATIONS AND OPTIONS List Print Format...
-
Page 223: Index
INDEX ........163 Numerics Density adjustment ....31 Density adjustment buttons/lamps ..........83 2IN1/4IN1 ..........80 Density level ........ 33 Department code .....24 Description of each component ........50 Acceptable originals ..........30 Digital keys ..........26 AC-IN terminal .........21 Disclaimer notice ..........31 Alarm lamp ............25 Drawer .......... - Page 224 Maximum number of originals scanned Registering paper size placed ..........50 .........60 in one go on bypass tray ...........35 ....45 Media type Registering size of paper placed ........157 ......187 Menu customize Replacing toner cartridge ........169 ........ 32 Menu list printing Reproduction ratio .........
- Page 225 ......74 Zooming in/out copy image INDEX...
- Page 226 INDEX...
- Page 227 Printed in China DP-1650/2040 OME060030C0...
- Page 228 MULTIFUNCTIONAL DIGITAL SYSTEMS Operator's Manual for Copying Functions 2-17-2, HIGASHIGOTANDA, SHINAGAWA-KU, TOKYO, 141-8664, JAPAN 6LE65159000 R060120A9403-TTEC Ver03 2006 - 09 2006 TOSHIBA TEC CORPORATION All rights reserved...