
Related Manuals for KitchenAid Blender


Summary of Contents for KitchenAid Blender
- Page 1 BLENDER INSTRUCTIONS LICUADORA INSTRUCCIONES LIQUIDIFICADOR INSTRUÇÕES 블렌더 사용 설명서 搅拌器 说明书 W10391621A...
-
Page 2: Table Of Contents
Blender Safety ........................2 Electrical Requirements ....................3 Important Safeguards ....................3 Blender Features ......................4-6 Preparing the Blender for Use ..................7 Before First Use ......................7 Blender Assembly ....................8 Using the Blender ......................9 Before Use ......................9 Operating the Blender ....................9 Crush Ice ........................9 Pulse Mode ......................10... -
Page 3: Electrical Requirements
1. Read all instructions. 2. To protect against risk of electrical shock, do not put Blender in water or other liquid. 3. Close supervision is necessary when any appliance is used by or near children. -
Page 4: Blender Features
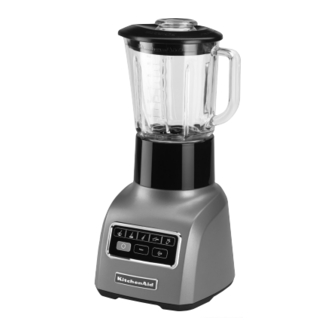
Blender Features stay-put lid with clear, 60 ml Ingredient cap easy-clean, plastic* pitcher design patented stainless steel Blade durable steel-reinforced speed couplers selection Buttons sealed membrane control panel die-cast metal Base * Depending on model. - Page 5 Blender Features stay-put lid with clear, 60 ml Ingredient cap easy clean, Glass* pitcher design patented stainless steel Blade locking collar and Blade Assembly speed selection Buttons sealed membrane control panel durable steel-reinforced couplers die-cast metal Base * Depending on model.
- Page 6 Provides a strong seal. The flexible lid design feature reduces start-up kick and will maintain its tight seal throughout allows hands-free operation. the life of the Blender. The lid includes a removable 60 ml cap for convenience in die-cast metal Base measuring and adding ingredients.
-
Page 7: Preparing The Blender For Use
Before First use 3. Align the pitcher tabs with the slots of the locking collar. Before using your Blender for the first time, wipe Blender base with a warm sudsy cloth, then wipe clean with a damp cloth. Dry with a soft cloth. wash pitcher,... -
Page 8: Blender Assembly
Blender Assembly - plastic pitcher (on some models) 1. Adjust the length of the power cord to suit your needs. 2. Place the Plastic pitcher on the blender base. 3. Plug into a grounded outlet. Blender is now ready for operation. -
Page 9: Using The Blender
, ChOP , MIx , PUREE , and lIqUEFY . In addition, it also 5. To turn off the Blender, press O (Off). features CRUSh ICE and PUlSE The O (Off) button will stop any speed mode. and deactivate the Blender at the same time. -
Page 10: Pulse Mode
Feature The Motor Control feature automatically starts the Blender at a lower speed to draw ingredients into the blades, then quickly increases to the selected speed for optimal performance. note: The Motor Control feature only works when a speed is selected from the “O”... -
Page 11: Speed Control Guide
Gravy ......Mix tip - Process up to one standard ice cube tray or 12 to 14 standard ice cubes at a time. Occasional stirring with a spatula will be helpful only when Blender is O (Off). The CRUSh ICE feature has been optimized to crush and chop ice without adding any liquid ingredients. -
Page 12: Care And Cleaning
Glass easily cleaned without disassembly. pitcher without disassembly • Clean the Blender thoroughly after 1. Put the pitcher on the Blender base, fill every use. half full with warm (not hot) water, and • Do not immerse the Blender base or add 1 or 2 drops of dishwashing liquid. -
Page 13: Troubleshooting
Blender does not operate when a setting is selected: Check to see if the Blender is plugged into a grounded 3-prong outlet. If it is, press O (Off), then unplug the Blender. Plug it back in to the same outlet. If the... -
Page 14: Blender Tips
, cover and blend at ChOP a full pitcher or with hot contents, stop pulsing a few times, about 3 seconds each the Blender and then add ingredients. time, until desired consistency is reached. • Stop the Blender before using utensils Use the crumbs to make a quick topping in the pitcher. - Page 15 Add 30 to until well-mixed, 10 to 20 seconds. Stop 60 ml broth, water, or milk per 235 ml of the Blender and scrape sides of the pitcher vegetables. Cover and blend at PUREE as needed.
- Page 16 Specifications subject to change without notice. ®Registered trademark/TMTrademark/the shape of stand mixer is a registered trademark of KitchenAid, U.S.A. Las especificaciones están sujetas a cambio sin previo aviso. ®Marca registrada/™ Marca de comercio/la forma de la batidora con base es una marca registrada de KitchenAid, U.S.A.