Advertisement
KENWOOD
CD-RECEIVER
KDC-219
KDG2019V
KDC-2019
KDG29MR
KDC-119
KDG119S
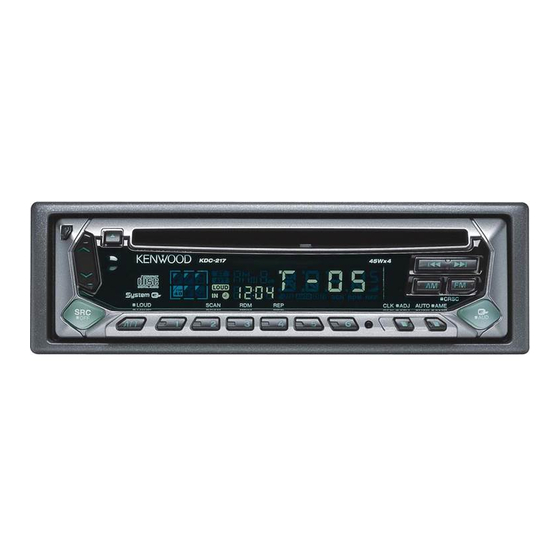
KDC-217
KDG217S
INSTRUCTION
MANUAL
AMPLI-TUNER-LECTEUR
DE CD
MODE D'EMPLOI
REPRODUCTOR DE DISCOS COMPACTOS RECEPTOR DE FM/AM
MANUAL DE INSTRUCCIONES
RECEPTOR DE CD
MANUAL DE INSTRU@ES
KENWOOD CORPORATION
Take the time to read through this instruction
manual. Familiarity
with installa-
tion and operation procedures will help you obtain the best performance
from
your new CD-receiver.
For your records
Record the serial number, found on the back of the unit, in the spaces designated on
the warranty card, and in the space provided below. Refer to the model and serial
numbers whenever you call upon your KENWOOD dealer for information or service on
the product.
Model KDC-219, KDC2019V, KDC-2019, KDC-29MR. KDC-119,
KDC-1 19S, KDC-217, KDC217S
Serial number
0 864-2114-00 (KWN)
COMPACT
do!3E
0
DIGITAL
AUDIO
Advertisement
Table of Contents

Related Manuals for Kenwood KDG119S


Summary of Contents for Kenwood KDG119S
- Page 1 Record the serial number, found on the back of the unit, in the spaces designated on the warranty card, and in the space provided below. Refer to the model and serial numbers whenever you call upon your KENWOOD dealer for information or service on the product.
-
Page 2: Table Of Contents
Warning ........3 Safety precautions . -
Page 3: Warning
In compliance with Federal Regulations, following are reproductions of labels on, or inside the product relating to laser product safety. KENWOOD CORP CERTIFIES THIS EQUIPMENT CONFORMS TO DHHS REGULATIONS NO 21 CFR 1040. 10. CHAPTER 1, SUBCHAPTER J. Location : Bottom Panel... - Page 4 Note that none of the KDC-CIOO, KDC-C302, C205, C705, and non-Kenwood CD changers can be connected. You can damage both your unit and the CD changer If you connect them rncorrectly Do Not Load 3-in.
- Page 5 If you experience problems during rnstallatron, consult your Kenwood dealer. If the unit does not seem to be working right, try pressing the reset button first. If that does not solve the problem, consult your Kenwood dealer Press the reset button if the DISC auto changer fails to operate correctly.
-
Page 6: Cds
Handling Don’t touch the recordrng surface of the CD. CD-R and CD-RW are easrer to damage than a normal musrc CD. Use a CD-R or a CD-RW after readrng the caution items on the package etc. Don’t stick tape etc. on the CD. Also, don’t use a CD wrth tape stuck on It. -
Page 7: General Features
General features Release button (KDC-219/KDC-2019V/KDC-20191 KDC-29MR/KDC-217/KDC-2 175 only) KDC-219/KDC-2019V/KDC-2019/KDC-29MR/KDC-217/KDC-217S ATT indicator LOUD indicator ’ Clock mdlcator SYSTEM 0 mdicator KDC- 1 IS/KDC- 119s LOUD indicator Clock indicator SYSTEM Q indicator Turning ON the Power Press the [SRCI button. Turning OFF the Power Press the [SRCI button for at least 1 second. - Page 8 Compensating for low and high tones during low volume. Press the [LOUD] button for at least 1 second. Each trme the button IS pressed for at least 1 second the Loudness turns ON or OFF. When It’s ON, “LOUD” indicator IS ON. You can recall the best sound setting preset for different the music.
- Page 9 3 Select the Speaker type Press the [I-] or [FHI button. Each time the button is pressed the setting switches as shown below. Speaker type For the OEM speaker For 6 & 6x9 in. speaker For 5 & 4 in. speaker 4 Exit Speaker Setting mode Press the [Ql button.
-
Page 10: Tuner Features
Function of the KDC-219/KDC-2019V/KDC-2019/KDC-29MR/KDC-217/KDC-217S helping to deter theft. Removing the Faceplate Press the Release button. The faceplate IS unlocked, allowlng you to detach The faceplate IS a precision piece of equipment and can be damaged by shocks 01 lolls For that reason, keep the faceplate in Its special storage case while detached Do not expose the faceplate 01 Its storage case to direct sunlight oi excessive heat or humldlty Also avold places with too much... - Page 11 utton IS pressed the Tuning mode switches as shown below. Automatic search for a station. “AUTO 1” Auto seek indicator Search in order of the stations “AUTO 2” Preset station in the Preset memory. Indicator seek Normal manual tuning control. Manual Selecting the station.
-
Page 12: Cd/External Disc Control Features
Tuner features Press the [CRSC] button for at least 1 second. Each time the button is pressed CRSC turns ON or OFF. When It’s ON, the CRSC indicator is ON. CD/External disc control features KDC-2 19/KDC-20 19V/KDC-20 19/KDC-29MR/KDC-2 17/KDC-217s Disc number Track-time /iv indicator KDC- 7 IS/KDC- 179s... - Page 13 Hold down on the [I-] Release your finger to play the disc at that point. Selecting the song you want to hear. Press the [MN] or [WI Disc player CD player Replaying the song/disc CD changer MD changer Press the [REP] button.
- Page 14 CD/External disc control features Start Track Scan Press the [SCAN] button. “SCN” indicator IS ON 2 Release it when the song you want to listen to is played Press the [SCAN] button. Playing all the songs on the disc in random order. Press the [RDMl button.
-
Page 15: Basic Operations
Basic Operations of remote Accessory of the KDC-219/KDC-2019V/KDC-2019 Insert the batteries with the + and - poles aligned properly. following the illustration inside the case. Store unused batteries out of the reach of chlldren Contact a doctor mmedlately If the battery IS accIdentally swallowed. Do Inot set the remote on hot places such as above the dashboard [VOL.] buttons AdlustIng... - Page 16 Basic Operations of remote Accessorv of the KDC-219/KDC-2019V/KDC-2019 Ml button is pressed it switches between the [~rrl/ buttons Tune up or down band. [I-]/ buttons Doing track forward and backward. [DISC+]/ [DISC-l buttons Doing album forward and backward. [FM] button Each time the button is pressed the song pauses and plays.
-
Page 17: Installation Procedure
External view External view ..Number of items The use of any accessows except for those provided might result in damage to the unit Make sure only to use the accessories shipped wth the unit, as shown above Installation Procedure... - Page 18 Front left output (White) (KDC-2019V/2019 only) Front right output (Red) (KDC-2019V/2019 only) KENWOOD disc changer control Input (KDC-219/2019V To connect the DISC changer, consult your DISC changer manual. 1 If no connectrons are made, do not let the Connect either to the power control termrnal when using the optional power amplifier, or to .I..,.
- Page 19 W Installation Frrewall or metal support Screw (M4X8) Metal mounting strap Self-tapprng screw (commercially avarIable) (commercrallv availablei Make sure that the unrt IS installed securely rn place If the unrt IS unstable, It may malfunction (for example, the sound may skrp) n Installing in Japanese-Made Refer to the section “Removing the hard rubber frame”...
- Page 20 W Removing the hard rubber frame Engage the catch pins on the removal tool and remove the two locks on the lower level. Lower the frame and pull it forward as shown In the figure. Accessory@ Removal tool 2 When the lower level is removed, remove the upper two locations.
-
Page 21: Connecting
What might seem to be a malfunction just be the result of slight misoperation Before calling service, first check the following for possible problems. General ? The power does not turn ON. The fuse has blown. =+ After checking for short circuits rn the wares, replace the fuse with one-with the same ratrng. - Page 22 Troubleshooting Guide Disc source ? “AVin” is displayed without achieving External O-N switch is set to “0” srde. Set the switch to “N” side Unsupported disc changer IS connected w Connect the supported drsc changer. (page 4) ? The specified disc does not play, but another The specrfied CD IS quote drrty.
- Page 23 60°C (14O”F), the disc will start playrng again. Discs are being exchanged in the Disc changer The CD player section not operating properly. I: Reinsert the CD. If the CD cannot be ejected or the display continues to flash even when the CD has been properly reinserted, please switch off the power and consult your nearest service center.
-
Page 24: Installation
(+400 kHz)..Stereo separation (1 kHz) ... AM tuner section Frequency range (IO kHz space) ... Usable sensrtrvrty (S/N = 20dB)..CD player section Laser diode..Digital filter (D/A)..D/A Converter ... Spindle speed..Wow & Flutter.. - Page 25 KENWOOD...
- Page 26 ACAUTION Be sure to connect the product wiring as written in the instruction manual. If the wiring is mistaken it can cause fire or other accidents. AATTENTION Prendre soin de raccorder cet appareil comme indique dans le manuel d’utilisation. Toute erreur de raccordement risque de provoquer un incendie ou un accident. AACHTUNG SchlieBen Sie die Drahte des Gerates unbedingt wie in der Bedienungsanleitung beschrieben an.
- Page 27 Sverige Dear Customer, Thank you for purchasing this kenwood product. As mentioned in the pages of this booklet, our warranty is only valid in the countries listed. If your country is not listed please contact your retailer for information on warranty procedure, or write to:...
- Page 28 U.S.A FOR CAR STEREO warrants this product warranty covers all defects I” material by the warranty in the U S.A. by Kenwood dealer or an automobile dealer, number has been defaced, modified resulting from: (clams must be presented t”...